


elasticsearch下载
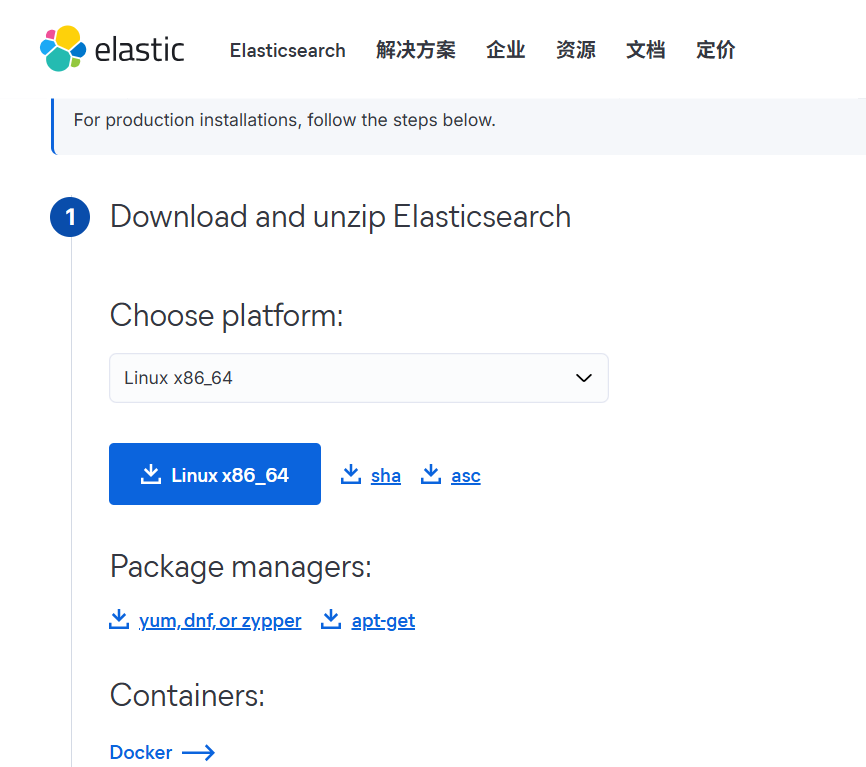
下载地址
Download Elasticsearch | Elastic
启动
# bin/elasticsearch -d
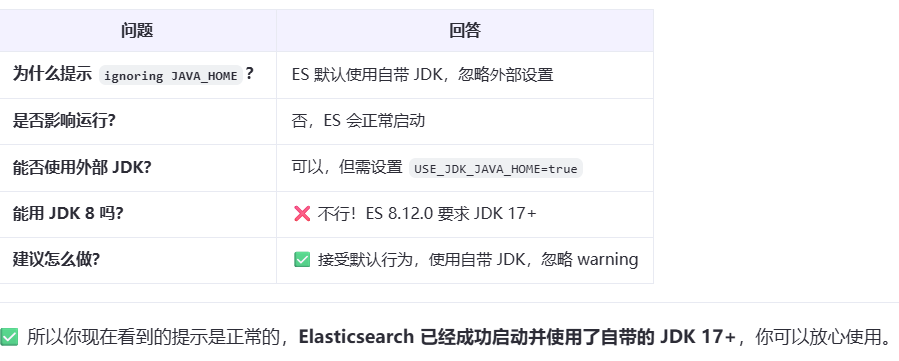
warning: ignoring JAVA_HOME=/data/apps/jdk8; using bundled JDK
CompileCommand: exclude org/apache/lucene/util/MSBRadixSorter.computeCommonPrefixLengthAndBuildHistogram bool exclude = true
CompileCommand: exclude org/apache/lucene/util/RadixSelector.computeCommonPrefixLengthAndBuildHistogram bool exclude = true
Aug 19, 2025 3:39:22 PM sun.util.locale.provider.LocaleProviderAdapter <clinit>
WARNING: COMPAT locale provider will be removed in a future release本地配置的jdk环境是java8的,但elasticsearch-8.x.x使用的jdk为java17+。所以会用自带的jdk.
错误一
[ERROR][o.e.b.Elasticsearch] [node71] node validation exception
[1] bootstrap checks failed. You must address the points described in the following [1] lines before starting Elasticsearch.
bootstrap check failure [1] of [1]: max virtual memory areas vm.max_map_count [65530] is too low, increase to at least [262144]
✅ 错误一
Elasticsearch 在启动时会进行一系列 bootstrap checks(启动自检),这是为了确保系统环境满足运行条件。
你的错误是:
vm.max_map_count的值太低(当前是 65530),必须至少设置为262144。
🔍 什么是 vm.max_map_count?
vm.max_map_count是 Linux 内核参数,表示一个进程可以拥有的最大内存映射区域数量。- Elasticsearch 使用了大量的内存映射文件(mmap),尤其是在处理索引和段(segments)时。
- 如果这个值太小,可能导致内存不足或性能问题,因此 Elasticsearch 强制要求提高它。
✅ 解决方法
修改 vm.max_map_count
1. 临时生效(重启后失效)
# sudo sysctl -w vm.max_map_count=2621442. 永久生效(推荐)
编辑 /etc/sysctl.conf 文件:
sudo vi /etc/sysctl.conf在文件末尾添加:
vm.max_map_count=262144保存后,执行以下命令使配置立即生效:
sudo sysctl -p3. 验证是否生效
cat /proc/sys/vm/max_map_count262144✅ 其他常见 bootstrap checks(顺便检查一下)
虽然当前只报了 max_map_count,但建议你也确认以下配置:
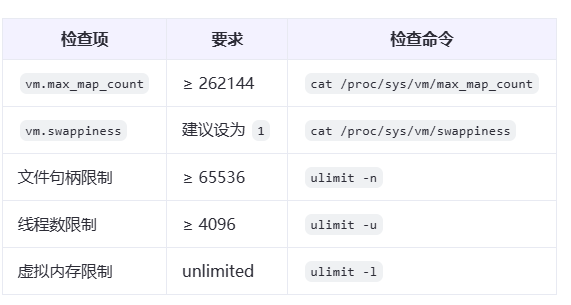
设置文件句柄和线程数(示例)
编辑 /etc/security/limits.conf:
* soft nofile 65536
* hard nofile 65536
* soft nproc 4096
* hard nproc 4096
* soft memlock unlimited
* hard memlock unlimited
注意:修改 limits 需要重新登录用户才会生效。
✅ 修改后重新启动 Elasticsearch
# 先确保旧进程已停止
ps aux | grep elasticsearch
# 如果有,kill 掉

# 启动
bin/elasticsearch -d
✅ 验证是否启动成功
# 查看日志
tail -f logs/isee_cluster.log

# 或检查端口
curl -X GET http://localhost:9200 -u username:password
单点配置
# =================== Elasticsearch 单节点配置示例 ===================

# 1. 节点名称(可自定义)
node.name: node-1

# 2. 数据和日志目录(根据实际路径修改)
path.data: /data/elasticsearch/data
path.logs: /data/elasticsearch/logs

# 3. 网络绑定
# 允许外部访问(0.0.0.0),也可绑定具体 IP
network.host: 0.0.0.0
http.port: 9200

# 4. 单节点发现配置(关键!)
# 禁用默认的生产模式发现,启用单节点发现
discovery.type: single-node
# 或者使用:
# discovery.seed_hosts: []
# cluster.initial_master_nodes: ["node-1"]

# 5. 关闭跨域限制(可选,用于 Kibana 或外部调用)
http.cors.enabled: true
http.cors.allow-origin: "*"
http.cors.allow-headers: X-Requested-With,Content-Type,Content-Length,Authorization

# 6. 堆内存设置(建议不超过物理内存的 50%,最大 32GB)
# 在 jvm.options 中设置,见下方说明

# 7. 是否启用安全功能(默认开启,建议保留)
xpack.security.enabled: true
xpack.security.transport.ssl.enabled: true

# 8. 其他可选配置
# 禁用 ML(若不使用)
xpack.ml.enabled: false
xpack.monitoring.collection.enabled: true
✅ 一、关键配置说明
🔹 discovery.type: single-node
- 这是 Elasticsearch 7.10+ 推荐的单节点模式
- 它会自动配置为 master、data、ingest 等所有角色
- 不再需要
discovery.seed_hosts或cluster.initial_master_nodes
✅ 推荐使用此方式,最简单安全。
✅ 二、JVM 堆内存设置(jvm.options)
路径:$ES_HOME/config/jvm.options
修改堆内存大小(建议 2G ~ 8G):
-Xms2g
-Xmx2g
⚠️ 注意:
-Xms和-Xmx应设置为相同值,避免动态调整- 不要超过 32GB(JVM 压缩指针限制)
- 建议不超过物理内存的 50%
✅ 三、系统环境配置(必须)
1. 设置 vm.max_map_count(重要!)
# 临时生效
sudo sysctl -w vm.max_map_count=262144

# 永久生效
echo "vm.max_map_count=262144" | sudo tee -a /etc/sysctl.conf
sudo sysctl -p
2. 文件句柄限制
编辑 /etc/security/limits.conf:
* soft nofile 65536
* hard nofile 65536
* soft nproc 4096
* hard nproc 4096
重新登录用户生效。
✅ 四、启动 Elasticsearch
# 切换到 ES 用户(不建议用 root)
su - isee

# 启动(后台运行)
bin/elasticsearch -d

# 查看日志
tail -f logs/isee_cluster.log
✅ 五、首次启动后:设置密码(安全模式)
Elasticsearch 8.x 默认启用安全,首次启动后会提示设置密码:
# 自动生成密码(用于开发)
bin/elasticsearch-setup-passwords auto

# 或交互式设置
bin/elasticsearch-setup-passwords interactive
记下
elastic用户的密码,用于登录 Kibana 或 API 调用。
✅ 六、验证是否启动成功
curl -X GET "http://localhost:9200" -u elastic:your_password预期输出:
{
  "name" : "node-1",
  "cluster_name" : "elasticsearch",
  "cluster_uuid" : "...",
  "version" : {
    "number" : "8.12.0",
    "build_flavor" : "default",
    "build_type" : "tar",
    "build_hash" : "...",
    "build_date" : "...",
    "build_snapshot" : false,
    "lucene_version" : "9.7.0",
    "minimum_wire_compatibility_version" : "7.17.0",
    "minimum_index_compatibility_version" : "7.0.0"
  }
}
✅ 七、可选:关闭不必要的功能(节省资源)
如果你只是做搜索测试,可以关闭:
# 在 elasticsearch.yml 中
xpack.ml.enabled: false
xpack.monitoring.enabled: false
xpack.security.enabled: false   # ⚠️ 仅测试环境!生产不建议关闭
xpack.watcher.enabled: false
⚠️ 关闭
security后无需密码,但不建议在公网或生产环境使用。
✅ 八、完整单节点配置示例(精简版)
node.name: node-1
path.data: /data/isee/elasticsearch/data
path.logs: /data/isee/elasticsearch/logs
network.host: 0.0.0.0
http.port: 9200
discovery.type: single-node
http.cors.enabled: true
http.cors.allow-origin: "*"
xpack.security.enabled: true
✅ 总结
| 步骤 | 说明 |
|---|---|
1. 修改 elasticsearch.yml | 设置 discovery.type: single-node |
| 2. 配置 JVM 内存 | jvm.options 中设置堆大小 |
| 3. 系统参数调优 | vm.max_map_count, ulimit |
| 4. 启动并设置密码 | 使用 setup-passwords |
| 5. 验证 API | curl http://localhost:9200 |
验证
# curl -k -u elastic:9yZWp=3UnEVkBxYBhnlS https://10.15.32.71:9200
{
  "name" : "node71",
  "cluster_name" : "isee_cluster",
  "cluster_uuid" : "4tfIRB45Smioe8fi1UygdA",
  "version" : {
    "number" : "8.12.0",
    "build_flavor" : "default",
    "build_type" : "tar",
    "build_hash" : "1665f706fd9354802c02146c1e6b5c0fbcddfbc9",
    "build_date" : "2024-01-11T10:05:27.953830042Z",
    "build_snapshot" : false,
    "lucene_version" : "9.9.1",
    "minimum_wire_compatibility_version" : "7.17.0",
    "minimum_index_compatibility_version" : "7.0.0"
  },
  "tagline" : "You Know, for Search"
}
在 Elasticsearch 中重置用户名密码,主要使用内置工具 elasticsearch-reset-password。该工具适用于 Elasticsearch 7.x 和 8.x 版本。
🔐 一、适用场景
- 忘记了
elastic用户密码 - 需要为内置用户(如
kibana,logstash等)设置新密码 - 安全策略要求定期更换密码
🛠️ 二、重置密码命令语法
bin/elasticsearch-reset-password [选项] -u <用户名>常用选项:
-u, --user <name>:指定要重置密码的用户-i, --interactive:交互式输入新密码-a, --auto:自动生成一个强密码并输出--password <password>:直接指定密码(不推荐,密码会暴露在历史记录中)
✅ 三、常用操作示例
1. 重置 elastic 超级用户密码(交互式)
bin/elasticsearch-reset-password -u elastic -i系统会提示你输入新密码:
Enter password for [elastic]:
Enter password for [elastic] again:
Password for the user [elastic] has been changed.
2. 让系统自动生成密码(推荐首次使用)
bin/elasticsearch-reset-password -u elastic -a输出示例:
Password for the user [elastic] is: 2X7u*9Fg!kLm@pQw
Please confirm that you have stored this password safely.
⚠️ 请立即保存该密码,不会再次显示。
3. 重置其他内置用户密码
# 重置 kibana_system 用户(Kibana 连接用)
bin/elasticsearch-reset-password -u kibana_system -i

# 重置 logstash_system 用户
bin/elasticsearch-reset-password -u logstash_system -i

# 重置 beats_system 用户
bin/elasticsearch-reset-password -u beats_system -i
4. 列出所有内置用户(可选)
bin/elasticsearch-users list输出示例:
elastic                enabled
kibana_system          enabled
logstash_system        enabled
beats_system           enabled
四、注意事项
-
必须在 Elasticsearch 节点本地执行
- 命令需要访问本地配置和安全模块
- 通常在
$ES_HOME/bin/目录下运行
-
确保 Elasticsearch 正在运行
- 某些操作需要连接到集群
- 如果集群未启动,部分功能可能受限
-
权限问题
- 使用运行 Elasticsearch 的用户执行命令(如
elasticsearch用户) - 避免使用
root直接运行,除非切换到对应用户
sudo -u elasticsearch /usr/share/elasticsearch/bin/elasticsearch-reset-password -u elastic -i - 使用运行 Elasticsearch 的用户执行命令(如
-
密码策略
- Elasticsearch 要求密码足够复杂(至少 6 位,建议 8 位以上,含大小写、数字、特殊字符)
- 简单密码会被拒绝
🚫 五、如果 xpack.security.enabled: false
如果你在 elasticsearch.yml 中设置了:
xpack.security.enabled: false则:
- 不需要用户名密码
- 所有请求可直接访问
http://ip:9200 elasticsearch-reset-password工具仍然可用,但无实际意义
⚠️ 仅建议在测试环境关闭安全功能。
✅ 六、验证密码是否生效
curl -u elastic:你的新密码 http://localhost:9200如果返回 JSON 信息,说明密码正确。
📚 七、相关命令汇总
| 功能 | 命令 |
|---|---|
| 重置密码(交互) | bin/elasticsearch-reset-password -u elastic -i |
| 自动生成密码 | bin/elasticsearch-reset-password -u elastic -a |
| 列出用户 | bin/elasticsearch-users list |
| 创建新用户 | bin/elasticsearch-users useradd <username> -r superuser |
✅ 总结:
使用 elasticsearch-reset-password -u elastic -i 是最安全、最常用的重置密码方式。
优化内容生成段落
通过智能检索工具获取相关信息,整合后生成清晰、实用的回答。确保内容符合用户需求,避免第一人称和步骤词汇,保持结构简洁明了。
结构规范
内容以Markdown格式组织,标题从三级开始。避免使用一级和二级标题,确保层级明确。代码和公式严格遵循格式要求,普通文本无需代码块包装。
格式要求
数学公式直接嵌入文本,例如:(E=mc^2)。代码块用标记,仅用于代码内容。避免非代码内容使用包装,确保格式统一。
内容限制
禁止使用步骤词汇或引用提示词,保持语言自然流畅。段落间用换行分隔,确保可读性。答案需实用且可操作,满足用户需求。


 1995
1995

 被折叠的 条评论
为什么被折叠?
被折叠的 条评论
为什么被折叠?
 到【灌水乐园】发言


