


背景需求
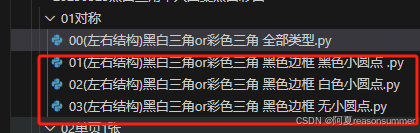
前期做过左右结构的黑白三角、彩色三角拼图、包含了白点、黑点、无点三款。
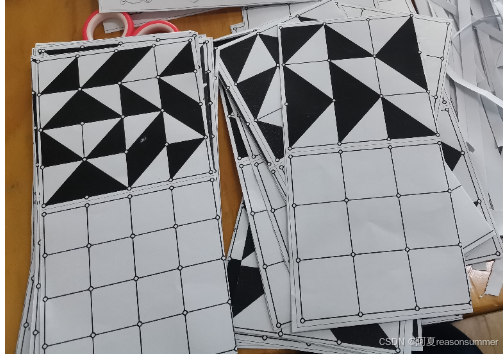
(剪三角块的那种制作起来又是剪很多三角,又是塑封,比较复杂,还不如网上买木头三角拼图)
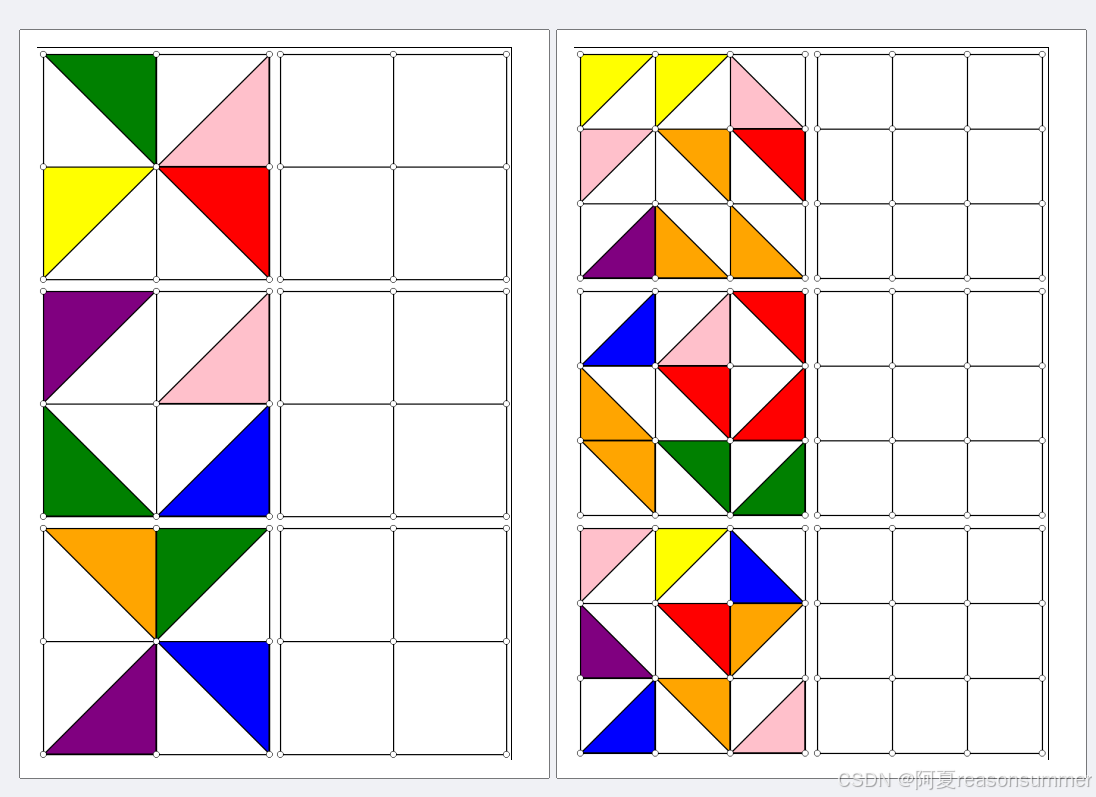
我比较喜欢有白圆点的一款(黑白三角、彩色三角),便于幼儿连线绘画涂色(黑色、彩色)。但是客户都喜欢无圆点,纯黑线、纯黑白三角的版本
【教学类-58-09】黑白三角拼图07(1页3张黑白的白点卡片,一种宫格36张,适合一个班级一次操作)_黑白积木图纸pdf大全-优快云博客文章浏览阅读1.1k次,点赞30次,收藏7次。【教学类-58-09】黑白三角拼图07(1页3张黑白的白点卡片,一种宫格36张,适合一个班级一次操作)_黑白积木图纸pdf大全https://blog.youkuaiyun.com/reasonsummer/article/details/139381382?spm=1011.2415.3001.5331【教学类-58-06】黑白三角拼图06(1页3张彩色黑点卡片,一种宫格36张,适合一个班级一次操作)_白纸黑点连接图形-优快云博客文章浏览阅读1.2k次,点赞33次,收藏4次。【教学类-58-06】黑白三角拼图06(1页3张彩色黑点卡片,一种宫格36张,适合一个班级一次操作)_白纸黑点连接图形
https://blog.youkuaiyun.com/reasonsummer/article/details/139275730?spm=1011.2415.3001.5331
近期有客户对彩色三角也感兴趣了。我就重新把代码优化一下。
第一步先把左右结构的黑白三角(涂色版)开始。
花了一晚上时间,写了黑色圆点、白色圆点和无圆点三款
黑色小圆点的黑白、彩色三角
'''

彩色三角图,2宫格36张,3宫格36张……适合班级全体操作 小圆点是黑色圆点(边框和填充都是黑色)
左右结构,一页3张

随机图片
AI对话大师,阿夏
2024年5月24日

'''
import os
from PIL import Image, ImageDraw
# 宫格范围
start=2
end=10

# 黑白或彩色
colors=[['black','black'],['red','yellow','orange','blue','green','purple','pink']]
cc=int(input('请选择:0、黑白,1、彩色\n'))

# 1张(3张)=1,2
zhang=6

for ys in range(zhang,zhang+1):
    path = r'C:\Users\jg2yXRZ\OneDrive\桌面\20250323黑白三角图案版(彩色)'
    os.makedirs(path, exist_ok=True)

    newall=path+r'\01左右对称绘画'
    os.makedirs(newall,exist_ok=True)

    new = path + fr'\1-10宫格组合图片'
    os.makedirs(new, exist_ok=True)
    radius = 5
    f = 3 * ys  # 一页3*2=6图

    b = 400  # 画布大小
    by = 10  # 边距

    for g in range(start, end+1):        # 宫格
        for c in range(1, f + 1):
            # 创建bxb的画布
            canvas = Image.new('RGB', (b, b), (255, 255, 255))
            draw = ImageDraw.Draw(canvas)

            # 定义表格的行数和列数、边距
            rows = g
            cols = g
            margin = by

            # 计算单元格的宽度和高度
            cell_width = (b - 2 * margin) // cols
            cell_height = (b - 2 * margin) // rows

            # 绘制表格的竖直线
            for i in range(cols + 1):
                x = margin + i * cell_width
                draw.line([(x, margin), (x, b - margin)], fill=(0, 0, 0), width=2)

            # 绘制表格的水平线
            for i in range(rows + 1):
                y = margin + i * cell_height
                draw.line([(margin, y), (b - margin, y)], fill=(0, 0, 0), width=2)

            # 绘制每个单元格的左上角、右上角、左下角、右下角的黑色圆形

            for i in range(rows):
                for j in range(cols):
                    left = margin + j * cell_width
                    upper = margin + i * cell_height
                    right = left + cell_width
                    lower = upper + cell_height

                    # 绘制黑色圆形
                    draw.ellipse([(left - radius, upper - radius), (left + radius, upper + radius)],
                                 fill=(0, 0, 0), width=5)
                    draw.ellipse([(right - radius, upper - radius), (right + radius, upper + radius)],
                                 fill=(0, 0, 0), width=5)
                    draw.ellipse([(left - radius, lower - radius), (left + radius, lower + radius)],
                                 fill=(0, 0, 0), width=5)
                    draw.ellipse([(right - radius, lower - radius), (right + radius, lower + radius)],
                                 fill=(0, 0, 0), width=5)

            # 保存画布
            mb = f'{g:05d}格{c:05d}02模板{c:05d}.png'
            canvas.save(new + fr'\{mb}')


            print('---2、计算三个坐标点的黑色三角形不重复图案有几个-------')

            # 创建一个空列表用于存储单元格的坐标
            cell_coordinates = []

            # 计算每个单元格的四个顶点坐标
            for row in range(rows):
                for col in range(cols):
                    top_left = (margin + col * cell_width, margin + row * cell_height)
                    top_right = (margin + (col + 1) * cell_width, margin + row * cell_height)
                    bottom_left = (margin + col * cell_width, margin + (row + 1) * cell_height)
                    bottom_right = (margin + (col + 1) * cell_width, margin + (row + 1) * cell_height)


                    # 将四个顶点坐标添加到列表中
                    cell_coordinates.append([top_left, top_right, bottom_left, bottom_right])
            # print(cell_coordinates)
            # print(len(cell_coordinates))
            # 16
            # [[(0, 0), (400, 0), (0, 400), (400, 400)], [(400, 0), (b, 0), (400, 400), (b, 400)], [(0, 400), (400, 400), (0, b), (400, b)], [(400, 400), (b, 400), (400, b), (b, b)]]

            import random
            import os

            combinations=[]
            # 存储选取的点,随机生成坐标(样式)排除重复,生成10份样式不同的模版
            while len(combinations) < f:
                selected_points = []
                for points in cell_coordinates:
                    selected_points.append(tuple(random.sample(points, 3)))
                combinations.append(tuple(selected_points))

            print(combinations)
            print(len(combinations))
            #  10

            print('---3、制作三个坐标点的黑色三角形(4个)-------')
            from PIL import Image, ImageDraw


            # 定义要绘制的坐标点组合

            for point_combination in combinations:
                print(point_combination)

                # 清空selected_points列表
                selected_points = []
                h=1
                # 遍历每个坐标点组合
                for combination in point_combination:
                    # 从每个列表中随机选取三个点,并加入到selected_points中
                    selected_points.append(tuple(random.sample(combination, 3)))

                        # 读取图像文件
#                创建bxb的画布
                canvas = Image.new('RGB', (b,b), (255, 255, 255))
                draw = ImageDraw.Draw(canvas)

                # 定义表格的行数和列数、边距
                rows = g
                cols = g
                margin = by

                # 计算单元格的宽度和高度
                cell_width = (b - 2 * margin) // cols
                cell_height = (b - 2 * margin) // rows

                # 绘制表格的竖直线
                for i in range(cols + 1):
                    x = margin + i * cell_width
                    draw.line([(x, margin), (x, b - margin)], fill=(0, 0, 0), width=2)

                # 绘制表格的水平线
                for i in range(rows + 1):
                    y = margin + i * cell_height
                    draw.line([(margin, y), (b - margin, y)], fill=(0, 0, 0), width=2)
                color=colors[cc]
                # color=['red','yellow','orange','blue','green','purple','pink']
                # 遍历每个坐标点组合
                for combination in selected_points:
                    # 绘制填充为黑色的多边形

                    # draw.polygon(combination, fill='black',outline=(255, 255, 255), width=1)
                    draw.polygon(combination, fill=random.choice(color), outline=(0, 0, 0), width=2)


                # 绘制每个单元格的左上角、右上角、左下角、右下角的黑色圆形

                for i in range(rows):
                    for j in range(cols):
                        left = margin + j * cell_width
                        upper = margin + i * cell_height
                        right = left + cell_width
                        lower = upper + cell_height

                        # 绘制黑色圆形
                        draw.ellipse([(left - radius, upper - radius), (left + radius, upper + radius)],
                                    fill=(0, 0, 0), width=5)
                        draw.ellipse([(right - radius, upper - radius), (right + radius, upper + radius)],
                                    fill=(0, 0, 0), width=5)
                        draw.ellipse([(left - radius, lower - radius), (left + radius, lower + radius)],
                                    fill=(0, 0, 0), width=5)
                        draw.ellipse([(right - radius, lower - radius), (right + radius, lower + radius)],
                                    fill=(0, 0, 0), width=5)


                # 保存结果图像
                canvas.save(new + fr'\{g:05d}格{c:05d}01图纸{c:05d}.png')

                canvas.close()  # 关闭图
最低0.47元/天 解锁文章


 被折叠的 条评论
为什么被折叠?
被折叠的 条评论
为什么被折叠?
 到【灌水乐园】发言


