


一、回顾:
1.拉取私有仓库镜像
# 配置docker

docker pull 192.168.2.30:5000/centosnginx:v0
2.容器网络
(1)bridge
bridge(nat) default

# docker启动之后会生成新的虚拟网卡,网卡的名称
(2)docker0
# 网段默认是172.17.0.1

# 所有的容器都桥接docker0,通过桥接共享网络

# brctrl show

# yum -y install bridge-utils
(3)host
# 使用方便,直接使用宿主机ip

# 无法并行多个同类的容器

# docker run -it --network bridge|host|none centos:latest /bin/bash
(4)none
3.跨主机容器网络
两台不同主机上的容器的连接,A宿主机上的a1容器可以访问B主机上的b1容器
flannel技术
# 使用flannel分配网段,被分配的网段都可以ping通

# 步骤

1.node1

docker

# 数据库,被flannel保存网络地址网段等信息
etcd

flannel

2.node2

flannel

docker
二、部署harbor项目
pip工具
是python的包管理工具,与yum和redhat的关系是一样的
1.安装软件
[root@haha ~]# yum -y install python2-pip2.查看pyhon安装的第三方库
[root@haha ~]# pip list3.没有指定源,升级报错
[root@haha ~]# pip install --upgrade pip
Could not fetch URL https://pypi.python.org/simple/pip/: There was a problem confirming the ssl certificate: [SSL: CERTIFICATE_VERIFY_FAILED] certificate verify failed (_ssl.c:579) - skipping
Requirement already up-to-date: pip in /usr/lib/python2.7/site-packages
4.临时使用安装源,指定版本号,安装pip
[root@haha ~]# pip install --upgrade pip==20.3 -i https://mirrors.aliyun.com/pypi/simple5.查看pip版本(20.3)
[root@haha ~]# pip list
pip                              20.3
6.使用阿里云的镜像源安装docker-compose,同时忽略已安装的requests库。
[root@haha ~]# pip install docker-compose --ignore-installed requests  -i https://mirrors.aliyun.com/pypi/simple

# 具体解释如下:

# pip install:这是 Python 的包管理工具pip的安装命令。

# docker-compose:要安装的软件包名称。

# --ignore-installed requests:表示忽略已安装的requests库,只安装docker-compose。

# -i https://mirrors.aliyun.com/pypi/simple:指定使用阿里云的镜像源来加速安装过程。
7.查看docker-compose版本
[root@haha ~]# pip list
docker-compose                     1.26.2
8.安装docker
[root@haha ~]# yum list installed|grep docker
containerd.io.x86_64               1.6.33-3.1.el7              @docker-ce-stable
docker-buildx-plugin.x86_64        0.14.1-1.el7                @docker-ce-stable
docker-ce.x86_64                   3:26.1.4-1.el7              @docker-ce-stable
docker-ce-cli.x86_64               1:26.1.4-1.el7              @docker-ce-stable
docker-ce-rootless-extras.x86_64   26.1.4-1.el7                @docker-ce-stable
docker-compose-plugin.x86_64       2.27.1-1.el7                @docker-ce-stable
9.查看docker版本
[root@haha ~]# docker --version
Docker version 26.1.4, build 5650f9b
10.解压软件包
[root@haha ~]# tar -zxvf harbor-offline-installer-v2.11.1.tgz
harbor/harbor.v2.11.1.tar.gz
harbor/prepare
harbor/LICENSE
harbor/install.sh
harbor/common.sh
harbor/harbor.yml.tmpl
[root@haha ~]# ls
anaconda-ks.cfg  docker.sh  harbor  harbor-offline-installer-v2.11.1.tgz
11.备份harbor/harbor.yml.tmpl文件
[root@haha harbor]# cp harbor.yml.tmpl harbor.yml
[root@haha harbor]# ls
common.sh              harbor.yml       install.sh  prepare
harbor.v2.11.1.tar.gz  harbor.yml.tmpl  LICENSE
12.修改harbor.yml配置文件
[root@haha harbor]# vim harbor.yml

# 修改为本机的ip地址
5 hostname: 192.168.2.40

# 注释掉
13 # https:

15 #  port: 443

17 #  certificate: /your/certificate/path
18 #  private_key: /your/private/key/path

# 登录harbor时的密码
47 harbor_admin_password: Harbor12345
13.配置docker的daemon.json文件
[root@haha harbor]# vim /etc/docker/daemon.json
{
    "registry-mirrors": [
        "https://do.nark.eu.org",
        "https://dc.j8.work",
        "https://docker.m.daocloud.io",
        "https://dockerproxy.com",
        "https://docker.mirrors.ustc.edu.cn",
        "https://docker.nju.edu.cn"
    ],
        "hosts":  [
                  "tcp://0.0.0.0:2375",
                  "unix:///var/run/docker.sock"
        ],
        "insecure-registries":[
                "http://192.168.2.40"

        ]
}
14.修改docker.service文件
[root@haha harbor]# vim /usr/lib/systemd/system/docker.service
ExecStart=/usr/bin/dockerd
[root@haha harbor]# systemctl daemon-reload
15.重启docker服务
[root@haha harbor]# systemctl restart docker16.检查环境,下载镜像
[root@haha harbor]# ./prepare 17.检查端口有没有被占用和关闭防火墙
[root@haha harbor]# netstat -lnput|grep 5000
[root@haha harbor]# netstat -lnput|grep 80
[root@haha harbor]# systemctl stop firewalld
18.执行install.sh文件
[root@haha harbor]# ./install.sh 19.检查容器健康状态
[root@haha harbor]# docker ps -a
CONTAINER ID   IMAGE                                 COMMAND                   CREATED             STATUS                        PORTS                                   NAMES
853cd527d97f   goharbor/nginx-photon:v2.11.1         "nginx -g 'daemon of…"   About an hour ago   Up 55 minutes (healthy)       0.0.0.0:80->8080/tcp, :::80->8080/tcp   nginx
82814d41f69c   goharbor/harbor-jobservice:v2.11.1    "/harbor/entrypoint.…"   About an hour ago   Up 55 minutes (healthy)                                               harbor-jobservice
3019a9cddc6a   goharbor/harbor-core:v2.11.1          "/harbor/entrypoint.…"   About an hour ago   Up 55 minutes (healthy)                                               harbor-core
776d415c1258   goharbor/harbor-db:v2.11.1            "/docker-entrypoint.…"   About an hour ago   Up 55 minutes (healthy)                                               harbor-db
ed2c0d0b35ce   goharbor/registry-photon:v2.11.1      "/home/harbor/entryp…"   About an hour ago   Up 55 minutes (healthy)                                               registry
75acda9bb8e2   goharbor/redis-photon:v2.11.1         "redis-server /etc/r…"   About an hour ago   Up 55 minutes (healthy)                                               redis
1170368a493b   goharbor/harbor-registryctl:v2.11.1   "/home/harbor/start.…"   About an hour ago   Exited (128) 58 minutes ago                                           registryctl
8c17658dc778   goharbor/harbor-portal:v2.11.1        "nginx -g 'daemon of…"   About an hour ago   Up 55 minutes (healthy)                                               harbor-portal
e1a5e320be83   goharbor/harbor-log:v2.11.1           "/bin/sh -c /usr/loc…"   About an hour ago   Up 55 minutes (healthy)       127.0.0.1:1514->10514/tcp               harbor-log
decd8137f46e   192.168.2.30:5000/centosnginx:v0      "/bin/sh -c /usr/sbi…"   26 hours ago        Exited (255) 2 hours ago      80/tcp                                  c8
20.浏览器访问:192.168.2.40

访问到的页面中可以查看推送命令

21.拉取镜像
[root@haha harbor]# docker pull centos22.给镜像打标签
[root@haha harbor]# docker tag centos:latest 192.168.2.40/library/hahacentos:v023.登录用户
[root@haha harbor]# docker login http://192.168.2.40
Username: admin
Password: Harbor12345
WARNING! Your password will be stored unencrypted in /root/.docker/config.json.
Configure a credential helper to remove this warning. See
https://docs.docker.com/engine/reference/commandline/login/#credentials-store

Login Succeeded
24.上传镜像
[root@haha harbor]# docker push 192.168.2.40/library/hahacentos:v0
The push refers to repository [192.168.2.40/library/hahacentos]
74ddd0ec08fa: Pushed
v0: digest: sha256:a1801b843b1bfaf77c501e7a6d3f709401a1e0c83863037fa3aab063a7fdb9dc size: 529
25.在浏览器访问到的页面中就可以看到上传镜像了 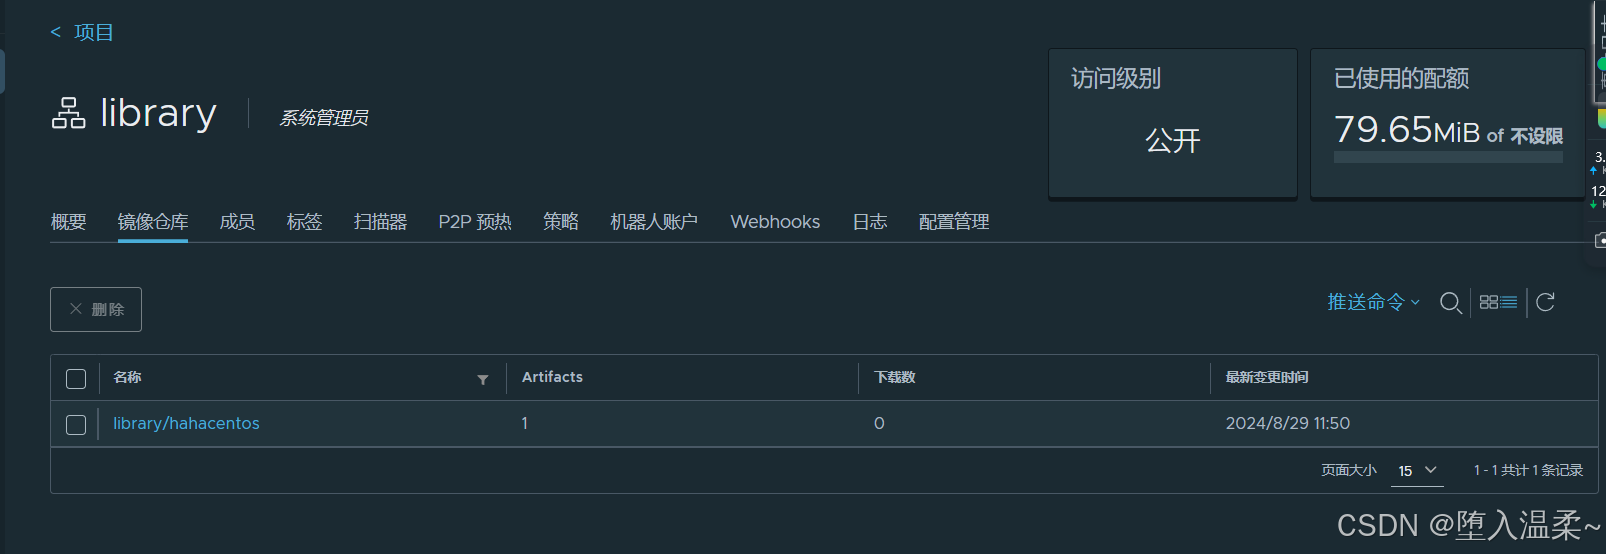
26.其他主机下载harbor仓库的镜像
# 修改daemon.json文件
[root@docker ~]# vim /etc/docker/daemon.json
{
    "registry-mirrors": [
        "https://do.nark.eu.org",
        "https://dc.j8.work",
        "https://docker.m.daocloud.io",
        "https://dockerproxy.com",
        "https://docker.mirrors.ustc.edu.cn",
        "https://docker.nju.edu.cn"
    ],
        "hosts":  [
                  "tcp://0.0.0.0:2375",
                  "unix:///var/run/docker.sock"
        ],
        "insecure-registries":[
                "http://192.168.2.40" # 配置harbor的ip地址

        ]
}

# 重启docker服务
[root@docker ~]# systemctl restart docker

# 拉取harbor仓库的镜像
[root@docker ~]# docker pull 192.168.2.40/library/hahacentos:v0
v0: Pulling from library/hahacentos
Digest: sha256:a1801b843b1bfaf77c501e7a6d3f709401a1e0c83863037fa3aab063a7fdb9dc
Status: Downloaded newer image for 192.168.2.40/library/hahacentos:v0
192.168.2.40/library/hahacentos:v0

# 查看镜像
[root@docker ~]# docker images
REPOSITORY                        TAG       IMAGE ID       CREATED         SIZE
192.168.2.30:5000/centosnginx     v0        4a14f7d33da9   46 hours ago    422MB
centos                            nginx     4a14f7d33da9   46 hours ago    422MB
centos                            httpd     ebbf109944f1   47 hours ago    338MB
centos                            yum       69f3775bce0c   47 hours ago    272MB
192.168.2.30:5000/centos          yum       ee9375ac855c   47 hours ago    272MB
registry                          latest    cfb4d9904335   11 months ago   25.4MB
192.168.2.40/library/hahacentos   v0        5d0da3dc9764   2 years ago     231MB
centos                            latest    5d0da3dc9764   2 years ago     231MB
三、Docker-compose容器编排
1.YAML 注意事项
(1)不⽀持制表符 tab 键缩进,需要使⽤空格缩进。

(2)通常开头缩进 2 个空格。

(3)字符后缩进 1 个空格,如:冒号,逗号,横杠。

(3)⽤ # 表示注释。

(4)如果包含特殊字符⽤单引号引起来。

(5)布尔值(true、false、yes、no、on、off)必须使⽤“”引号括起来,这样分析器会将它们解释为字符串。
2.列表和属组
在yaml中,可以使⽤“-”符号表示⼀个列表和数组
fruits: # fruits是⼀个键,它对应⼀个列表,包含三个元素:apple、banana、orange
- apple # fruits为⼀个⼤项,下⾯的⼩项只需要缩进⼏个空格,与其他项⽬对⻬即可
- banana
- orange
3.嵌套数据结构
yaml⽀持嵌套数据结构,可以⽤缩进来表示不同层级之间的关系,可使⽤ # 号表示注释信息。
person:
 name: 'Meng Mr' # 两个空格,name和age是person的⼀级⼦节点
 age: "34"
 address: # address是person的⼆级⼦节点
 street: '123 Main St' # address节点包含了street、city、state和zip四个⼀级⼦节点
 city: 'Anytown'
 state: 'CA'
 zip: '12345'
4.docker compose 命令选项
(1)build:重新构建服务

(2)ps:列出容器

(3)up:启动所有docker-compose服务

(4)up -d:启动所有docker-compose服务启动并后台运⾏

(5)exec:进⼊容器实例内部

(6)scale:指定⼀个服务器启动数量

(7)top:显示容器进程

(8)logs:查看容器输出⽇志

(9)down:停⽌并删除容器、⽹络、卷、镜像

(10)stop:停⽌服务

(11)start:启动服务

(12)restart:重启服务

(13)config:检查配置

(14)config -q:检查配置,有问题才有输出

(15)--version:查看版本
四、docker-compose 实例
1.安装软件
[root@haha ~]# yum -y install python2-pip2.临时使用安装源,指定版本号,安装pip
[root@haha ~]# pip install --upgrade pip==20.3 -i https://mirrors.aliyun.com/pypi/simple3.查看pip版本(20.3)
[root@haha ~]# pip list
pip                              20.3
4.使用阿里云的镜像源安装docker-compose,同时忽略已安装的requests库。
[root@haha ~]# pip install docker-compose --ignore-installed requests  -i https://mirrors.aliyun.com/pypi/simple

# 具体解释如下:

# pip install:这是 Python 的包管理工具pip的安装命令。

# docker-compose:要安装的软件包名称。

# --ignore-installed requests:表示忽略已安装的requests库,只安装docker-compose。

# -i https://mirrors.aliyun.com/pypi/simple:指定使用阿里云的镜像源来加速安装过程。
7.查看docker-compose版本
[root@haha ~]# pip list
docker-compose                     1.26.2
8.安装docker
# 执行脚本
[root@docker03 ~]# source docker.sh
9.创建目录,该目录是一个工程
[root@docker03 ~]# mkdir test
[root@docker03 ~]# cd test/
10.创建数据卷目录/root/test/html
[root@docker03 test]# pwd
/root/test
[root@docker03 test]# mkdir html

# 准备索引文件
[root@docker03 test]# echo "我是被编排的nginx" > ./html/index.html

# 查看创建的卷目录
[root@docker03 test]# tree
.
└── html
    └── index.html

1 directory, 1 file
11.创建yml文件
[root@docker03 test]# vim docker-compose.yml

version: "3"	# 指定文件版本
services:
  nginx:		# 这是service名
    container_name: c1	# 这是容器名
    image: "nginx:latest"
    ports:
    - "80:80"		# 端口映射
    volumes:
    - /root/test/html/:/usr/share/nginx/html/	#挂载
[root@docker03 test]# ls
docker-compose.yml  html
12.配置docker环境
# 启动compose失败,因为docker服务没有启动
[root@docker03 test]# docker compose up -d
WARN[0000] /root/test/docker-compose.yml: `version` is obsolete
Cannot connect to the Docker daemon at unix:///var/run/docker.sock. Is the docker daemon running?

# 传一份配置好的daemon.json文件到本机
[root@docker ~]# scp /etc/docker/daemon.json 192.168.2.50:/etc/docker/

# 修改docker.service文件
[root@docker03 test]# vim /usr/lib/systemd/system/docker.service

# 删除dockerd后面的内容
13	ExecStart=/usr/bin/dockerd

# 加载修改后的文件
[root@docker03 test]# systemctl daemon-reload

# 重新启动docker服务
[root@docker03 test]# systemctl start docker.service

# 查看docker-compose.yml⽂件与索引文件是否在一个目录下
[root@docker03 test]# ls
docker-compose.yml  html

# 查看镜像(空的)
[root@docker03 test]# docker images
REPOSITORY   TAG       IMAGE ID   CREATED   SIZE
13.启动compose集群
要在 docker-compose.yml ⽂件所在的⽬录下才能通过 docker compose 命令启动容器。
# 成功启动
[root@docker03 test]# docker compose up -d
WARN[0000] /root/test/docker-compose.yml: `version` is obsolete
[+] Running 8/8
 ✔ nginx Pulled                                                                105.4s
   ✔ e4fff0779e6d Pull complete                                                 28.2s
   ✔ 2a0cb278fd9f Pull complete                                                 29.6s
   ✔ 7045d6c32ae2 Pull complete                                                 29.6s
   ✔ 03de31afb035 Pull complete                                                 29.6s
   ✔ 0f17be8dcff2 Pull complete                                                 29.6s
   ✔ 14b7e5e8f394 Pull complete                                                 29.6s
   ✔ 23fa5a7b99a6 Pull complete                                                 29.6s
[+] Running 2/2
 ✔ Network test_default  Created                                                 0.1s
 ✔ Container c1          Started                                                 0.4s
14.在浏览器上访问:192.168.2.50
就能看到在索引文件中编辑地内容了

15.查看镜像和容器进行验证
# 创建了yml文件中编写的nginx镜像
[root@docker03 test]# docker images
REPOSITORY   TAG       IMAGE ID       CREATED       SIZE
nginx        latest    5ef79149e0ec   2 weeks ago   188MB

# 创建了yml文件中编写的名为c1的容器
[root@docker03 test]# docker ps --all
CONTAINER ID   IMAGE          COMMAND                   CREATED              STATUS              PORTS                               NAMES
fe40c6a15262   nginx:latest   "/docker-entrypoint.…"   About a minute ago   Up About a minute   0.0.0.0:80->80/tcp, :::80->80/tcp   c1


 被折叠的 条评论
为什么被折叠?
被折叠的 条评论
为什么被折叠?
 到【灌水乐园】发言


