


 文章介绍了Vue中组件间通信的几种常见方式,包括使用ref属性来访问DOM元素或子组件实例,通过props向子组件传递数据,子组件通过自定义事件向父组件传递数据,以及利用全局事件总线实现任意组件间通信。此外,还提到了消息订阅和发布的模式作为另一种通信手段。
Vue组件间通信方式
ref属性
用来给元素或子组件注册引用信息(id的替代者)
ref属性应用在html标签上获取的是真实DOM元素,应用在组件标签上是组件实例对象(vc)
- 使用方式:
- 标识数据:
<h1 ref="xxx">...</h1>或<School ref="xxx"></School> - 获取:
this.$refs.xxx
- 标识数据:
实例代码:
父组件App.vue
<template>
  <div id="app">
    <div ref="info">{{ info }}</div>
    <School name="haha" :age="this.age" ref="school"></School>
  </div>
</template>

<script>
import School from './components/School.vue'

export default {
  name: 'App',
  data () {
    return {
      age: 360 ,
      info:'我是div上的info数据',
    }
  },
  components: {
    School
  },
  mounted(){
    console.log(this.$refs.info);
    console.log(this.$refs.school);

  }
}
</script>

<style>
#app {
  font-family: Avenir, Helvetica, Arial, sans-serif;
  -webkit-font-smoothing: antialiased;
  -moz-osx-font-smoothing: grayscale;
  text-align: center;
  color: #2c3e50;
  margin-top: 60px;
}
</style>
子组件School.vue:
<template>
    <div class="demo">
      <h2>学校名称:{{ name }}</h2>
      <h2>学校年龄:{{ age }}</h2>
      <h2>学校地址:{{ address }}</h2>
      <button @click="showName">点我提示学校名</button>
    </div>
  </template>

  <script>
  export default {
    name: "School",
    // 最简单的写法:props: ['name', 'age']
    props: {
      name: {
        type: String,
        required: true // 必须要传的
      },
      age: {
        type: Number,
        required: true
      }
    },
    data() {
      return {
        address: "西南石油大学",
      };
    },
    methods: {
      showName() {
        alert(this.name);
      },
    },
  };
  </script>

  <style>
  .demo {
    background-color: orange;
  }
  </style>
在上述代码中,在div标签中使用ref="info"标记,在school组件上使用ref="school"标记。
在父组件App.vue中使用this.$refs.xxx获取标记的信息。
页面打印结果: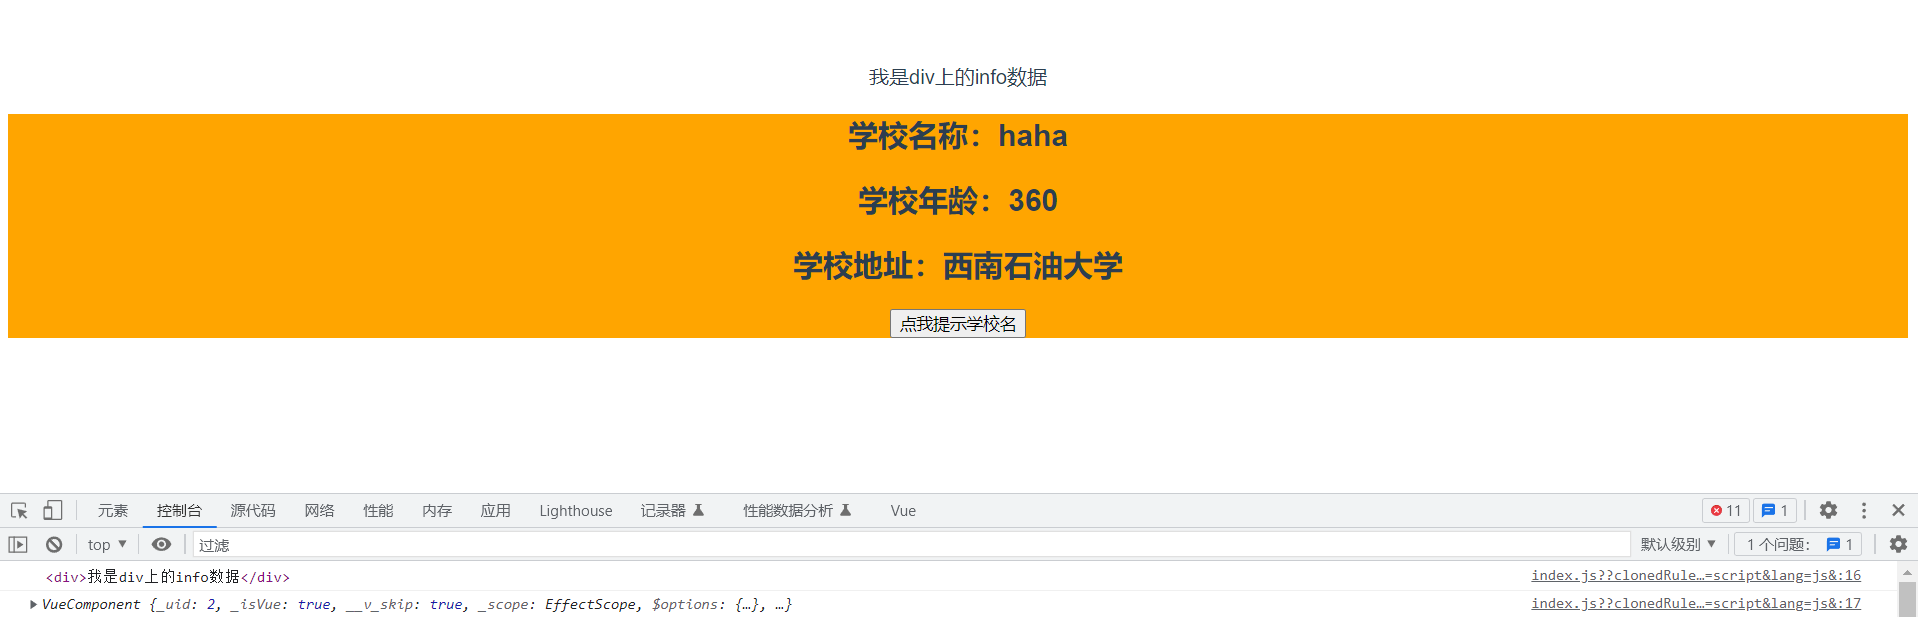
可以看到第一个打印的信息为真实DOM信息,第二个打印信息为子组件vueComponent(vc)信息。
在开发中可以通过ref标记获取标签中的信息和子组件的信息。
props配置项
功能:让组件接收外部传过来的数据。父组件 ----> 子组件
传递数据:<Demo name="xxx"/>
接收数据:
-
第一种方式(只接收):
props['name'] -
第二种方式(限制类型):
props:{name:String} -
第三种方式(限制类型、必要性,指定默认值):
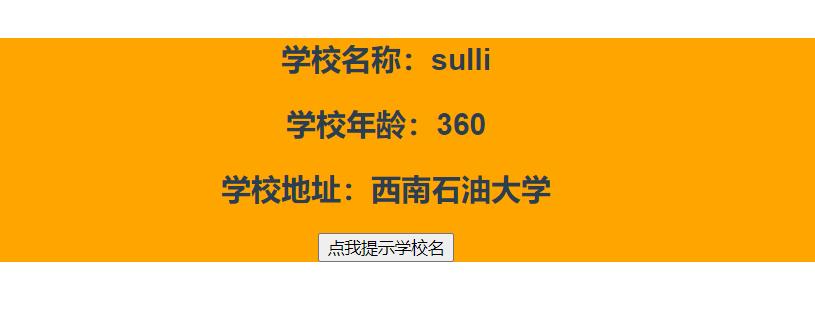
props:{
  name:{
      type:String,//类型
      required:true,//必要性
      default:'sulli'
  }
}
注意:props是获取的数据只读的,Vue底层会检测你对props的修改,如果进行了修改,就会发出警告。若业务需求需要修改数据,可以将props获取到的数据复制到data中,修改data的数据。
示例代码:
父组件App.vue:
<template>
  <div id="app">
    <School name="sulli" :age="this.age"></School>
  </div>
</template>

<script>
import School from './components/School.vue'
export default {
  name: 'App',
  data () {
    return {
      age: 360 ,
    }
  },
  components: {
    School
  },
  mounted(){

  }
}
</script>

<style>
#app {
  font-family: Avenir, Helvetica, Arial, sans-serif;
  -webkit-font-smoothing: antialiased;
  -moz-osx-font-smoothing: grayscale;
  text-align: center;
  color: #2c3e50;
  margin-top: 60px;
}
</style>
子组件School.vue:
<template>
    <div class="demo">
      <h2>学校名称:{{ name }}</h2>
      <h2>学校年龄:{{ age }}</h2>
      <h2>学校地址:{{ address }}</h2>
      <button @click="showName">点我提示学校名</button>
    </div>
  </template>

  <script>
  export default {
    name: "School",
    // 最简单的写法:props: ['name', 'age']
    props: {
      name: {
        type: String,
        required: true // 必须要传的
      },
      age: {
        type: Number,
        required: true
      }
    },
    data() {
      return {
        address: "西南石油大学",
      };
    },
    methods: {
      showName() {
        alert(this.name);
      },
    },
  };
  </script>

  <style>
  .demo {
    background-color: orange;
  }
  </style>
在上述代码中,子组件从父组件中接收了name数据和age数据。此时网页页面渲染效果:
组件自定义事件
组件自定义事件是一种组件间通信的方式,适用于:子组件 --> 父组件
使用场景:
A是父组件,B是子组件,B想给A传数据,那么就要在A中给B绑定自定义事件(事件的回调在A中)。
绑定自定义事件:
**方式一:**在父组件中:<Demo @sendStudentName="getStudentName"/>或<Demo v-on:sendStudentName="getStudentName"/>
示例代码:
父组件App.vue
<template>
  <div id="app">
    <School @getStudentName="getStudentName"></School>
  </div>
</template>

<script>
import School from './components/School.vue'
export default {
  name: 'App',
  data () {
    return {
      age: 360 ,
    }
  },
  components: {
    School
  },
  methods:{
    getStudentName(name,...params){
        console.log('这里是App收到的:'+name,params);
    }
  }
}
</script>

<style>
#app {
  font-family: Avenir, Helvetica, Arial, sans-serif;
  -webkit-font-smoothing: antialiased;
  -moz-osx-font-smoothing: grayscale;
  text-align: center;
  color: #2c3e50;
  margin-top: 60px;
}
</style>
子组件School.vue
<template>
    <div class="demo">
      <button @click="sendStudentName">点击,将学生姓名给App</button>
    </div>
  </template>

  <script>
  export default {
    name: "School",
    // 最简单的写法:props: ['name', 'age']
    data() {
      return {
            name:'sulli',
      };
    },
    methods: {
        sendStudentName(){
            this.$emit('getStudentName',this.name,22,33,44);
        }
    },
  };
  </script>

  <style>
  .demo {
    background-color: orange;
  }
  </style>
上述代码在父组件中对子组件绑定了自定义事件,通过在子组件中触发事件,执行回调函数,实现将子组件的数据传递到父组件的功能。
浏览器打印结果:
可以从打印结果中看到,父组件成功接收到了从子组件传递过来的数据。
方式二:
在父组件中使用this.$refs.xxx.$on()的方式绑定,这种写法更加灵活。
示例代码:
父组件App.vue
<template>
  <div id="app">
    <School ref="school"></School>
  </div>
</template>

<script>
import School from './components/School.vue'
export default {
  name: 'App',
  data () {
    return {
      studentName:'',
    }
  },
  components: {
    School
  },
  methods:{
    getStudentName(name,...params){
        console.log('这里是App收到的:'+name,params);
        this.studentName = name;
    }
  },
  mounted(){
    this.$refs.school.$on('getStudentName',this.getStudentName);
  }
}
</script>

<style>
#app {
  font-family: Avenir, Helvetica, Arial, sans-serif;
  -webkit-font-smoothing: antialiased;
  -moz-osx-font-smoothing: grayscale;
  text-align: center;
  color: #2c3e50;
  margin-top: 60px;
}
</style>
子组件school.vue代码保持不变。
执行上述代码,发现与方案一得到相同的结果。成功从子组件中获取到数据。
全局事件总线
全局事件总线是一种组件间的通信方式,适用于任意组件间的通信。
- 安装全局事件总线:
new Vue({
  ......
  beforeCreate(){
  		Vue.prototype.$bus = this //安装全局事件总线,$bus就是当前应用的vm
},
  ......
})
-
使用事件总线
-
接收数据:A组件想接收数据,则在A组件中给
$bus绑定自定义事件,事件的回调留在A组件自身。methods(){ demo(data){ ...... } ...... mounted(){ this.$bus.$on('xxx',this.demo); } } -
提供数据:
this.$bus.$emit('xxxx',数据)
-
-
最好在
beforeDestroty钩子中,用$off去解绑当前组件所用到的事件。
示例代码:
School.vue组件:
<template>
    <div class="school">
        <h2>学校名称:{{name}}</h2>
		<h2>学校地址:{{address}}</h2>
    </div>
  </template>

  <script>
  export default {
    name: "School",
    // 最简单的写法:props: ['name', 'age']
    data() {
      return {
            name:'这是一个名称',
            address:'这是一个地址'
      };
    },
    methods: {
            demo(data){
                console.log('我是School组件,收到了数据',data)
            }
    },
    mounted(){
        this.$bus.$on('hello',this.demo);
    },
    beforeDestroy(){
        this.$bus.$off('hello');
    }
  };
  </script>

  <style>
  .demo {
    background-color: orange;
  }
  </style>
Student.vue组件:
<template>
  <div class="student">
        <h2>学生姓名:{{name}}</h2>
		<h2>学生性别:{{sex}}</h2>
		<button @click="sendStudentName">把学生名给School组件</button>
  </div>
</template>

<script>
export default {
    name:'Student',
		data() {
			return {
				name:'张三',
				sex:'男',
			}
		},
		mounted() {
			// console.log('Student',this.x)
		},
		methods: {
			sendStudentName(){
				this.$bus.$emit('hello',this.name)
			}
		},
}
</script>

<style>

</style>
上述代码希望组件School接收到组件Student传递过来的数据,运行代码查看浏览器运行结果:

此时便实现了任意两个组件间消息传递的功能。
消息订阅与发布
是一种组件间通信的方式,同样适用于任意组件间通信。
-
使用步骤:
-
安装pubsub:
npm i pubsub-js -
引入:
import pubsub from 'pubsub-js' -
接收数据:A组件想接收数据,则在A组件中订阅消息,订阅的回调留在A组件自身。
methods:{ demo(data){......} } ...... mounted() { this.pid = pubsub.subscribe('xxx',this.demo) //订阅消息 } -
提供数据:
pubsub.publish('xxx',数据) -
最好在beforeDestroy钩子中,用
PubSub.unsubscribe(pid)去取消订阅。
-
示例代码:
School.vue
<template>
    <div class="school">
        <h2>学校名称:{{name}}</h2>
		<h2>学校地址:{{address}}</h2>
    </div>
  </template>

  <script>
import PubSub from 'pubsub-js';
  export default {
    name: "School",
    // 最简单的写法:props: ['name', 'age']
    data() {
      return {
            name:'这是一个名称',
            address:'这是一个地址'
      };
    },
    mounted(){
        this.pubId = PubSub.subscribe('hello',(msgName,data)=>{
            console.log('有人发布了hello消息,hello消息的回调执行了',msgName,data);
        })
    },
    beforeDestroy(){
        pubsub.unsubscribe(this.pubId)
    }
  };
  </script>

  <style>
  .demo {
    background-color: orange;
  }
  </style>
Student.vue
<template>
  <div class="student">
        <h2>学生姓名:{{name}}</h2>
		<h2>学生性别:{{sex}}</h2>
		<button @click="sendStudentName">把学生名给School组件</button>
  </div>
</template>

<script>
import pubsub from 'pubsub-js'
export default {
    name:'Student',
		data() {
			return {
				name:'张三',
				sex:'男',
			}
		},
		mounted() {
			// console.log('Student',this.x)
		},
		methods: {
			sendStudentName(){
				pubsub.publish('hello',this.name)
			}
		},
}
</script>

<style>

</style>
上述代码中Student组件发布消息,将name数据传递给School组件。实现了组件间的消息传递。

emplate>
学生姓名:{{name}}
学生性别:{{sex}}
上述代码中Student组件发布消息,将name数据传递给School组件。实现了组件间的消息传递。

[外链图片转存中...(img-msjzjwAg-1688991817955)]


 549
549

 被折叠的 条评论
为什么被折叠?
被折叠的 条评论
为什么被折叠?
 到【灌水乐园】发言


