


 本文档详细介绍了如何使用kubeadm在Linux环境下搭建Kubernetes集群,包括集群类型选择、主机规划、环境初始化、安装docker以及kubernetes组件的安装步骤。适合于想要快速构建K8s测试或生产环境的读者。
K8s集群环境搭建
环境规划
1、集群类型
Kubernetes集群大体上分为两类:一主多从和多主多从
一主多从:一台master节点和多台node节点,搭建简单,但是有单机故障风险,适用于测试环境
多主多从:多台master节点和多台node节点,搭建麻烦,安全性高,适用于生产环境

2、安装方式
Kubernetes有多种部署方式,目前主流的方式有kubeadm、minikube、二进制包
- Minikube:一个用于快速搭建单节点kubernetes的工具
- Kubeadm:一个用于快速搭建kubernetes集群的工具,https://kubernetes.io/docs/reference/setup-tools/kubeadm/kubeadm/
- 二进制包:从官网下载每个组件的二进制包,依次去安装,此方式对于理解kubernetes组件更加有效,https://github.com/kubernetes/kubernetes
说明:现在需要安装kubernetes的集群环境,但是又不想过于麻烦,所有选择使用kubeadm方式
3、主机规划
角色 ip地址 组件
master:192.168.56.172 docker,kubectl,kubeadm,kubelet
node1: 192.168.56.178 docker,kubectl,kubeadm,kubelet
node2: 192.168.56.179 docker,kubectl,kubeadm,kubelet
二、环境搭建
本次环境搭建需要安装三台Linux系统(一主二从),内置centos7.5系统,然后在每台linux中分别安装docker。kubeadm(1.25),kubelet(1.25.4),kubelet(1.25.4).
1、主机安装
安装虚拟机过程中注意下面选项的设置:
1、操作系统环境:cpu2个 内存2G 硬盘50G centos7+
2、语言:中文简体/英文
3、软件选择:基础设施服务器
4、分区选择:自动分区/手动分区
5、网络配置:按照下面配置网络地址信息
网络地址:192.168.56.(172、178、179)
子网掩码:255.255.255.0
默认网关:192.168.56.2
DNS:8.8.8.8
6、主机名设置:
Master节点:master
Node节点:node1
Node节点:node2
2、环境初始化
1、查看操作系统的版本
# 此方式下安装kubernetes集群要求Centos版本要在7.5或之上
cat /etc/redhat-release
Red Hat Enterprise Linux release 8.2 (Ootpa)
2、禁用firewalld、selinux、postfix**(三个节点都做)**
关闭防火墙、selinux,postfix----3台主机都配置
[root@master ~]# systemctl stop firewalld
[root@master ~]# systemctl disable firewalld
Removed /etc/systemd/system/multi-user.target.wants/firewalld.service.
Removed /etc/systemd/system/dbus-org.fedoraproject.FirewallD1.service.
[root@master ~]# vim /etc/selinux/config
SELINUX=disabled

[root@master ~]# setenforce 0
[root@master ~]# systemctl stop postfix
Failed to stop postfix.service: Unit postfix.service not loaded.
3、主机名解析 (三个节点都做)
为了方便集群节点间的直接调用,在这个配置一下主机名解析,企业中推荐使用内部DNS服务器
[root@master ~]# vim /etc/hosts
192.168.56.172 master.example.com      master
192.168.56.178 node1.example.com       node1
192.168.56.179 node2.example.com       node2

[root@master ~]# scp /etc/hosts  root@192.168.56.178:/etc/hosts
The authenticity of host '192.168.56.178 (192.168.56.178)' can't be established.
ECDSA key fingerprint is SHA256:eQmQvNKvqyunaSCRVsY9fMK2hNemyw9vET5TfKGsYRo.
Are you sure you want to continue connecting (yes/no/[fingerprint])? yes
Warning: Permanently added '192.168.56.178' (ECDSA) to the list of known hosts.
root@192.168.56.178's password:
hosts                                         100%  294    75.7KB/s   00:00

[root@master ~]# scp /etc/hosts  root@192.168.56.179:/etc/hosts
The authenticity of host '192.168.56.179 (192.168.56.179)' can't be established.
ECDSA key fingerprint is SHA256:GN3clt4iK6mZ/V5GjZapZjrDbtWVX6v/h0OQdgomwr4.
Are you sure you want to continue connecting (yes/no/[fingerprint])? yes
Warning: Permanently added '192.168.56.179' (ECDSA) to the list of known hosts.
root@192.168.56.179's password:
hosts                                         100%  294   116.5KB/s   00:00

[root@master ~]# ssh-keygen
Generating public/private rsa key pair.
Enter file in which to save the key (/root/.ssh/id_rsa):
Enter passphrase (empty for no passphrase):
Enter same passphrase again:
Your identification has been saved in /root/.ssh/id_rsa.
Your public key has been saved in /root/.ssh/id_rsa.pub.
The key fingerprint is:
SHA256:D4PHGwzC+g94PWnIXm/uyUuaZtwdNl7Md/MWjJVyjl4 root@master.example.com
The key's randomart image is:
+---[RSA 3072]----+
|                 |
|   .             |
|    o .         .|
|   . . =     . + |
|  .   . S  o  O  |
|   + o o *+ +o.E.|
|  . *.*.o+.+....+|
|   o =+Bo.o  .  o|
|    .o++B.     . |
+----[SHA256]-----+
[root@master ~]# ssh-copy-id -i ~/.ssh/id_rsa.pub root@node1
/usr/bin/ssh-copy-id: INFO: Source of key(s) to be installed: "/root/.ssh/id_rsa.pub"
The authenticity of host 'node1 (192.168.56.178)' can't be established.
ECDSA key fingerprint is SHA256:eQmQvNKvqyunaSCRVsY9fMK2hNemyw9vET5TfKGsYRo.
Are you sure you want to continue connecting (yes/no/[fingerprint])? yes
/usr/bin/ssh-copy-id: INFO: attempting to log in with the new key(s), to filter out any that are already installed
/usr/bin/ssh-copy-id: INFO: 1 key(s) remain to be installed -- if you are prompted now it is to install the new keys
root@node1's password:

Number of key(s) added: 1

Now try logging into the machine, with:   "ssh 'root@node1'"
and check to make sure that only the key(s) you wanted were added.

[root@master ~]# ssh-copy-id -i ~/.ssh/id_rsa.pub root@node2
/usr/bin/ssh-copy-id: INFO: Source of key(s) to be installed: "/root/.ssh/id_rsa.pub"
The authenticity of host 'node2 (192.168.56.179)' can't be established.
ECDSA key fingerprint is SHA256:GN3clt4iK6mZ/V5GjZapZjrDbtWVX6v/h0OQdgomwr4.
Are you sure you want to continue connecting (yes/no/[fingerprint])? yes
/usr/bin/ssh-copy-id: INFO: attempting to log in with the new key(s), to filter out any that are already installed
/usr/bin/ssh-copy-id: INFO: 1 key(s) remain to be installed -- if you are prompted now it is to install the new keys
root@node2's password:

Number of key(s) added: 1

Now try logging into the machine, with:   "ssh 'root@node2'"
and check to make sure that only the key(s) you wanted were added.
4、时钟同步
kubernetes要求集群中的节点时间必须精确一致,这里使用chronyd服务从网络同步时间
企业中建议配置内部的时间同步服务器
Master:
[root@master ~]# vim /etc/chrony.conf
local stratum 10          //去掉注释
[root@master ~]# systemctl restart chronyd
[root@master ~]# systemctl enable chronyd
Created symlink /etc/systemd/system/multi-user.target.wants/chronyd.service → /usr/lib/systemd/system/chronyd.service.
[root@master ~]# hwclock  -w
Node1和node2:
[root@node1 ~]# vim /etc/chrony.conf
#pool 2.rhel.pool.ntp.org iburst       //将其注释掉
server  master.example.com  iburst    //添加此行

[root@node1 ~]# systemctl restart chronyd
[root@node1 ~]# systemctl enable chronyd
Created symlink /etc/systemd/system/multi-user.target.wants/chronyd.service → /usr/lib/systemd/system/chronyd.service.
[root@node1 ~]# hwclock  -w


[root@node2 ~]# vim /etc/chrony.conf
#pool 2.rhel.pool.ntp.org iburst       //将其注释掉
server  master.example.com  iburst    //添加此行

[root@node2 ~]# systemctl restart chronyd
[root@node2 ~]# systemctl enable chronyd
Created symlink /etc/systemd/system/multi-user.target.wants/chronyd.service → /usr/lib/systemd/system/chronyd.service.
[root@node2 ~]# hwclock  -w
5、禁用swap分区**(三个节点都做)**
[root@master ~]# vim /etc/fstab
注释掉swap分区那一行
[root@master ~]# swapoff  -a
[root@master ~]# free -m
              total        used        free      shared  buff/cache   available
Mem:           1800        1183          97          25         519         428
Swap:             0           0           0


[root@node1 ~]# vim /etc/fstab
[root@node1 ~]# swapoff  -a
[root@node1 ~]# free -m
              total        used        free      shared  buff/cache   available
Mem:           1800        1137         160          17         502         484
Swap:             0           0           0


[root@node2 ~]# vim /etc/fstab
[root@node2 ~]# swapoff  -a
[root@node2 ~]# free -m
              total        used        free      shared  buff/cache   available
Mem:           1800        1085         133          17         581         537
Swap:             0           0           0
6、开启IP转发,和修改内核信息—三个节点都需要配置
[root@master ~]# vim /etc/sysctl.d/k8s.conf
net.ipv4.ip_forward = 1
net.bridge.bridge-nf-call-ip6tables = 1
net.bridge.bridge-nf-call-iptables = 1

[root@master ~]# modprobe   br_netfilter
[root@master ~]# sysctl -p  /etc/sysctl.d/k8s.conf
net.ipv4.ip_forward = 1
net.bridge.bridge-nf-call-ip6tables = 1
net.bridge.bridge-nf-call-iptables = 1
7、配置IPVS功能**(三个节点都做)**
[root@master ~]# vim /etc/sysconfig/modules/ipvs.modules
#!/bin/bash
modprobe -- ip_vs
modprobe -- ip_vs_rr
modprobe -- ip_vs_wrr
modprobe -- ip_vs_sh

[root@master ~]# chmod +x /etc/sysconfig/modules/ipvs.modules
[root@master ~]# bash /etc/sysconfig/modules/ipvs.modules
[root@master ~]# reboot
3、安装docker
1、切换镜像源 (三个节点都做)
[root@master ~]# cd /etc/yum.repos.d/
[root@master yum.repos.d]# ls
redhat.repo
[root@master yum.repos.d]# rm -rf *
[root@master yum.repos.d]# wget -O /etc/yum.repos.d/CentOS-Base.repo https://mirrors.aliyun.com/repo/Centos-vault-8.5.2111.repo
--2022-11-17 16:57:47--  https://mirrors.aliyun.com/repo/Centos-vault-8.5.2111.repo
Resolving mirrors.aliyun.com (mirrors.aliyun.com)... 119.96.90.238, 119.96.90.237, 119.96.90.239, ...
Connecting to mirrors.aliyun.com (mirrors.aliyun.com)|119.96.90.238|:443... connected.
HTTP request sent, awaiting response... 200 OK
Length: 2495 (2.4K) [application/octet-stream]
Saving to: ‘/etc/yum.repos.d/CentOS-Base.repo’

/etc/yum.repos.d/Ce 100%[===================>]   2.44K  --.-KB/s    in 0.03s

2022-11-17 16:57:47 (94.2 KB/s) - ‘/etc/yum.repos.d/CentOS-Base.repo’ saved [2495/2495]

[root@master yum.repos.d]# dnf -y install epel-release
......
Complete!

[root@master yum.repos.d]# wget https://mirrors.aliyun.com/docker-ce/linux/centos/docker-ce.repo
--2022-11-17 23:32:00--  https://mirrors.aliyun.com/docker-ce/linux/centos/docker-ce.repo
Resolving mirrors.aliyun.com (mirrors.aliyun.com)... 119.96.90.236, 119.96.90.242, 119.96.90.243, ...
Connecting to mirrors.aliyun.com (mirrors.aliyun.com)|119.96.90.236|:443... connected.
HTTP request sent, awaiting response... 200 OK
Length: 2081 (2.0K) [application/octet-stream]
Saving to: ‘docker-ce.repo’

docker-ce.repo      100%[===================>]   2.03K  --.-KB/s    in 0s

2022-11-17 23:32:00 (21.3 MB/s) - ‘docker-ce.repo’ saved [2081/2081]
2、安装docker-ce (三个节点都做)
[root@master ~]# dnf -y install docker-ce --allowerasing
......
Complete!
[root@master ~]# systemctl restart docker
[root@master ~]# systemctl enable docker
Created symlink /etc/systemd/system/multi-user.target.wants/docker.service → /usr/lib/systemd/system/docker.service.
3、添加一个配置文件,配置docker仓库加速器 (三个节点都做)
[root@master ~]# cat > /etc/docker/daemon.json << EOF
> {
> "registry-mirrors": ["https://14lrk6zd.mirror.aliyuncs.com"],
> "exec-opts": ["native.cgroupdriver=systemd"],
> "log-driver": "json-file",
> "log-opts": {
> "max-size": "100m"
> },
> "storage-driver": "overlay2"
> }
> EOF
[root@master ~]# systemctl daemon-reload
[root@master ~]# systemctl restart docker
4、安装kubernetes组件(1-3步骤都需要在所有节点运行)
1、由于kubernetes的镜像在国外,速度比较慢,这里切换成国内的镜像源
[root@master ~]# cat > /etc/yum.repos.d/kubernetes.repo << EOF
> [kubernetes]
> name=Kubernetes
>baseurl=https://mirrors.aliyun.com/kubernetes/yum/repos/kubernetes-el7-x86_64/
> enabled=1
> gpgcheck=0
> repo_gpgcheck=0
> gpgkey=https://mirrors.aliyun.com/kubernetes/yum/doc/yum-key.gpg https://mirrors.aliyun.com/kubernetes/yum/doc/rpm-package-key.gpg
> EOF
2、安装kubeadm kubelet kubectl工具
[root@master ~]# dnf  -y  install kubeadm  kubelet  kubectl
......
Complete!
[root@master ~]# systemctl  restart  kubelet
[root@master ~]# systemctl  enable  kubelet
Created symlink /etc/systemd/system/multi-user.target.wants/kubelet.service → /usr/lib/systemd/system/kubelet.service.
3、配置containerd
为确保后面集群初始化及加入集群能够成功执行,需要配置containerd的配置文件/etc/containerd/config.toml,此操作需要在所有节点执行
[root@master ~]# containerd config default > /etc/containerd/config.toml
[root@master ~]# vim /etc/containerd/config.toml
sandbox_image = "registry.aliyuncs.com/google_containers/pause:3.6"

[root@master ~]# systemctl   restart  containerd
[root@master ~]# systemctl   enable  containerd
Created symlink /etc/systemd/system/multi-user.target.wants/containerd.service → /usr/lib/systemd/system/containerd.service.
4、部署k8s的master节点(在master节点运行)
[root@master ~]# kubeadm init \
>   --apiserver-advertise-address=192.168.56.172 \
>   --image-repository registry.aliyuncs.com/google_containers \
>   --kubernetes-version v1.25.4 \
>   --service-cidr=10.96.0.0/12 \
>   --pod-network-cidr=10.244.0.0/16
.......
Your Kubernetes control-plane has initialized successfully!

To start using your cluster, you need to run the following as a regular user:

  mkdir -p $HOME/.kube
  sudo cp -i /etc/kubernetes/admin.conf $HOME/.kube/config
  sudo chown $(id -u):$(id -g) $HOME/.kube/config

Alternatively, if you are the root user, you can run:

  export KUBECONFIG=/etc/kubernetes/admin.conf

You should now deploy a pod network to the cluster.
Run "kubectl apply -f [podnetwork].yaml" with one of the options listed at:
  https://kubernetes.io/docs/concepts/cluster-administration/addons/

Then you can join any number of worker nodes by running the following on each as root:

kubeadm join 192.168.56.172:6443 --token wyc9jc.yz33kmpi6jzjpab5 \
        --discovery-token-ca-cert-hash sha256:83e4ddcf37aa9f2a1898dfO42755646f9876117bd920d03d4f7a4fb0f763df69

[root@master ~]# vim /etc/profile.d/kuber.sh
export KUBECONFIG=/etc/kubernetes/admin.conf
[root@master ~]# source /etc/profile.d/kuber.sh
5、安装pod网络插件
[root@master ~]# wget https://raw.githubusercontent.com/coreos/flannel/master/Documentation/kube-flannel.yml
[root@master ~]# kubectl apply -f kube-flannel.yml
namespace/kube-flannel created
clusterrole.rbac.authorization.k8s.io/flannel created
clusterrolebinding.rbac.authorization.k8s.io/flannel created
serviceaccount/flannel created
configmap/kube-flannel-cfg created
daemonset.apps/kube-flannel-ds created
6、将node节点加入k8s集群
[root@node1 ~]# kubeadm join 192.168.56.172:6443 --token wyc9jc.yz33kmpi6jzjpab5 \
>        --discovery-token-ca-cert-hash sha256:83e4ddcf37aa9f2a1898dfO42755646f9876117bd920d03d4f7a4fb0f763df69
[preflight] Running pre-flight checks
        [WARNING FileExisting-tc]: tc not found in system path
[preflight] Reading configuration from the cluster...
[preflight] FYI: You can look at this config file with 'kubectl -n kube-system get cm kubeadm-config -o yaml'
[kubelet-start] Writing kubelet configuration to file "/var/lib/kubelet/config.yaml"
[kubelet-start] Writing kubelet environment file with flags to file "/var/lib/kubelet/kubeadm-flags.env"
[kubelet-start] Starting the kubelet
[kubelet-start] Waiting for the kubelet to perform the TLS Bootstrap...

This node has joined the cluster:
* Certificate signing request was sent to apiserver and a response was received.
* The Kubelet was informed of the new secure connection details.
7、创建pod,运行nginx容器进行测试
[root@master ~]# kubectl create deployment nginx --image nginx
deployment.apps/nginx created
[root@master ~]# kubectl get pods
NAME                    READY   STATUS    RESTARTS   AGE
nginx- d4968fb-640fd   0/1     Pending   0          15s
[root@master ~]# kubectl expose deployment nginx --port 80 --type NodePort
service/nginx exposed
[root@master ~]# kubectl get pods -o wide
NAME                    READY   STATUS    RESTARTS   AGE     IP           NODE                NOMINATED NODE   READINESS GATES
nginx- d4968fb-640fd   1/1     Running   0          4m53s   10.244.1.3   node1.example.com   <none>           <none>
[root@master ~]# kubectl get services
NAME         TYPE        CLUSTER-IP     EXTERNAL-IP   PORT(S)        AGE
kubernetes   ClusterIP   10.96.0.1      <none>        443/TCP        122m
nginx        NodePort    10.109.89.19   <none>        80:30656/TCP   5m13s
8、测试访问
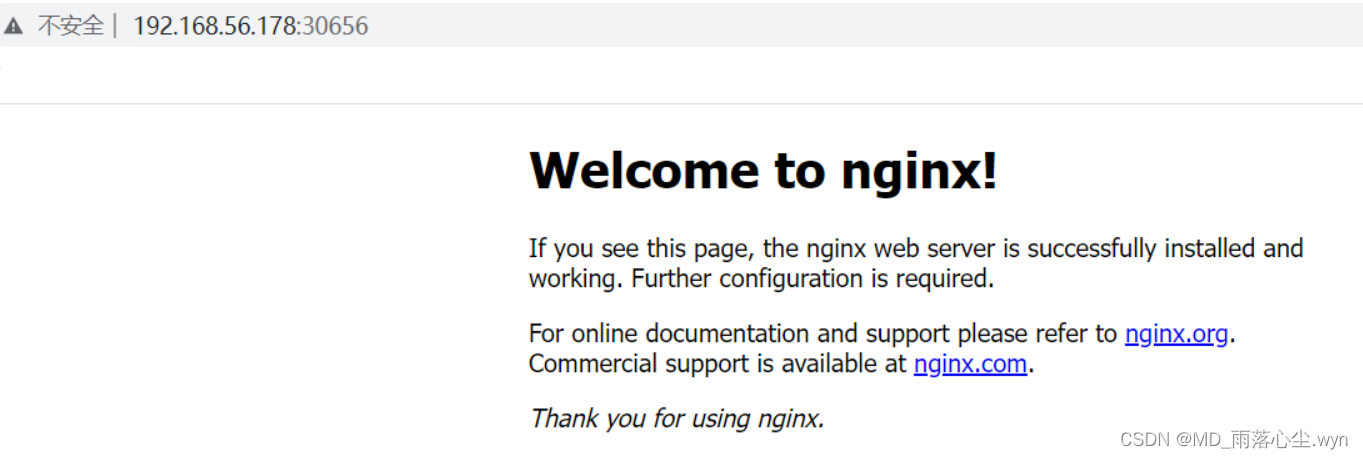
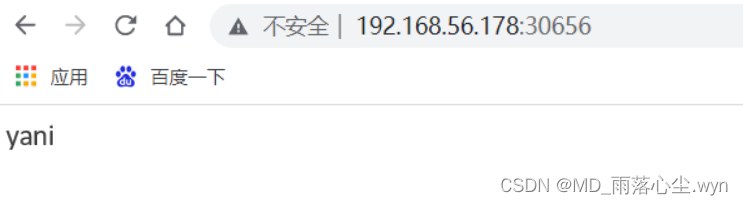
9、修改默认网页
[root@master ~]# kubectl exec -it pod/nginx-76d6c9b8c-sfb7x -- /bin/bash
root@nginx-d4968fb-640fd:/# cd /usr/share/nginx/html/
root@nginx-d4968fb-640fd:/usr/share/nginx/html# echo "yani" > index.html
root@nginx-d4968fb-640fd:/usr/share/nginx/html#


 1187
1187

 被折叠的 条评论
为什么被折叠?
被折叠的 条评论
为什么被折叠?
 到【灌水乐园】发言


