


1.添加依赖
<!--swagger-bootstrap依赖-->
        <dependency>
            <groupId>com.github.xiaoymin</groupId>
            <artifactId>swagger-bootstrap-ui</artifactId>
            <version>1.9.6</version>
        </dependency>
        <!-- https://mvnrepository.com/artifact/io.springfox/springfox-boot-starter -->
        <dependency>
            <groupId>io.springfox</groupId>
            <artifactId>springfox-boot-starter</artifactId>
            <version>3.0.0</version>
        </dependency>
2。添加swagger配置文件
@Configuration
public class SwaggerConfig {
@Bean
public Docket createDocket(){
return new Docket(DocumentationType.SWAGGER_2)
.apiInfo(getApiInfo())
.host("localhost:8080")
.enable(true)//为true可以访问 false不能访问
.select()//通过.select()方法,去配置扫描接口
.apis(RequestHandlerSelectors.basePackage("com.wh.controller"))//RequestHandlerSelectors配置如何扫描接口
.paths(PathSelectors.ant("/api/**"))//扫描以 /api开头的请求
.build();
}
private ApiInfo getApiInfo(){
return new ApiInfoBuilder()
.title("接口文档")
.description("接口文档,里面包含了所有的请求及参数信息")
.contact(new Contact("LWH", "http://localhost", "3519973006@qq.com"))
.version("v1.0")
.build();
}
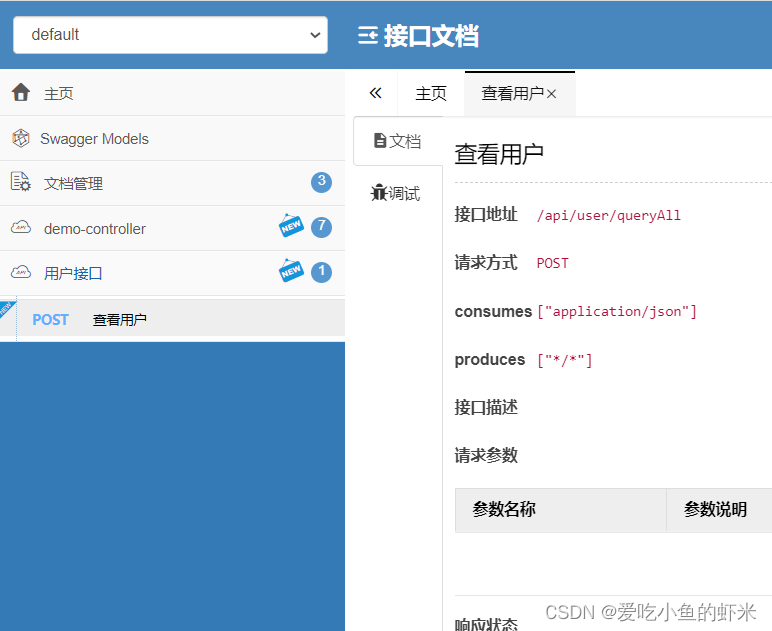
}3.编写controller文件
@Controller
@Api(tags = {"用户接口"})
@RequestMapping("/api/user")
public class UserController {
    @ApiOperation("查看用户")
    @PostMapping("/queryAll")
    public String queryAll(){
        return "张三";
    }

}
4.效果如图所示


 被折叠的 条评论
为什么被折叠?
被折叠的 条评论
为什么被折叠?
 到【灌水乐园】发言


