


 本文档介绍了如何使用Bootstrap实现轮播图,包括HTML、CSS和JS代码示例。作者展示了轮播图的最终效果,并详细说明了在自定义样式时遇到的两个问题:CSS样式被覆盖及控件容器的大小和位置不正确。解决方案是通过添加!important提高CSS权重以及调整容器样式。
Bootstrap项目(轮播图)实践2
文章目录
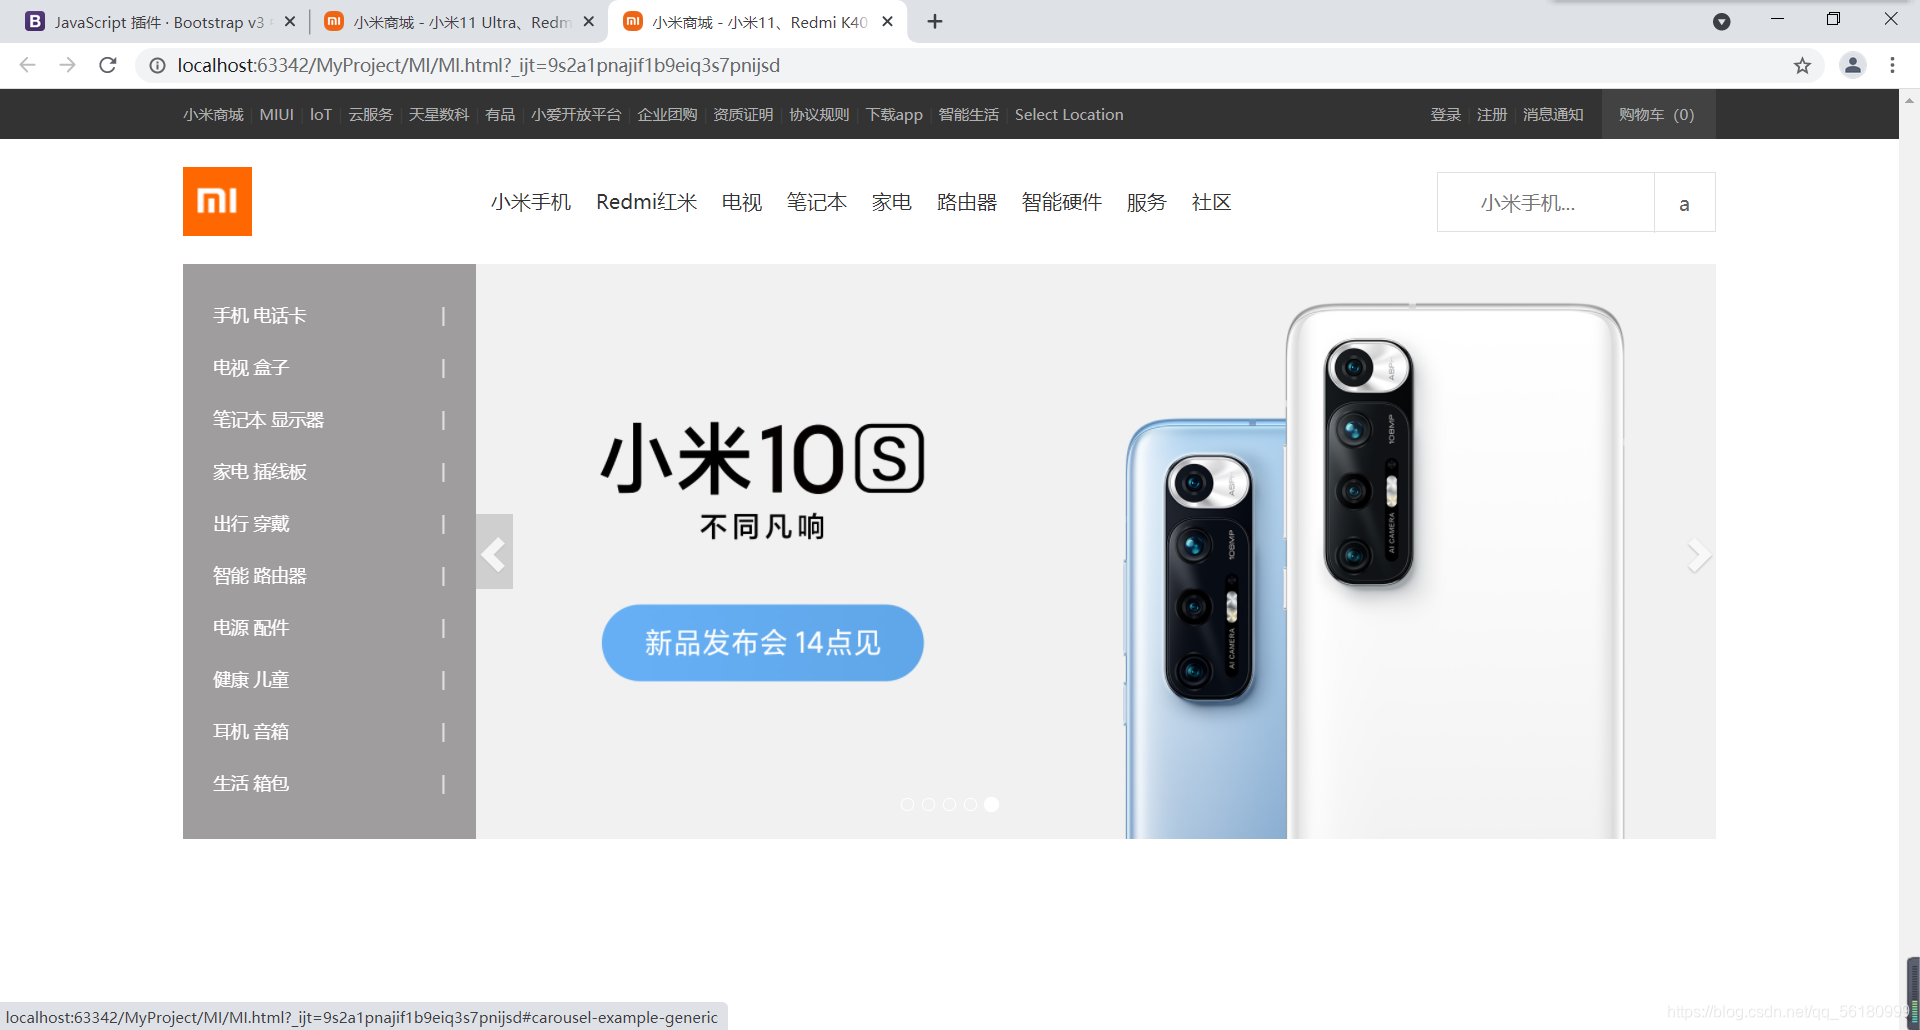
一、成果展示


二、主要代码(Bootstrap)
其他html和css样式可以自己写
1.css代码
 <style>
        a{
            text-decoration: none !important;
        }
		//设置控件容器大小、位置和背景
        .carousel-control{
            width:30px;
            height:60px;
            top:0;
            bottom:0;
            margin:auto auto;
            background:transparent none no-repeat !important;
        }
        .carousel-control:hover{
            opacity:0.3;
            background:gray none no-repeat !important;
        }
		//设置左控件容器位置
        .left_1{
            left:234px;
        }
		//设置控件颜色和位置
        .glyphicon{
            color:white;
            top:45%!important ;
        }
        .glyphicon-chevron-left{
            left:35%!important;
        }
        .glyphicon-chevron-right{
            left:0!important;
        }
    </style>
2.html代码
<div class="announce">
    <div id="carousel-example-generic" class="carousel slide" data-ride="carousel">
        <!-- Indicators -->
        <ol class="carousel-indicators">
            <li data-target="#carousel-example-generic" data-slide-to="0" class="active"></li>
            <li data-target="#carousel-example-generic" data-slide-to="1"></li>
            <li data-target="#carousel-example-generic" data-slide-to="2"></li>
            <li data-target="#carousel-example-generic" data-slide-to="3"></li>
            <li data-target="#carousel-example-generic" data-slide-to="4"></li>
        </ol>

        <!-- Wrapper for slides -->
        <div class="carousel-inner" role="listbox">
            <div class="item active">
                <a href="javascript:;"><img src="picture/01.png" alt="..."></a>
            </div>
            <div class="item">
                <a href="javascript:;"><img src="picture/02.png" alt="..."></a>
            </div>
            <div class="item">
                <a href="javascript:;"><img src="picture/03.png" alt="..."></a>
            </div>
            <div class="item">
                <a href="javascript:;"><img src="picture/04.png" alt="..."></a>
            </div>
            <div class="item">
                <a href="javascript:;"><img src="picture/05.png" alt="..."></a>
            </div>
        </div>

        <!-- Controls -->
        <a class="left_1 left carousel-control" href="#carousel-example-generic" role="button" data-slide="prev">
            <span class="glyphicon glyphicon-chevron-left" aria-hidden="true"></span>
            <span class="sr-only">Previous</span>
        </a>
        <a class="right carousel-control" href="#carousel-example-generic" role="button" data-slide="next">
            <span class="glyphicon glyphicon-chevron-right" aria-hidden="true"></span>
            <span class="sr-only">Next</span>
        </a>
    </div>
</div>
3.js代码
<script>
    $('.carousel').carousel({
        interval: 1500
    })
</script>
三、遇到的问题和解决
1.自己的css样式被bootstrap覆盖
解决方法:
重新设置style样式,但我发现自己设置的样式权重没bootstrap的大(设置没用),所以我在自己要修改的样式后加上 !important提高自己样式的权限。<不建议使用>
2.控件容器太大、位置不正确
解决方法:
设置容器大小,并居中(源码已开启定位,设置top和bottom、margin ),设置左控件让其移到正确位置


 739
739

 被折叠的 条评论
为什么被折叠?
被折叠的 条评论
为什么被折叠?
 到【灌水乐园】发言


