


什么是Swagger?
①是一个API框架
②可以在线自动生成 RestFul 风格的API文档,实现API文档和API定义同步更新
③可以直接运行、在线测试 API 接口
④支持多种语言(Java、PHP等)
官网:API Documentation & Design Tools for Teams | Swagger
SpringBoot集成Swagger
1、新建一个springboot-web项目
2、导入依赖
        <dependency>
            <groupId>io.springfox</groupId>
            <artifactId>springfox-swagger2</artifactId>
            <version>2.9.2</version>
        </dependency>

        <dependency>
            <groupId>io.springfox</groupId>
            <artifactId>springfox-swagger-ui</artifactId>
            <version>2.9.2</version>
        </dependency>
3、编写HelloController
@RestController
public class HelloController {
    @RequestMapping("/hello")
    public String hello(){
        return "hello呀";
    }
}
4、编写Swagger配置类
@Configuration
@EnableSwagger2     //开启Swagger
public class SwaggerConfig {
}
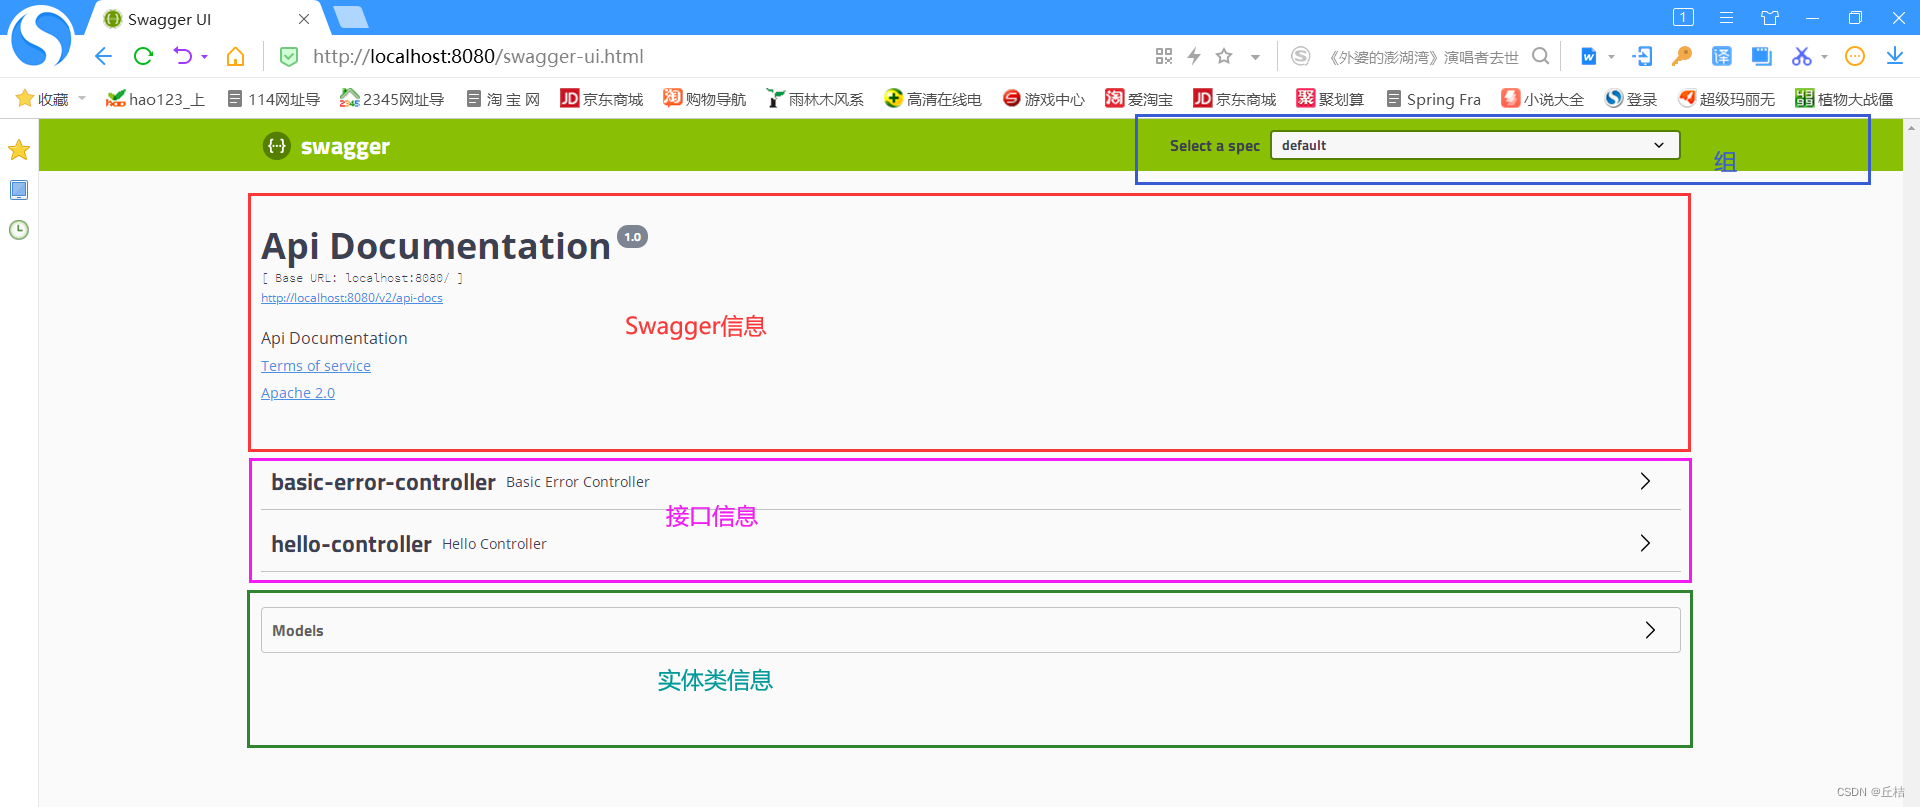
5、测试访问:http://localhost:8080/swagger-ui.html
配置Swagger
1、配置swagger
@Configuration
@EnableSwagger2 //开启Swagger
public class SwaggerConfig {
//Swagger的bean实例是Docket,所以要通过配置Docket实例来配置Swagger
@Bean
public Docket docket(){
return new Docket(DocumentationType.SWAGGER_2).apiInfo(myApiInfo());
}
//自定义swagger信息
private ApiInfo myApiInfo(){
//联系人信息
Contact contact = new Contact("联系人名字", "联系人访问链接", "联系人邮箱");
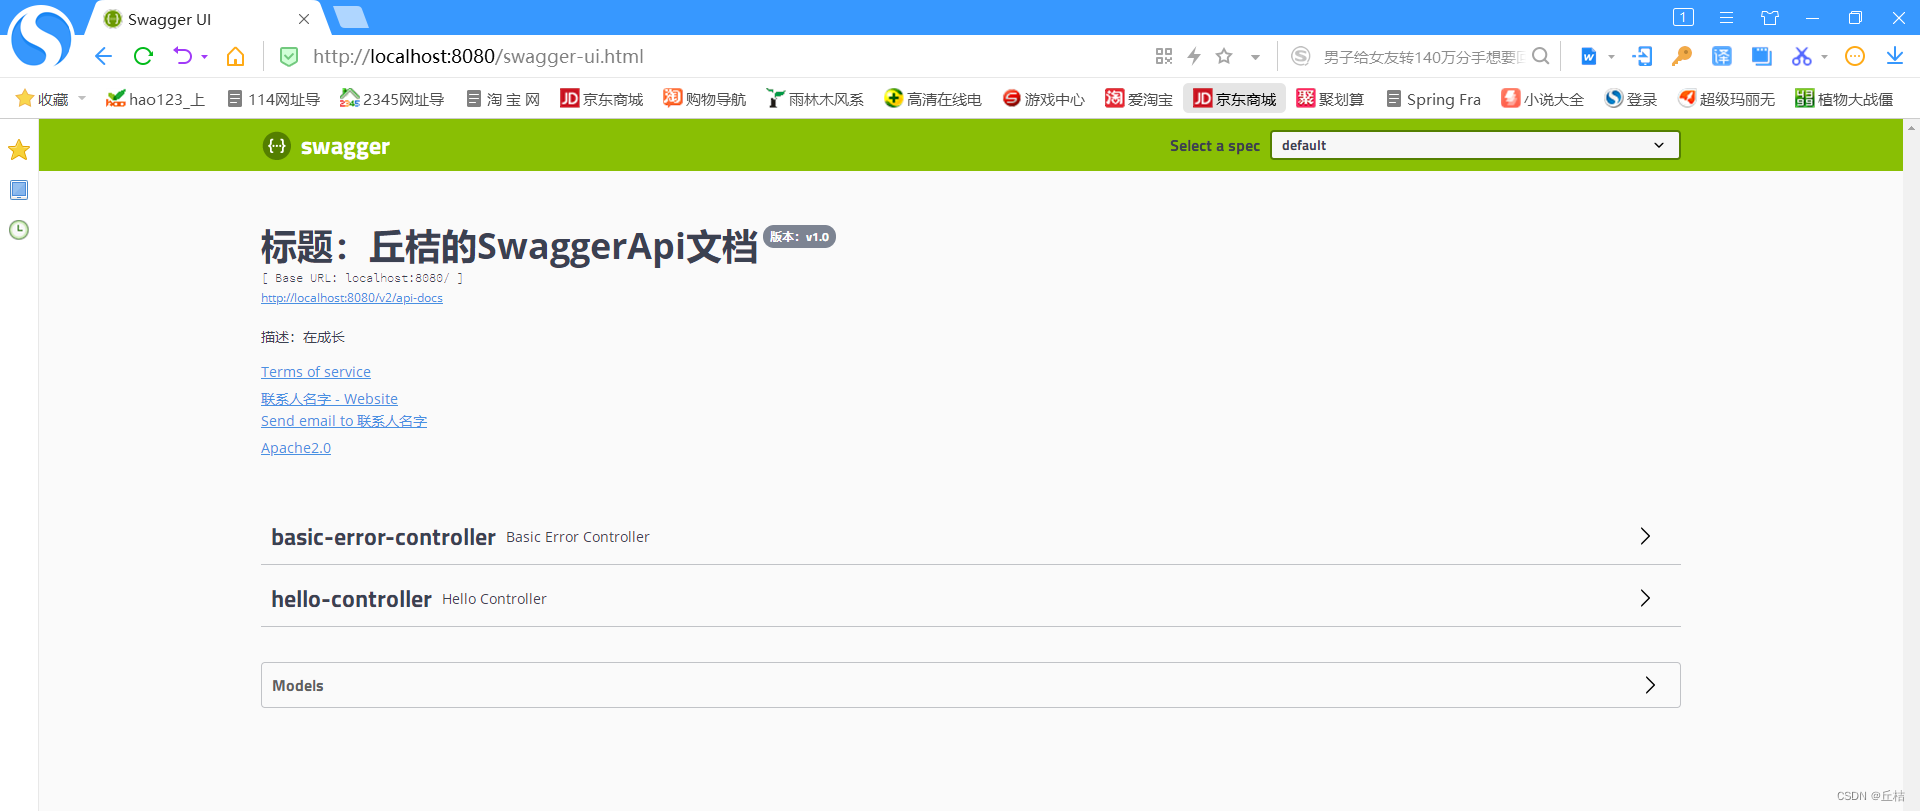
return new ApiInfo(
"标题:丘桔的SwaggerApi文档",
"描述:在成长",
"版本:v1.0",
"组织链接",
contact,
"Apache2.0",
"许可链接",
new ArrayList<>() //扩展
);
}
}
2、显示结果
Swagger配置扫描接口
    //Swagger的bean实例是Docket,所以要通过配置Docket实例来配置Swagger
    @Bean
    public Docket docket(){
        return new Docket(DocumentationType.SWAGGER_2)
                            .apiInfo(myApiInfo())
                            .select()
                            /*
                                RequestHandlerSelectors:配置要扫描接口的方式
                                basePackage:指定要扫描的包
                                any():全部扫描
                                none():都不扫描
                                withClassAnnotation():扫描包含指定注解的类
                                withMethodAnnotation():扫描包含指定注解的方法
                             */
                            .apis(RequestHandlerSelectors.basePackage("com.controller"))
                            //paths():过滤什么路径
                            .paths(PathSelectors.ant("/hello/**"))
                            .build();
    }
配置是否启动Swagger
.enable(false) //默认值为true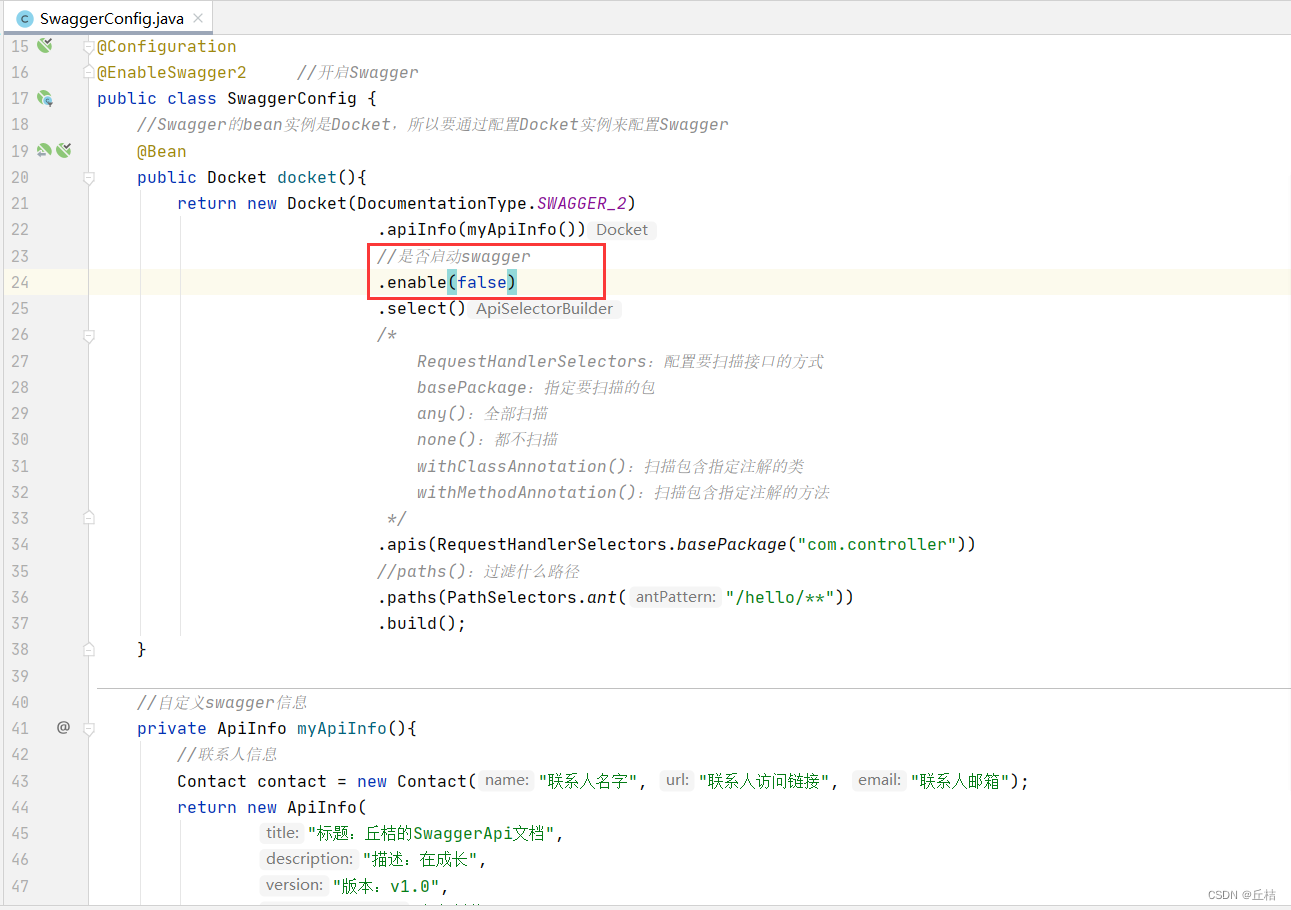
思考:怎样才能让swagger只在生产环境中使用,在发布的时候不使用?
1、设置环境
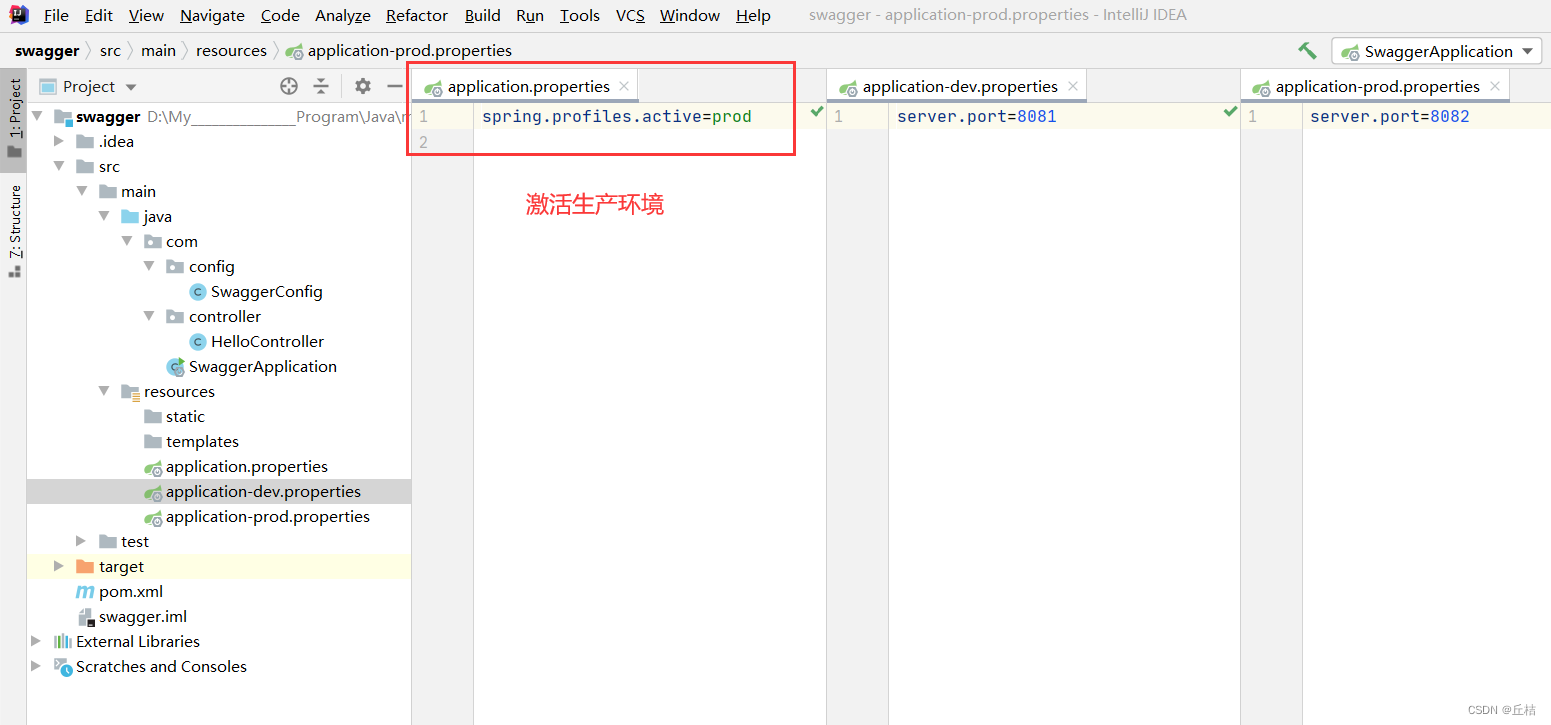
2、在docket 中获取当前环境,判断它是否为生产环境,如果是,就开启swagger
        //设置要显示的swagger环境
        Profiles profiles = Profiles.of("prod");
        //判断当前环境是不是我们设置的环境
        boolean flag = environment.acceptsProfiles(profiles);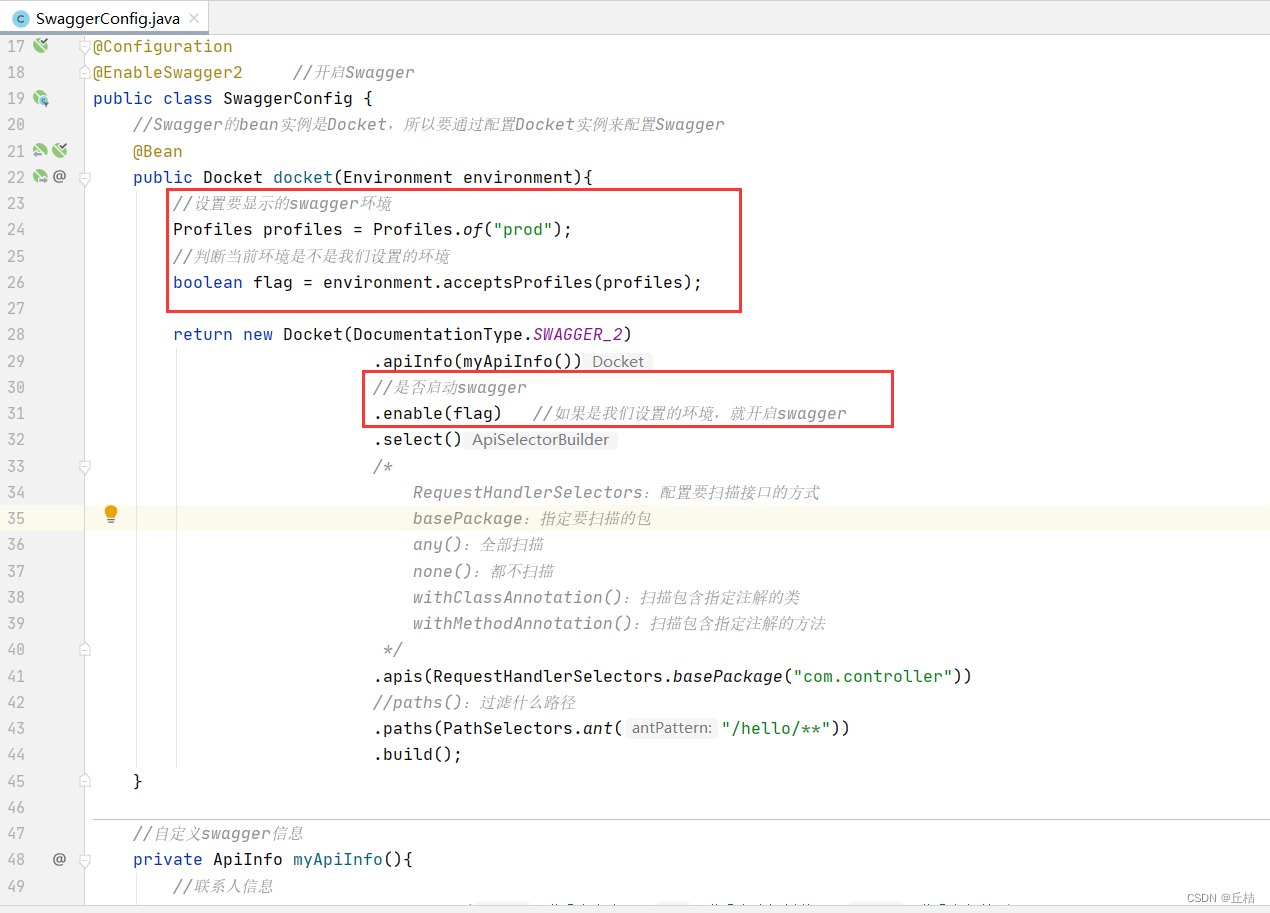
配置API文档的分组
.groupName("丘桔")如何设置多个分组?多个Docket实例即可
    @Bean
    public Docket docket1(){
        return new Docket(DocumentationType.SWAGGER_2).groupName("A");
    }
    @Bean
    public Docket docket2(){
        return new Docket(DocumentationType.SWAGGER_2).groupName("B");
    }
    @Bean
    public Docket docket3(){
        return new Docket(DocumentationType.SWAGGER_2).groupName("C");
    }
实体类配置和注解
1、新建实体类
@ApiModel("给实体类加注释")
public class User {
    @ApiModelProperty("给属性加注释")
    public String username;
    public String password;
}
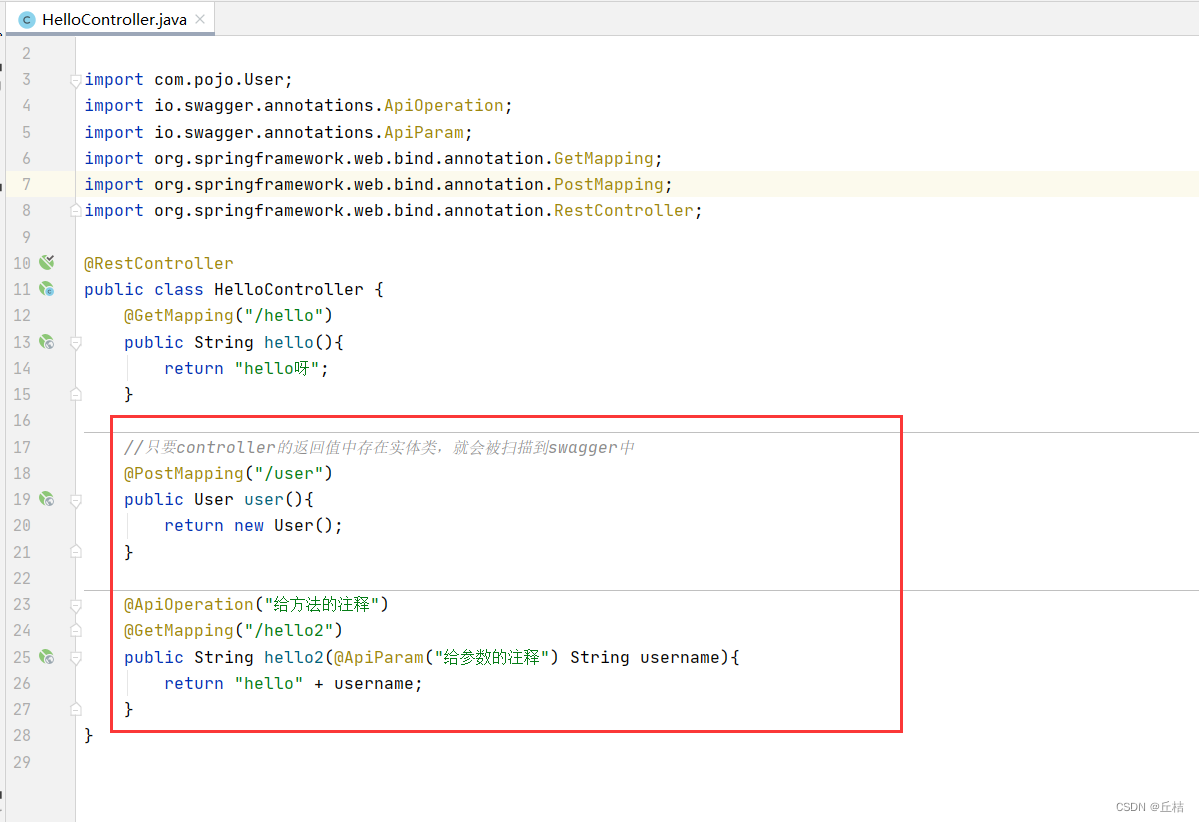
2、编写controller
    //只要controller的返回值中存在实体类,就会被扫描到swagger中
    @PostMapping("/user")
    public User user(){
        return new User();
    }

    @ApiOperation("给方法的注释")
    @GetMapping("/hello2")
    public String hello2(@ApiParam("给参数的注释") String username){
        return "hello" + username;
    }
总结:
1、我们可以通过swagger给一些比较难理解的属性或者接口,增加注释信息
2、接口文档实时更新
3、可以在线测试
注意:在正式发布的时候,关闭swagger(出于安全考虑,而且节省运行的内存)


 被折叠的 条评论
为什么被折叠?
被折叠的 条评论
为什么被折叠?
 到【灌水乐园】发言


