


服务异步通信 RabbitMQ
了解MQ
同步通信
什么是同步通信?
- 比如 打电话 ,你说一句我说一句,有问有答。并且在聊天时,不能接入其他聊天。
同步通信的优缺点
优点:
- 时效性强,可以立即得到结果
缺点:
- 耦合度高(每次加入新的功能都需要修改原来的代码)
- 性能降低(调用者需要等待这个请求响应,时间过长)
- 资源浪费(在调用链中的每个服务在等待响应过程中,不能释放请求占用的资源,对高并发非常的不友好,很浪费资源)
- 级联失败(如果等待响应的过程中出现了问题,那么后面的请求也都不会执行了)
异步通信
什么是异步通信?
- 比如 聊天 ,可以同时对多个用户进行问答,效率高
异步通信的优缺点:
优点:
- 耦合度低(因为不需要调用对方,而是通过发布事件,所以几乎是没有耦合)
- 吞吐量的提升(因为不存在调用,所以就不用等待对方的回复,耗时更短)
- 故障隔离(因为都没有调用,对方挂了,跟我也没什么关系)
- 流量削峰(在高并发的时候通过
Broker(代理)做缓存,微服务自己去取)
缺点:
- 依赖
Broker(代理)的可靠性、安全性、吞吐能力(对Broker的要求非常高,所以如果Broker挂了的话,就没得玩了) - 架构复杂了,没有明显的流程线,不好追踪管理(就是调用不清晰,哪里出了问题不好排查)
RabbitMQ入门
Rabbit概述
RabbitMQ是实现了高级消息队列协议(AMQP)的开源消息代理软件(亦称面向消息的中间件)。RabbitMQ服务器是用Erlang语言编写的,而集群和故障转移是构建在开放电信平台框架上的
官网地址:https://www.rabbitmq.com/
Rabbit安装(单机部署)
在centos7虚拟机中使用docker安装rabbitmq
-
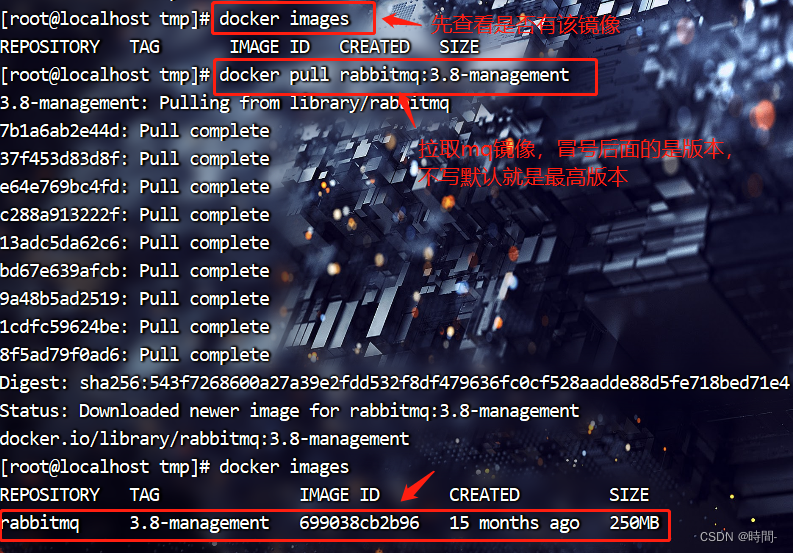
首先确保你安装了
docker并且启动了它, -
在
/tmp目录下使用docker安装 -
输入命令
docker pull rabbitmq:3.8-management
-
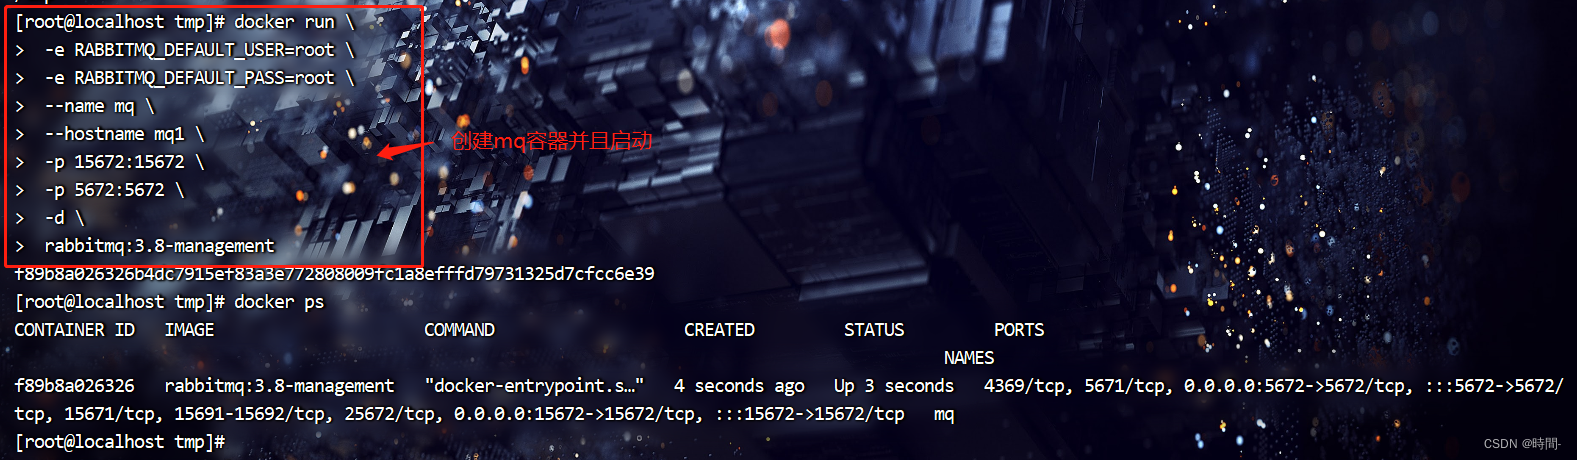
然后再创建并启动mq容器
docker run \
 -e RABBITMQ_DEFAULT_USER=root \
 -e RABBITMQ_DEFAULT_PASS=root \
 --name mq \
 --hostname mq1 \
 -p 15672:15672 \
 -p 5672:5672 \
 -d \
 rabbitmq:3.8-management
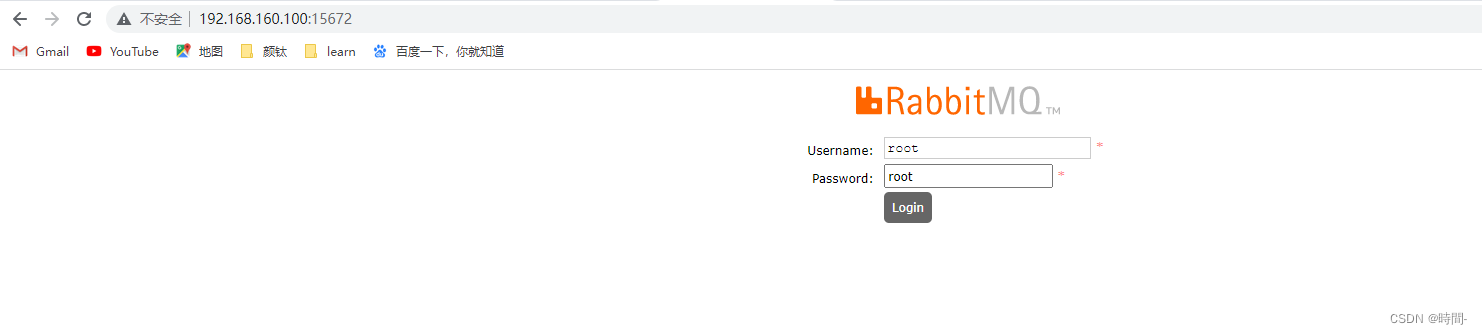
5. 访问mq的管理页面http://192.168.160.100:15672/ip地址为你虚拟机的地址,密码就是上面你配置的密码
关于mq的版本可以再docker官网中查看,官网地址:https://hub.docker.com/_/rabbitmq
SpringAMQP
Basic Queue 简单队列模型
利用SpringAMQP实现HelloWorld基础消息队列功能
生产队列
- 前提是你已经构建好了工程
- 在父工程中加入依赖
spring-boot-starter-amqp
<?xml version="1.0" encoding="UTF-8"?>
<project xmlns="http://maven.apache.org/POM/4.0.0"
xmlns:xsi="http://www.w3.org/2001/XMLSchema-instance"
xsi:schemaLocation="http://maven.apache.org/POM/4.0.0 http://maven.apache.org/xsd/maven-4.0.0.xsd">
<modelVersion>4.0.0</modelVersion>
<groupId>cn.itcast.demo</groupId>
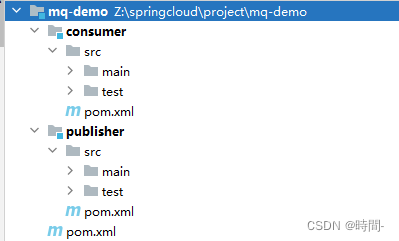
<artifactId>mq-demo</artifactId>
<version>1.0-SNAPSHOT</version>
<modules>
<module>publisher</module>
<module>consumer</module>
</modules>
<packaging>pom</packaging>
<parent>
<groupId>org.springframework.boot</groupId>
<artifactId>spring-boot-starter-parent</artifactId>
<version>2.3.9.RELEASE</version>
<relativePath/>
</parent>
<properties>
<maven.compiler.source>8</maven.compiler.source>
<maven.compiler.target>8</maven.compiler.target>
</properties>
<dependencies>
<!--AMQP依赖,包含RabbitMQ-->
<dependency>
<groupId>org.springframework.boot</groupId>
<artifactId>spring-boot-starter-amqp</artifactId>
</dependency>
<!--单元测试-->
<dependency>
<groupId>org.springframework.boot</groupId>
<artifactId>spring-boot-starter-test</artifactId>
</dependency>
</dependencies>
</project>
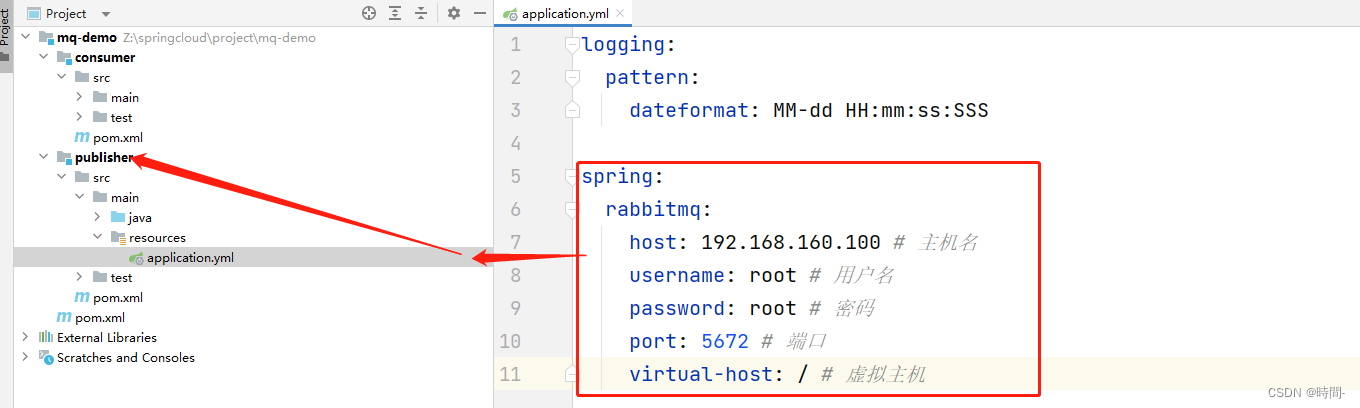
- 在 publisher 的配置文件中加入,mq的连接信息
spring:
  rabbitmq:
    host: 192.168.160.100 # 主机名
    username: root # 用户名
    password: root # 密码
    port: 5672 # 端口
    virtual-host: / # 虚拟主机
- 编写测试类
SpringAMQPTest
import org.junit.Test;
import org.junit.runner.RunWith;
import org.springframework.amqp.rabbit.core.RabbitTemplate;
import org.springframework.beans.factory.annotation.Autowired;
import org.springframework.boot.test.context.SpringBootTest;
import org.springframework.test.context.junit4.SpringRunner;

@RunWith(SpringRunner.class)
@SpringBootTest
public class SpringAMQPTest {

    @Autowired
    private RabbitTemplate rabbitTemplate;

    @Test
    public void sendMessage(){
        String queueName = "simple.queue";
        String message = "hello,springAMQP!";

        rabbitTemplate.convertAndSend(queueName, message);
        System.out.println("发送成功");
    }
}
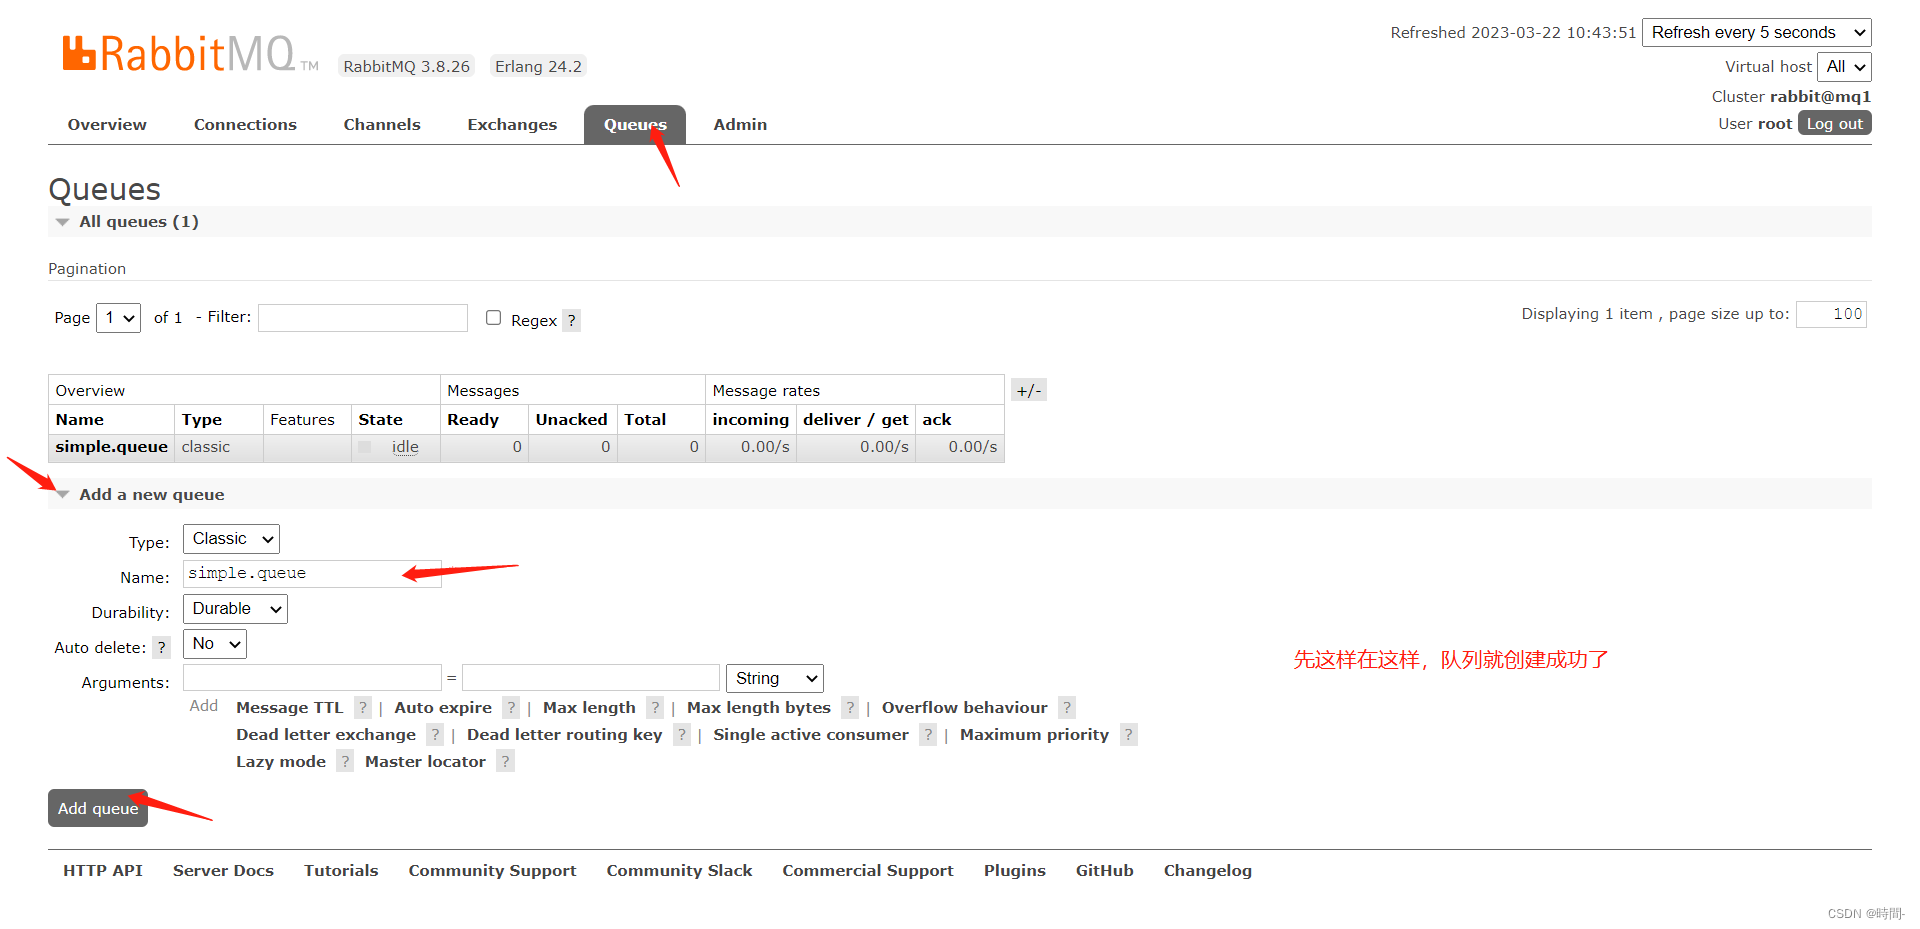
- 启动测试方法。注意: 队列是必须存在的,因为他不会去创建队列
消费队列
- 在 consumer 工程中,监听
simple.queue队列 - 编写mq的连接信息,在yml配置文件中
spring:
  rabbitmq:
    host: 192.168.160.100 # 主机名
    username: root # 用户名
    password: root # 密码
    port: 5672 # 端口
    virtual-host: / # 虚拟主机
- 创建
SpringRabbitListener类,监听
import org.springframework.amqp.rabbit.annotation.RabbitListener;
import org.springframework.stereotype.Component;

@Component
public class SpringRabbitListener {

    @RabbitListener(queues = "simple.queue")
    public void getMessage(String message){
        System.out.println("message => "+message);
    }

}
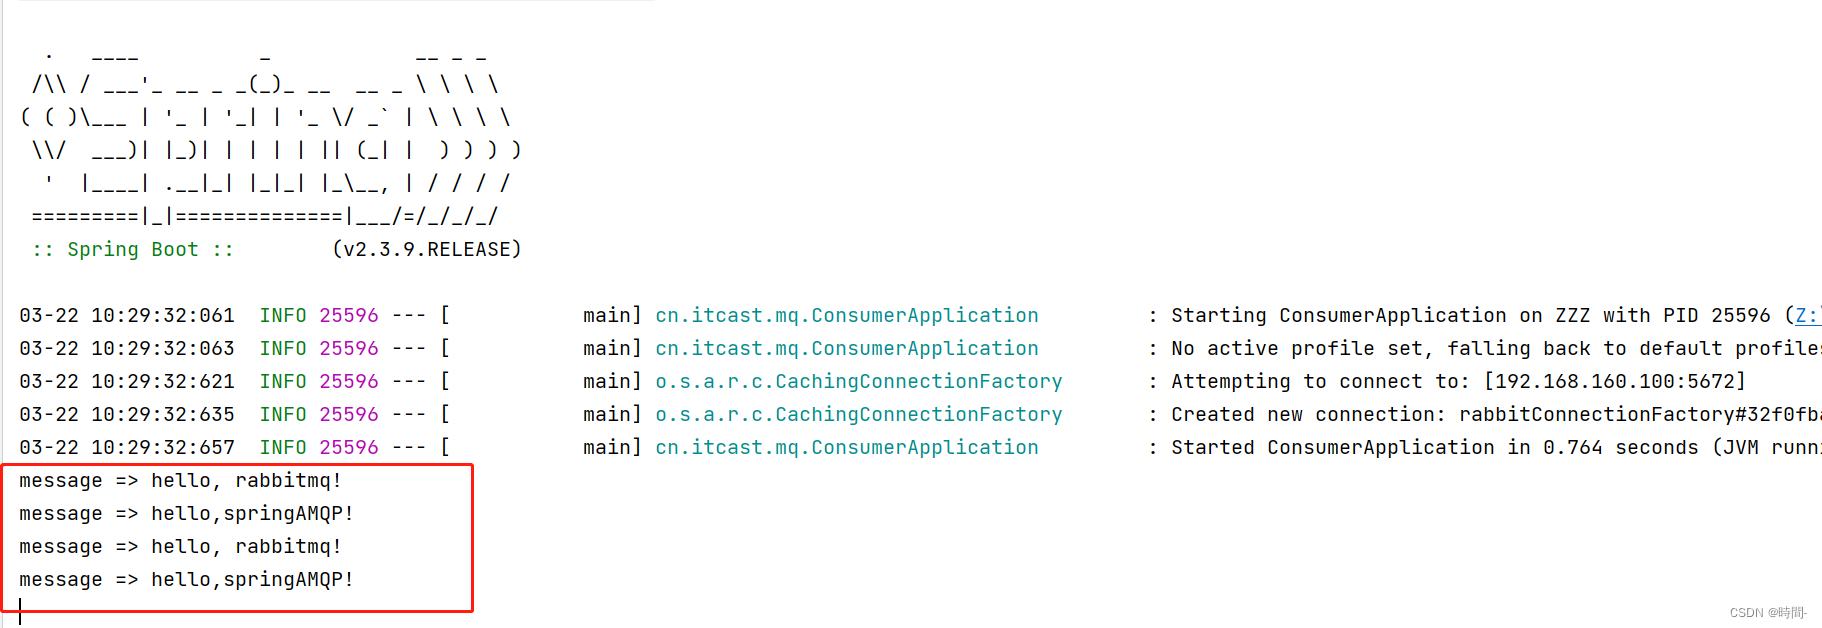
- 启动springboot,消费成功
Work Queue 工作队列模型
work queue,工作队列,可以提高消息队列处理的速度,避免消息队列的堆积。
Work模型的使用:
- 多个消费者绑定到一个队列,同一条消息只会被一个消费者处理
- 通过设置prefetch来控制消费者预取的消息数量
模拟WorkQueue,实现一个队列绑定多个消费者
- 基于上面案例上修改,在SpringAMQPTest测试类中(publisher),新增一个一次性发送50条消息的方法
	@Test
    public void sendBasicMessage(){
        String queueName = "simple.queue";
        String message = "hello,springAMQP__";

        for (int i = 1; i <= 50; i++) {
            rabbitTemplate.convertAndSend(queueName, message+i);
            //避免消息接收太快
        	Thread.sleep(50);
        }
        System.out.println("发送成功");
    }
- 在consumer服务中定义两个消息监听者,都监听simple.queue队列
	@RabbitListener(queues = "simple.queue")
    public void getWorkMessage1(String message) throws InterruptedException {
        System.out.println("message => "+message);
        Thread.sleep(20);
    }

    @RabbitListener(queues = "simple.queue")
    public void getWorkMessage2(String message) throws InterruptedException {
        System.err.println("message => "+message);
        //避免消息接收太快
        Thread.sleep(50);
    }
- 启动springboot,然后再发送消息,可以看到消费是出于均衡分配的状态,没有根据能力的不同去分配,这样显然是不太好的,能力不够还要做这么多事
- 修改application.yml文件,设置preFetch这个值,可以控制预取消息的上限:
spring:
  rabbitmq:
    host: 192.168.160.100 # 主机名
    username: root # 用户名
    password: root # 密码
    port: 5672 # 端口
    virtual-host: / # 虚拟主机
    listener:
      simple:
        prefetch: 1 #   每次只能取一条消息,每次处理完成才能取下一条消息
- 重新启动springboot,然后再发送消息,可以看到控制台的输出work2方法打印的明显变少了。
发布( Publish )、订阅( Subscribe )
通过上面的案例可以观察到,一条消息只能被消费一次。
发布订阅模式就是允许同一消息发送给多个消费者。实现方式就是加入了 exchange(交换机)。没有什么是加一层解决不了的,如果有就加两层。
常见的交换机类型:
fanout广播direct路由topic话题
注意:exchange负责消息路由,而不是存储,路由失败则消息丢失
发布、订阅模型-Fanout
Fanout Exchange 会将接收到的消息广播到绑定的queue(队列)
案例
利用SpringAMQP演示FanoutExchange的使用
1.在consumer服务中,利用代码声明队列、交换机,并将两者绑定
import org.springframework.amqp.core.*;
import org.springframework.context.annotation.Bean;
import org.springframework.context.annotation.Configuration;

@Configuration
public class FanoutConfig {

    //交换机 fanout.exchange
    @Bean
    public FanoutExchange exchange() {
        return new FanoutExchange("fanout.exchange");
    }

    //队列1 fanout.queue1
    @Bean
    public Queue fanoutQueue1() {
        return new Queue("fanout.queue1");
    }

    //将队列绑定到交换机上
    @Bean
    public Binding bindingQuery1(Queue fanoutQueue1, FanoutExchange exchange){
        return BindingBuilder.bind(fanoutQueue1).to(exchange);
    }

    //队列2 fanout.queue2
    @Bean
    public Queue fanoutQueue2() {
        return new Queue("fanout.queue2");
    }

    //将队列绑定到交换机上
    @Bean
    public Binding bindingQuery2(Queue fanoutQueue2, FanoutExchange exchange){
        return BindingBuilder.bind(fanoutQueue2).to(exchange);
    }
}
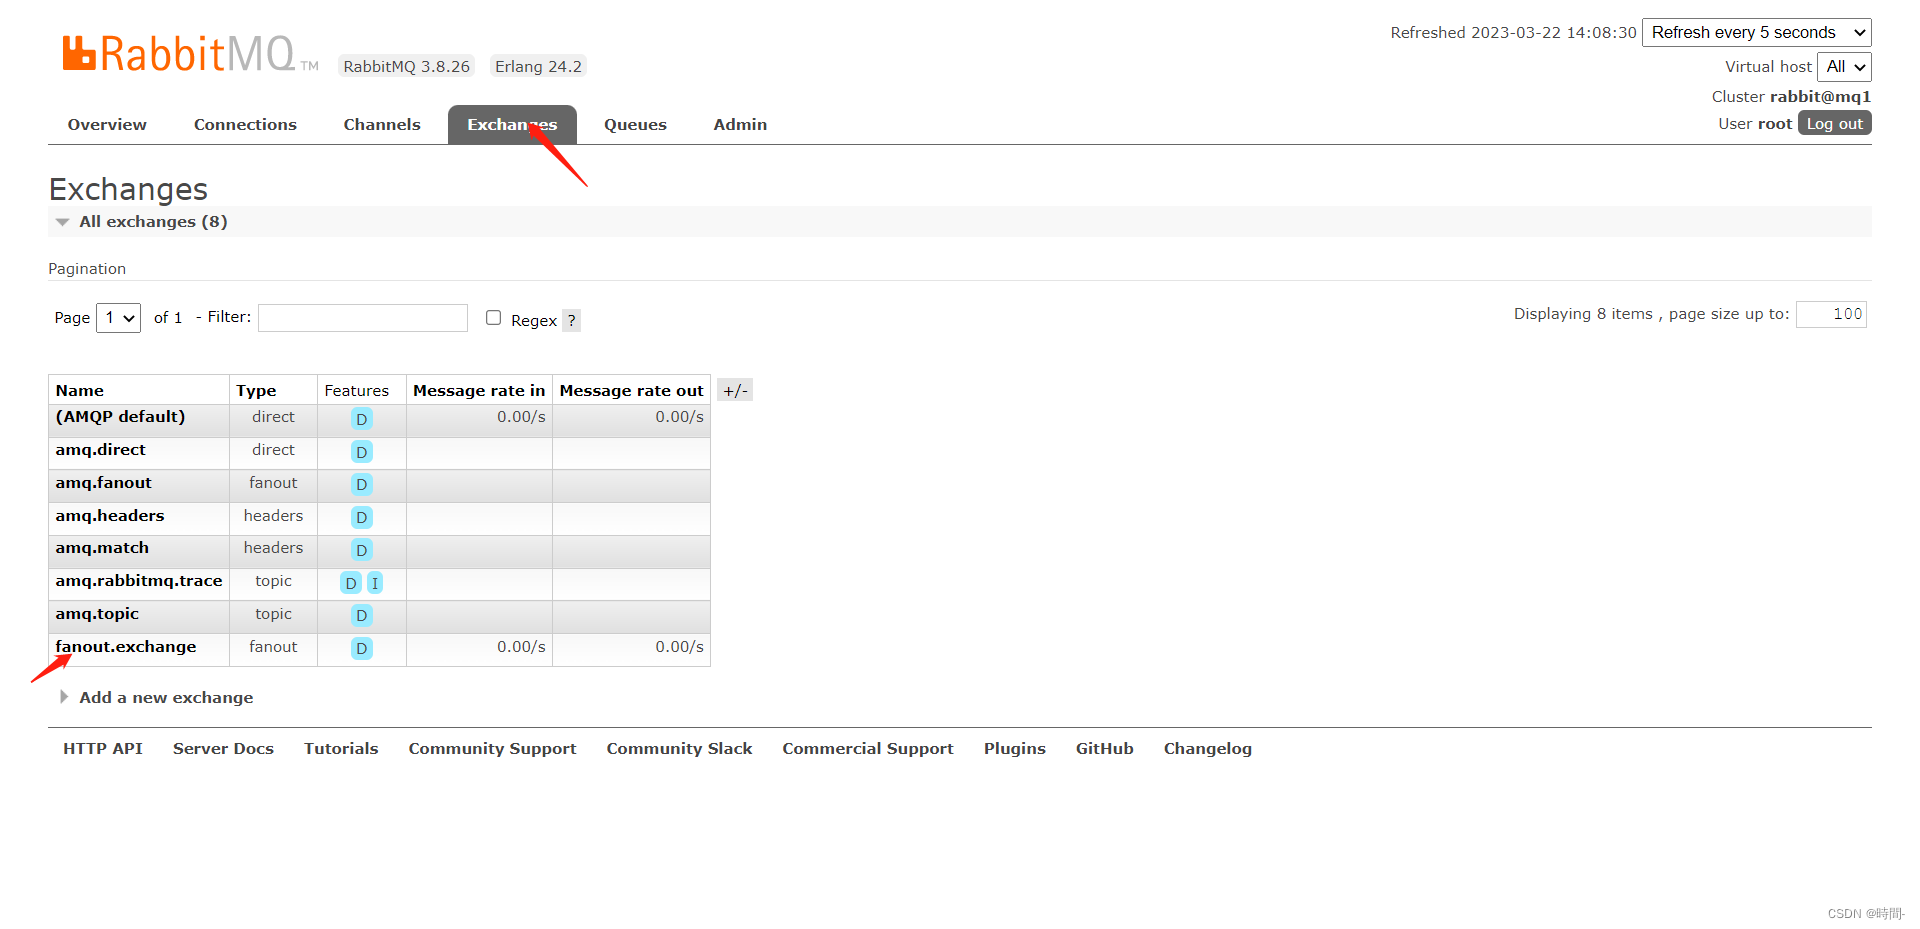
启动springboot,然后查看 Rabbit MQ 可以看到交换机创建成功
2. 在consumer服务中,编写两个消费者方法,分别监听fanout.queue1和fanout.queue2
import org.springframework.amqp.rabbit.annotation.RabbitListener;
import org.springframework.stereotype.Component;

@Component
public class SpringRabbitListener {

    //接收订阅消息
    @RabbitListener(queues = "fanout.queue1")
    public void getFanoutMsg1(String message){
        System.out.println("fanout1 => 【"+message+"】");
    }

    //接收订阅消息
    @RabbitListener(queues = "fanout.queue2")
    public void getFanoutMsg2(String message){
        System.out.println("fanout2 => 【"+message+"】");
    }
}
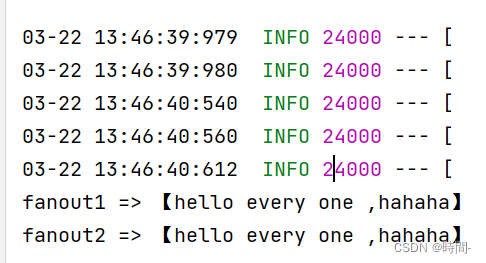
- 在publisher中编写测试方法,向fanout.exchange发送消息
 @Test
    public void sendFanoutExchangeMessage() {
        String fanoutExchangeName = "fanout.exchange";
        String message = "hello every one ,hahaha";
        rabbitTemplate.convertAndSend(fanoutExchangeName, "", message);
    }
- 重启 consumer ,观察控制台
总结
交换机的作用是什么?
- 接收publisher(发布者)发布的信息
- 将消息按照路由到规则绑定到与之一样的队列
- 不能缓存消息,路由失败,则消息丢失
- FanoutExchange会将消息路由到每个绑定的队列
声明队列、交换机、绑定关系的Bean是什么?
- Queue
- FanoutExchange
- Binding
发布、订阅模型-Direct
Direct Exchange 会将接收到的消息,根据规则路由到指定的Queue,称为路由模式。
- 每一个queue(队列)都与exchange(交换机)设置一个bindingKey
- 发布者发布消息时,指定消息的routingKey(路由的key)
- exchange(交换机)将消息路由到 bindingKey与消息routingKey一直的队列
案例
利用SpringAMQP演示DirectExchange的使用
- 利用@RabbitListener声明Exchange、Queue、RoutingKey
- 在consumer服务中,编写两个消费者方法,分别监听direct.queue1和direct.queue2,重启springboot
import org.springframework.amqp.rabbit.annotation.Exchange;
import org.springframework.amqp.rabbit.annotation.Queue;
import org.springframework.amqp.rabbit.annotation.QueueBinding;
import org.springframework.amqp.rabbit.annotation.RabbitListener;
import org.springframework.stereotype.Component;

@Component
public class SpringRabbitListener {
    @RabbitListener(bindings = @QueueBinding(
            value = @Queue(value = "direct.queue1"),//队列名称
            exchange = @Exchange(value = "direct.exchange",type = ExchangeTypes.DIRECT),// 交换机名称,指定交换机的类型(默认是direct)
            key = {"person","boy"}//绑定的key
    ))
    public void directQueue1(String message){
        System.out.println("directQueue1 - 队列1:【"+message+"】");
    }

    @RabbitListener(bindings = @QueueBinding(
            value = @Queue(value = "direct.queue2"), //队列名称
            exchange = @Exchange(value = "direct.exchange",type = ExchangeTypes.DIRECT), // 交换机名称,指定交换机的类型(默认是direct)
            key = {"person","girl"} //绑定的key
    ))
    public void directQueue2(String message){
        System.out.println("directQueue2 - 队列2:【"+message+"】");
    }
}
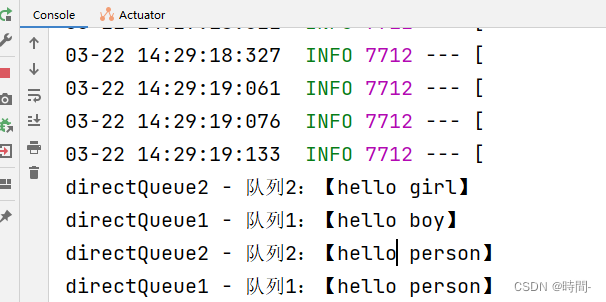
- 在publisher中编写测试方法,向 direct.exchange 发送消息
@Test
    public void sendDirectExchangeMessage() {
        String fanoutExchangeName = "direct.exchange";

        String message = "hello boy";
        //String message = "hello girl";
        //String message = "hello person";

        //第一个参数是:交换机名称,第二个参数是routingKey,第三个参数的发送的消息

        //rabbitTemplate.convertAndSend(fanoutExchangeName, "boy", message);
        //rabbitTemplate.convertAndSend(fanoutExchangeName, "girl", message);
        rabbitTemplate.convertAndSend(fanoutExchangeName, "person", message);
    }
依次测试,观察控制台,可以看到他是根据routingKey接收消息的。
总结
描述下Direct交换机与Fanout交换机的差异?
- fanout交换机是将消息发给每一个绑定Queue(队列
- Direct交换机是将消息发送个bindingKey和routingKey一致的队列
基于@RabbitListener注解声明队列和交换机有哪些常见注解?
- @QueueBinding()
- @Queue()
- @Exchange()
发布、订阅模型-Topic
案例
利用SpringAMQP演示TopicExchange的使用
修改路由到类型和key,由于Direct与Topic非常的相似,不过多记录。
	@RabbitListener(bindings = @QueueBinding(
            value = @Queue(value = "topic.queue1"), //队列名称
            exchange = @Exchange(value = "topic.exchange",type = ExchangeTypes.TOPIC), // 交换机名称,指定交换机的类型(默认是direct)
            key = "#.girl" //绑定的key
    ))
    public void topicQueue2(String message){
        System.out.println("directQueue2 - 队列2:【"+message+"】");
    }
	@Test
    public void sendTopicExchangeMessage() {
        String fanoutExchangeName = "topic.exchange";

        String message = "hello girl";

        rabbitTemplate.convertAndSend(fanoutExchangeName, "china.girl", message);
    }
总结
描述下Direct交换机与Topic交换机的差异?
- TopicExchange与DirectExchange非常相似,区别在于routingKey必须是多个单词组成且必须以
.分割。 - Topic交换机与队列绑定时的bindingKey可以指定通配符
#代表0个或多个单词*代表一个单词
SpringAMQP-消息转换器
测试发送Object类型消息
- 在consumer中利用@Bean声明一个队列:
	@Bean
    public Queue objectQueue(){
        return new Queue("object.queue");
    }
- 在publisher中发送消息以测试:
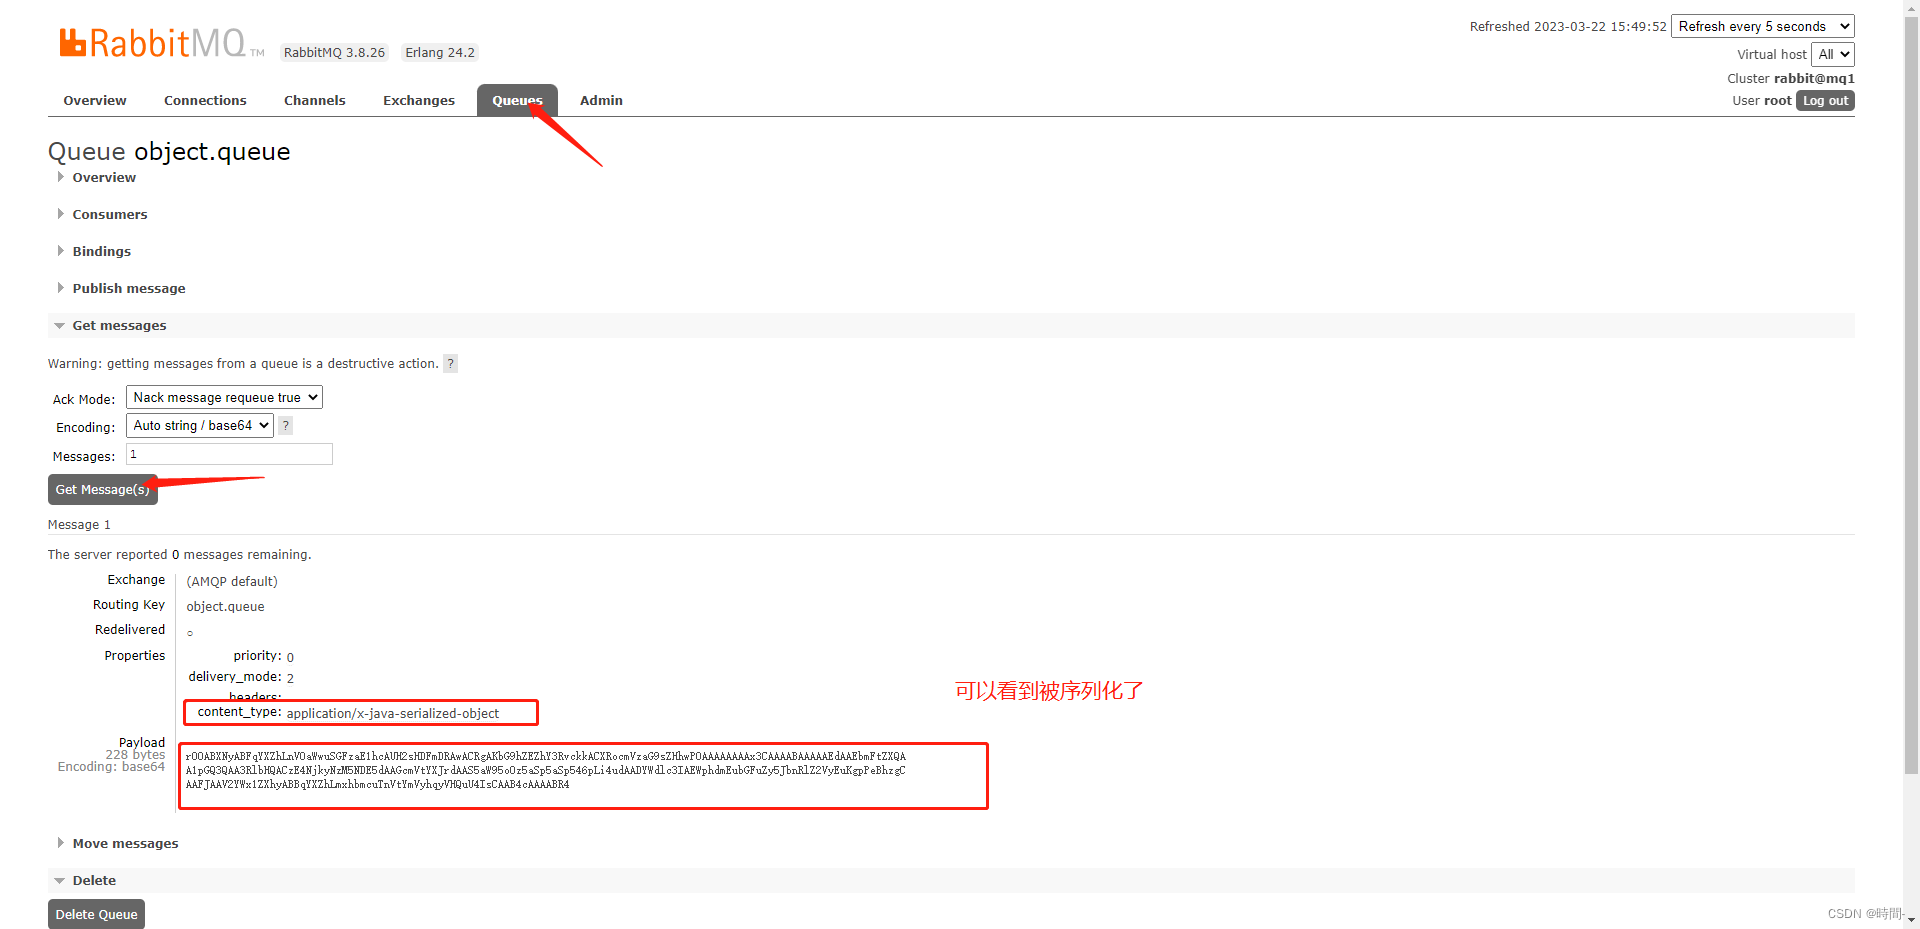
	@Test
    public void sendMapMessage() {
        Map<String, Object> map = new HashMap<>();
        map.put("name","ZFC");
        map.put("age",20);
        map.put("tel","18692739419");
        map.put("remark","好想天天玩...");
        rabbitTemplate.convertAndSend("object.queue",map);
    }
- 打开RabbitMQ管理页面查看发送的消息,图中的序列化性能比较差、安全性有问题、数据长度太长、不推荐
消息转换器
只需要定义一个MessageConverter 类型的Bean即可。推荐用JSON方式序列化,步骤如下:
- 直接在父工程中加入坐标,这样就不用两个工程都加了
		<dependency>
            <groupId>com.fasterxml.jackson.core</groupId>
            <artifactId>jackson-databind</artifactId>
        </dependency>
- 在publisher服务声明MessageConverter:
import org.springframework.amqp.support.converter.Jackson2JsonMessageConverter;
import org.springframework.amqp.support.converter.MessageConverter;
import org.springframework.boot.SpringApplication;
import org.springframework.boot.autoconfigure.SpringBootApplication;
import org.springframework.context.annotation.Bean;

@SpringBootApplication
public class PublisherApplication {
    public static void main(String[] args) {
        SpringApplication.run(PublisherApplication.class);
    }

    @Bean
    public MessageConverter messageConverter(){
        return new Jackson2JsonMessageConverter();
    }
}
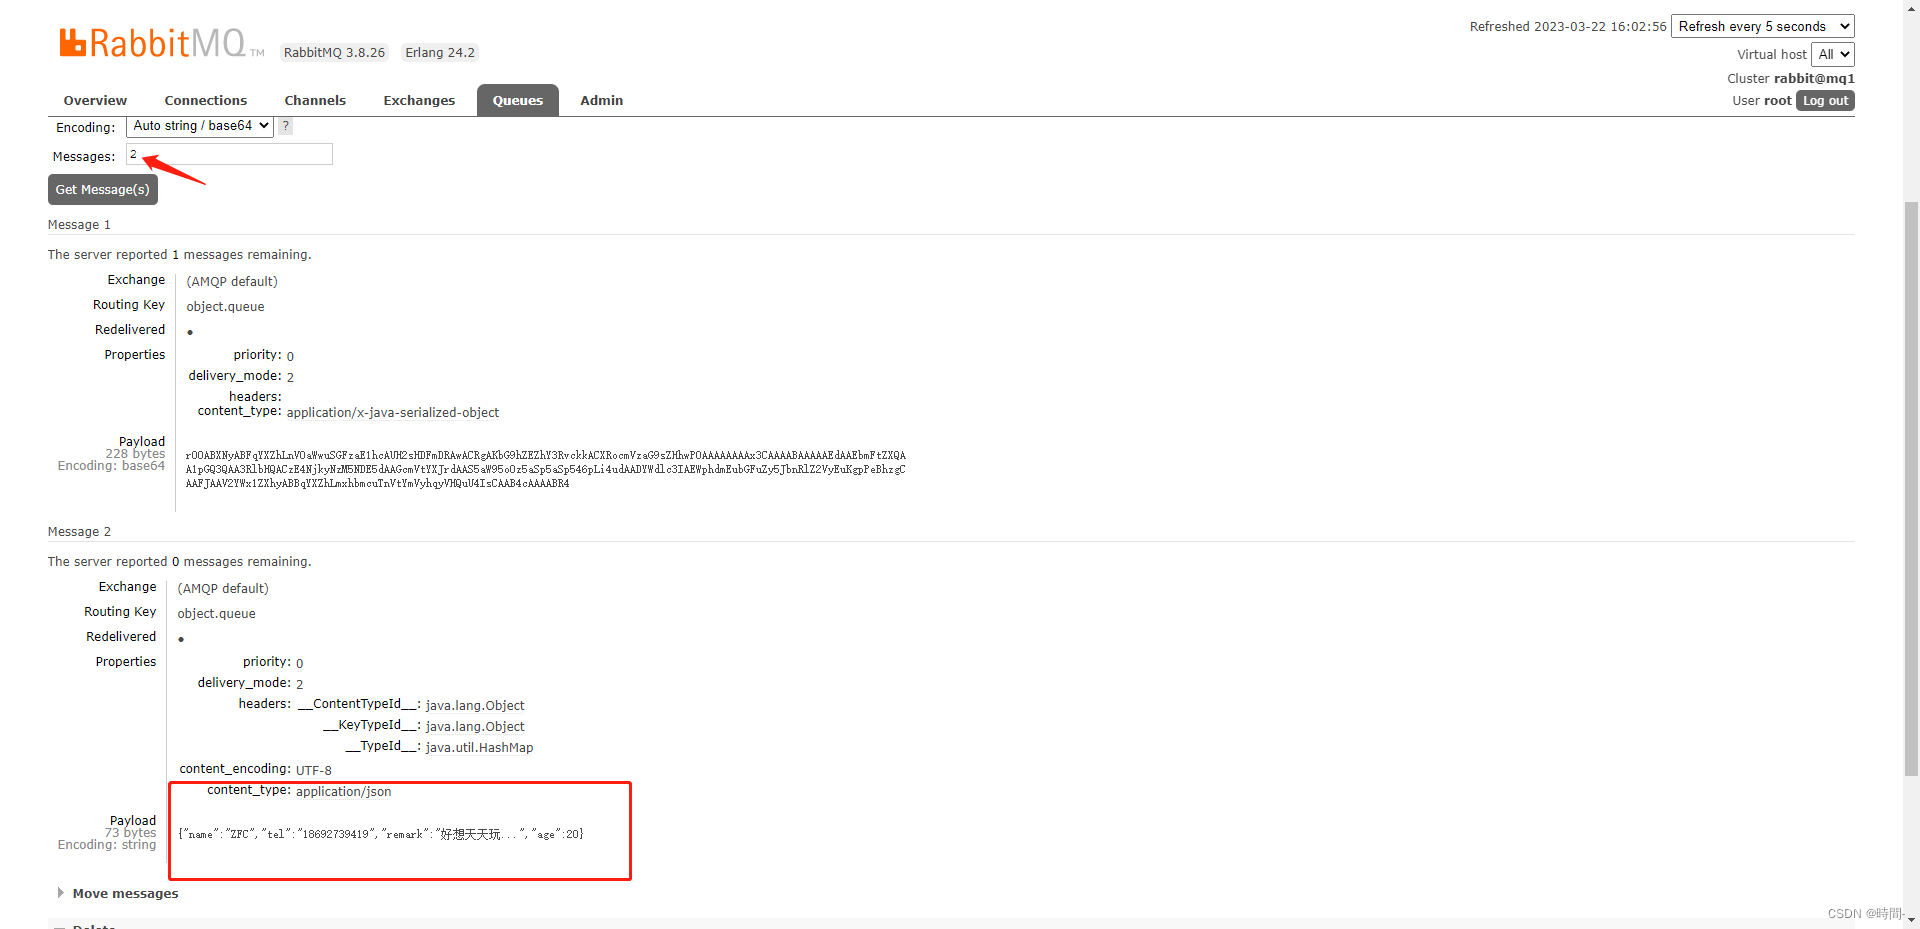
可以看到 内容的类型变成了json
- 因为依赖已经加在了父工程中,所以这里不需要引入依赖了,在consumer服务定义MessageConverter
import org.springframework.amqp.support.converter.Jackson2JsonMessageConverter;
import org.springframework.amqp.support.converter.MessageConverter;
import org.springframework.boot.SpringApplication;
import org.springframework.boot.autoconfigure.SpringBootApplication;
import org.springframework.context.annotation.Bean;

@SpringBootApplication
public class ConsumerApplication {
    public static void main(String[] args) {
        SpringApplication.run(ConsumerApplication.class, args);
    }

    @Bean
    public MessageConverter messageConverter(){
        return new Jackson2JsonMessageConverter();
    }
}
- 监听object.queue,搞定
	@RabbitListener(queues = "object.queue")
    public void objectQueue(Map<String, Object> map) {
        System.out.println(map);
    }


 被折叠的 条评论
为什么被折叠?
被折叠的 条评论
为什么被折叠?
 到【灌水乐园】发言


