


Luckfox RV1106搭建qt环境
相关资料
材料选择
| 物品 | 淘宝链接 |
|---|---|
| st7735 1.8寸 | https://item.taobao.com/item.htm?id=583173435654 |
| sd/tf卡 | 自行购买 |
| usb转typec | 自行购买 |
| 网线 | 自行购买 |
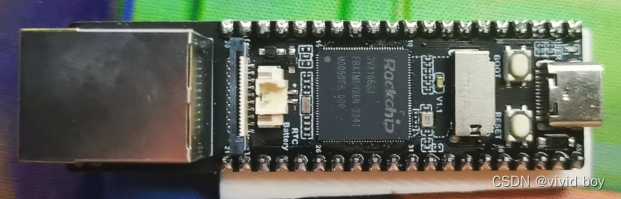
| 辛狐RV1106 Pro Max | https://item.taobao.com/item.htm?id=740872477147 |

SDK环境搭建
- Ubuntu22.04下配置环境
# 更新软件源
sudo apt update
# 安装需要的环境
sudo apt-get install -y git ssh make gcc gcc-multilib g++-multilib module-assistant expect g++ gawk texinfo libssl-dev bison flex fakeroot cmake unzip gperf autoconf device-tree-compiler libncurses5-dev pkg-config bc python-is-python3 passwd openssl openssh-server openssh-client vim file cpio rsync
# 下载SDK
cd Code
git clone https://gitee.com/LuckfoxTECH/luckfox-pico.git
cd luckfox-pico
# 修改配置文件安装buildroot系统
vim project/cfg/BoardConfig_IPC/BoardConfig-SPI_NAND-Buildroot-RV1106_Luckfox_Pico_Pro_Max-IPC.mk
`
export LF_TARGET_ROOTFS=buildroot
`
# 安装交叉编译工具链
source tools/linux/toolchain/arm-rockchip830-linux-uclibcgnueabihf/env_install_toolchain.sh
# 添加环境变量
vim ~/.bashrc
`
export PATH=~/Code/luckfox-pico/bin:$PATH
export PATH=~/Code/luckfox-pico/tools/linux/toolchain/arm-rockchip830-linux-uclibcgnueabihf/bin:$PATH
`
source ~/.bashrc
# 编译busybox/buildroot(第一次很慢)
echo 8 | ./build.sh lunch
./build.sh
设备树搭建
- 挂载 SD 卡
vim sysdrv/source/kernel/arch/arm/boot/dts/rv1103g-luckfox-pico-plus.dts
`
/**********SDMMC**********/
&sdmmc {
  max-frequency = <50000000>;
  no-sdio;
  no-mmc;
  bus-width = <4>;
  cap-mmc-highspeed;
  cap-sd-highspeed;
  disable-wp;
  pinctrl-names = "default";
  pinctrl-0 = <&sdmmc0_clk &sdmmc0_cmd &sdmmc0_det &sdmmc0_bus4>;
  status = "okay";
};
`
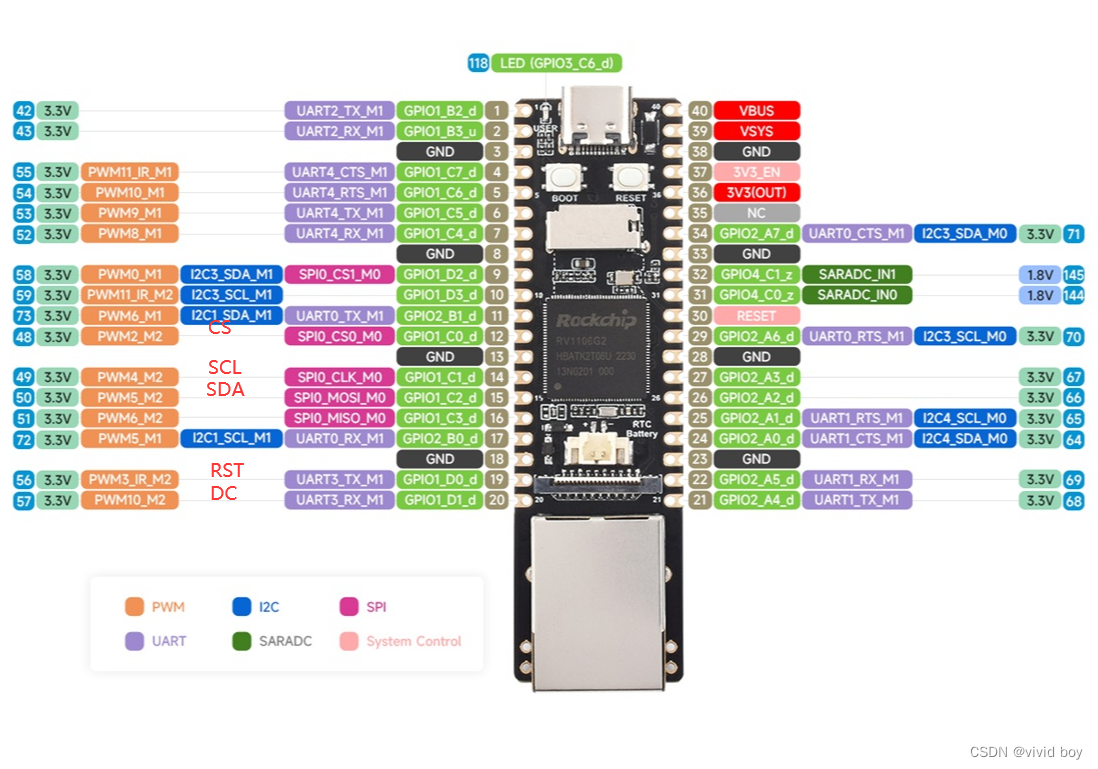
- 挂载屏幕驱动spi
// 注释usart3
//&uart3 {
//      status = "okay";
//      pinctrl-names = "default";
//      pinctrl-0 = <&uart3m1_xfer>;
//};

/ {
        model = "Luckfox Pico Max";
        compatible = "rockchip,rv1103g-38x38-ipc-v10", "rockchip,rv1106";

        gpio1rstgpios:gpio1rstgpios {
                compatible = "regulator-fixed";
                pinctrl-names = "default";
                pinctrl-0 = <&gpio1_rst_gpios>;
                regulator-name = "gpio1-rst-gpios";
                regulator-always-on;
        };
        gpio1dcgpios:gpio1dcgpios {
                compatible = "regulator-fixed";
                pinctrl-names = "default";
                pinctrl-0 = <&gpio1_dc_gpios>;
                regulator-name = "gpio1-dc-gpios";
                regulator-always-on;
        };
};

&pinctrl {
        gpio1_rst_gpios {
                gpio1_rst_gpios:gpio1_rst_gpios {
                        rockchip,pins = <1 RK_PD0 RK_FUNC_GPIO &pcfg_pull_up>;
                };
        };
        gpio1_dc_gpios {
                gpio1_dc_gpios:gpio1_dc_gpios {
                        rockchip,pins = <1 RK_PD1 RK_FUNC_GPIO &pcfg_pull_up>;
                };
        };
};


// /**********SPI**********/
&spi0 {
        status = "okay";
        pinctrl-names = "default";
        pinctrl-0 = <&spi0m0_pins>;
        cs-gpios = <&gpio1 RK_PC0 1>;
        // cs-gpios = <&gpio1 26 1>;
        #address-cells = <1>;
        #size-cells = <0>;
        st7735s: st7735s@0 {
                compatible = "sitronix,st7735r";
                status = "okay";
                spi-max-frequency = <48000000>;
                reg = <0>;
                reset = <&gpio1 RK_PD0 1>;      // 复位引脚
                dc = <&gpio1 RK_PD1 1>;         // 数据/命令引脚
                rotation = <90>;                // 屏幕旋转90度
                buswidth = <8>;                 // 总线的宽度
                fps = <30>;
                spi-cpol;
                spi-cpha;
                rgb;
        };
};
内核配置
# 进入到内核目录
cd sysdrv/source/kernel/
# 移动官方rv1106配置文件
cp ./arch/arm/configs/luckfox_rv1106_linux_defconfig .config
# 进入配置页面
make ARCH=arm menuconfig
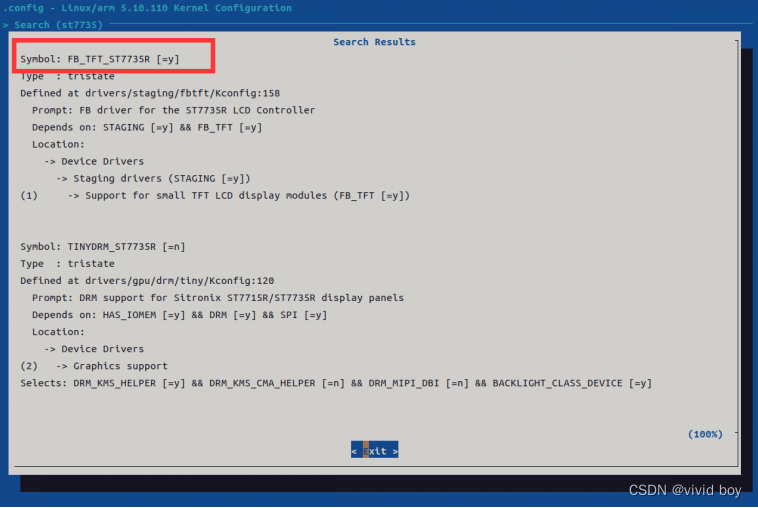
按下’/'搜索st7735驱动,输入1进入
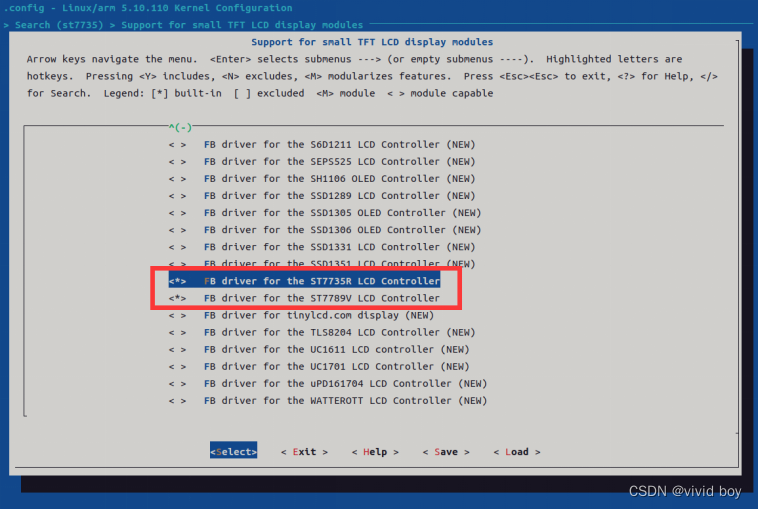
输入y选中后save保存
make ARCH=arm savedefconfig
cp defconfig ./arch/arm/configs/luckfox_rv1106_linux_defconfig
Buildroot 配置
- 配置qt,按下’/'搜索qt5
cd sysdrv/source/buildroot/buildroot-2023.02.6/
make luckfox_pico_defconfig
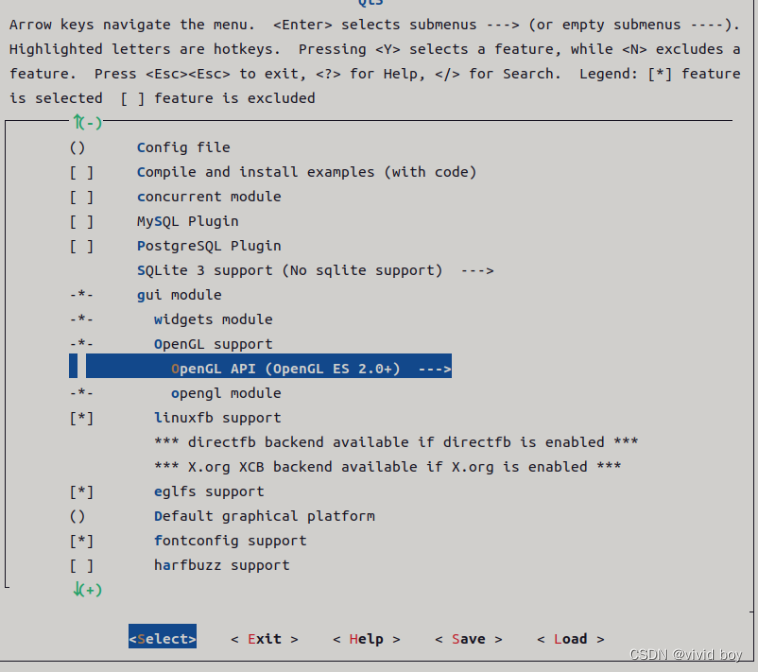
make menuconfig
`
-*- qt5base
-*- gui module
[*] widgets module
*** OpenGL support needs an OpenGL-capable backend ***
-*- linuxfb support
*** directfb backend available if directfb is enabled ***
*** X.org XCB backend available if X.org is enabled ***
*** eglfs backend available if OpenGL and EGL are enabled ***
[*] fontconfig support
[*] GIF support
[*] JPEG support
[*] PNG support
[*] Enable Tslib support
[*] qt5multimedia
[*] qjson
`
- 安装rsync(2)
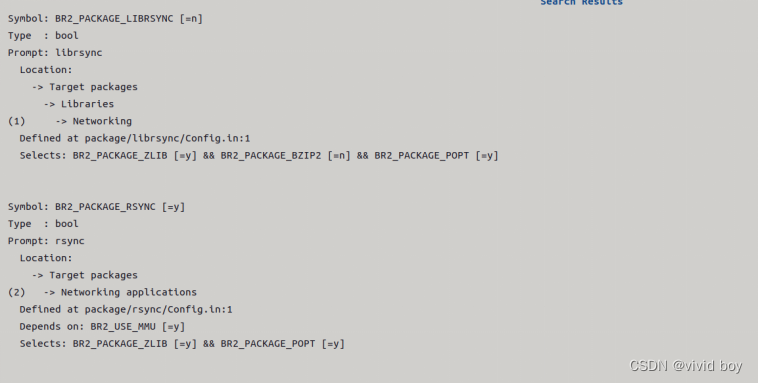
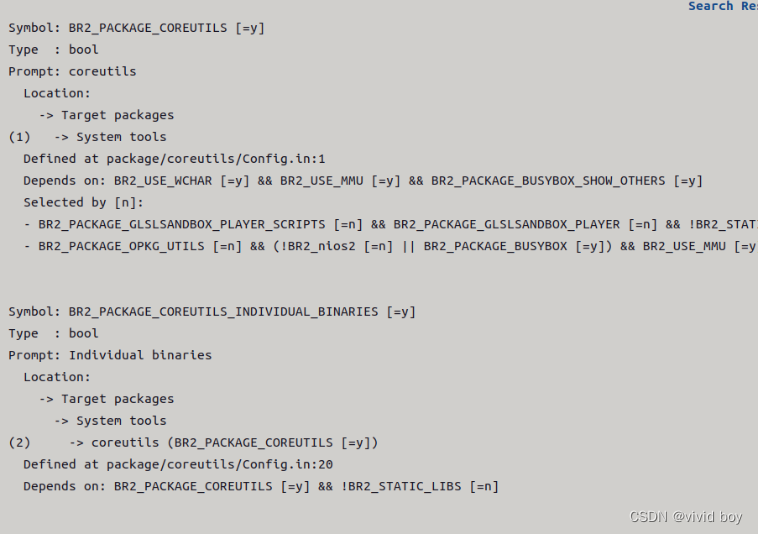
- 安装coreutils(1,2)
- 安装opengl,eglfs
`
Target packages
  ->Libraries
    ->Graphics
      ->libdrm
        ->etnaviv--支持的GPU驱动。
        ->Install test programs--libdrm测试程序。
    -> Graphic libraries and applications (graphic/text)
    ->mesa3d
      ->Gallium Etnaviv driver--Vivante GPU的Mesa驱动。
      ->Gallium swrast driver--基于Gallium3D架构实现的软件OpenGL。
      ->gbm--使能Generic Buffer Management。
      ->OpenGL EGL--EGL是OpenGL ES和底层Native平台视窗系统之间的接口。
      ->OpenGL ES--OpenGL ES (OpenGL for Embedded Systems)。
`
- 编译
make savedefconfig
make
# 生成软件开发工具包
make sdk
# 添加qmake环境变量
vim ~/.bashrc
`
export PATH=~/Code/luckfox-pico/sysdrv/source/buildroot/buildroot-2023.02.6/output/build/qt5base-2ffb7ad8a1079a0444b9c72affe3d19b089b60de/qmake:$PATH
`
source ~/.bashrc
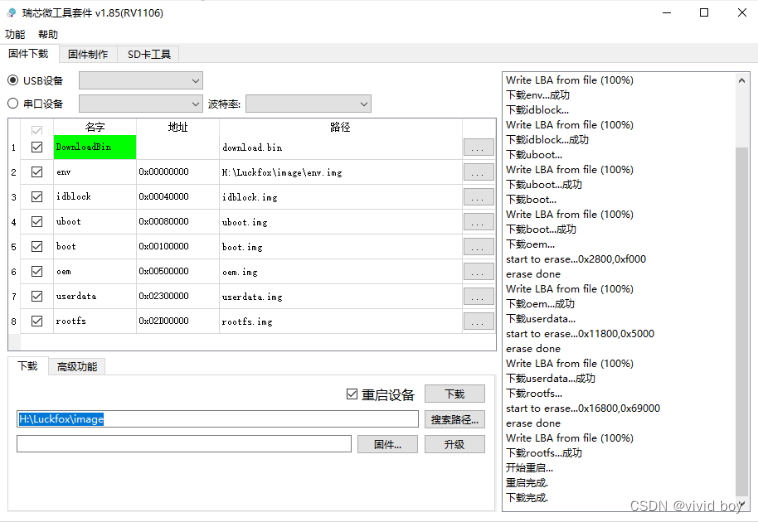
烧录
echo 8 | ./build.sh lunch
./build.sh
移动output/image到windows下
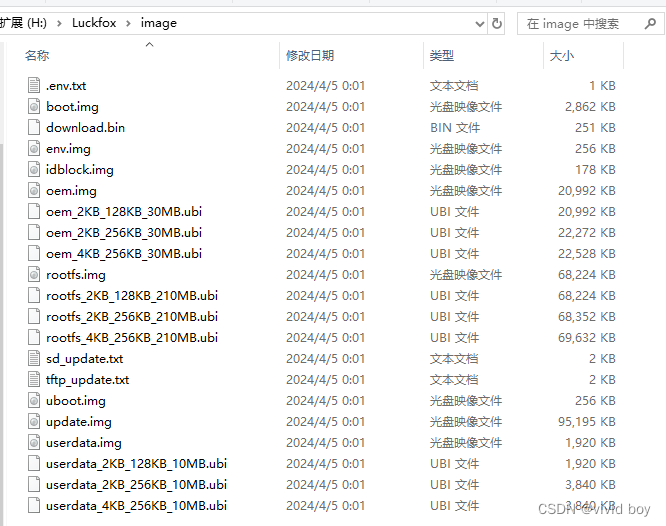
烧录程序,详细见官网
qt环境如下(过时不具备参考意义)
配置环境(buildroot 下)
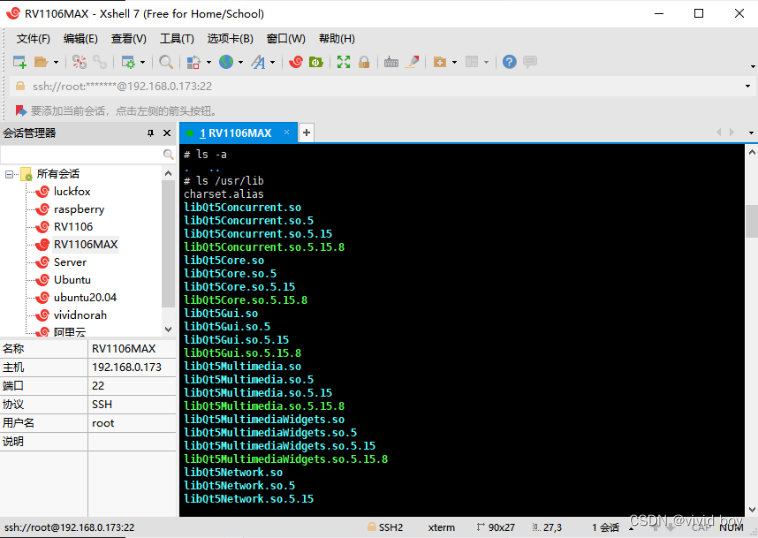
- qt环境(buildroot 下)
vi /etc/profile
`
export QT_QPA_PLATFORM_PLUGIN_PATH=/usr/lib/
export QT_QPA_PLATFORM=linuxfb:tty=/dev/fb0
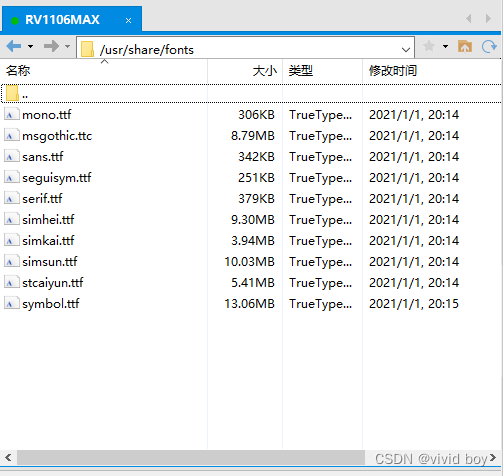
export QT_QPA_FONTDIR=/usr/share/fonts
export QT_QPA_GENERIC_PLUGINS=tslib:$TSLIB_TSDEVICE
`
source /etc/profile
- 添加字库(添加一个即可)
链接:https://pan.baidu.com/s/1MorzYf0-3IT9byPAxWXCrg?pwd=ynwu
提取码:ynwu
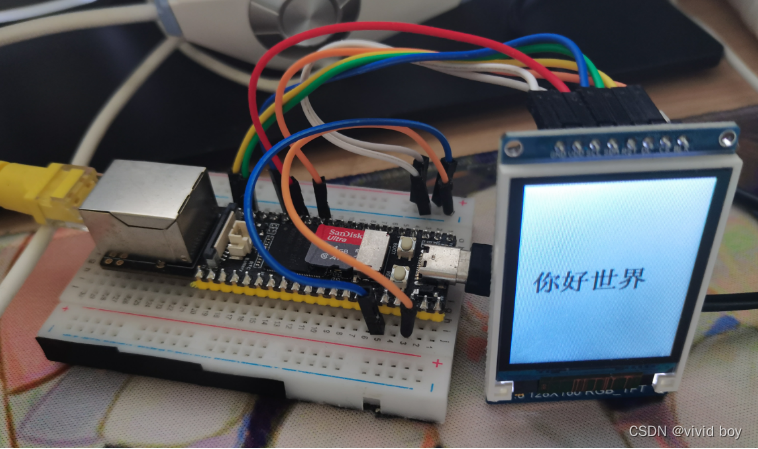
- 启动样例程序(buildroot 下)
./analogclock -platform linuxfb
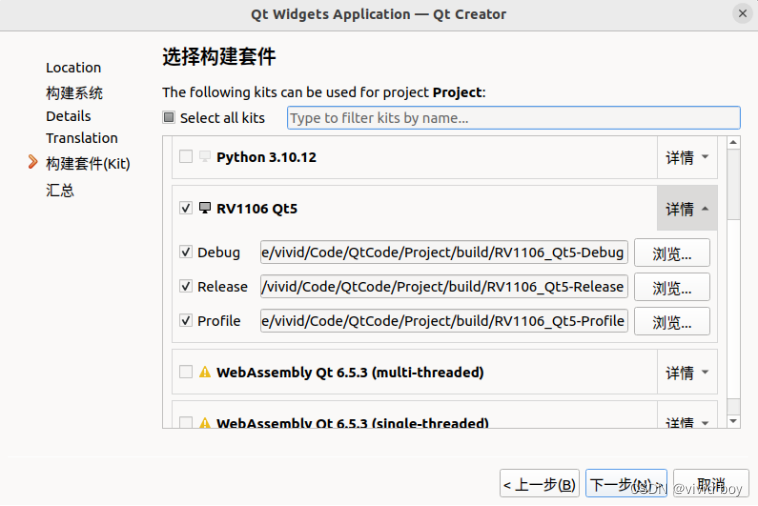
QT配置
# gcc路径
sysdrv/source/buildroot/buildroot-2023.02.6/output/host/bin/arm-rockchip830-linux-uclibcgnueabihf-gcc
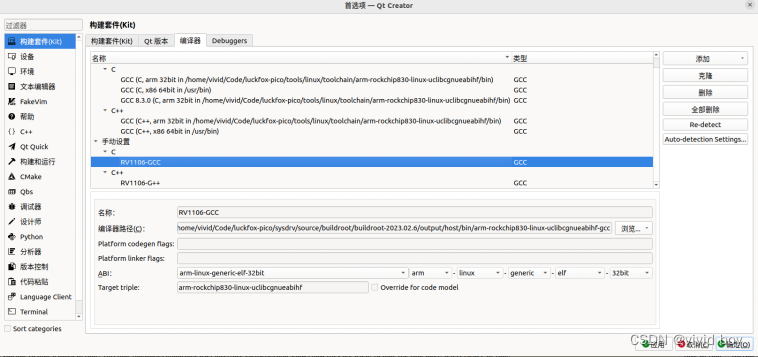
# g++路径
sysdrv/source/buildroot/buildroot-2023.02.6/output/host/bin/arm-rockchip830-linux-uclibcgnueabihf-g++
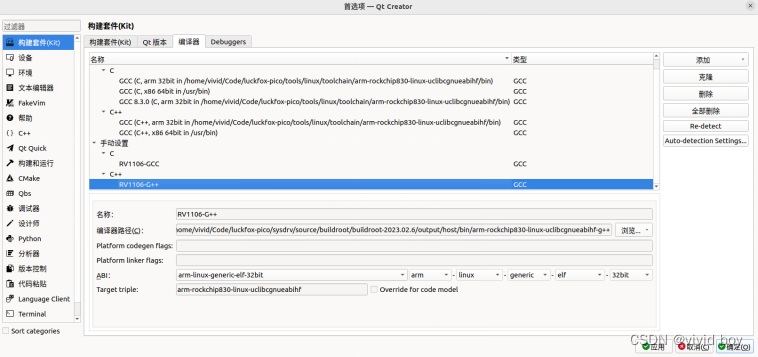
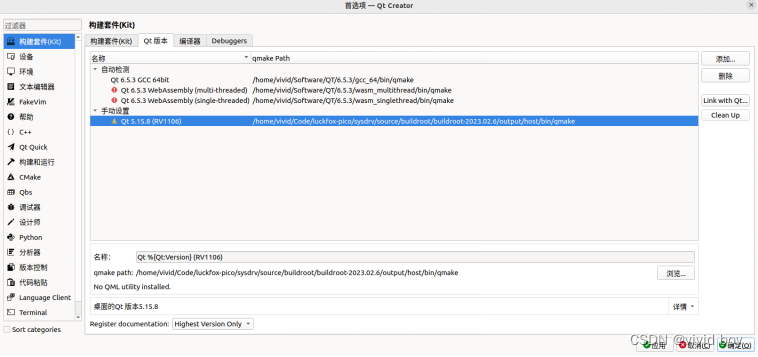
# qmake路径
sysdrv/source/buildroot/buildroot-2023.02.6/output/host/bin/qmake
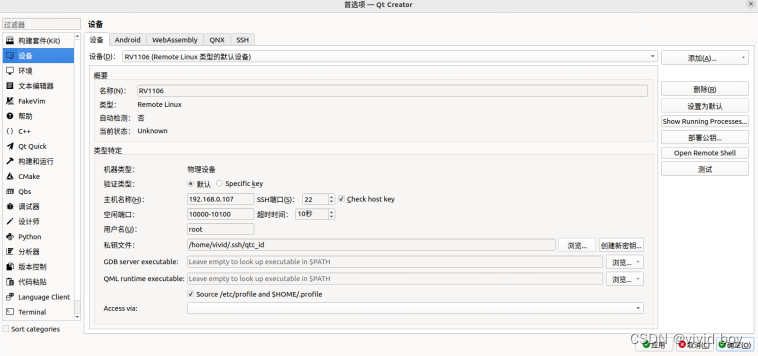
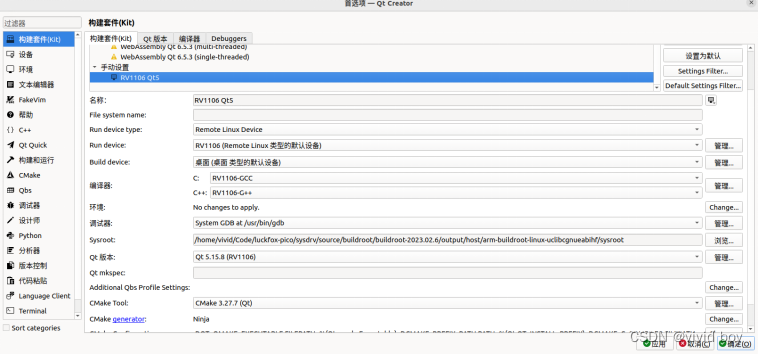
# 配置设备(确保测试通过)
# sysroot路径
sysdrv/source/buildroot/buildroot-2023.02.6/output/host/arm-buildroot-linux-uclibcgnueabihf/sysroot
创建项目
修改pro文件
target.path = /root
INSTALLS += target
这步骤暂定不需要
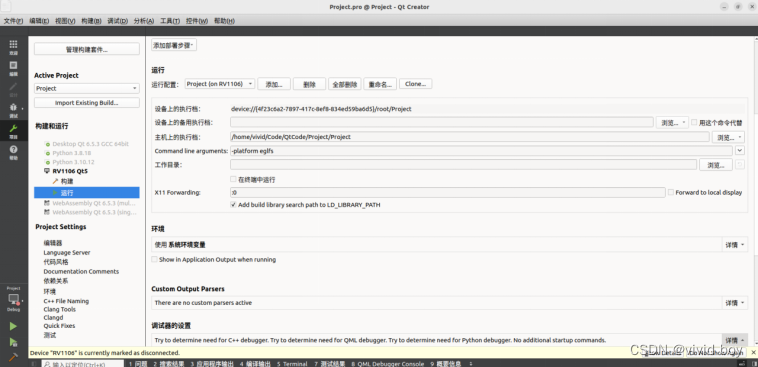
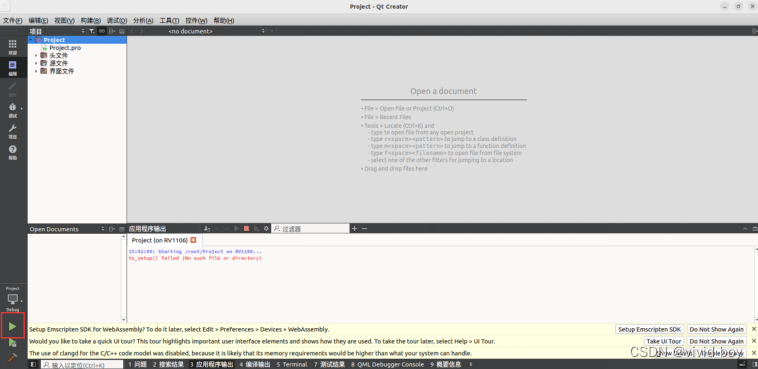
启动项目
点击启动按钮同步在开发板执行,并且将执行文件保存到root下


 804
804

 被折叠的 条评论
为什么被折叠?
被折叠的 条评论
为什么被折叠?
 到【灌水乐园】发言


