


SpringBoot项目使用QQ邮箱发送邮件本地可以发送激活邮件,放到服务器上就是连接超时,报错如下 java.net.ConnectException: Connection timed out Couldn't connect to host, port: smtp.qq.com, 25; timeout -1;
User
Closing non transactional SqlSession [org.apache.ibatis.session.defaults.DefaultSqlSession@141d88c7]
com.sun.mail.util.MailConnectException: Couldn't connect to host, port: smtp.qq.com, 25; timeout -1;
  nested exception is:
        java.net.ConnectException: Connection timed out (Connection timed out)
        at com.sun.mail.smtp.SMTPTransport.openServer(SMTPTransport.java:2210)
这个报错的原因,是阿里云服务器,不支持默认端口25来发送邮件,哪怕是关闭防火墙,放行安全组都没有用。我这个是项目是部署到Docker容器的,但是都是
一样的。
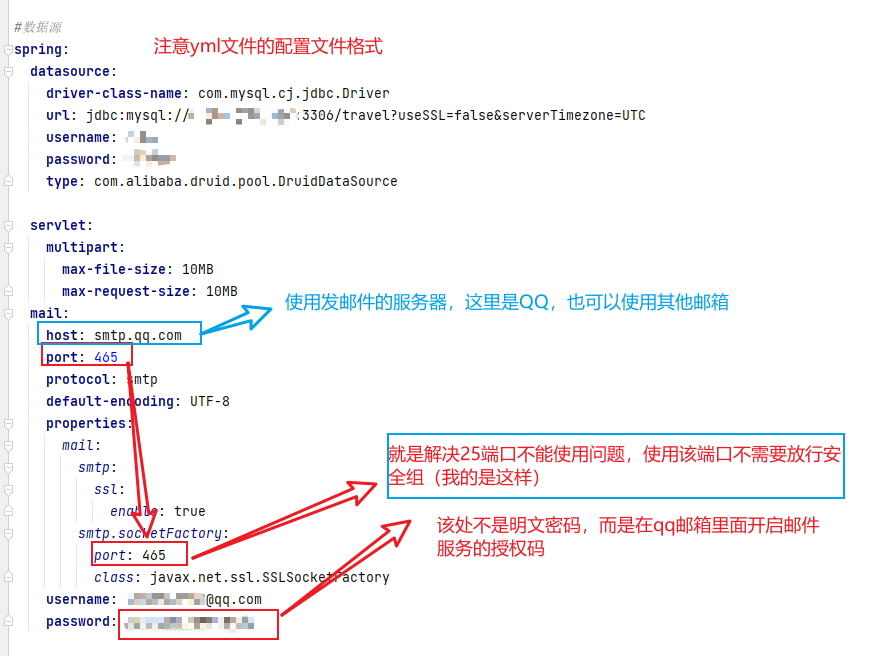
- 配置模板(复制注意yml格式,层级对齐缩进,否则会出错,我之前就是因为少了一个空格而出错,找了半天度找不出来!还去找了外援!)
spring:
  datasource:
    driver-class-name: com.mysql.cj.jdbc.Driver
    url: jdbc:mysql://127.0.0.1:3306/travel?useSSL=false&serverTimezone=UTC
    username:
    password:
    type: com.alibaba.druid.pool.DruidDataSource

  servlet:
    multipart:
      max-file-size: 10MB
      max-request-size: 10MB

  mail:
    host: smtp.qq.com
    port: 465
    protocol: smtp
    default-encoding: UTF-8
    properties:
      mail:
        smtp:
          ssl:
            enable: true
        smtp.socketFactory:
          port: 465
          class: javax.net.ssl.SSLSocketFactory
    username:
    password:
- 首先我们先引入stater依赖
    <!-- 发邮件 -->
        <dependency>
            <groupId>org.springframework.boot</groupId>
            <artifactId>spring-boot-starter-mail</artifactId>
        </dependency>
- QQ邮箱获取授权码
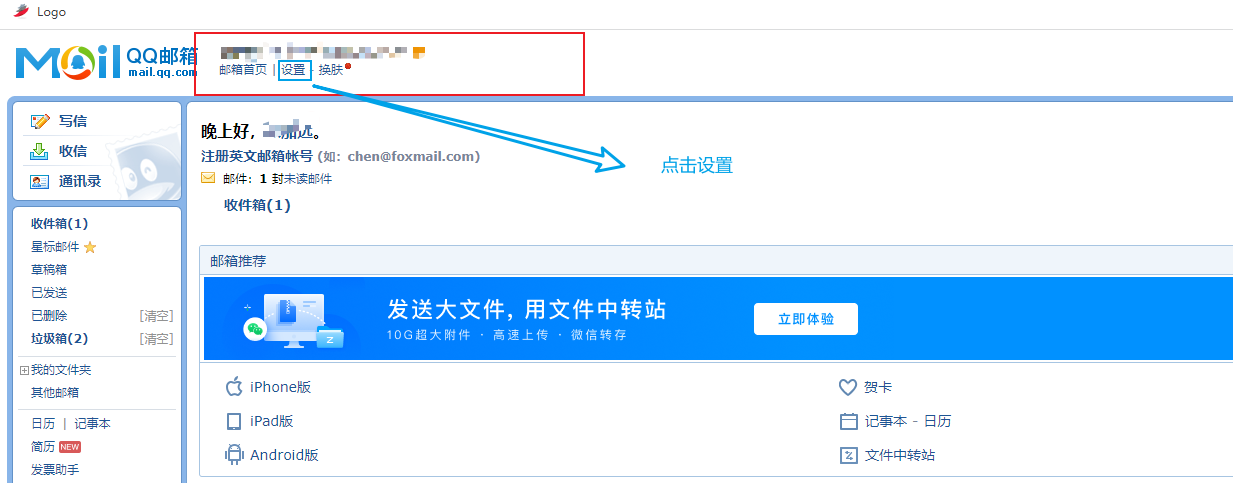


首次可能需要,发送短信,最后把授权码拿下来。放到配置文件中的密码处。
我的初始错误代码就不展示了,就展示正确的代码吧。踩坑太痛!!!!!
- 邮件工具类
import org.springframework.beans.factory.annotation.Autowired;
import org.springframework.beans.factory.annotation.Value;
import org.springframework.mail.javamail.JavaMailSender;
import org.springframework.mail.javamail.MimeMessageHelper;
import org.springframework.stereotype.Component;

import javax.mail.MessagingException;
import javax.mail.internet.MimeMessage;

/**
 * 发邮件工具类
 */
@Component
public class MailUtils2 {

/*    @Autowired
    private JavaMailSender mailSender;*/


    private final JavaMailSender mailSender;

    @Autowired
    public MailUtils2(JavaMailSender mailSender) {
        this.mailSender = mailSender;
    }

    @Value("${spring.mail.username}")
    private String senderEmailAddress;
    /**
     * 发送邮件
     *
     * @param to     收件人邮箱
     * @param text   邮件正文
     * @param title  标题
     */
    public boolean sendMail(String to, String text, String title) {
        try {
            MimeMessage message = mailSender.createMimeMessage();
            MimeMessageHelper helper = new MimeMessageHelper(message, true, "UTF-8");
            helper.setFrom(senderEmailAddress);
            helper.setTo(to);
            helper.setSubject(title);
            helper.setText(text, true);
            mailSender.send(message);
            return true;
        } catch (MessagingException e) {
            e.printStackTrace();
        }
        return false;
    }
}
- 在使用的地方直接注入
  @Autowired
    private MailUtils2 mailUtils;
可以的话顺变点一个小小的赞!!


 被折叠的 条评论
为什么被折叠?
被折叠的 条评论
为什么被折叠?
 到【灌水乐园】发言


