


 本文介绍了如何在React项目中利用Antd实现UI设计,并结合Redux进行状态管理,涉及组件引入、数据变更和Store创建过程,以及React Developer Tools的安装与使用。
文章目录
前言
Redux 是 JavaScript 应用的状态容器,提供可预测的状态管理。可以帮助开发出行为稳定可预测的、运行于不同的环境(客户端、服务器、原生应用)、易于测试的应用程序。不仅于此,它还提供超爽的开发体验,比如有一个与时间旅行调试器相结合的实时代码编辑。可以将 Redux 与 React 或其他视图库一起使用。它体小精悍(只有2kB,包括依赖),却有很强大的插件扩展生态。
一、Antd是什么?
antd 是基于 Ant Design 设计体系的 React UI 组件库,主要用于研发企业级中后台产品。
二、使用Antd实现页面UI
1.引入Antd
代码如下(示例):
npm install antd --save
2.使用组件和样式
代码如下(示例):
import { Button } from 'antd';
import "antd/dist/antd.css";
import "antd/dist/antd"
3.依靠antd提供的UI组件快速搭建页面
antd官网:https://ant.design/components/list-cn/
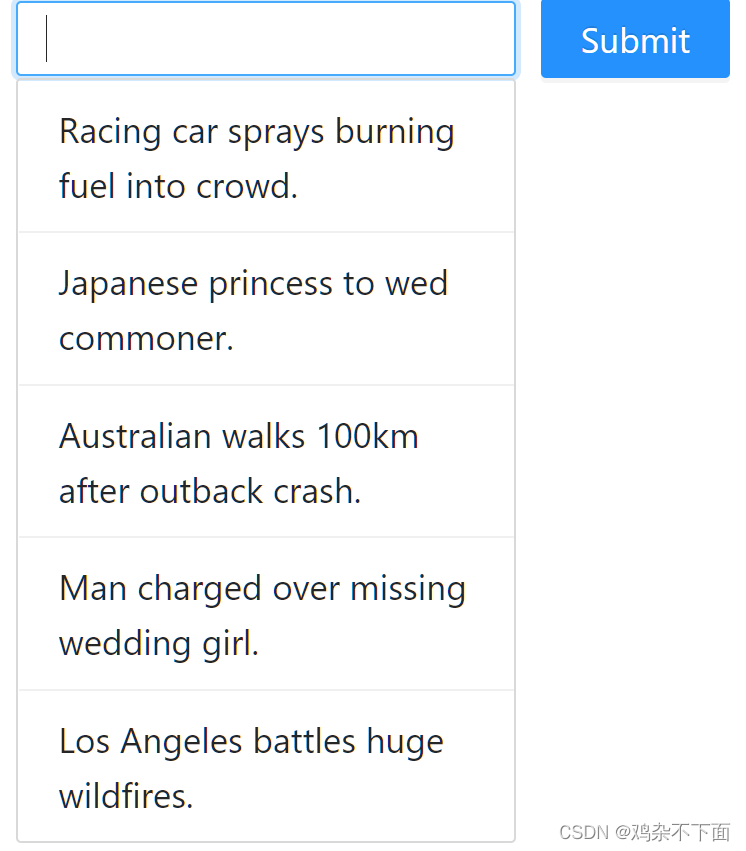
页面代码如下:
import React, { Fragment } from 'react';
import { Component } from 'react';
import { Button } from 'antd';
import "antd/dist/antd.css";
import "antd/dist/antd";
import { Input } from 'antd';
import { Divider, List, Typography } from 'antd';

const InputStyle = {
  width: 200,
  height: 30,
  marginLeft: 40,
  marginRight: 10
}

const ListStyle = {
  width: 200,
  marginLeft: 40,
}

const data = [
  'Racing car sprays burning fuel into crowd.',
  'Japanese princess to wed commoner.',
  'Australian walks 100km after outback crash.',
  'Man charged over missing wedding girl.',
  'Los Angeles battles huge wildfires.',
];

class TodoList extends Component {
  constructor(props) {
    super(props);
  }
  render() {
    return (
      <Fragment>
        <Input style={InputStyle}></Input>
        <Button type="primary">Submit</Button>
        <List
          size="small"
          style={ListStyle}
          bordered
          dataSource={data}
          renderItem={(item) => <List.Item>{item}</List.Item>}
        />
      </Fragment>
    )
  }
}


export default TodoList;
三、创建Store
1.什么是redux
Redux 是 JavaScript 应用的状态容器,提供可预测的状态管理。可以将 Redux 与 React 或其他视图库一起使用。
2.redux的安装
npm install redux
3.redux工作流程
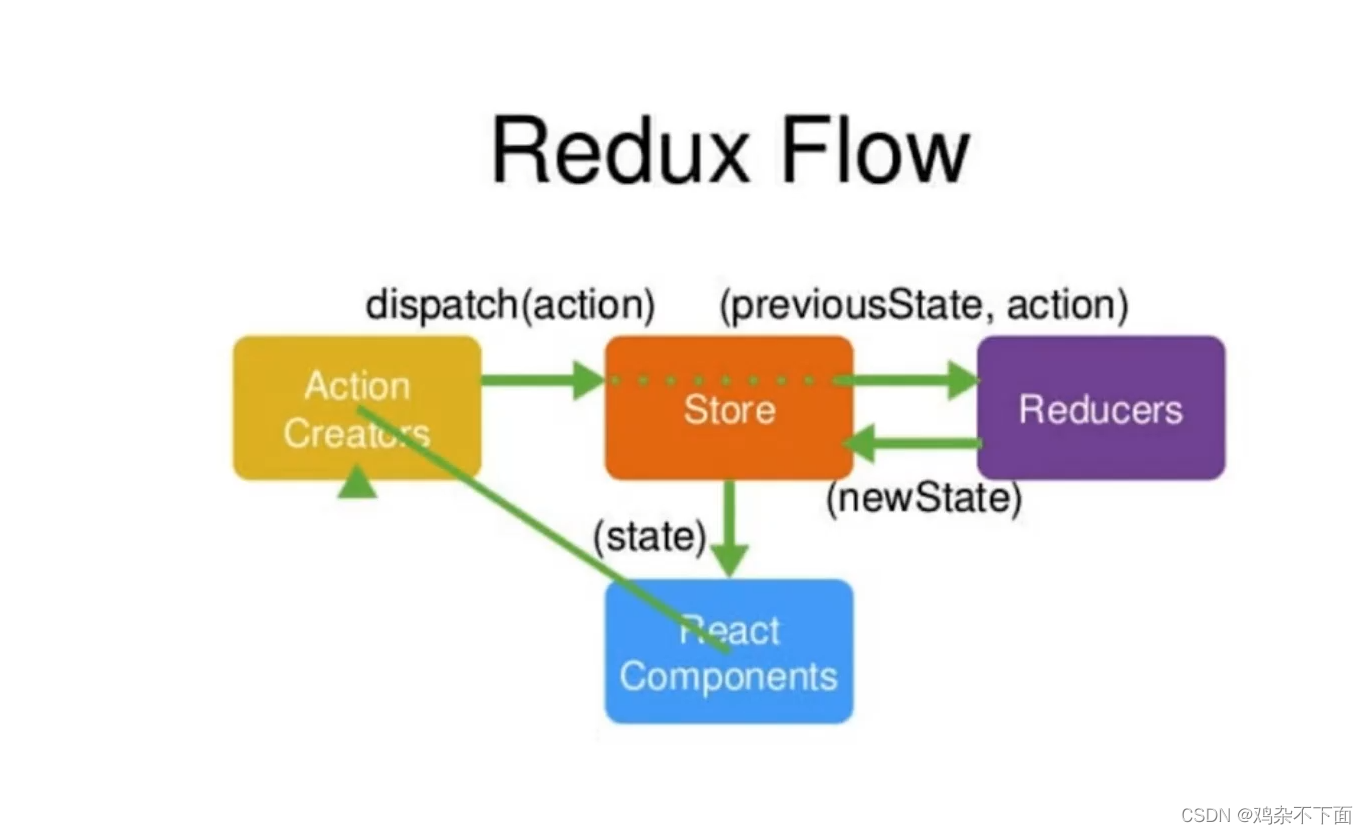
Redux的整体全局状态以对象树的方式存放于单个 store。 唯一改变状态树(state tree)的方法是创建 action,一个描述发生了什么的对象,并将其 dispatch 给 store。 要指定状态树如何响应 action 来进行更新,一般编写纯 reducer 函数,这些函数根据旧 state 和 action 来计算新 state。
reducer函数是一个纯函数,所谓纯函数是指,给定固定的输入,就一定会有固定的输出,而且不会有任何副作用
4.Store目录下的各个文件
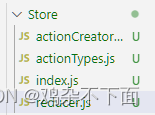
actionCreator文件 是创建各个action的函数
actionTypes文件 用来定义一些action的type的常量
index.js文件 创建一个包含应用程序 state 的 Redux store
reducer文件 编写一个名为 reducer 的特殊函数,来决定如何基于 action 来更新整个应用的状态树。
四、部分功能的具体实现
1.按照Redux的工作流程实现输入框中数据的改变
1.1 index.js创建一个包含应用程序state的Redux store
import reducer from "./reducer";
import { legacy_createStore as createStore} from 'redux';

const Store = createStore(reducer);
export default Store;
1.2 在actionCreator.js写一个创建getInputAction的函数并暴露
action函数返回的type传到reducer中来决定如何更新state
import Store from "../Store";

export const getInputAction = (value) => ({
    type: 'change_input_value',
    value
})
1.3在reducer.js编写纯函数
reducer可以决定如何基于 action 来更新整个应用的状态树,可以接收state,但是绝对不能修改state
reducer必须是纯函数(纯函数是指,给定固定的输出,而且不会有任何副作用)
创建一个defaultState给state初始化一个默认的值;
由于state不能直接修改,代码中的newstate是克隆的操作前的state,对newstate进行操作将其返回
const defaultState = {
    inputValue: '',
    list: [1, 3, 4]
}
export default (state = defaultState, action) => {
    if (action.type === 'change_input_value') {
        const newState = JSON.parse(JSON.stringify(state));
        newState.inputValue = action.value;
        return newState;
    }
    return state;
}
1.4给Input绑定对应的事件,完成state数据更新
<Input style={InputStyle} onChange={this.handleInputChange}></Input>
handleInputChange(e) {
    const action = getInputAction(e.target.value);
    Store.dispatch(action);
  }
2.按照Redux的工作流程实现List数据的增加
2.1首先我们使用 subscribe() 来更新 UI 以响应 state 的更改
constructor(props) {
    super(props);
    this.state = Store.getState();
    this.handleInputChage = this.handleInputChage.bind(this);
    this.handleStoreChage = this.handleStoreChage.bind(this);
    this.handleClick = this.handleClick.bind(this);
    Store.subscribe(this.handleStoreChage);
  }
handleStoreChage() {
    this.setState(Store.getState());
  }
2.2在actionCreator.js写一个创建getClickAction的函数并暴露
export const getClickAction = () => ({
    type: 'add_value',
});
2.3reducer中配置
if (action.type === 'add_value') {
        const newState = JSON.parse(JSON.stringify(state));
        newState.list.push(newState.inputValue);
        newState.inputValue = '';
        return newState;
    }
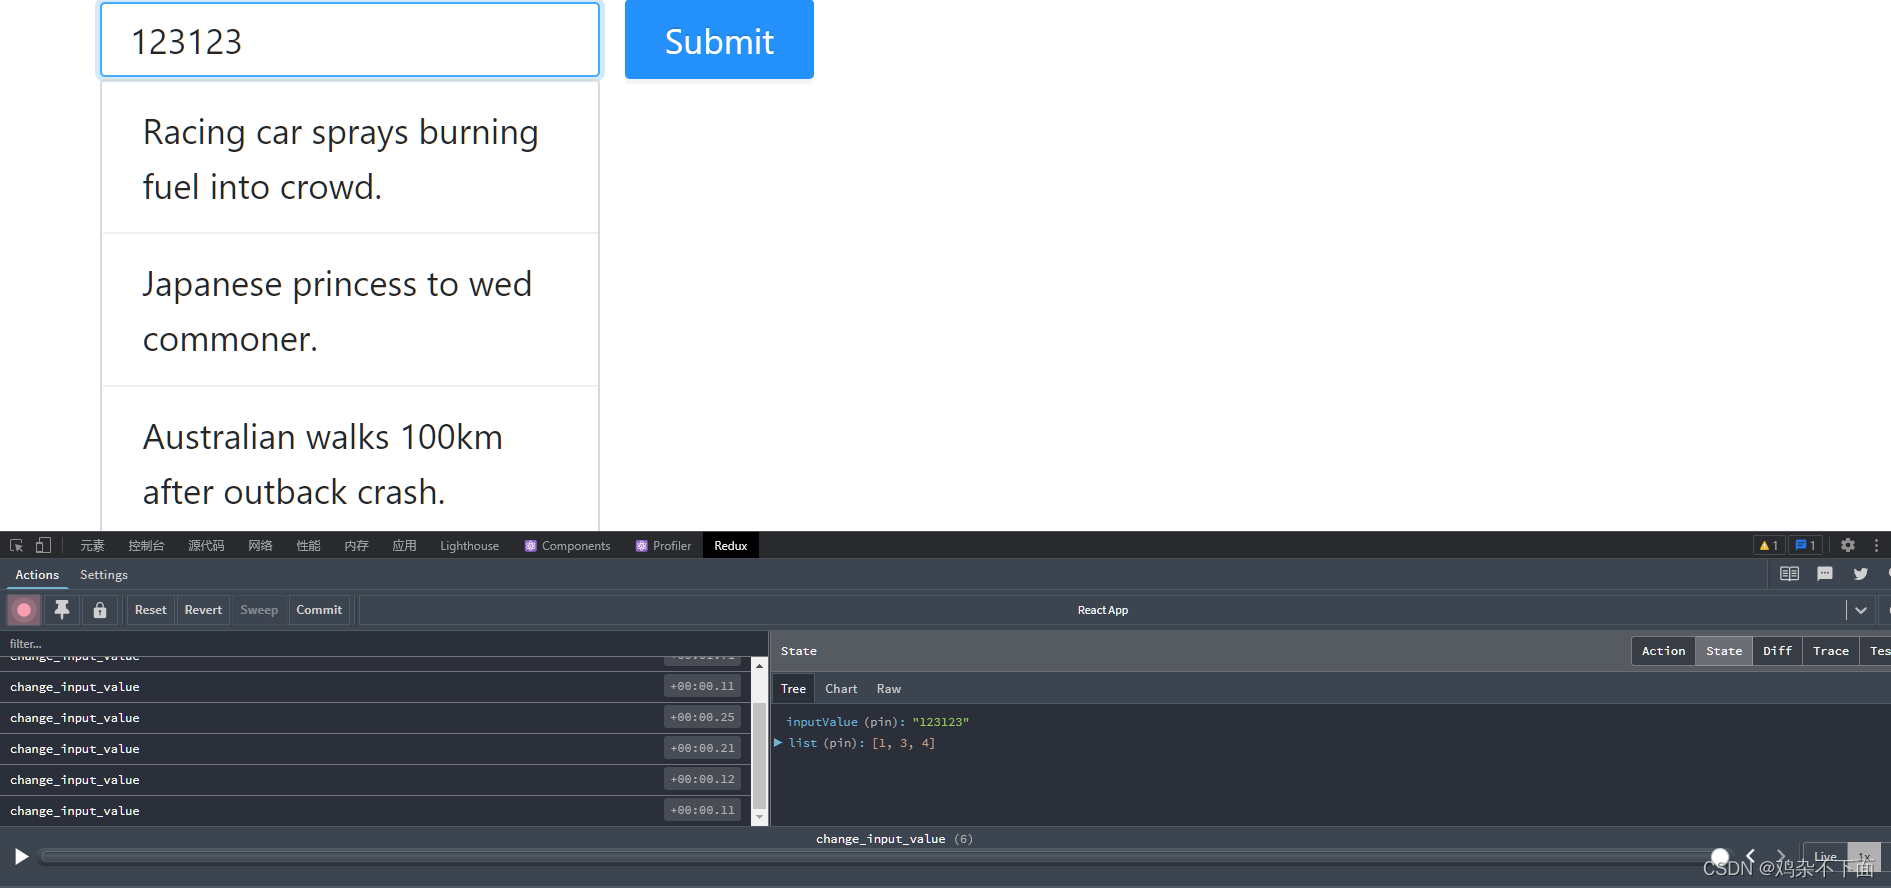
五.React Developer Tools安装
4.1.打开浏览器的应用商店下载React Developer Tools
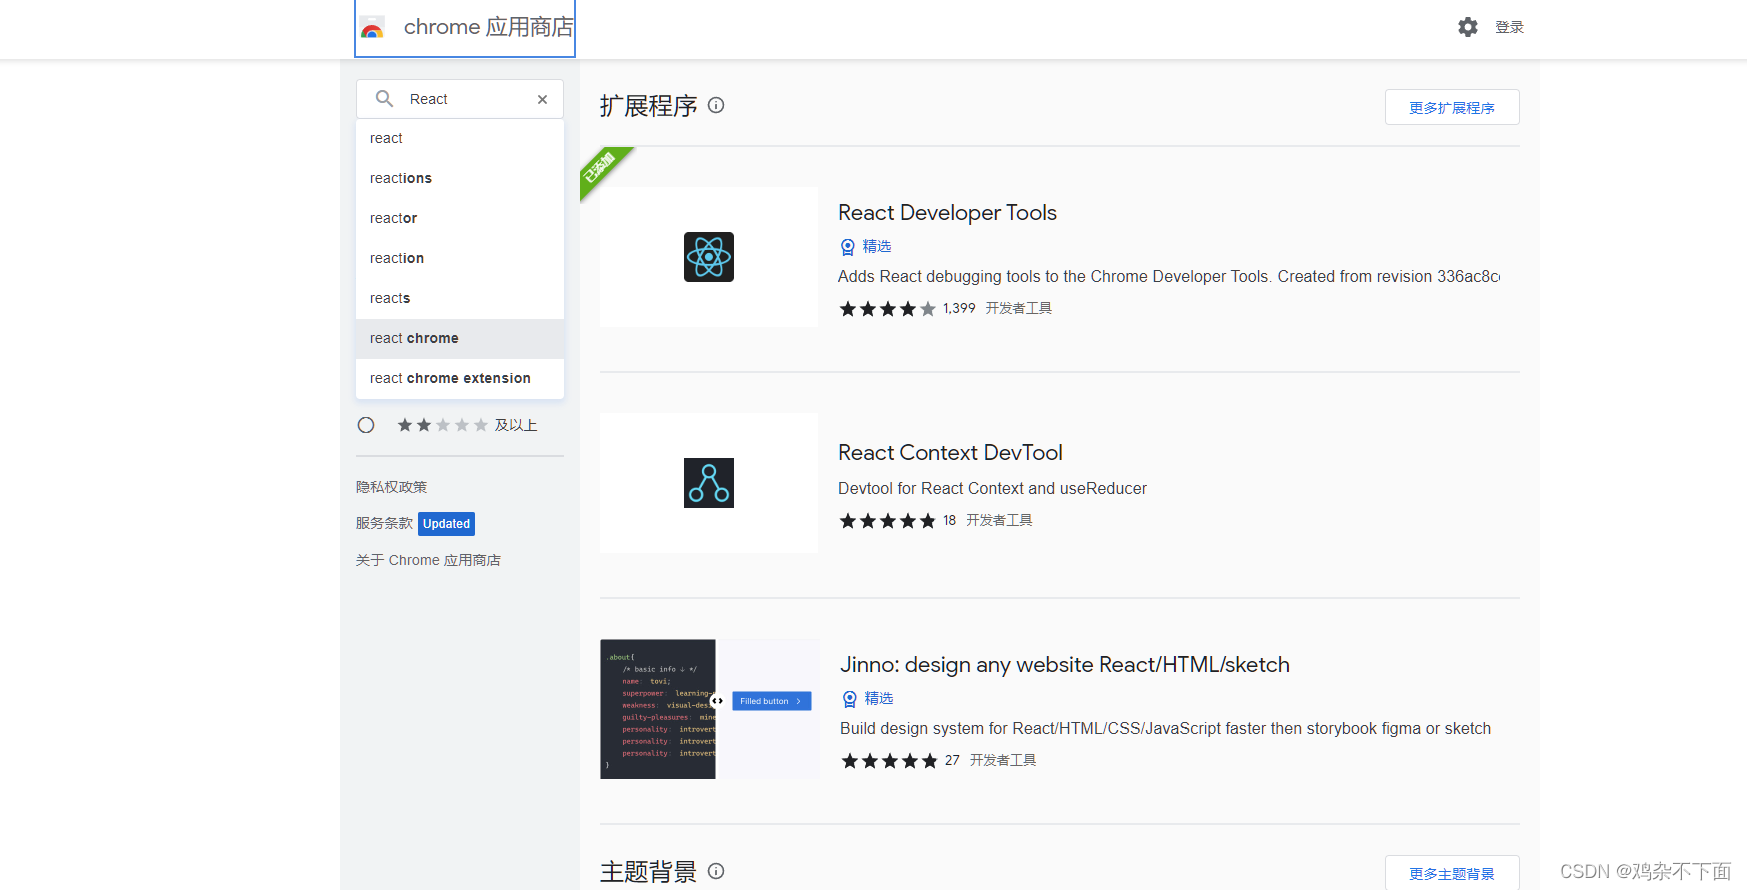
4.2React Developer Tools的适配
在Store目录下的index.js文件中进行如下配置
import reducer from "./reducer";
import { legacy_createStore as createStore, compose, applyMiddleware } from 'redux';
//import { composeWithDevTools } from 'redux-devtools-extension';

const composeEnhancers = window.__REDUX_DEVTOOLS_EXTENSION_COMPOSE__({}) || compose;
const enhancer = composeEnhancers(
);
const Store = createStore(reducer, enhancer);
export default Store;
这样就可以正常使用这个插件的功能了,这个插件可以方便我们观察State的数据变化
六.全部代码(cv直接看这)
TodoList.js
import React, { Fragment } from 'react';
import { Component } from 'react';
import { Button } from 'antd';
import "antd/dist/antd.css";
import "antd/dist/antd";
import { Input } from 'antd';
import { List } from 'antd';
import Store from './Store';
import { getClickAction, getDeleteAction, getInputAction } from './Store/actionCreator';

const InputStyle = {
  width: 200,
  height: 30,
  marginLeft: 40,
  marginRight: 10
}

const ListStyle = {
  width: 200,
  marginLeft: 40,
}


class TodoList extends Component {
  constructor(props) {
    super(props);
    this.state = Store.getState();
    this.handleInputChange = this.handleInputChange.bind(this);
    this.handleClick = this.handleClick.bind(this);
    this.handleStoreChange = this.handleStoreChange.bind(this);
    Store.subscribe(this.handleStoreChange);
  }
  render() {
    return (
      <Fragment>
        <Input style={InputStyle} onChange={this.handleInputChange}></Input>
        <Button type="primary" onClick={this.handleClick}>Submit</Button>
        <List
          size="small"
          style={ListStyle}
          bordered
          dataSource={this.state.list}
          renderItem={(item, index) => (
            <List.Item
              onClick={this.handleDelete.bind(this, index)}
            >{item}</List.Item>
          )}
        />
      </Fragment>
    )
  }

  handleInputChange(e) {
    const action = getInputAction(e.target.value);
    Store.dispatch(action);
  }

  handleClick() {
    const action = getClickAction();
    Store.dispatch(action);
  }

  handleDelete(index) {
    const action = getDeleteAction(index);
    Store.dispatch(action);
  }

  handleStoreChange() {
    this.setState(Store.getState());
  }
}


export default TodoList;
Store文件夹下actionCreator.js
import Store from "../Store";

export const getInputAction = (value) => ({
    type: 'change_input_value',
    value
});

export const getClickAction = () => ({
    type: 'add_value',
});

export const getDeleteAction = (index) => ({
    type: 'delete_value',
    index
});
Store文件夹下index.js
import reducer from "./reducer";
import { legacy_createStore as createStore, compose, applyMiddleware } from 'redux';

const composeEnhancers = window.__REDUX_DEVTOOLS_EXTENSION_COMPOSE__({}) || compose;
const enhancer = composeEnhancers(
);
const Store = createStore(reducer, enhancer);
export default Store;
Store文件夹下reducer.js
const defaultState = {
    inputValue: '',
    list: [1, 3, 4]
}

//reducer可以接收state,但是绝对不能修改state
//reducer必须是纯函数(纯函数是指,给定固定的输出,而且不会有任何副作用)
export default (state = defaultState, action) => {
    if (action.type === 'change_input_value') {
        const newState = JSON.parse(JSON.stringify(state));
        newState.inputValue = action.value;
        return newState;
    }

    if (action.type === 'add_value') {
        const newState = JSON.parse(JSON.stringify(state));
        newState.list.push(newState.inputValue);
        newState.inputValue = '';
        return newState;
    }

    if (action.type === 'delete_value') {
        const newState = JSON.parse(JSON.stringify(state));
        newState.list.splice(action.index, 1);
        return newState;
    }
    return state;
}
总结
现在是2022年10月23日,Redux基础基本过完了,Redux的两个中间件也学完了,后面会写一篇总结复习一遍Redux的两个中间件的应用,前面因为很多事拖慢了整体学习进度,后面应该会加快React的学习和对之前的知识的复习,继续加油吧。


 1793
1793

 被折叠的 条评论
为什么被折叠?
被折叠的 条评论
为什么被折叠?
 到【灌水乐园】发言


