


前言
本文提供一个功能完备的OpenCv视频播放处理类,供大家使用。(支持,保存视频、日志打印、视频裁剪、Q键退出、是否播放,选择使用摄像头或者视频, 播放完释放资源,进度条打印,日志打印。。。
【Opencv工程开发所用类】VideoTracker 视频摄像头
VideoTracker.py
# --time**2022.8.13
# --** worker:优快云大气层煮月亮
# --** email:2642898145@qq.com

import cv2
import time

# import torch
import warnings
import numpy as np

from PIL import Image

from loguru import logger

import os

os.environ["KMP_DUPLICATE_LIB_OK"] = "TRUE"


class VideoTracker(object):
    def __init__(self, cam=-1, video_path='', save_path='', use_frame=[0, -1], display=True):
        self.display = display
        self.use_frame = use_frame
        self.video_path = video_path
        self.cam = cam
        if self.cam != -1:
            print("Using webcam :" + str(self.cam))
            self.vdo = cv2.VideoCapture(self.cam)
        else:
            print("Using video :" + str(self.video_path))
            self.vdo = cv2.VideoCapture()

        self.save_path = save_path
        self.frame_interval = 1
        self.use_cuda = True

        #use_cuda = self.use_cuda and torch.cuda.is_available()
        #if not use_cuda:
            #warnings.warn("Running in cpu mode which maybe very slow!", UserWarning)

    def __enter__(self):
        if self.cam != -1:
            ret, frame = self.vdo.read()
            assert ret, "Error: Camera error"
            self.im_width = frame.shape[0]
            self.im_height = frame.shape[1]
            self.count_frame = int(-1)
        else:
            assert os.path.isfile(self.video_path), "Path error"
            self.vdo.open(self.video_path)
            self.im_width = int(self.vdo.get(cv2.CAP_PROP_FRAME_WIDTH))
            self.im_height = int(self.vdo.get(cv2.CAP_PROP_FRAME_HEIGHT))
            self.count_frame = int(self.vdo.get(cv2.CAP_PROP_FRAME_COUNT))
            assert self.vdo.isOpened()

        if self.save_path != '':
            os.makedirs(self.save_path, exist_ok=True)

            # path of saved video and results
            self.save_video_path = os.path.join(self.save_path, "results.avi")

            # create video writer
            fourcc = cv2.VideoWriter_fourcc(*'MJPG')
            self.writer = cv2.VideoWriter(self.save_video_path, fourcc, 24, (self.im_width, self.im_height))

            # logging
            logger.info("Save results to {}".format(self.save_path))

        return self

    def __exit__(self, exc_type, exc_value, exc_traceback):
        if exc_type:
            print(exc_type, exc_value, exc_traceback)

        # 释放视频资源
        if hasattr(self, 'vdo') and self.vdo.isOpened():
            self.vdo.release()
            print("Video resource released.")

        # 释放视频写入器资源
        if hasattr(self, 'writer'):
            self.writer.release()
            print("Video writer resource released.")

    def run(self):
        idx_frame = 0
        all_costTime = 0

        while self.vdo.grab():
            idx_frame += 1

            start_iter_frame_id = int(self.count_frame * self.use_frame[0])
            end_iter_frame_id = int(self.count_frame * self.use_frame[1])
            # 展示用
            self.show_count_frames = end_iter_frame_id

            if idx_frame % self.frame_interval:
                continue

            if idx_frame < start_iter_frame_id:
                continue

            if idx_frame > end_iter_frame_id:
                break

            start = time.time()
            ref, ori_im = self.vdo.retrieve()

            if ref is True:
                # start your code from here

                # -----------end-----------
                if self.display:
                    cv2.imshow("frame", ori_im)
                    if cv2.waitKey(1) & 0xFF == ord('q'):
                        break

                if self.save_path:
                    self.writer.write(ori_im)

                # logging
                end = time.time() - start if time.time() - start != 0 else 1
                all_costTime += end - start
                if self.display:
                    if self.cam != -1:
                        logger.info("frame schedule:<{}/-1> ({:.2f} ms), fps: {:.03f}"
                                .format(idx_frame, end - start, 1 / (end - start)))
                    else:
                        logger.info("frame schedule:<{}/{}> ({:.2f} ms), fps: {:.03f}"
                                .format(idx_frame, self.show_count_frames , end - start, 1 / (end - start)))
                else:
                    self.print_progress_bar(idx_frame, self.show_count_frames, prefix='Progress:', suffix='Complete', length=50)

        logger.info("ALL_COST_TIME:{:.3f}s".format(all_costTime))

    def print_progress_bar(self, iteration, total, prefix='', suffix='', length=50, fill='█'):
        """
        Args:
        iteration (int): 当前迭代次数
        total (int): 总迭代次数
        prefix (str): 进度条前缀文本
        suffix (str): 进度条后缀文本
        length (int): 进度条长度
        fill (str): 用于填充进度条的字符
        """
        percent = ("{0:.1f}").format(100 * (iteration / float(total)))
        filled_length = int(length * iteration // total)
        bar = fill * filled_length + '-' * (length - filled_length)
        sys.stdout.write('\r%s |%s| %s%% %s' % (prefix, bar, percent, suffix))
        sys.stdout.flush()

    def pil_to_cv2(self, pil_image):
        """
        Convert a PIL Image to an OpenCV image (NumPy array).

        Args:
        pil_image (PIL.Image): The image in PIL format.

        Returns:
        numpy.ndarray: The image in OpenCV format.
        """
        # Convert the PIL image to a NumPy array
        pil_image_np = np.array(pil_image)
        # Convert RGB to BGR
        cv2_image = cv2.cvtColor(pil_image_np, cv2.COLOR_RGB2BGR)
        return cv2_image

    def cv2_to_pil(self, cv2_image):
        """
        Convert an OpenCV image (NumPy array) to a PIL Image.

        Args:
        cv2_image (numpy.ndarray): The image in OpenCV format.

        Returns:
        PIL.Image: The image in PIL format.
        """
        # OpenCV uses BGR by default, whereas PIL uses RGB, so we need to convert the image
        cv2_image_rgb = cv2.cvtColor(cv2_image, cv2.COLOR_BGR2RGB)
        # Convert the NumPy array to a PIL image
        pil_image = Image.fromarray(cv2_image_rgb)
        return pil_image
Camer
#using camer
from VideoCapture import VideoTracker

if __name__ == '__main__':
    # select the camer you want to use
    with VideoTracker(cam=0) as vdo_trk:
        vdo_trk.run()
Video
#using video
from VideoCapture import VideoTracker

if __name__ == '__main__':
    # select the video you want to use
    '''
    @video_path<str> -> |视频路径
    @use_frame<list> -> |取值范围[0,1],如果设置为【0,0.5】那么意思就是只使用该视频的前半段。
    @display<bool> -> |是否播放视频。
    '''
    with VideoTracker(video_path='test.mp4',use_frame=[0, 1]) as vdo_trk:
        vdo_trk.run()
# save video
只需要在VideoTracker中设置参数save_path,save_path是要存放保存视频的位置,如:'datasets/out_video/'
from VideoCapture import VideoTracker

if __name__ == '__main__':
    # select the video you want to use
    with VideoTracker(video_path='test.mp4',save_path='database/output/', use_frame=[0, -1]) as vdo_trk:
        vdo_trk.run()
# crop video
use_frame=[0,-1],默认播放所有视频。
裁剪视频的原理非常简单,比如将use_frame=[10,100],且设置save_path,就是只处理视频[10,100]帧,并且保存视频。也就是说最后的输出视频是只有[10,100]帧的视频。
from VideoCapture import VideoTracker

if __name__ == '__main__':
    # select the video you want to use
    with VideoTracker(video_path='test.mp4',save_path='database/output/', use_frame=[10, 100]) as vdo_trk:
        vdo_trk.run()
【OUTPUT】
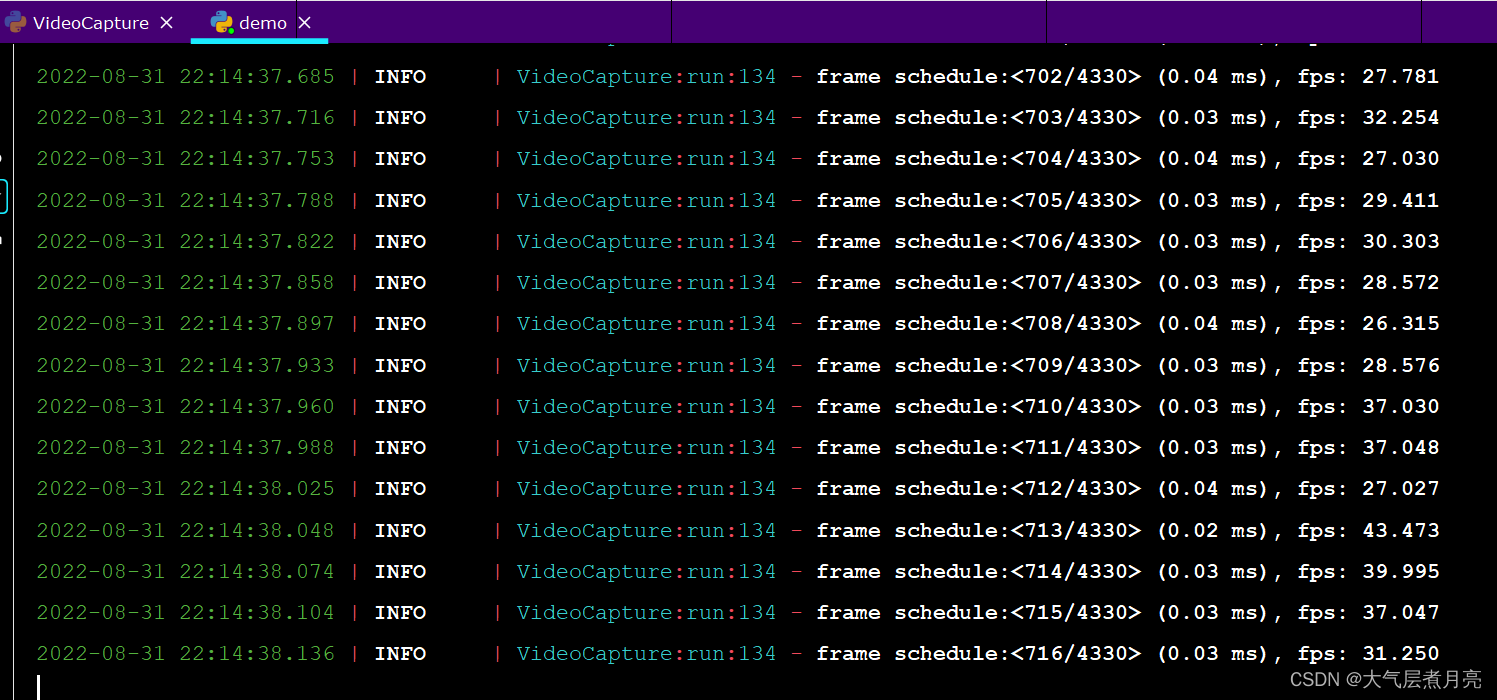
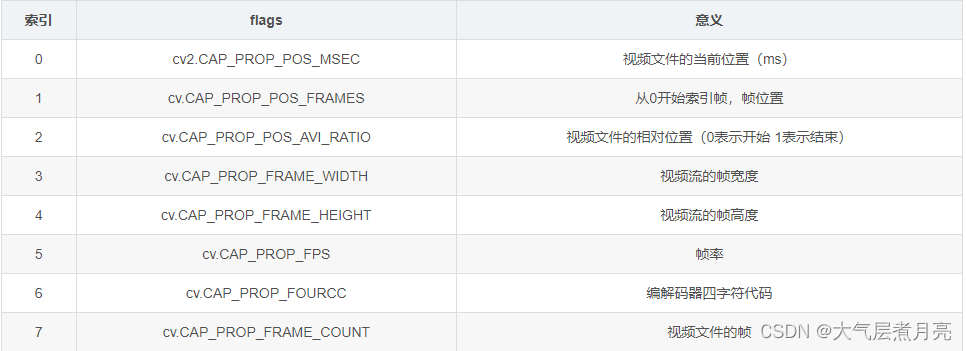
一些关于OpenCv的参数:


 被折叠的 条评论
为什么被折叠?
被折叠的 条评论
为什么被折叠?
 到【灌水乐园】发言


