


 本文详细介绍PXE预启动执行环境的原理及批量部署系统的方法。涵盖了PXE组件介绍、服务部署步骤,以及如何配置kickstart文件实现CentOS 7.6和CentOS 6.6的自动化安装。
PXE批量部署系统
文章目录
一、PXE是什么
前言介绍:
PXE 预启动执行环境(Preboot eXecution Environment,PXE)也被称为预执行环境,提供了一种使用网络接口(Network Interface)启动计算机的机制。这种机制让计算机的启动可以不依赖本地数据存储设备(如硬盘)或本地已安装的操作系统。
PXE最显而易见的优点:
PXE被设计成适合各种计算机体系。2.1版的描述中确定了6种系统规格,包括IA-64和DEC Alpha。可是只有IA-32的完全表述.Intel 在IA-64 的 扩展固件接口中包括了PXE,落实了标准。
二、PXE组件介绍
1、共享对应的系统安装文件
FTP/NFS/HTTP
2、提供DHCP服务,告知tftp地址
3、提供tftp服务
1)提供系统安装源的菜单
2)共享内核vmlinuz、初始化镜像文件initrd.img
3)pxelinux.0
介绍:
pxelinux0文件(相当于一个小型的操作系统,可以认为其为一个操作系统的底层,挂载光盘到主机workstation,挂载点/var/ftp/pub里面包含此文件)----启动内核加载模块vmlinuz(vmlinux的压缩文件,可以认为其为一个小型的内核模块)、initrd.img(可以不用更改内核文件,从而实现任何硬件系统与内核的兼容,可以自行加载各种硬件格式)—启动ks.cfg文件(放置光盘的位置,可以编写shell脚本,实现更多的功能)-----完成启动
4)syslinux
pxelinux.0 tftp服务共享
提供系统引导的支持
三、PXE服务部署提供centos 7.6安装源
1、扩展根分区(根分区大小不够,执行这步操作{可跳过})
查看一下新添加的硬盘
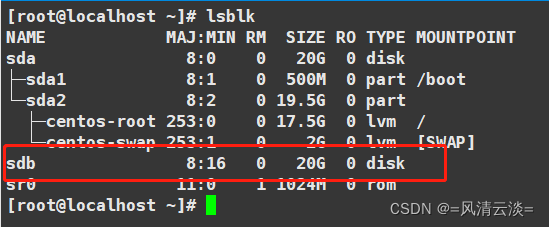
成功创建了物理卷“/dev/sdb”。
[root@localhost ~]# pvcreate /dev/sdb
  Physical volume "/dev/sdb" successfully created.
卷组“centos”成功扩展
[root@localhost ~]# vgextend centos /dev/sdb
  Volume group "centos" successfully extended
逻辑卷/根的大小从17.51GIB(4482个区段)变为36.51GIB(9346个区段)。逻辑卷/根成功调整大小。
[root@localhost ~]# lvextend -L +19G /dev/centos/root
  Size of logical volume centos/root changed from <17.51 GiB (4482 extents) to <36.51 GiB (9346 extents).
  Logical volume centos/root successfully resized.
xfs_growfs 同步文件系统
[root@localhost ~]# xfs_growfs /dev/centos/root
meta-data=/dev/mapper/centos-root isize=512    agcount=4, agsize=1147392 blks
         =                       sectsz=512   attr=2, projid32bit=1
         =                       crc=1        finobt=0 spinodes=0
data     =                       bsize=4096   blocks=4589568, imaxpct=25
         =                       sunit=0      swidth=0 blks
naming   =version 2              bsize=4096   ascii-ci=0 ftype=1
log      =internal               bsize=4096   blocks=2560, version=2
         =                       sectsz=512   sunit=0 blks, lazy-count=1
realtime =none                   extsz=4096   blocks=0, rtextents=0
data blocks changed from 4589568 to 9570304
2、部署ftp服务提供系统安装源
安装所需服务
yum install -y vsftpd dhcp tftp-server xinetd syslinux -y
创建文件夹 挂载光盘 拷贝光盘文件
保证光盘正常挂载
[root@localhost ~]# mkdir /var/ftp/centos7.6
[root@localhost ~]# mount /dev/sr0 /mnt/
mount: /dev/sr0 写保护,将以只读方式挂载
[root@localhost ~]# cp -r /mnt/* /var/ftp/centos7.6/ &   #   &表示:挂在后台执行
[1] 1461         # 进程id


[1]+  完成                  cp -i -r /mnt/* /var/ftp/centos7.6/      #已完成拷贝
启动服务 自启动 查看服务
[root@localhost ~]# systemctl start vsftpd
[root@localhost ~]# systemctl enable vsftpd
Created symlink from /etc/systemd/system/multi-user.target.wants/vsftpd.service to /usr/lib/systemd/system/vsftpd.service.

[root@localhost ~]# netstat -antp | grep ftp
tcp6       0      0 :::21                   :::*                    LISTEN      1488/vsftpd
[root@localhost ~]#
3、部署tftp服务
1)共享内核、初始化镜像文件、菜单文件
[root@localhost ~]# cp /mnt/isolinux/* /var/lib/tftpboot/

[root@localhost ~]# mkdir /var/lib/tftpboot/centos7.6

[root@localhost ~]# mv /var/lib/tftpboot/vmlinuz /var/lib/tftpboot/initrd.img /var/lib/tftpboot/centos7.6/

[root@localhost ~]# ls /var/lib/tftpboot/
boot.cat  boot.msg  centos7.6  grub.conf  isolinux.bin  isolinux.cfg  memtest  splash.png  TRANS.TBL  vesamenu.c32

[root@localhost ~]# ls /var/lib/tftpboot/centos7.6/
initrd.img  vmlinuz
2) 共享pxelinux.0文件
[root@localhost ~]# cp /usr/share/syslinux/pxelinux.0 /var/lib/tftpboot/
3) 编辑菜单文件
[root@localhost ~]# mkdir /var/lib/tftpboot/pxelinux.cfg
[root@localhost ~]# mv /var/lib/tftpboot/isolinux.cfg /var/lib/tftpboot/pxelinux.cfg/default
[root@localhost ~]# vim /var/lib/tftpboot/pxelinux.cfg/default
label centos76
  menu label Install CentOS7.6
  kernel centos7.6/vmlinuz
  append initrd=centos7.6/initrd.img inst.stage2=ftp://192.168.140.143/centos7.6 inst.repo=ftp://192.168.140.143/centos7.6 ks=ftp://192.168.140.143/centos7.6/centos76_ks.cfg
initrd= 系统初始化镜像文件,相对路径
inst.stage2= 指定系统安装文件的存储位置
inst.repo= 指定软件安装包的存储位置
4) 启动tftp服务
[root@localhost ~]# vim /etc/xinetd.d/tftp
# 修改
	disable			= no
[root@localhost ~]# systemctl restart xinetd.service
[root@localhost ~]# systemctl enable  xinetd.service
4、配置DHCP服务
[root@localhost ~]# vim /etc/dhcp/dhcpd.conf

subnet 192.168.140.0 netmask 255.255.255.0 {
    range 192.168.140.66 192.168.140.88;
    option routers 192.168.140.2;
    option domain-name-servers 114.114.114.114,223.5.5.5;
    next-server 192.168.140.143;
    filename "pxelinux.0";
}
启动服务
[root@localhost ~]# systemctl start dhcpd
[root@localhost ~]# systemctl enable dhcpd
Created symlink from /etc/systemd/system/multi-user.target.wants/dhcpd.service to /usr/lib/systemd/system/dhcpd.service.
[root@localhost ~]# netstat -tunlp | grep dhcp
udp        0      0 0.0.0.0:67              0.0.0.0:*                           12170/dhcpd
[root@localhost ~]#
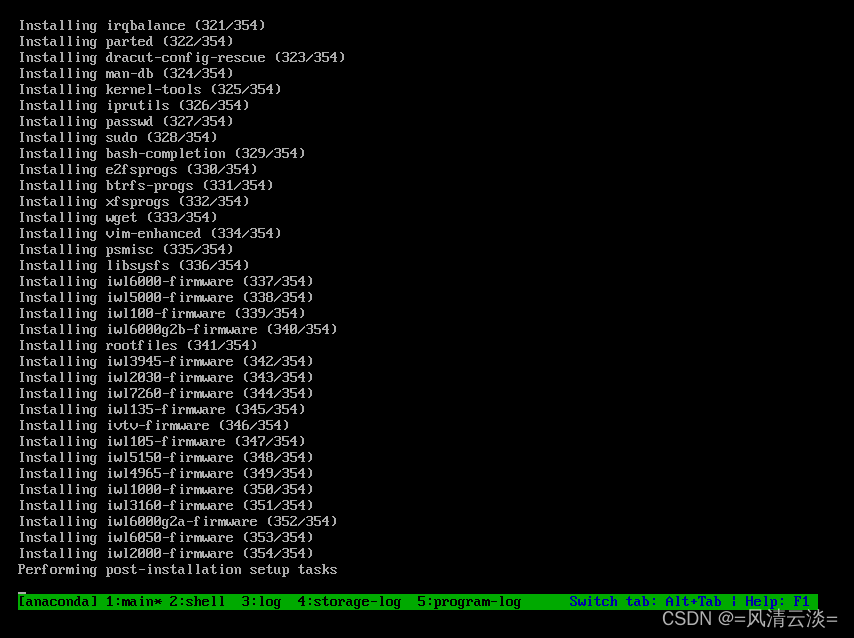
5、测试
centos7要求2G内存容量
初步实现自动化安装!!!!!!!!!!!!!!

四、添加centos 6.6安装源
1、通过FTP共享centos 6.6光盘文件
[root@localhost ~]# mount /dev/sr0 /mnt/
mount: /dev/sr0 写保护,将以只读方式挂载
[root@localhost ~]# cd /mnt/
[root@localhost mnt]# ls
CentOS_BuildTag  GPL       Packages                  RPM-GPG-KEY-CentOS-6           RPM-GPG-KEY-CentOS-Testing-6
EFI              images    RELEASE-NOTES-en-US.html  RPM-GPG-KEY-CentOS-Debug-6     TRANS.TBL
EULA             isolinux  repodata                  RPM-GPG-KEY-CentOS-Security-6
[root@localhost mnt]# mkdir /var/ftp/centos6.6
[root@localhost mnt]# cp -r /mnt/* /var/ftp/centos6.6/
[root@localhost centos6.6]# ls
CentOS_BuildTag  GPL       Packages                  RPM-GPG-KEY-CentOS-6           RPM-GPG-KEY-CentOS-Testing-6
EFI              images    RELEASE-NOTES-en-US.html  RPM-GPG-KEY-CentOS-Debug-6     TRANS.TBL
EULA             isolinux  repodata                  RPM-GPG-KEY-CentOS-Security-6
[root@localhost centos6.6]#
2、通过tftp共享centos 6.6内核、初始化文件
[root@localhost ~]# mkdir /var/lib/tftpboot/centos6.6
[root@localhost ~]# cp /mnt/isolinux/vmlinuz /mnt/isolinux/initrd.img /var/lib/tftpboot/centos6.6/

[root@localhost centos6.6]# ls
initrd.img  vmlinuz

[root@localhost tftpboot]# ls
boot.cat  centos6.6  grub.conf     memtest     pxelinux.cfg  TRANS.TBL
boot.msg  centos7.6  isolinux.bin  pxelinux.0  splash.png    vesamenu.c32
3、添加centos6菜单项
vim /var/lib/tftpboot/pxelinux.cfg/default

label centos66
  menu label Install CentOS6.6
  kernel centos6.6/vmlinuz
  append initrd=centos6.6/initrd.img
4、测试centos 6.6
五、配置kickstart文件实现系统自动安装
1、kickstart文件介绍
kickstart文件,自动应答文件,简称ks文件
文件中记录在安装系统过程中的操作(磁盘分区、root密码等)
2、kickstart文件格式
常规配置
设置语言、时区
设置root密码
磁盘分区
网卡
安装软件
%packages
软件名称
软件名称
软件名称
@软件组名称
%end
系统安装完毕后自动执行的操作
%post
操作命令
操作命令
操作命令
%end
3、kickstart文件的获取
anaconda-ks.cfg
system-config-kickstart图形化工具
最小化系统需要安装x11图形转发工具
yum install -y x11
4、配置ks文件实现centos 7.6自动安装
1) 通过ftp共享ks文件
[root@localhost ~]# vim centos76_ks.cfg

[root@localhost ~]# cp centos76_ks.cfg /var/ftp/centso7.6
2) 编辑菜单文件
[root@localhost ~]# vim /var/lib/tftpboot/pxelinux.cfg/default


label centos76
  menu label Install CentOS7.6
  kernel centos7.6/vmlinuz
  append initrd=centos7.6/initrd.img inst.stage2=ftp://192.168.140.143/centos7.6 inst.repo=ftp://192.168.140.143/centos7.6 ks=ftp://192.168.140.143/centos76_ks.cfg
centos 76 ks文件参考:
#platform=x86, AMD64, or Intel EM64T
#version=DEVEL
# Install OS instead of upgrade
install
# Keyboard layouts
keyboard 'us'
# Root password
rootpw --iscrypted $1$pHhwGQlp$FnSejX6/.MBUrHVJlIUTb/
# System language
lang en_US
# System authorization information
auth  --useshadow  --passalgo=sha512
# Use text mode install
text
firstboot --disable
# SELinux configuration
selinux --disabled


# Firewall configuration
firewall --disabled
# Network information
network  --bootproto=dhcp --device=ens33
# Reboot after installation
reboot
# System timezone
timezone Asia/Shanghai
# Use network installation
url --url="ftp://192.168.140.10/centos7.6"
# System bootloader configuration
bootloader --location=mbr
# Clear the Master Boot Record
zerombr
# Partition clearing information
clearpart --all --initlabel
# Disk partitioning information
part /boot --fstype="xfs" --size=500
part swap --fstype="swap" --size=2048
part / --fstype="xfs" --grow --size=1

%packages
@core
vim-enhanced
net-tools
psmisc
lftp
wget
rsync
ntpdate
bash-completion
%end


%post
sed -ri '/^#Port/c \Port 33333' /etc/ssh/sshd_config
systemctl restart sshd
%end
centos 66 ks文件参考:
#platform=x86, AMD64, or Intel EM64T
#version=DEVEL
# Install OS instead of upgrade
install
# Keyboard layouts
keyboard 'us'
# Root password
rootpw --iscrypted $1$pHhwGQlp$FnSejX6/.MBUrHVJlIUTb/
# System language
lang en_US
# System authorization information
auth  --useshadow  --passalgo=sha512
# Use text mode install
text
firstboot --disable
# SELinux configuration
selinux --disabled


# Firewall configuration
firewall --disabled
# Network information
network  --bootproto=dhcp --device=eth0
# Reboot after installation
reboot
# System timezone
timezone Asia/Shanghai
# Use network installation
url --url="ftp://192.168.140.10/centos6.6"
# System bootloader configuration
bootloader --location=mbr
# Clear the Master Boot Record
zerombr
# Partition clearing information
clearpart --all --initlabel
# Disk partitioning information
part /boot --fstype="ext4" --size=500
part swap --fstype="swap" --size=2048
part / --fstype="ext4" --grow --size=1

%packages
@core
vim-enhanced
net-tools
psmisc
lftp
wget
rsync
ntpdate
%end


%post
sed -ri '/^#Port/c \Port 33333' /etc/ssh/sshd_config
service sshd restart
%end
成功


 被折叠的 条评论
为什么被折叠?
被折叠的 条评论
为什么被折叠?
 到【灌水乐园】发言


