


 本文介绍如何结合element-resize-detector插件和ECharts,实现在父元素尺寸变化时自动刷新图表的功能。通过监听元素大小变化并触发ECharts的resize方法,确保图表始终保持合适的尺寸。示例代码中详细展示了配置过程,包括安装、引入组件以及关键代码段。
需要使用到的插件:element-resize-detector
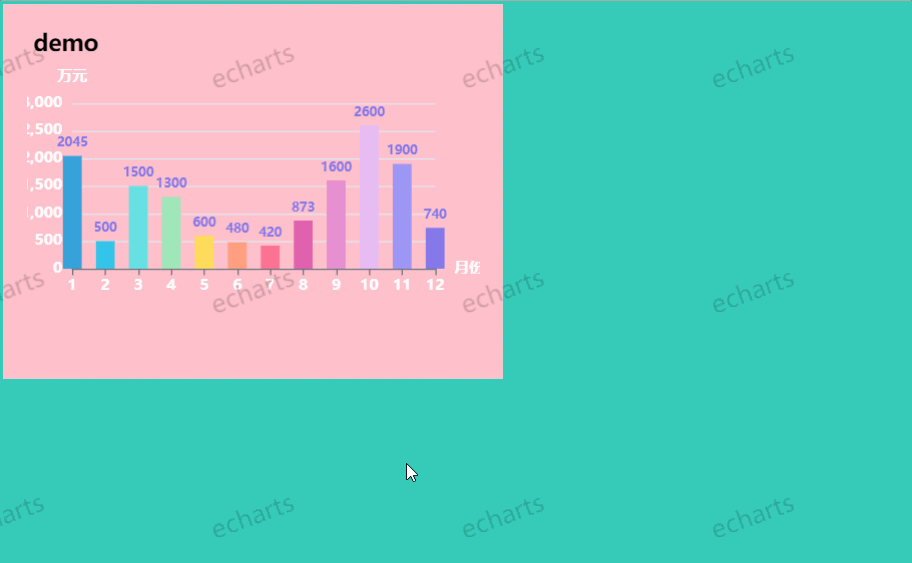
欣赏一下效果
- 安装
npm install element-resize-detector
- 使用
<template>
  <div id="left">
    <vdr
      class="vdring"
      :parent="true"
      :w="400"
      :h="300"
      :min-width="225"
      :min-height="273"
      id="big"
    >
    <div id="EChart" style="width: 100%; height:100%"></div>
    </vdr>
  </div>
</template>
<script>
import vdr from "vue-draggable-resizable-gorkys";//拖拽组件
import "vue-draggable-resizable-gorkys/dist/VueDraggableResizable.css";//拖拽组件默认样式
import ElementResize from "element-resize-detector"; // 尺寸监听组件
export default {
  name: "MydemoDrag",
  components: { vdr },
  mounted() {
    this.getRenderer()
  },
  methods: {
    getRenderer() {
      var echarts = require("echarts");
      //初始化echarts实例
      var mainChart = document.getElementById("EChart");
      var big= document.getElementById("big");//获取此id是为了备用,文章末尾会有说明
      var myChart = echarts.init(mainChart);
      var elementResize = ElementResize({
        strategy: "scroll", //  推荐监听滚动,提升性能
        callOnAdd: true,    // 添加侦听器时是否应调用,默认true
      });
      elementResize.listenTo(mainChart, function (element) {// 当元素尺寸发生改变是会触发此事件,刷新图表
        echarts.init(mainChart).resize();
      });
      let option = {
        title: {
          textStyle: {
            color: "black",
            textBorderColor: "#ffffff",
          },
          text: "demo",
          tooltip: { trigger: "axis" },
          legend: {
            data: ["销售额"],
          },
          textAlign: "left",
        },
        xAxis: {
          name: "月份",
          boundaryGap: false, // 将此属性设置为false
          type: "category",
          data: ["1", "2", "3", "4", "5", "6", "7", "8", "9", "10", "11", "12"],
          axisLabel: {
            interval: "0",
            // margin:'10'
          },
        },
        yAxis: {
          name: "万元",
          boundaryGap: false,
          type: "value",
        },

        textStyle: {
          color: "#FFFFFF",
          fontsize: "12px",
          fontWeight: "bolder",
        },
        resize: {
          width: "auto",
          height: "auto",
        },
        series: [
          {
            barWidth: 15, //柱图宽度
            barGap: "0%", //柱图间距
            itemStyle: {
              normal: {
                label: {
                  show: true, //开启显示
                  position: "top",
                  // formatter: '万元',//在上方显示
                  textStyle: {
                    //数值样式
                    color: "wihte",
                    fontSize: 10,
                  },
                },
                color: function (params) {
                  var colorList = [
                    "#37A2DA",
                    "#32C5E9",
                    "#67E0E3",
                    "#9FE6B8",
                    "#FFDB5C",
                    "#ff9f7f",
                    "#fb7293",
                    "#E062AE",
                    "#E690D1",
                    "#e7bcf3",
                    "#9d96f5",
                    "#8378EA",
                    "#96BFFF",
                  ];
                  return colorList[params.dataIndex];
                },
              },
            },
            data: [
              2045,
              500,
              1500,
              1300,
              600,
              480,
              420,
              873,
              1600,
              2600,
              1900,
              740,
            ],
            type: "bar",
            showBackground: false,
          },
        ],
      };
      myChart.setOption(option);
    },
  },
};
</script>

<style lang="scss" scoped>
#left{
  width: 1000px;
  height: 600px;
  position: fixed;
  top: 100px;
  left: 100px;
}
.vdring {
  padding: 23px;
  background: pink;
}
</style>
上面是这个例子的全部代码,看起来可能不是很清楚,下面分开截出里面的核心部分
var elementResize = ElementResize({
        strategy: "scroll", //  推荐监听滚动,提升性能
        callOnAdd: true,    // 添加侦听器时是否应调用,默认true
      });
      elementResize.listenTo(mainChart, function (element) {// 当元素尺寸发生改变是会触发此事件,刷新图表
        echarts.init(mainChart).resize();
      });
//ElementResize是引入的组件名
//big跟mainChart是元素的id名
如果使用上面的方法echarts图表不能根据父元素的改变而刷新图表的话核心代码部分可以使用下面的代码
var elementResize = ElementResize({
        strategy: "scroll", //  推荐监听滚动,提升性能
        callOnAdd: true,    // 添加侦听器时是否应调用,默认true
      });
      elementResize.listenTo(big, function (element) {// 当元素尺寸发生改变是会触发此事件,刷新图表
        echarts.init(mainChart).resize();
      });
//ElementResize是引入的组件名
//big跟mainChart是元素的id名
其实正常情况下是不需要用到big这个id的,big是要监测的元素的id,mainChart是要刷新图表的id名,两处可以都是用要刷新图表的id名,正常情况下是没有问题的,但是偶尔的时候他监测不到,就可以使用大小有改变的元素的id名作为要监测的元素。
插件的更多用途:
- 调整大小的Web组件UI开发
- 基于元素的响应式设计
- 基于大小的内容加载
- 你可以想象的任何东西!
想了解此demo图表实现请看vue项目使用echarts
想了解拖拽缩放组件请看vue-draggable-resizable——可拖拽缩放的组件


 2万+
2万+

 被折叠的 条评论
为什么被折叠?
被折叠的 条评论
为什么被折叠?
 到【灌水乐园】发言


