GUI简单教程
改变GUI界面默认的style属性
gui.domElement.style.right = '0px';
gui.domElement.style.width = '300px';
.add(控制对象,对象具体属性,其他参数)创建一个UI交互界面
1. 数字; 交互界面是一个鼠标可以拖动的拖动条,可以在一个区间改变属性的值。
gui.add(obj, 'x', 0, 180)
2. 数组; 生成交互界面是下拉菜单
gui.add(obj, 'scale', [-100, 0, 100])
3. 对象; 生成交互界面是下拉菜单(对应值)
gui.add(obj, 'scale', {
左: -100,
中: 0,
右: 100
})
4. 布尔; 生成交互界是一个单选框
gui.add(obj, 'bool')
5. 函数; 点击可触发该函数
gui.add({ fn: () => { gsap.to(cube.position, { x: 5, duration: 2, yoyo: true, repeat: -1 }) } }, 'fn')
6. 颜色选择器
gui.addColor({ color: 0x00ffff }, 'color')
.onChange()变化触发,.onFinishChange()完成触发
.addFolder()分组 / 可套娃
const meshFolder = gui.addFolder('模型位置');
meshFolder.add(cube.position, 'x', 0, 180)
const meshFolder2 = meshFolder.addFolder('模型位置2');
meshFolder2.add({ scale: 0 }, 'scale', [-100, 0, 100])
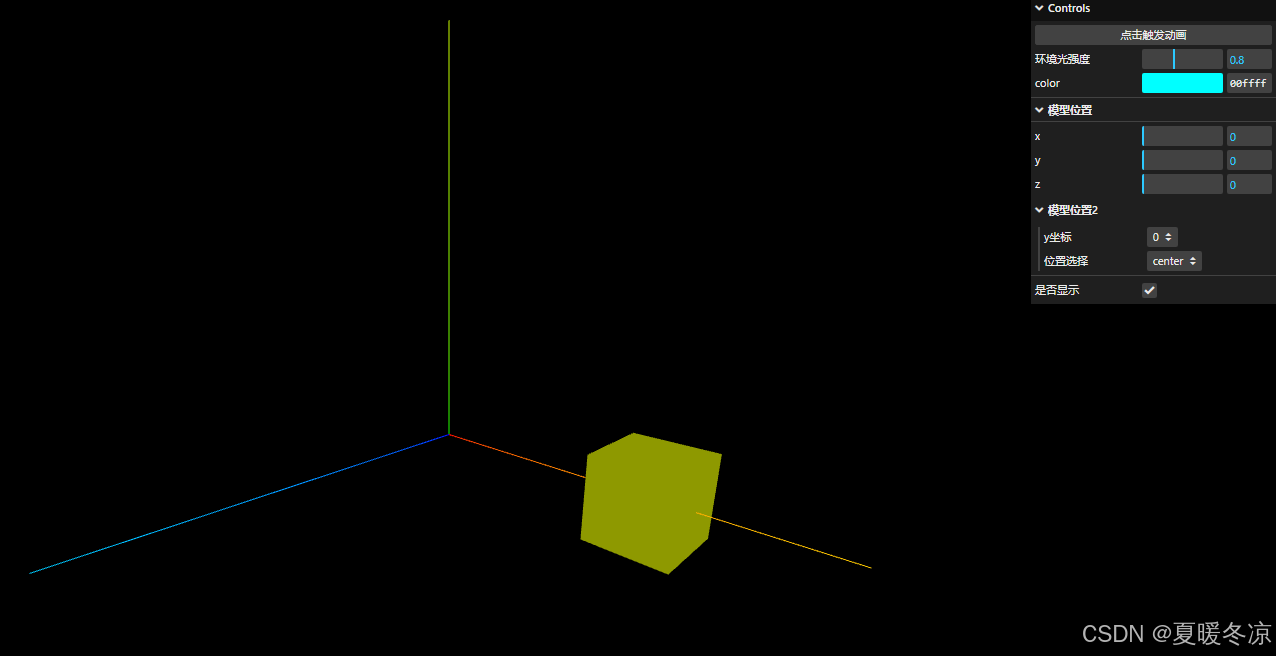
完整代码
const ambient = new THREE.AmbientLight(0xffffff, 0.1);
scene.add(ambient);
const gui = new GUI();
gui.add({ fn: () => { gsap.to(cube.position, { x: 5, duration: 2, yoyo: true, repeat: -1 }) } }, 'fn').name('点击触发动画')
gui.add(ambient, 'intensity', 0, 2.0).step(0.1).name('环境光强度').onFinishChange((value) => {
console.log('完全停下来', value);
});
gui.addColor({ color: 0x00ffff }, 'color').onChange((value) => { mesh.material.color.set(value); });
const meshFolder = gui.addFolder('模型位置');
meshFolder.add(mesh.position, 'x', 0, 180).onChange((value) => { mesh.position.x = value; });
meshFolder.add(mesh.position, 'y', 0, 180).onChange((value) => { mesh.position.y = value; });
meshFolder.add(mesh.position, 'z', 0, 180).onChange((value) => { mesh.position.z = value; });
const meshFolder2 = meshFolder.addFolder('模型位置2');
meshFolder2.add({ scale: 0 }, 'scale', [-100, 0, 100]).name('y坐标').onChange((value) => { mesh.position.y = value; });
meshFolder2.add({ scale: 0 }, 'scale', {
left: -100,
center: 0,
right: 100
}).name('位置选择').onChange((value) => {
mesh.position.x = value;
});
gui.add(mesh, 'visible').name('是否显示')


 245
245

 被折叠的 条评论
为什么被折叠?
被折叠的 条评论
为什么被折叠?
 到【灌水乐园】发言


