


 本文介绍了Springboot中Thymeleaf和Freemarker两种模板引擎的使用。Thymeleaf作为HTML页面,提供了便捷的开发体验,而在配置中需要注意开发环境的缓存关闭。Freemarker则是一款模板引擎,用于生成输出文本,如HTML、配置文件等。文章详细阐述了Freemarker的依赖导入、配置、HTML界面和后台代码,并展示了效果。
Thymeleaf模板
关于Thymeleaf的优点:它就是html页面。
1.相关pom依赖配置:
<dependency>
   <groupId>org.springframework.boot</groupId>
   <artifactId>spring-boot-starter-thymeleaf</artifactId>
 </dependency>
Springboot官方文档建议在开发是将缓存关闭,就在application.properties文件中加入以下代码:
spring.thymeleaf.cache=false
注:正式环境还是要将缓存开启的
对应后台代码:
package com.wang.springboot01.Entity;

import lombok.Data;

/**
 * @author wang
 * @site https://blog.youkuaiyun.com/qq_45432593
 * @create 2020-11-27  16:09
 */
@Data
public class User {
    private  Integer uid;
    private  String uname;
    private String pwd;

    public User() {
    }

    public User(Integer uid, String uname, String pwd) {
        this.uid = uid;
        this.uname = uname;
        this.pwd = pwd;
    }
}
package com.wang.springboot01.Controller;
import com.wang.springboot01.Entity.User;
import org.springframework.stereotype.Controller;
import org.springframework.web.bind.annotation.RequestMapping;
import javax.servlet.http.HttpServletRequest;
import java.util.ArrayList;
import java.util.List;
/**
* @author wang
* @site https://blog.youkuaiyun.com/qq_45432593
* @create 2020-11-27 16:10
*/
@Controller
@RequestMapping("/thymeleaf")
public class UserController {
@RequestMapping("/list")
public String hello(HttpServletRequest request){
/**
* 1.获取单个值
* 2.能够在html页面进行遍历展示
* 3.如何在html页面转义html代码块
*/
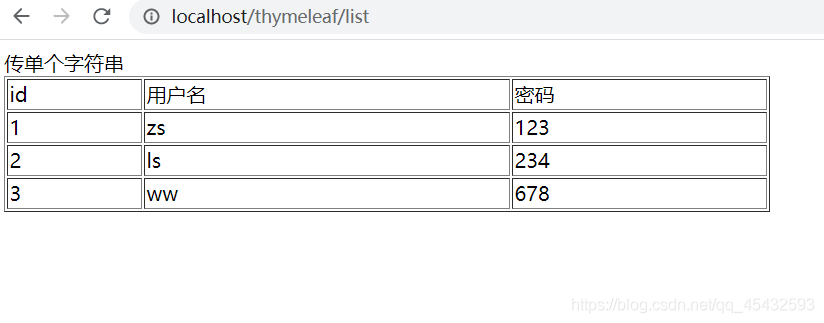
request.setAttribute("msg","传单个字符串");
List<User> userList=new ArrayList<>();
userList.add(new User(1,"zs","123"));
userList.add(new User(2,"ls","234"));
userList.add(new User(3,"ww","678"));
request.setAttribute("userList",userList);
request.setAttribute("htmlStr","<span style='color:red'></span>");
return "list";
}
}
前台Html页面
<!DOCTYPE html>
<html xmlns:th="http://www.thymeleaf.org">
<head>
    <meta charset="UTF-8">
    <title>thymeleaf模板介绍</title>
</head>
<body>
<div th:text="${msg}"></div>
<div th:utext="${htmlStr}"></div>
<table width="60%" border="1">
    <tr>
        <td>id</td>
        <td>用户名</td>
        <td>密码</td>
    </tr>
    <tr th:each="u : ${userList}">
        <td th:text="${u.uid}"></td>
        <td th:text="${u.uname}"></td>
        <td th:text="${u.pwd}"></td>

    </tr>

</table>

</body>
</html>
效果图展示:
Freemarker模板
FreeMarker 是一款 模板引擎: 即一种基于模板和要改变的数据, 并用来生成输出文本(HTML网页,电子邮件,配置文件,源代码等)的通用工具。 它不是面向最终用户的,而是一个Java类库,是一款程序员可以嵌入他们所开发产品的组件。
1.导入pom依赖
<dependency>
    <groupId>org.springframework.boot</groupId>
	<artifactId>spring-boot-starter-freemarker</artifactId>
</dependency>
2.application.yml文件的默认配置
spring:
thymeleaf:
cache: false
freemarker:
# 设置模板后缀名
suffix: .ftl
# 设置文档类型
content-type: text/html
# 设置页面编码格式
charset: UTF-8
# 设置页面缓存
cache: false
# 设置ftl文件路径,默认是/templates,为演示效果添加role
template-loader-path: classpath:/templates/role
 mvc:
static-path-pattern: /static/**
3.前台html界面
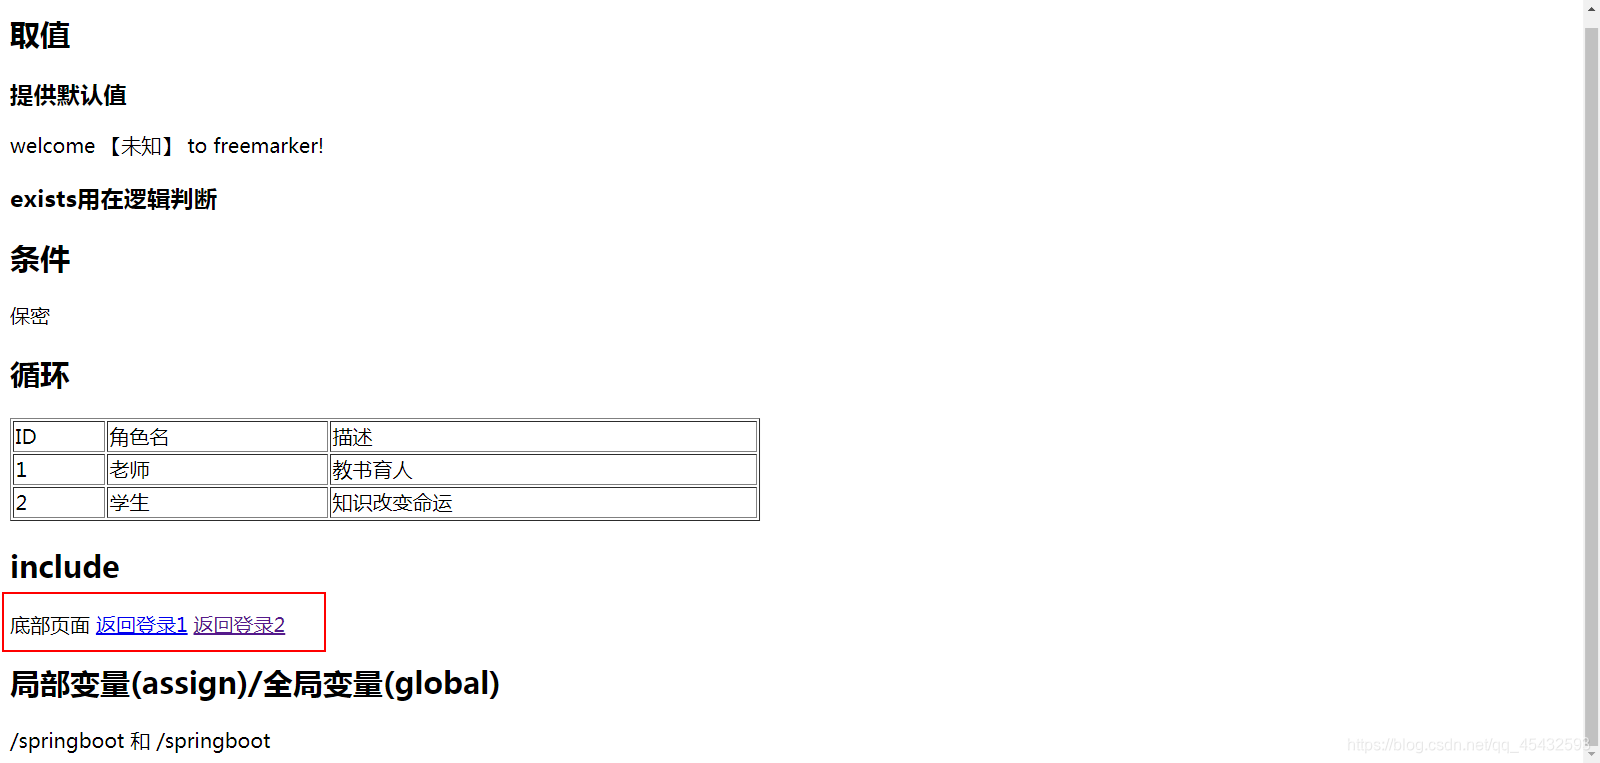
<h2>取值</h2>
<h3>提供默认值</h3>
welcome 【${name!'未知'}】 to freemarker!

<h3>exists用在逻辑判断</h3>
<#if name?exists>
    ${name}
</#if>

<h2>条件</h2>
<#if sex=='girl'>
		女
<#elseif sex=='boy'>
		男
<#else>
</#if>
<h2>循环</h2>
<table border="1px" width="600px">
    <thead>
    <tr>
        <td>ID</td>
        <td>角色名</td>
        <td>描述</td>
    </tr>
    </thead>
    <tbody>
    <#list roles as role>
    <tr>
        <td>${role.rid}</td>
        <td>${role.roleName}</td>
        <td>${role.desc}</td>
    </tr>
    </#list>
    </tbody>
</table>
<h2>include</h2>
<#include 'foot.ftl'>

<h2>局部变量(assign)/全局变量(global)</h2>
 <#assign ctx1>
     ${springMacroRequestContext.contextPath}
 </#assign>
<#global ctx2>
    ${springMacroRequestContext.contextPath}
</#global>

${ctx1}和${ctx2}
底部页面
<a href="login.ftl">返回登录1</a>
<a href="${ctx}/toLogin">返回登录2</a>
common
<#assign ctx>
    ${springMacroRequestContext.contextPath}
</#assign>
<base href="${ctx}/">
login界面
欢迎来到登录界面
4,后台相关代码(controler)
@RequestMapping("/role/list")
    public ModelAndView roleList(){
        ModelAndView mav = new ModelAndView();
        mav.setViewName("/list");
mav.addObject("name",null);
        mav.addObject("sex","gay");
        List list = new ArrayList();
        list.add(new Role(1,"老师","教书育人"));
        list.add(new Role(2,"学生","知识改变命运"));
        mav.addObject("roles",list);

        return mav;
    }

    @RequestMapping("toLogin")
    public String toLogin(){
        return "login";
    }
5.效果图展示
注:freemarker模板也可以像jsp那样设置根路径


 被折叠的 条评论
为什么被折叠?
被折叠的 条评论
为什么被折叠?
 到【灌水乐园】发言


