


一、Flume的安装
- 准备两台机器:
wyg01.para.com(192.168.244.3)
wyg02.para.com(192.168.244.4)
2、通过安装包解压安装
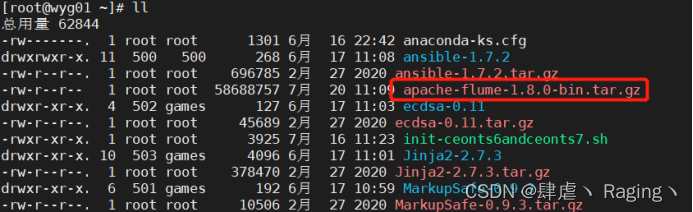
[root@wyg01 app]# tar -zxvf apache-flume-1.8.0-bin.tar.gz -C /app/

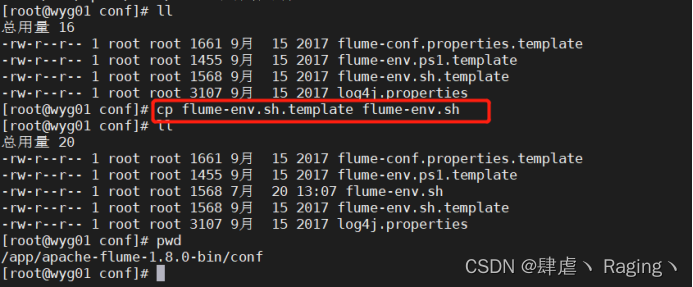
3、修改文件名:cp flume-env.sh.template flume-env.sh
4、更改配置:vi flume-env.sh
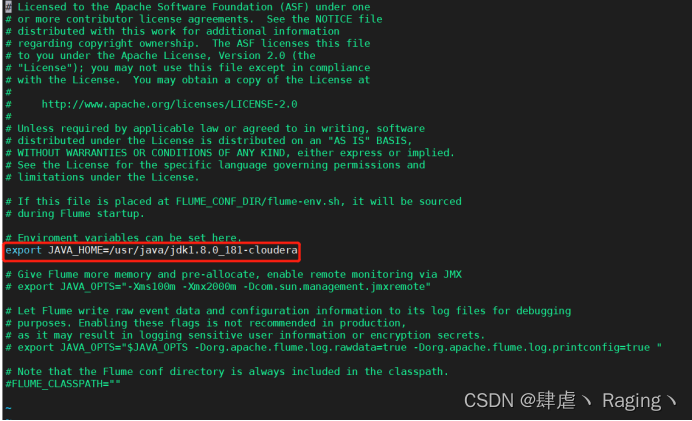
export JAVA_HOME=/usr/java/jdk1.8.0_181-cloudera
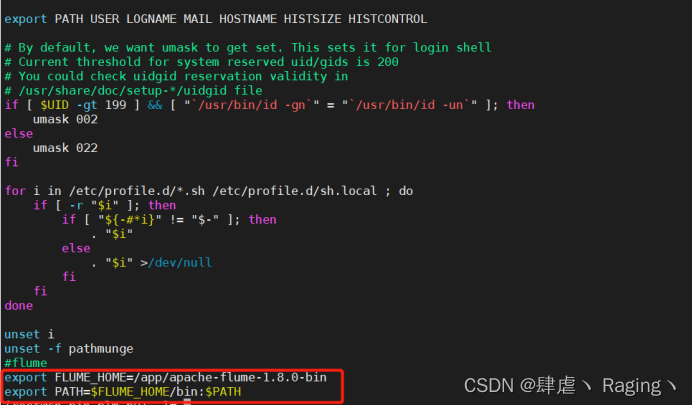
- 修改环境变量
vim /etc/profile
添加如下配置:
#flume
export FLUME_HOME=/app/apache-flume-1.8.0-bin
export PATH=$FLUME_HOME/bin:$PATH

- 生效环境变量
source /etc/profile
- 验证
flume-ng version

- Flume的使用
案例1:监控端口数据
- 创建一个目录: mkdir -p /app/apache-flume-1.8.0-bin/options
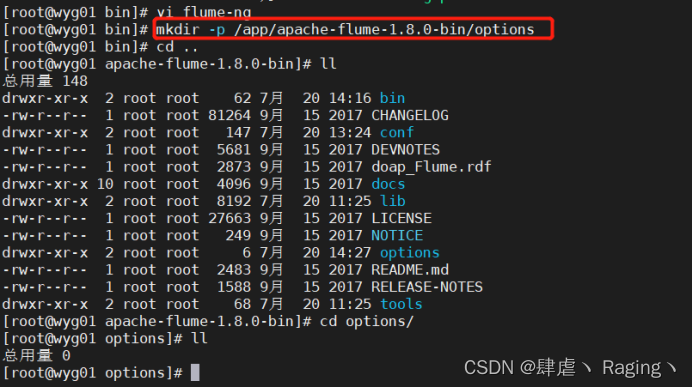
- 创建配置文件
vim example.conf
添加如下内容:
#me the components on this agent
a1.sources = r1
a1.sinks = k1
a1.channels = c1
# Describe/configure the source
a1.sources.r1.type = netcat
a1.sources.r1.bind = localhost
a1.sources.r1.port = 44444
# Describe the sink
a1.sinks.k1.type = logger
# Use a channel which buffers events in memory
a1.channels.c1.type = memory
#默认该通道中最大可以存储的event数量
a1.channels.c1.capacity = 1000
#每次最大可以从source中拿到或者送到sink中的event数量
a1.channels.c1.transactionCapacity = 100
# Bind the source and sink to the channel
a1.sources.r1.channels = c1
a1.sinks.k1.channel = c1
- 启动flume
flume-ng agent -n a1 -c options/ -f example.conf -Dflume.root.logger=INFO,console
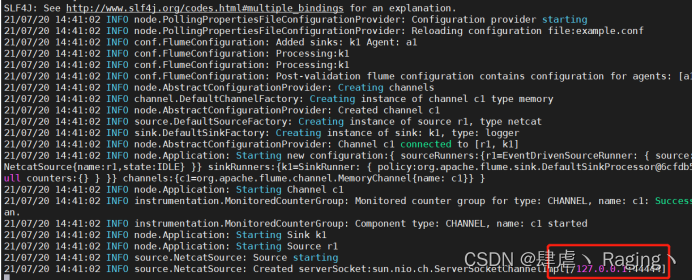
表示已经开始监控44444端口了
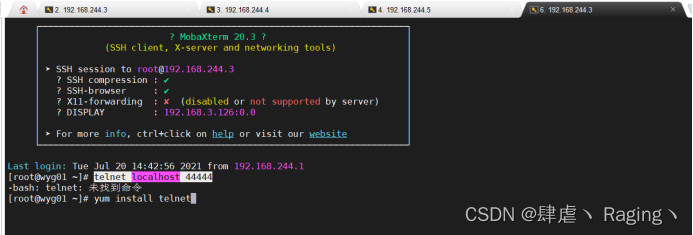
- 另外打开一个页面
yum install telnet
telnet localhost 44444
telnet下载完成后可以往端口写入数据
- 验证
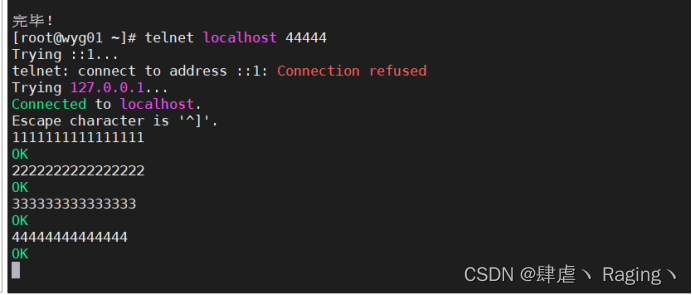
在另外一个窗口:实时收集日志信息
应用场景:机器未安装kafka、hdfs等其余任何收集组件,该机器就是要收集,这种时候就可通过flume

案例2:两个Flume做集群
- 第二台机器安装flume
scp -r /app/apache-flume-1.8.0-bin wyg02.para.com:/app/
- 拷贝配置文件
scp /etc/profile wyg02.para.com:/etc/
[root@wyg02 app]# source /etc/profile
[root@wyg02 app]# flume-ng version

- wyg01.para.com主机的配置文件
vim two_flume.conf
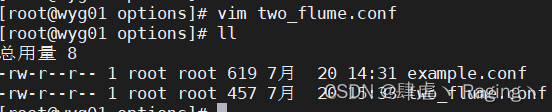
新建监控文件:
touch /app/flume.txt

添加如下内容:
# Name the components on this agent
a1.sources = r1
a1.sinks = k1
a1.channels = c1
#监控的是flume.txt这个文件
a1.sources.r1.type = exec
a1.sources.r1.command=tail -F /app/flume.txt
#跨集群的连接点
a1.sinks.k1.type = avro
a1.sinks.k1.hostname = wyg02.para.com
a1.sinks.k1.port = 45454
a1.channels.c1.type = memory
a1.channels.c1.capacity = 1000
a1.channels.c1.transactionCapacity = 100
a1.sources.r1.channels = c1
a1.sinks.k1.channel = c1
注:Flume的特性----复杂流动
Flume允许用户构建多跳流程,其中事件在到达最终目的地之前会通过多个代理传播。它还允许扇入和扇出流,上下文路由和备份路由(故障转移)
为了使数据跨多个代理或跃点流动,前一个代理的接收器和当前跃点的源必须为avro类型,接收器指向源的主机名(或IP地址)和端口
- wyg02.para.com主机的配置文件
cd /app/apache-flume-1.8.0-bin/options/

vim two_flume.conf
添加如下内容:
a2.sources = r1
a2.sinks = k1
a2.channels = c1
a2.sources.r1.type = avro
a2.sources.r1.bind = wyg02.para.com
a2.sources.r1.port = 45454
a2.sinks.k1.type = logger
a2.channels.c1.type = memory
a2.channels.c1.capacity = 1000
a2.channels.c1.transactionCapacity = 100
a2.sources.r1.channels = c1
a2.sinks.k1.channel = c1
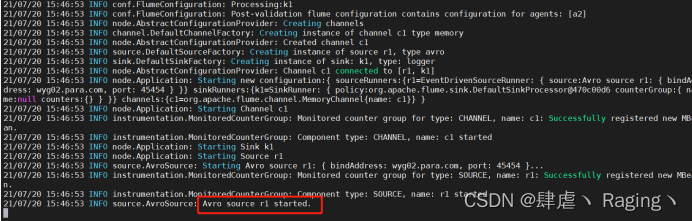
- 先启动wyg02.para.com主机的flume
flume-ng agent -n a2 -c options/ -f two_flume.conf -Dflume.root.logger=INFO,console
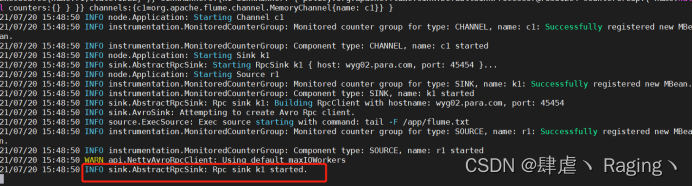
- 启动wyg01.para.com主机的flume
flume-ng agent -n a1 -c options/ -f two_flume.conf
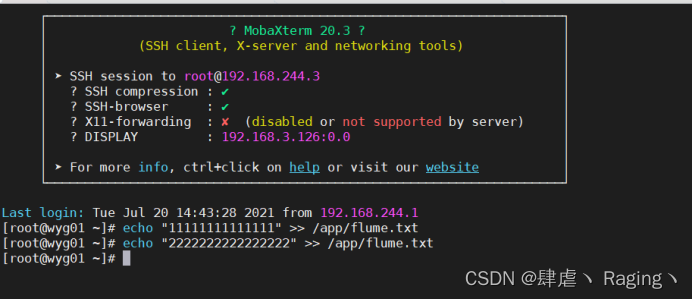
- 打开wyg01.para.com主机的第二个窗口
[root@wyg01 ~]# echo "11111111111111" >> /app/flume.txt
[root@wyg01 ~]# echo "2222222222222222" >> /app/flume.txt
- 在wyg02.para.com主机上查看
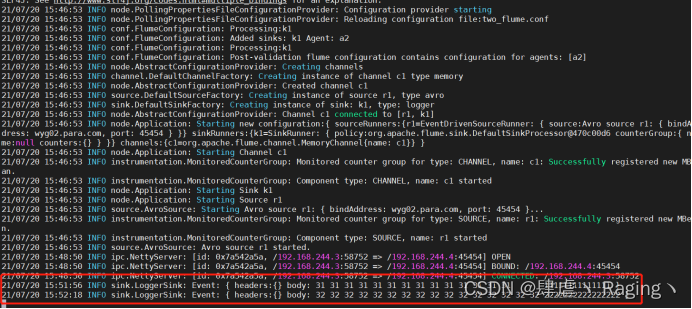
验证将wyg01的数据日志传输到wyg02上去
案例3:监控目录将其输出
- wyg01.para.com主机上编辑配置文件
cd /app/apache-flume-1.8.0-bin/options/
vi spooling.conf
# Name the components on this agent
a1.sources = r1
a1.sinks = k1
a1.channels = c1
a1.sources.r1.type = spooldir
a1.sources.r1.spoolDir = /home/logs
a1.sources.r1.fileHeader = true
a1.sinks.k1.type = logger
a1.channels.c1.type = memory
a1.channels.c1.capacity = 1000
a1.channels.c1.transactionCapacity = 100
a1.sources.r1.channels = c1
a1.sinks.k1.channel = c1
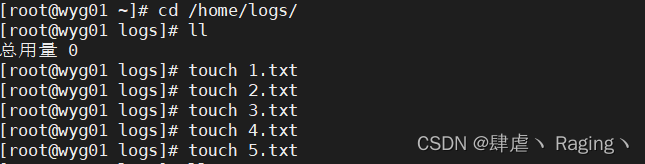
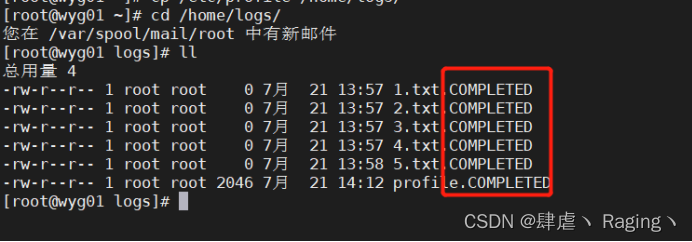
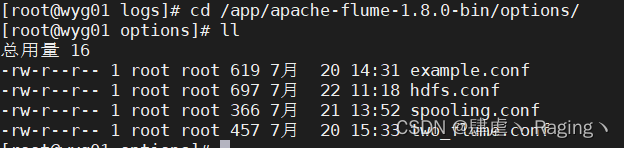
- 查看配置路径下的文件
cd /home/logs/
3、启动flume
flume-ng agent -n a1 -c /app/apache-flume-1.8.0-bin/options/ -f spooling.conf -Dflume.root.logger=INFO,console

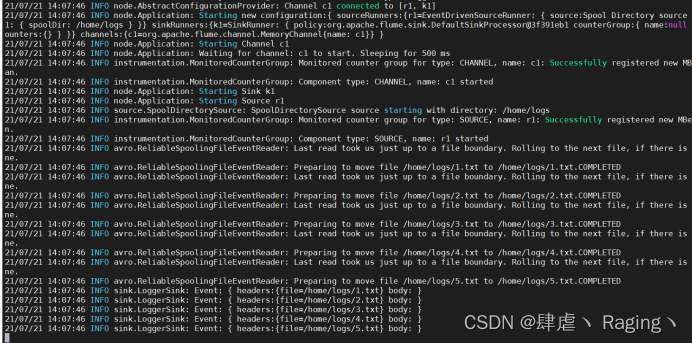
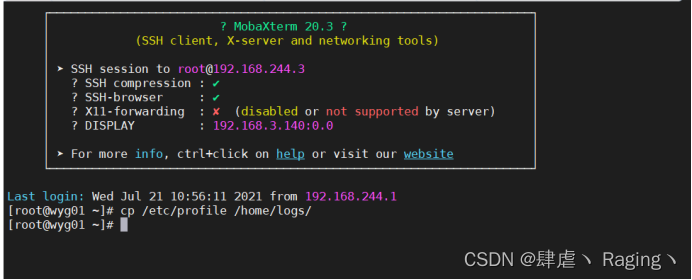
- flume运行中复制文件到/home/logs/目录下查看
打开另一个wyg01.para.com主机的窗口执行命令:
cp /etc/profile /home/logs/
这时再查看原窗口的操作台:
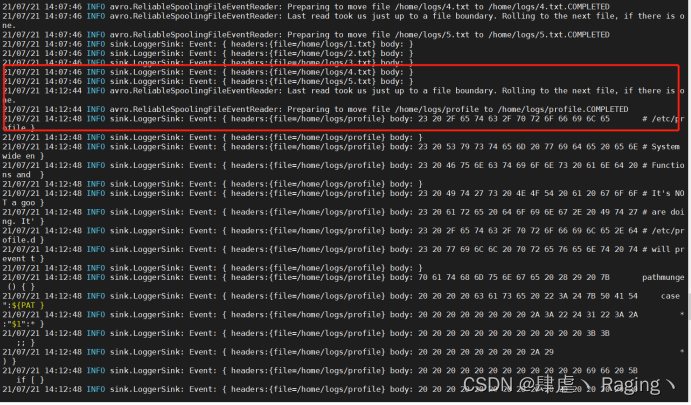
新窗口查看:Flume读取完文件后都将其重命名
- 再次执行相同的复制命令则会报错,因为该文件已经存在与/home/logs/目录下
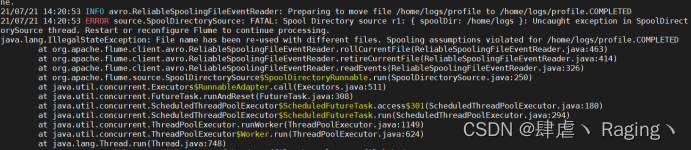
这时报错后Flume的服务已经停止
要想继续执行必须要重启Flume
案例4:上传hdfs sink
我所在的集群环境是三台机器搭建的CDH6.2.1集群,若未搭建集群可安装hadoop集群和zookeeper,主节点启动hdfs:start-dfs.sh 所有节点启动zookeeper:zkServer.shstart即可测试
在案例3的基础上进行测试
- 配置文件
cd /app/apache-flume-1.8.0-bin/options/
vi hdfs.conf
a1.sources = r1
a1.sinks = k1
a1.channels = c1
a1.sources.r1.type = spooldir
a1.sources.r1.spoolDir = /home/logs
a1.sources.r1.fileHeader = true
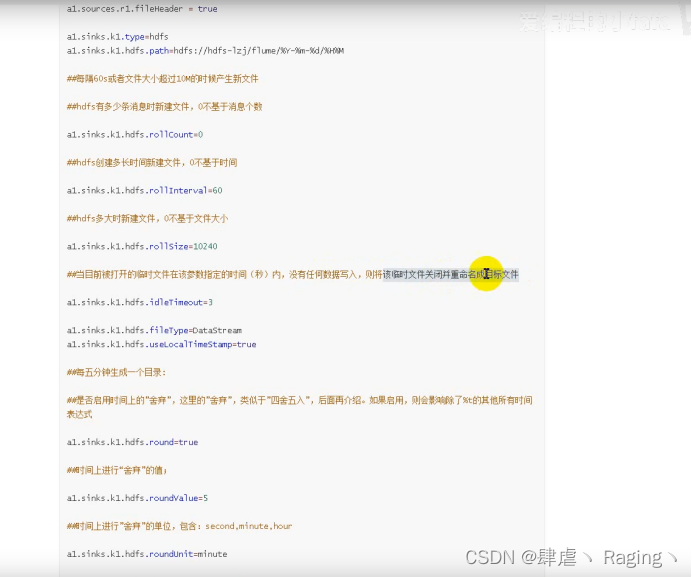
a1.sinks.k1.type = hdfs
a1.sinks.k1.hdfs.path = hdfs://wyg01.para.com:8020/tmp/%Y-%m-%d/%H%M
a1.sinks.k1.hdfs.rollCount=0
a1.sinks.k1.hdfs.rollInterval=60
a1.sinks.k1.hdfs.rollSize=10240
a1.sinks.k1.hdfs.idleTimeout=3
a1.sinks.k1.hdfs.flieType=DataStream
a1.sinks.k1.hdfs.useLocalTimeStamp=true
a1.sinks.k1.hdfs.round=true
a1.sinks.k1.hdfs.roundValue=5
a1.sinks.k1.hdfs.roundUnit=minute
a1.channels.c1.type = memory
a1.channels.c1.capacity = 1000
a1.channels.c1.transactionCapacity = 100
a1.sources.r1.channels = c1
a1.sinks.k1.channel = c1
后台运行:
nohup flume-ng agent -n a1 -c /app/apache-flume-1.8.0-bin/options/ -f hdfs.conf &
- 启动flume
flume-ng agent -n a1 -c /app/apache-flume-1.8.0-bin/options/ -f hdfs.conf
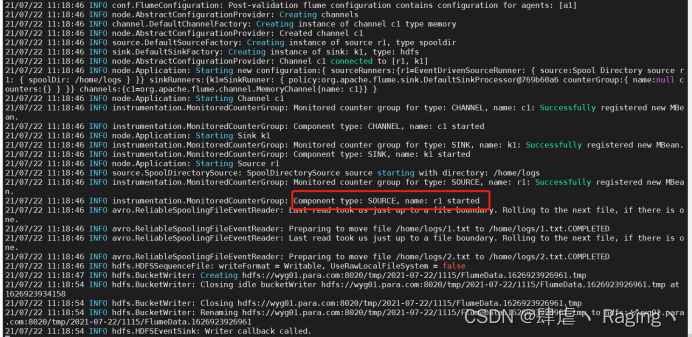
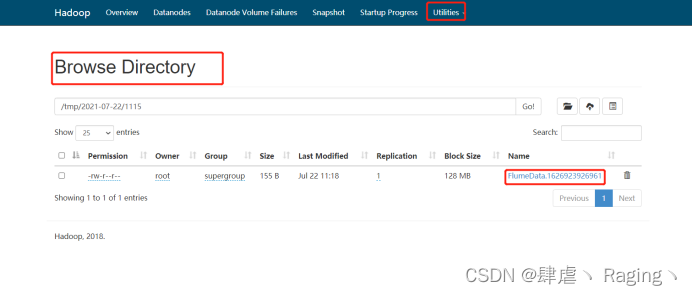
- 验证日志是否上传到hdfs上
案例5:上传图片以及其他文件到hdfs上
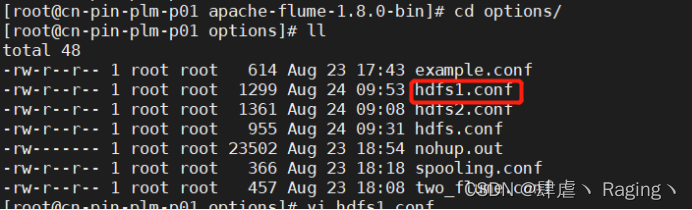
vi hdfs1.conf
内容如下:
# ==== start ====
agent.sources = spooldirsource
agent.channels = memoryChannel
agent.sinks = hdfssink
# For each one of the sources, the type is defined
agent.sources.spooldirsource.type = spooldir
# The channel can be defined as follows.
agent.sources.spooldirsource.channels = memoryChannel
agent.sources.spooldirsource.spoolDir =/home/logs/
agent.sources.spooldirsource.deserializer = org.apache.flume.sink.solr.morphline.BlobDeserializer$Builder
agent.sources.spooldirsource.deserializer.maxBlobLength = 100000000
# Each sink's type must be defined
agent.sinks.hdfssink.type = hdfs
#Specify the channel the sink should use
agent.sinks.hdfssink.channel = memoryChannel
# ns1 是高可用地址
# /%Y/%m/%d 根据日期动态写目录
agent.sinks.hdfssink.hdfs.path = hdfs://10.169.112.150:8020/tmp/%Y/%m/%d
agent.sinks.hdfssink.hdfs.useLocalTimeStamp = true
#agent.sinks.hdfssink.hdfs.fileSuffix = .jpg
#agent.sinks.hdfssink.hdfs.fileSuffix = .docx
agent.sinks.hdfssink.hdfs.fileType = DataStream
# Each channel's type is defined.
agent.channels.memoryChannel.type = memory
# Other config values specific to each type of channel(sink or source)
# can be defined as well
# In this case, it specifies the capacity of the memory channel
agent.channels.memoryChannel.capacity = 100000
运行:flume-ng agent -n agent -c /app/apache-flume-1.8.0-bin/options/ -f hdfs1.conf
再向/home/logs路径下添加照片再hdfs dfs -ls /tmp下查看是否上传,同时hue页面的文件里也可以查看图片
案例6:Flume负载均衡
通过三台机器来进行模拟flume的负载均衡 三台机器规划如下:
wyg01.para.com(192.168.244.3):采集数据,发送到wyg02和wyg03机器上去
wyg02.para.com(192.168.244.4):接收wyg01的部分数据
wyg03.para.com(192.168.244.5):接收wyg01的部分数据
注:三台机器操作相同已安装Flume
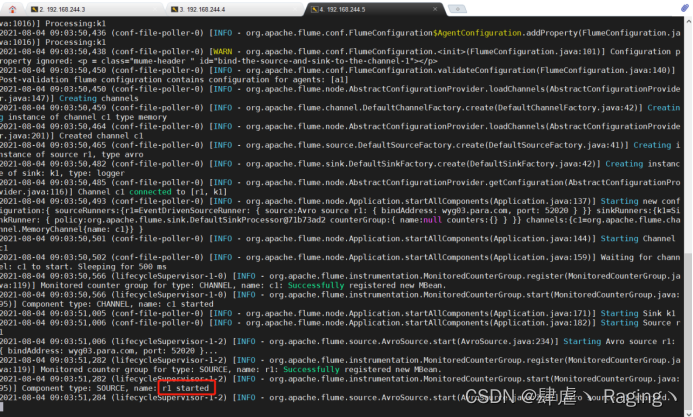
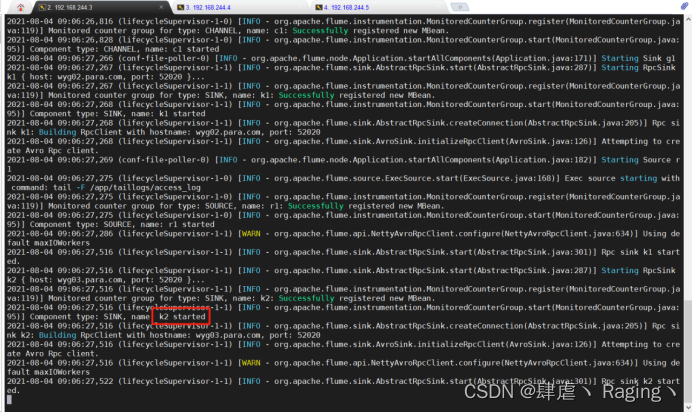
- 开发wyg01服务器的flume配置
[root@wyg01 conf]# cd /app/apache-flume-1.8.0-bin/options
[root@wyg01 conf]# vi load_banlancer_client.conf
# agent name
<p class="mume-header " id="agent-name"></p>
a1.channels = c1
a1.sources = r1
a1.sinks = k1 k2
# set gruop
<p class="mume-header " id="set-gruop"></p>
a1.sinkgroups = g1
# set channel
<p class="mume-header " id="set-channel"></p>
a1.channels.c1.type = memory
a1.channels.c1.capacity = 1000
a1.channels.c1.transactionCapacity = 100
a1.sources.r1.channels = c1
a1.sources.r1.type = exec
a1.sources.r1.command = tail -F /app/taillogs/access_log
# set sink1
<p class="mume-header " id="set-sink1"></p>
a1.sinks.k1.channel = c1
a1.sinks.k1.type = avro
a1.sinks.k1.hostname = wyg02.para.com
a1.sinks.k1.port = 52020
# set sink2
<p class="mume-header " id="set-sink2"></p>
a1.sinks.k2.channel = c1
a1.sinks.k2.type = avro
a1.sinks.k2.hostname = wyg03.para.com
a1.sinks.k2.port = 52020
# set sink group
<p class="mume-header " id="set-sink-group"></p>
a1.sinkgroups.g1.sinks = k1 k2
# set failover
<p class="mume-header " id="set-failover"></p>
a1.sinkgroups.g1.processor.type = load_balance
a1.sinkgroups.g1.processor.backoff = true
a1.sinkgroups.g1.processor.selector = round_robin
a1.sinkgroups.g1.processor.selector.maxTimeOut=10000
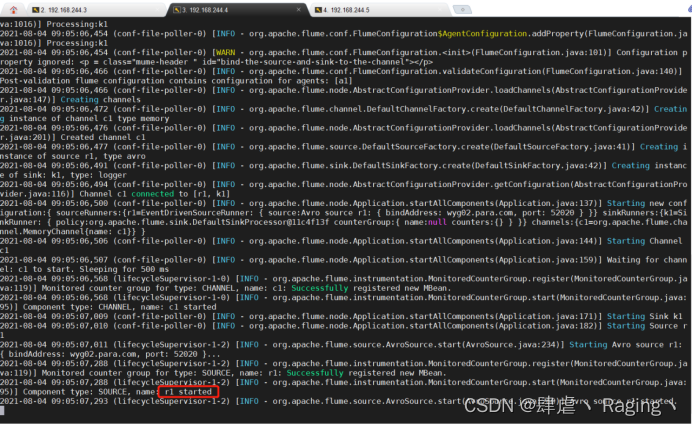
- 开发wyg02服务器的flume配置
[root@wyg02 bin]# cd /app/apache-flume-1.8.0-bin/options
[root@wyg02 conf]# vi load_banlancer_server.conf
# Name the components on this agent
<p class="mume-header " id="name-the-components-on-this-agent"></p>
a1.sources = r1
a1.sinks = k1
a1.channels = c1
# Describe/configure the source
<p class="mume-header " id="describeconfigure-the-source"></p>
a1.sources.r1.type = avro
a1.sources.r1.channels = c1
a1.sources.r1.bind = wyg02.para.com
a1.sources.r1.port = 52020
# Describe the sink
<p class="mume-header " id="describe-the-sink"></p>
a1.sinks.k1.type = logger
# Use a channel which buffers events in memory
<p class="mume-header " id="use-a-channel-which-buffers-events-in-memory"></p>
a1.channels.c1.type = memory
a1.channels.c1.capacity = 1000
a1.channels.c1.transactionCapacity = 100
# Bind the source and sink to the channel
<p class="mume-header " id="bind-the-source-and-sink-to-the-channel"></p>
a1.sources.r1.channels = c1
a1.sinks.k1.channel = c1
- 开发wyg03服务器的flume配置
[root@wyg03 bin]# cd /app/apache-flume-1.8.0-bin/options
[root@wyg03 conf]# vi load_banlancer_server.conf
# Name the components on this agent
<p class="mume-header " id="name-the-components-on-this-agent-1"></p>
a1.sources = r1
a1.sinks = k1
a1.channels = c1
# Describe/configure the source
<p class="mume-header " id="describeconfigure-the-source-1"></p>
a1.sources.r1.type = avro
a1.sources.r1.channels = c1
a1.sources.r1.bind = wyg03.para.com
a1.sources.r1.port = 52020
# Describe the sink
<p class="mume-header " id="describe-the-sink-1"></p>
a1.sinks.k1.type = logger
# Use a channel which buffers events in memory
<p class="mume-header " id="use-a-channel-which-buffers-events-in-memory-1"></p>
a1.channels.c1.type = memory
a1.channels.c1.capacity = 1000
a1.channels.c1.transactionCapacity = 100
# Bind the source and sink to the channel
<p class="mume-header " id="bind-the-source-and-sink-to-the-channel-1"></p>
a1.sources.r1.channels = c1
a1.sinks.k1.channel = c1
- 分别启动三台主机的Flume
- 启动wyg03.para.com主机的Flume:
[root@wyg03 ~]# cd /app/apache-flume-1.8.0-bin/bin/
[root@wyg03 bin]# ./flume-ng agent -c /app/apache-flume-1.8.0-bin/conf -f /app/apache-flume-1.8.0-bin/options/load_banlancer_server.conf -n a1 -Dflume.root.logger=INFO,console
- 启动wyg02.para.com主机的Flume:
[root@wyg02 ~]# cd /app/apache-flume-1.8.0-bin/bin/
[root@wyg02 bin]# ./flume-ng agent -c /app/apache-flume-1.8.0-bin/conf -f /app/apache-flume-1.8.0-bin/options/load_banlancer_server.conf -n a1 -Dflume.root.logger=INFO,console
- 启动wyg01.para.com主机的Flume:
[root@wyg01 bin]# cd /app/apache-flume-1.8.0-bin/bin/
[root@wyg01 bin]# ./flume-ng agent -c /app/apache-flume-1.8.0-bin/conf -f /app/apache-flume-1.8.0-bin/options/load_banlancer_client.conf -n a1 -Dflume.root.logger=INFO,console
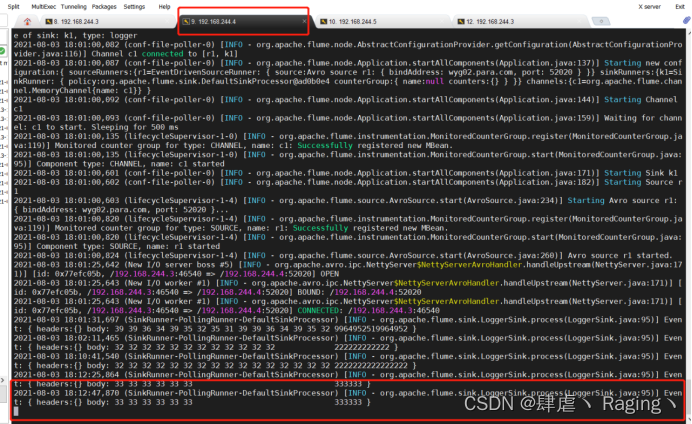
- 验证负载均衡
- 另外打开wyg01.para.com的终端,并往之前在该主机配置文件路径中的日志文件中写入内容并观察wyg02.para.com主机和wyg03.para.com主机的变化

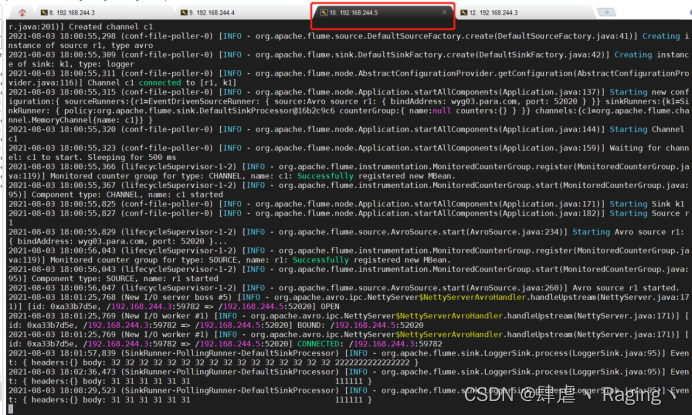
(2)如图,可以看到wyg03.para.com主机有了变化

(3)观察发现控制台上可以看到刚才添加的内容
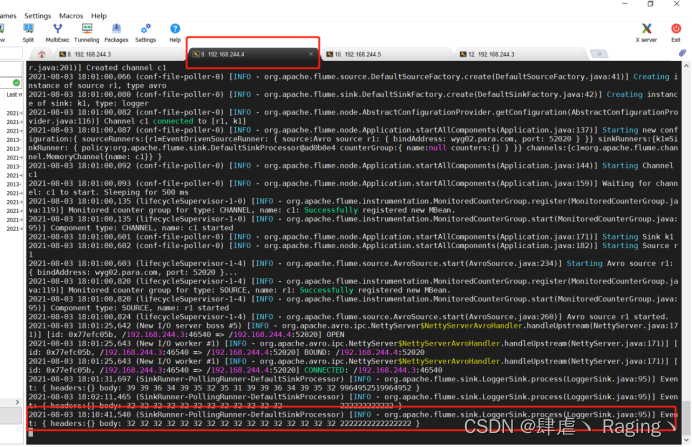
- 再一次向wyg01.para.com的主机中的日志文件添加内容,观察另外两台主机的变化发现此时wyg02.para.com这台主机的控制台上打印了刚才添加到日志文件的内容
![]()

(5)此时,将wyg03.para.com主机上的Flume关闭,再添加内容到日志文件中去
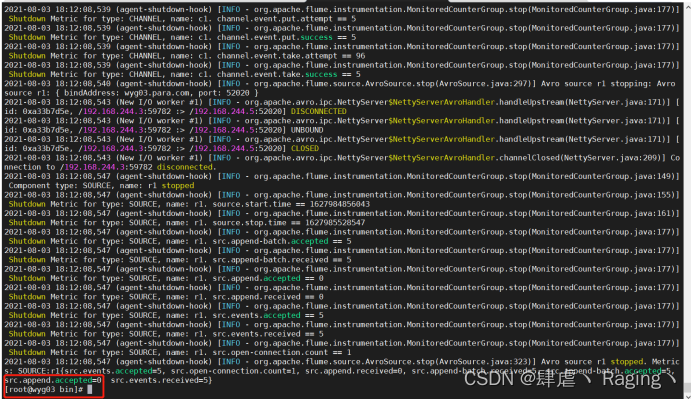

(6)wyg01.para.com主机和wyg02.para.com主机都发生了变化

(7)wyg01.para.com这台主机提示报错,报错内容事无法连接wyg03.para.com这台主机,因为之前把这台主机的Flume给关闭了
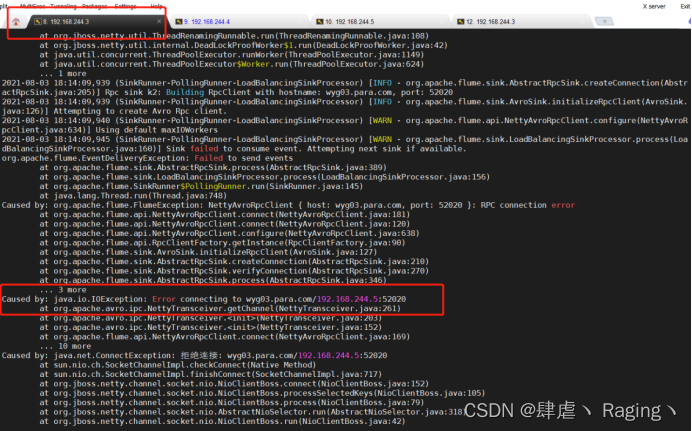
(8)由于接受数据内容的两台主机有一台已经关闭,所以日志的输出只能再wyg02.para.com这台主机的控制台上打印


 被折叠的 条评论
为什么被折叠?
被折叠的 条评论
为什么被折叠?
 到【灌水乐园】发言


