


JSP自定义标签案例
想了解jsp的一些原理,可以参考我的上篇博客,今天我们继续更深一步的了解jsp标签
我们要准备三步 助手类,文件**.tld**,最后调用taglib
首先我们必须知道
UI标签
有以下这几个,他们呢都没有标签体,相当于控制台打印,这些是在页面上打印
out
select
控制标签
有标签体,但是打印与否有属性值控制,要进行判断
if
foreach
据标签
作用是存储数据,它既没有标签体,并没有在页面上展示任何内容
set
记住助手类都要继承BodyTagSupport
set
set标签里有两个属性值 var 和 value(object类型),在实体类中进行封装,调用doStartTag()方法
设置键值 返回skip_body

out
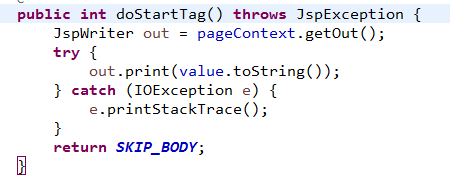
out标签 写一个 value 属性进行封装,同样是object类型,调用doStartTag()方法
输出value
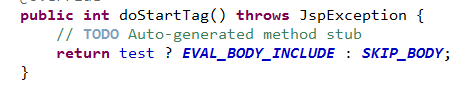
if
if标封装 boolean类型的test 调用doStartTag()方法 运用三元运算符 判断 返回值
在我们创建的标签库中tld 定义标签名,注意 属性名必须和助手类的属性名必须保持一致
 <tag>
    <name>set</name>//标签库里的标签名
    <tag-class>Chen_jsp2.SetTag</tag-class>//标签对应的助手类的全路径名
    <body-content>JSP</body-content>
    <attribute>
        <name>var</name>//属性名(可以有多个)
        <required>true</required>//属性值是否必填
        <rtexprvalue>true</rtexprvalue>//EL是否支持表达式
    </attribute>
    <attribute>
        <name>value</name>
        <required>true</required>
        <rtexprvalue>true</rtexprvalue>
    </attribute>
  </tag>

  <tag>
    <name>out</name>
    <tag-class>Chen_jsp2.OutTag</tag-class>
    <body-content>JSP</body-content>
    <attribute>
        <name>value</name>
        <required>true</required>
        <rtexprvalue>true</rtexprvalue>
    </attribute>
  </tag>


   <tag>
    <name>if</name>
    <tag-class>Chen_jsp2.IfTag</tag-class>
    <body-content>JSP</body-content>
    <attribute>
        <name>test</name>
        <required>true</required>
        <rtexprvalue>true</rtexprvalue>
    </attribute>
  </tag>
接下来我们在**.jsp**中调用 我们自己定义的taglib 来实现我刚才写的标签
<z:set var="name" value="zhangsan"></z:set>
<z:out value="${name }"></z:out>

<z:if test="true">lishi</z:if>
<z:if test="false">wangwu</z:if>//false当然不显示啦

foreach
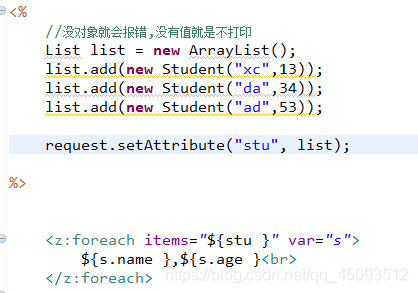
第一步除了和上面一样,定义属性并且封装,还要建一个实体类进行测试我建的是student 里面定义 名字和年龄两个属性进行封装
private String var;
private List items = new ArrayList<>();
public int doStartTag() throws JspException {
		if (items.size()==0) {//如果items的长度等于0的话就跳过
			return SKIP_BODY;
		}
		else {//如果有的话就调用迭代器进行打印
			Iterator<Object> it = items.iterator();//迭代器
			pageContext.setAttribute(var, it.next());
			pageContext.setAttribute("it", it);//不止一个属性就传进行下一轮打印
			return EVAL_BODY_INCLUDE;
		}
	}

	@Override
	public int doAfterBody() throws JspException {
		Iterator<Object> it = (Iterator<Object>) pageContext.getAttribute("it");//用迭代器接收doStartTag()方法的it
		if (it.hasNext()) {//有下一个接着循环打印
			pageContext.setAttribute(var, it.next());
			pageContext.setAttribute("it", it);
			return EVAL_BODY_AGAIN;
		}
		return EVAL_PAGE;
	}
tld标签库内的标签名属性
 <attribute>
        <name>var</name>
        <required>true</required>
        <rtexprvalue>false</rtexprvalue>
    </attribute>
    <attribute>
        <name>items</name>
        <required>true</required>
        <rtexprvalue>true</rtexprvalue>
    </attribute>
进行测试,最后会遍历出结果
select
一样的套路,在这时要导入两个包

值得传递 id,name
数据源 items
展示列与数据存储列与实体类的对应关系 textKey展示列 textVal数据储存
数据回显 selectedVal
可能下拉框有默认值 (头标签) headerTextKey头展示 headerTextVal头数据储存
	private String id;
	private String name;
	private List<Object> items = new ArrayList<Object>();
	private String textKey;
	private String textVal;
	private String selectedVal;
	private String headerTextKey;
	private String headerTextVal;

	@Override
	public int doStartTag() throws JspException {
		JspWriter out = pageContext.getOut();
		try {
			out.print(toHTML());
		} catch (SecurityException e) {
			e.printStackTrace();
		} catch (IOException e) {
			e.printStackTrace();
		} catch (Exception e) {
			e.printStackTrace();
		}
		return super.doStartTag();
	}

	o value;//不管是什么类型都能接收,就不会不显示了
	String html;
	private String toHTML() throws Exception, SecurityException {
		StringBuffer sb = new StringBuffer();
		sb.append("<select id='"+id+"' name='"+name+"'>");
		if (!(headerTextKey ==null ||"".equals(headerTextKey)||
				headerTextVal ==null || "".equals(headerTextVal))) {//非空的情况下
			sb.append("<option selected value='"+headerTextKey+"'>"+headerTextVal+"</option>");
		}
		for (Object obj : items) {
			//运用反射获得textkey的对象
			Field textKeyField = obj.getClass().getDeclaredField(textKey);
			textKeyField.setAccessible(true);//打开访问权限
			value = (Integer) textKeyField.get(obj);//赋值
			html = (String) PropertyUtils.getProperty(obj, textVal);
			if (value.equals(selectedVal)) {
				sb.append("<option selected value='"+value+"'>"+html+"</option>");
			}else {
				sb.append("<option value='"+value+"'>"+html+"</option>");
			}

		}

		sb.append("</select>");
		return sb.toString();
	}
headerTextKey="da"设置头部值为"da"的显示
headerTextVal="–请选择–"默认
<z:select headerTextKey="da" headerTextVal="===请选择===" textVal="name" items="${stu }" selectedVal="2" textKey="age"></z:select>
checkbox
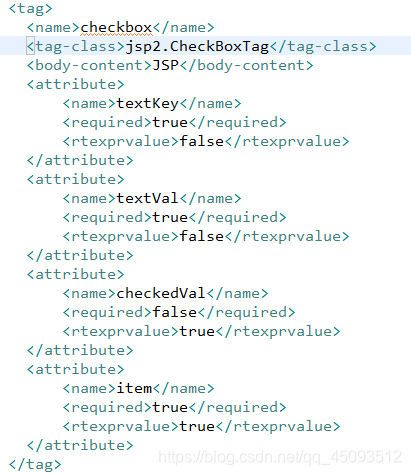
我们要知道复选框checkbox需要几个属性 首先我们知道 展示出来的东西和存进数据库里的东西都不一样 我们就把textKey当做是存进数据库的值 , textVal 是展示出来给我们看的 ,checkedVal做回显数据集合,item作为我们勾选很多数据的时候做数据集合
先把助手类写好
package jsp2;

import java.io.IOException;
import java.lang.reflect.InvocationTargetException;
import java.util.ArrayList;
import java.util.List;

import javax.servlet.jsp.JspException;
import javax.servlet.jsp.JspWriter;
import javax.servlet.jsp.tagext.BodyTagSupport;

import org.apache.commons.beanutils.PropertyUtils;

public class CheckBoxTag extends BodyTagSupport {
	private static final long serialVersionUID = 1L;
	private String textKey;//传入值
	private String textVal;//显示值
	private List<Object> checkedVal=new ArrayList<>();//回显数据集合
	private List<Object> item=new ArrayList<>();//数据集合

	public List<Object> getItem() {
		return item;
	}
	public void setItem(List<Object> item) {
		this.item = item;
	}
	public String getTextKey() {
		return textKey;
	}
	public List<Object> getCheckedVal() {
		return checkedVal;
	}
	public void setCheckedVal(List<Object> checkedVal) {
		this.checkedVal = checkedVal;
	}
	public void setTextKey(String textKey) {
		this.textKey = textKey;
	}
	public String getTextVal() {
		return textVal;
	}
	public void setTextVal(String textVal) {
		this.textVal = textVal;
	}


	public CheckBoxTag() {
	}

	public CheckBoxTag(String textKey, String textVal, List<Object> checkedVal, List<Object> item) {
		this.textKey = textKey;
		this.textVal = textVal;
		this.checkedVal = checkedVal;
		this.item = item;
	}
	@Override
	public int doStartTag() throws JspException {
		JspWriter out = pageContext.getOut();
			try {
				out.print(toHTML());
			} catch (NoSuchFieldException e) {
				e.printStackTrace();
			} catch (SecurityException e) {
				e.printStackTrace();
			} catch (IllegalArgumentException e) {
				e.printStackTrace();
			} catch (IllegalAccessException e) {
				e.printStackTrace();
			} catch (NoSuchMethodException e) {
				e.printStackTrace();
			} catch (InvocationTargetException e) {
				e.printStackTrace();
			} catch (IOException e) {
				e.printStackTrace();
			}
		return super.doStartTag();
	}
	private String toHTML() throws NoSuchFieldException, SecurityException, IllegalArgumentException, IllegalAccessException,  NoSuchMethodException, InvocationTargetException {
		StringBuffer sb=new StringBuffer();
		String value;
		String html;
		for (Object obj : item) {
			//获取value和html
			value=(String) PropertyUtils.getProperty(obj, textKey);
			html=(String) PropertyUtils.getProperty(obj, textVal);

			if(checkedVal.contains(value)) {//判断回显集合里是否包含这个value,包含就设置选中
				sb.append("<input checked type='checkbox' value='"+value+"' />"+html+"");
			}
			else {
				sb.append("<input type='checkbox' value='"+value+"' />"+html+"");
			}
		}
		return sb.toString();
	}

}
配置zlt文件
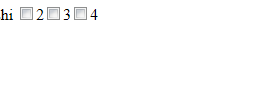
测试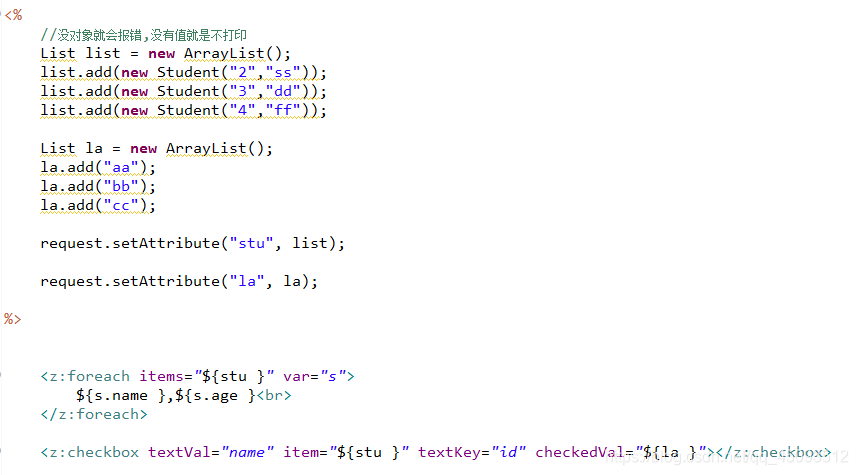
结果


 222
222

 被折叠的 条评论
为什么被折叠?
被折叠的 条评论
为什么被折叠?
 到【灌水乐园】发言


