


 本文详细介绍了手写SpringMVC框架的过程,包括DispatchServlet的核心原理,初始化Spring上下文和MVC组件,以及请求拦截和处理流程。文章还涵盖了控制器的实现,前端页面交互,以及通过反射和注解处理参数。此外,提到了如何解决Java中反射无法获取方法参数名的问题,并提供了项目源码地址。
手写springmvc需要引入之前手写的spring和服务器的依赖,
参考博客:手写spring框架:实现ioc和aop功能;使用三级缓存解决循环依赖问题
由于整合过程中需要添加和修改一些功能,所以之前的博客代码可能稍有不同,但是整体思路是一致的,最新代码可以参考我放在文末的gitee地址。老规矩,只列出整个思路,具体代码参考源码地址。
1. 项目结构
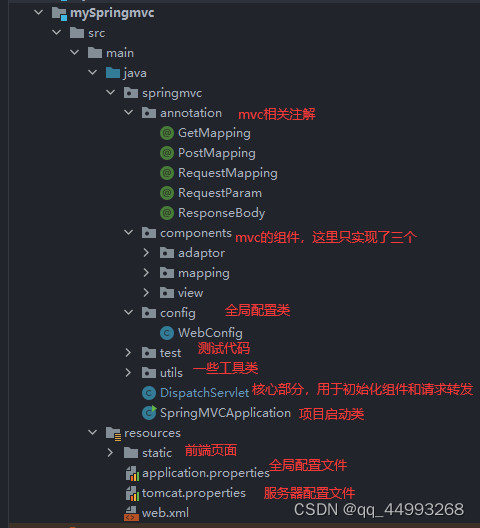
2.DispatchServlet
springmvc的核心原理就是在服务器启动时初始化所有的请求映射关系,并用DispatchServlet拦截服务器的所有请求,找到对应的处理方法来实现自定义的功能。
2.1 用到的属性
    /**
     * 存放spring容器
     */
    private ApplicationContext context;
    /**
     * 存放请求映射处理器
     */
    private List<HandlerMapping> handlerMappings = new CopyOnWriteArrayList<>();
    /**
     * 存放处理器适配器
     */
    private Map<HandlerMapping, HandlerAdaptor> handlerAdaptorMap = new ConcurrentHashMap<>();
    /**
     * 存放视图解析器
     */
    private List<ViewResolver> viewResolvers = new CopyOnWriteArrayList<>();
    //配置类
    private WebConfig webConfig;
2.2 初始化spring上下文和mvc组件
/**
     * 初始化springmvc组件
     *
     * @param config 配置类
     * @throws Exception
     */
    @Override
    public void init(Class<?> config) throws Exception {
        //初始化spring容器
        context = new ApplicationContext(config);
        //初始化mvc配置
        webConfig = new WebConfig("application.properties");
        //初始化springmvc的组件
        initStrategies(context);
    }

    private void initStrategies(ApplicationContext context) {
        //请求处理映射器(已实现)
        initHandlerMappings(context);

        //初始化参数处理器(已实现)
        initHandlerAdapters(context);

        //初始化视图解析器(已实现)
        initViewResolvers(context);

        //初始化视图预处理器
        initRequestToViewNameTranslator(context);
        //多文件上传的组件
        initMultipartResolver(context);
        //初始化本地语言环境
        initLocaleResolver(context);
        //初始化模板处理器
        initThemeResolver(context);
        //初始化异常拦截器
        initHandlerExceptionResolvers(context);
        //参数缓存器
        initFlashMapManager(context);
    }
2.3 拦截所有的请求统一执行
  @Override
    protected void doGet(HttpRequest request, HttpResponse response) {
        doPost(request, response);
    }

    @Override
    protected void doPost(HttpRequest request, HttpResponse response) {
        try {
            //放入请求上下文
            RequestContext.setHttpRequest(request);
            doDispatch(request, response);
        } catch (Exception e) {
            e.printStackTrace();
            response.write500();
        }finally {
            RequestContext.removeHttpRequest();
        }
    }
2.4 执行流程
 /**
     * 处理请求
     *
     * @param request
     * @param response
     */
    private void doDispatch(HttpRequest request, HttpResponse response) throws InvocationTargetException, IllegalAccessException, IOException {
        String method = request.getMethod();
        String url = request.getUrl();
        HandlerMapping handlerMapping = null;
        //找到匹配的映射器
        for (HandlerMapping mapping : handlerMappings) {
            if (mapping.support(url, method)) {
                handlerMapping = mapping;
                break;
            }
        }
        //未找到处理器则抛出404
        if (handlerMapping == null) {
            //todo 优先返回自定义的404界面
            response.write404();
            return;
        }
        //找到映射处理器
        HandlerAdaptor handlerAdaptor = handlerAdaptorMap.get(handlerMapping);
        //执行处理逻辑并返回ModelAndView
        Object result = handlerAdaptor.handle(request, response, handlerMapping);
        //todo 可以使用适配器模式优化代码
        if (handlerMapping.isRender()) {
            //如果是视图类,就进行视图解析
            viewResolve(request, response, result);
        } else {
            //否则则进行结果解析
            StringResolve(request, response, result);
        }
    }
3. 结果测试
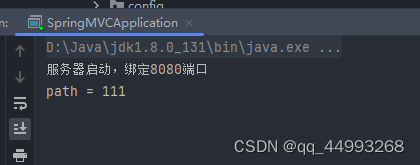
3.1 启动类
@ComponentScan
public class SpringMVCApplication {
    public static void main(String[] args) {
        BootStrap bootStrap = new BootStrap(SpringMVCApplication.class);

        bootStrap.start();
    }
}
3.2 controller
参数中传入自定义的类也可以解析,但是需要POST请求。
@Controller
@RequestMapping("/web")
public class UserController {
    @PostMapping("login")
    public ModelAndView login(User user, String path) {
        System.out.println("path = " + path);

        String username = user.getUsername();
        String password = user.getPassword();
        //模拟each渲染
        List<User> userList = new ArrayList<>();
        userList.add(new User("张三", "111"));
        userList.add(new User("李四", "222"));
        userList.add(new User("王五", "333"));
        ModelAndView mv = new ModelAndView();
        Map<String, Object> map = new HashMap<>();
        map.put("username", username);
        map.put("password", password);
        map.put("userList", userList);
        mv.setModel(map);
        mv.setViewName("index");
        return mv;
    }
}
注意:java中反射默认是无法获得方法的参数名的,比如上述中的user和path,在反射获取时会得到arg0和arg1。解决方法:1.添加RequestParam注解,在注解中指明参数名。2.在pom中添加-parameters参数。
<build>
<plugins>
<plugin>
<groupId>org.apache.maven.plugins</groupId>
<artifactId>maven-compiler-plugin</artifactId>
<version>3.1</version>
<configuration>
<source>8</source>
<target>8</target>
<encoding>utf-8</encoding>
<!-- 运行时获取方法参数名-->
<compilerArgument>-parameters</compilerArgument>
</configuration>
</plugin>
</plugins>
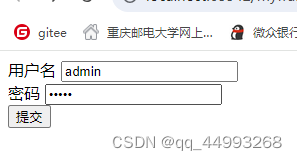
</build>3.3 前端页面
<!DOCTYPE html>
<html lang="en">
<head>
    <meta charset="UTF-8">
    <title>登录</title>
</head>
<body>
    <form action="http://localhost:8080/web/login?path=111" method="post">
        用户名 <input type="text" name="username"><br>
        密码 <input type="password" name="password"><br>
        <input type="submit">
    </form>
</body>
</html>
<!DOCTYPE html>
<html lang="en">
<head>
<meta charset="UTF-8">
<title>Title</title>
</head>
<body>
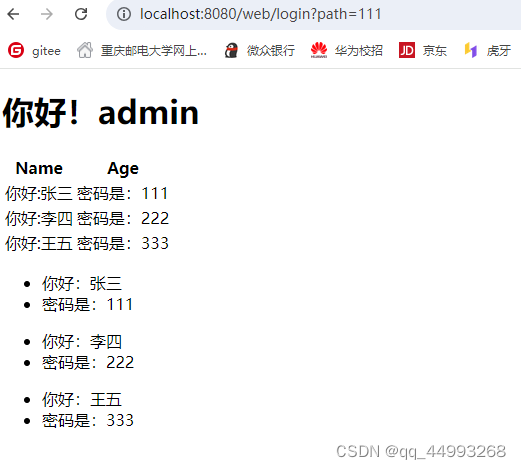
<h1>你好!${username}</h1>
<table>
<tr>
<th>Name</th>
<th>Age</th>
</tr>
<tr th:each="user : ${userList}">
<td th:text="${user.username}">你好:${}</td>
<td th:text="${user.password}">密码是:${}</td>
</tr>
</table>
<ul th:each="user:${userList}">
<li th:text="${user.username}">你好:${}</li>
<li th:text="${user.password}">密码是:${}</li>
</ul>
</body>
</html>3.4 结果


 694
694

 被折叠的 条评论
为什么被折叠?
被折叠的 条评论
为什么被折叠?
 到【灌水乐园】发言


