


1、为什么用Shiro
易于使用:使用Shiro构建系统安全框架非常简单。就算第一次接触也可以快速掌握。
全面:Shiro包含系统安全框架需要的功能,满足安全需求的“一站式服务”。灵活:Shiro可以在任何应用程序环境中工作。虽然它可以在Web、EJB和IoC环境中工作,但不需要依赖它们。Shiro也没有强制要求任何规范,甚至没有很多依赖项。
强力支持Web:Shiro具有出色的Web应用程序支持,可以基于应用程序URL和Web协议(例如REST)创建灵活的安全策略,同时还提供一组JSP库来控制页面输出。
兼容性强:Shiro的设计模式使其易于与其他框架和应用程序集成。Shiro与Spring、Grails、Wicket、Tapestry、Mule、Apache Camel、Vaadin等框架无缝集成。
社区支持:Shiro是Apache软件基金会的一个开源项目,有完备的社区支持,文档支持。如果需要,像Katasoft这样的商业公司也会提供专业的支持和服务。
2、Shiro与SpringSecurity的对比
1、SpringSecurity基于Spring开发,项目若使用Spring作为基础,配合SpringSecurity做权限更加方便,而Shiro需要和Spring进行整合开发;
2、SpringSecurity功能比Shiro更加丰富些,例如安全维护方面;
3、SpringSecurity社区资源相对比Shiro更加丰富;
4、Shiro的配置和使用比较简单,SpringSecurity上手复杂些;
5、Shiro依赖性低,不需要任何框架和容器,可以独立运行.SpringSecurity依赖Spring容器;
6、shiro不仅仅可以使用在web中,它可以工作在任何应用环境中。在集群会话时Shiro最重要的一个好处或许就是它的会话是独立于容器的。
3、基本使用
3.1 环境准备
Shiro不依赖容器,直接创建maven工程即可
    <dependencies>
        <dependency>
            <groupId>org.apache.shiro</groupId>
            <artifactId>shiro-core</artifactId>
            <version>1.9.0</version>
        </dependency>
        <dependency>
            <groupId>commons-logging</groupId>
            <artifactId>commons-logging</artifactId>
            <version>1.2</version>
        </dependency>
    </dependencies>
3.2 INI文件
Shiro 获取权限相关信息可以通过数据库获取,也可以通过 ini 配置文件获取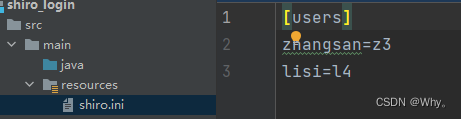
3.3 登录认证
3.3.1 登录认证概念
(1)身份验证:一般需要提供如身份ID等一些标识信息来表明登录者的身份,如提供email,用户名/密码来证明。
(2)在shiro中,用户需要提供principals(身份)和credentials(证明)给shiro,从而应用能验证用户身份:
(3)principals:身份,即主体的标识属性,可以是任何属性,如用户名、邮箱等,唯一即可。一个主体可以有多个principals,但只有一个Primary principals,一般是用户名/邮箱/手机号。
(4)credentials:证明/凭证,即只有主体知道的安全值,如密码/数字证书等。
(5)最常见的principals和credentials组合就是用户名/密码
3.3.2 登录认证基本流程
(1)收集用户身份/凭证,即如用户名/密码
(2)调用Subject.login进行登录,如果失败将得到相应的AuthenticationException异常,根据异常提示用户错误信息;否则登录成功
(3)创建自定义的Realm类,继承org.apache.shiro.realm.AuthenticatingRealm类,实现doGetAuthenticationInfo()方法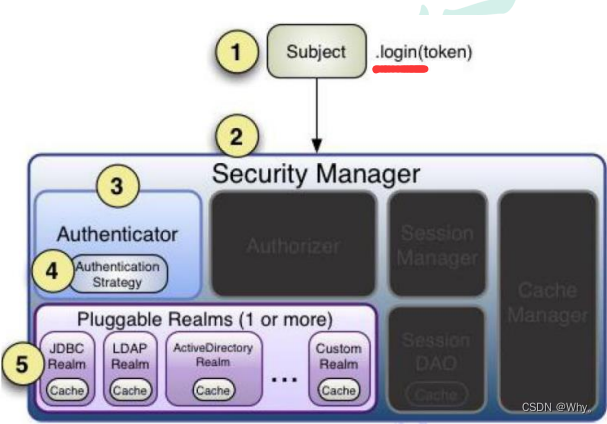
3.3.3 登录认证实例
创建测试类,获取认证对象,进行登录认证
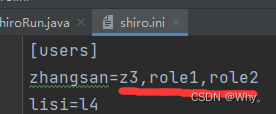
[users]
zhangsan=z3,role1,role2
lisi=l4
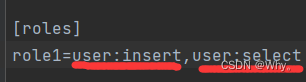
[roles]
role1=user:insert,user:selectpublic class ShiroRun {
public static void main(String[] args) {
//1 初始化获取SecurityManager
IniSecurityManagerFactory factory = new IniSecurityManagerFactory("classpath:shiro.ini");
SecurityManager securityManager = factory.getInstance();
SecurityUtils.setSecurityManager(securityManager);
//2 获取Subject对象
Subject subject = SecurityUtils.getSubject();
//3 创建token对象,web应用用户名和密码从页面传递
AuthenticationToken token = new UsernamePasswordToken("zhangsan", "z3");
//4 完成登录
try {
subject.login(token);
System.out.println("登录成功");
//5 判断角色
boolean result = subject.hasRole("role1");
System.out.println("是否拥有此角色:"+result);
//6 判断权限
boolean isPermitted = subject.isPermitted("user:select");
System.out.println("是否拥有此权限:" + isPermitted);
// 也可以用checkPermission方法,但没有返回值,没权限的话抛AuthenticationException
subject.checkPermission("user:select");
}
catch (UnknownAccountException e) {
e.printStackTrace();
System.out.println("用户不存在");
}
catch (IncorrectCredentialsException e) {
e.printStackTrace();
System.out.println("密码错误");
}
catch (AuthenticationException e) {
e.printStackTrace();
}
}
}3.3.4 身份认证流程
(1)首先调用Subject.login(token)进行登录,其会自动委托给SecurityManager
(2)SecurityManager负责真正的身份验证逻辑;它会委托给Authenticator进行身份验证;
(3)Authenticator才是真正的身份验证者,Shiro API中核心的身份认证入口点,此处可以自定义插入自己的实现;
(4)Authenticator可能会委托给相应的AuthenticationStrategy进行多Realm身份验证,默认ModularRealmAuthenticator会调用AuthenticationStrategy进行多Realm身份验证;
(5)Authenticator会把相应的token传入Realm,从Realm获取身份验证信息,如果没有返回/抛出异常表示身份验证失败了。此处可以配置多个Realm,将按照相应的顺序及策略进行访问。
3.4 角色、授权
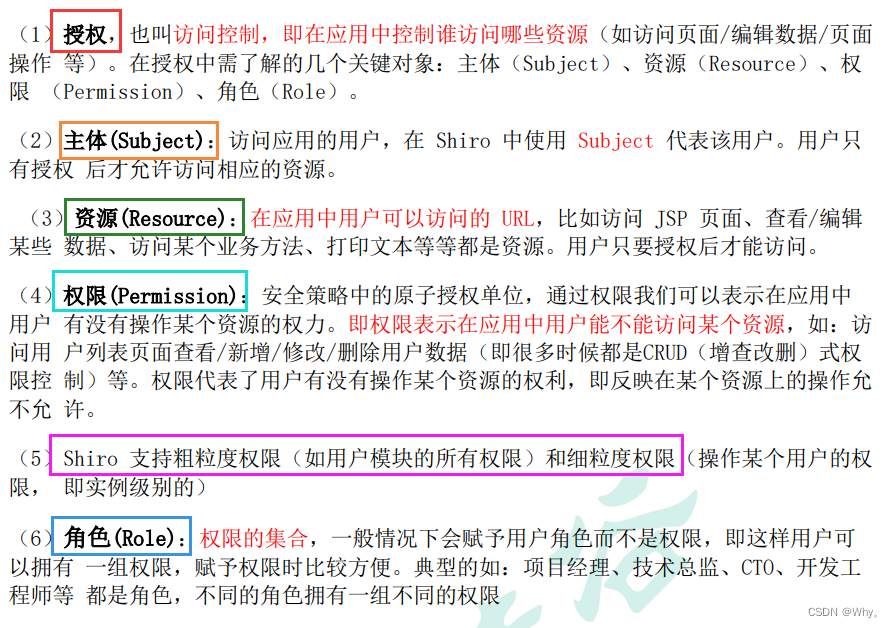
3.4.1 授权概念
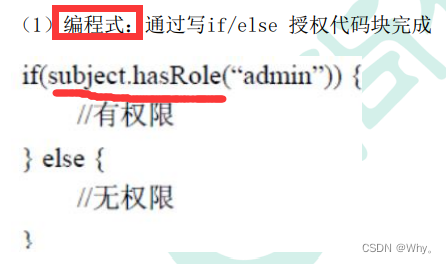
3.4.2 授权方式
3.4.3 授权流程
(1)首先调用Subject.isPermitted*/hasRole*接口,其会委托给SecurityManager,而SecurityManager接着会委托给Authorizer;
(2)Authorizer是真正的授权者,如果调用如isPermitted(“user:view”),其首先会通过PermissionResolver把字符串转换成相应的Permission实例;
(3)在进行授权之前,其会调用相应的Realm获取Subject相应的角色/权限用于匹配传入的角色/权限;
(4)Authorizer会判断Realm的角色/权限是否和传入的匹配,如果有多个Realm,会委托给ModularRealmAuthorizer进行循环判断,如果匹配如isPermitted*/hasRole*会返回true,否则返回false表示授权失败
3.4.4 授权实例-获取角色信息-subject.hasRole()

3.4.5 授权实例-判断权限信息-Subject.isPermitted()

3.5 Shiro加密
实际系统开发中,一些敏感信息需要进行加密,比如说用户的密码。Shiro内嵌很多常用的加密算法,比如MD5加密。Shiro可以很简单的使用信息加密
public class ShiroMD5 {
    public static void main(String[] args) {
        // 密码明文
        String password = "z3";
        // 使用md5加密
        Md5Hash md5Hash = new Md5Hash(password);
        //toHex()是什么:转码,字符串转换为十六进制编码
        System.out.println("md5加密:"+md5Hash.toHex());
        // 带盐的 md5 加密,盐就是在密码明文后拼接新字符串,然后再进行加密
        Md5Hash md5Hash2 = new Md5Hash(password, "salt");
        System.out.println("md5带盐加密:"+md5Hash2.toHex());
        // 为了保证安全,避免被破解还可以多次迭代加密,保证数据安全
        Md5Hash md5Hash3 = new Md5Hash(password, "salt", 3);
        System.out.println("md5带盐三次加密:"+md5Hash3.toHex());
        // 使用父类实现加密
        SimpleHash simpleHash = new SimpleHash("MD5",password,"salt",3);
        System.out.println("父类带盐三次加密:"+simpleHash.toHex());
    }
}
3.6 Shiro自定义登录认证
Shiro默认的登录认证是不带加密的,如果想要实现加密认证需要自定义登录认证,自定义Realm。
(1)在shiro.ini中添加配置信息
[main]
md5CredentialsMatcher=org.apache.shiro.authc.credential.Md5CredentialsMatcher
md5CredentialsMatcher.hashIterations=3

myrealm=com.atguigu.shirotest.MyRealm
myrealm.credentialsMatcher=$md5CredentialsMatcher
securityManager.realms=$myrealm

[users]
zhangsan=7174f64b13022acd3c56e2781e098a5f,role1,role2
lisi=l4

[roles]
role1=user:insert,user:select
(2) 自定义登录认证
自定义的登录认证方法,Shiro 的 login 方法底层会调用该类的认证方法完成登录认证
public class MyRealm extends AuthenticatingRealm {
    @Override
    //自定义的登录认证方法,Shiro 的 login 方法底层会调用该类的认证方法完成登录认证
    //需要配置自定义的 realm 生效,在 ini 文件中配置,或 Springboot 中配置
    //该方法只是获取进行对比的信息,认证逻辑还是按照 Shiro 的底层认证逻辑完成认证
    protected AuthenticationInfo doGetAuthenticationInfo(AuthenticationToken token) throws AuthenticationException {
        //1 获取身份信息
        String principal = token.getPrincipal().toString();
        //2 获取凭证信息
        String password = new String((char[]) token.getCredentials());
        System.out.println("认证用户信息:"+principal+"---"+password);
        //3 获取数据库中存储的用户信息
        if (principal.equals("zhangsan")){
            //3.1 数据库存储的加盐迭代3次密码
            String pwdInfo = "7174f64b13022acd3c56e2781e098a5f";
            //3.2 创建封装了校验逻辑的对象,将要比较的数据给该对象
            AuthenticationInfo info = new SimpleAuthenticationInfo(
                    token.getPrincipal(),
                    pwdInfo,
                    ByteSource.Util.bytes("salt"),
                    token.getPrincipal().toString()
            );
            return info;
        }
        return null;
    }
}
4、SpringBoot整合Shiro
4.1 框架整合
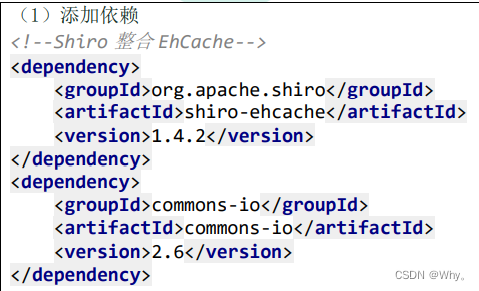
4.1.1添加依赖
<parent>
<groupId>org.springframework.boot</groupId>
<artifactId>spring-boot-starter-parent</artifactId>
<version>2.2.1.RELEASE</version>
</parent>
<dependencies>
<dependency>
<groupId>org.apache.shiro</groupId>
<artifactId>shiro-spring-boot-web-starter</artifactId>
<version>1.9.0</version>
</dependency>
<!--mybatis-plus-->
<dependency>
<groupId>com.baomidou</groupId>
<artifactId>mybatis-plus-boot-starter</artifactId>
<version>3.5.1</version>
</dependency>
<!--mysql-->
<dependency>
<groupId>mysql</groupId>
<artifactId>mysql-connector-java</artifactId>
<version>5.1.46</version>
</dependency>
<dependency>
<groupId>org.projectlombok</groupId>
<artifactId>lombok</artifactId>
</dependency>
<dependency>
<groupId>org.springframework.boot</groupId>
<artifactId>spring-boot-starter-thymeleaf</artifactId>
</dependency>
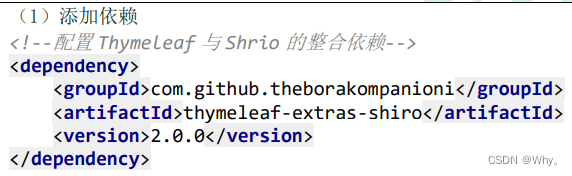
<!--配置Thymeleaf与Shrio的整合依赖-->
<dependency>
<groupId>com.github.theborakompanioni</groupId>
<artifactId>thymeleaf-extras-shiro</artifactId>
<version>2.0.0</version>
</dependency>
<!--Shiro整合EhCache-->
<dependency>
<groupId>org.apache.shiro</groupId>
<artifactId>shiro-ehcache</artifactId>
<version>1.4.2</version>
</dependency>
<dependency>
<groupId>commons-io</groupId>
<artifactId>commons-io</artifactId>
<version>2.6</version>
</dependency>
</dependencies>4.1.2 添加配置文件
mybatis-plus:
  configuration:
    log-impl: org.apache.ibatis.logging.stdout.StdOutImpl
  mapper-locations: classpath:mapper/*.xml
spring:
  datasource:
    type: com.zaxxer.hikari.HikariDataSource
    driver-class-name: com.mysql.jdbc.Driver
    url: jdbc:mysql://localhost:3306/shirodb?characterEncoding=utf-8&useSSL=false
    username: root
    password: 820820
  jackson:
    date-format: yyyy-MM-dd HH:mm:ss
    time-zone: GMT+8
shiro:
  loginUrl: /myController/login
4.1.3 添加启动类-ShiroApplication.java
@SpringBootApplication
@MapperScan("com.atguigu.shiro.mapper")
public class ShiroApplication {
    public static void main(String[] args) {
        SpringApplication.run(ShiroApplication.class,args);
    }
}
4.2 登录认证实现
访问数据库获取用户信息,实现登录认证
4.2.1 准备工作
CREATE TABLE `user` (
 `id` BIGINT(20) NOT NULL AUTO_INCREMENT COMMENT '编号',
 `name` VARCHAR(30) DEFAULT NULL COMMENT '用户名',
 `pwd` VARCHAR(50) DEFAULT NULL COMMENT '密码',
 `rid` BIGINT(20) DEFAULT NULL COMMENT '角色编号',
 PRIMARY KEY (`id`)
) ENGINE=INNODB AUTO_INCREMENT=2 DEFAULT CHARSET=utf8 COMMENT='用户表';
@Data
@NoArgsConstructor
@AllArgsConstructor
public class User {
private Integer id;
private String name;
private String pwd;
private Integer rid;
}@Repository
public interface UserMapper extends BaseMapper<User> {
}
public interface UserService {
// 用户登录
User getUserInfoByName(String name);
}
@Service
public class UserServiceImpl implements UserService {
@Autowired
private UserMapper userMapper;
@Override
public User getUserInfoByName(String name) {
QueryWrapper<User> wrapper = new QueryWrapper<>();
wrapper.eq("name",name);
User user = userMapper.selectOne(wrapper);
return user;
}
}4.2.2 自定义realm
@Component
public class MyRealm extends AuthorizingRealm {
    @Autowired
    private UserService userService;

    // 自定义授权方法
    @Override
    protected AuthorizationInfo doGetAuthorizationInfo(PrincipalCollection principalCollection) {
        return null;
    }

    // 自定义登录认证方法
    @Override
    //自定义的登录认证方法,Shiro 的 login 方法底层会调用该类的认证方法完成登录认证
    //需要配置自定义的 realm 生效,在 ini 文件中配置,或 Springboot 中配置
    //该方法只是获取进行对比的信息,认证逻辑还是按照 Shiro 的底层认证逻辑完成认证
    protected AuthenticationInfo doGetAuthenticationInfo(AuthenticationToken token) throws AuthenticationException {
        //1 获取用户身份信息
        String name = token.getPrincipal().toString();
        //2 调用业务层从数据库获取用户信息
        User user = userService.getUserInfoByName(name);
        //3 判断并将数据库完成封装
        if (user!=null){
            AuthenticationInfo info = new SimpleAuthenticationInfo(
                    token.getPrincipal(),
                    user.getPwd(),
                    ByteSource.Util.bytes("salt"),
                    token.getPrincipal().toString()
            );
            return info;
        }
        return null;
    }
}
4.2.3 编写配置类 ShiroConfig.java
@Configuration
public class ShiroConfig {
    @Autowired
    private MyRealm myRealm;

    //配置 SecurityManager
    @Bean
    public DefaultWebSecurityManager defaultWebSecurityManager() {
        //1 创建defaultWebSecurityManager对象
        DefaultWebSecurityManager defaultWebSecurityManager = new DefaultWebSecurityManager();
        //2 创建加密对象,设置相关属性
        HashedCredentialsMatcher matcher = new HashedCredentialsMatcher();
        //2.1采用md5加密
        matcher.setHashAlgorithmName("md5");;
        //2.2迭代加密次数
        matcher.setHashIterations(3);
        //3 将加密对象存储到myRealm中
        myRealm.setCredentialsMatcher(matcher);
        //4 将myRealm存入defaultWebSecurityManager对象
        defaultWebSecurityManager.setRealm(myRealm);
        //5 返回
        return defaultWebSecurityManager;
    }
    //配置 Shiro 内置过滤器拦截范围
    @Bean
    public DefaultShiroFilterChainDefinition
    shiroFilterChainDefinition(){
        DefaultShiroFilterChainDefinition definition = new
                DefaultShiroFilterChainDefinition();
        //设置不认证可以访问的资源
        definition.addPathDefinition("/myController/userLogin","anon");
        definition.addPathDefinition("/login","anon");
        //设置需要进行登录认证的拦截范围
        definition.addPathDefinition("/**","authc");
        return definition;
    }
}
4.2.4 实现controller
@Controller
@RequestMapping("myController")
//@Controller 执行完结束后默认返回重定向
//@RestController :返回结果数据 json串
public class MyController {
@GetMapping("userLogin")
@ResponseBody
public String userLogin(String name,String pwd){
//1 获取Subject对象
Subject subject = SecurityUtils.getSubject();
//2 封装请求数据到token对象中
UsernamePasswordToken token = new UsernamePasswordToken(name, pwd);
//3 调用login方法进行登录认证
try {
subject.login(token);
return "登录成功";
} catch (AuthenticationException e) {
e.printStackTrace();
System.out.println("登录失败");
return "登录失败";
}
}
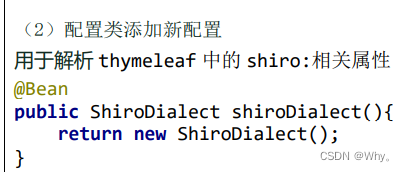
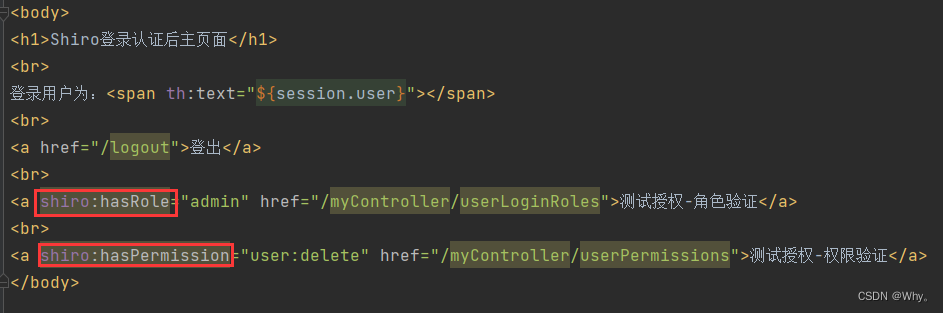
}5、 实现前端页面-Shiro整合Thymeleaf
确认依赖
添加login.html和main.html
<!DOCTYPE html>
<html lang="en">
<head>
<meta charset="UTF-8">
<title>Title</title>
</head>
<body>
<h1>Shiro登录认证</h1>
<br>
<form action="/myController/userLogin">
<div>用户名:<input type="text" name="name" value=""></div>
<div>密码:<input type="password" name="pwd" value=""></div>
<div>记住用户:<input type="checkbox" name="rememberMe" value="true"></div>
<div><input type="submit" value="登录"></div>
</form>
</body>
</html>
-----------------------------------------------------------------------------
<!DOCTYPE html>
<html lang="en" xmlns:th="http://www.thymeleaf.org"
xmlns:shiro="http://www.w3.org/1999/xhtml">
<head>
<meta charset="UTF-8">
<title>Title</title>
</head>
<body>
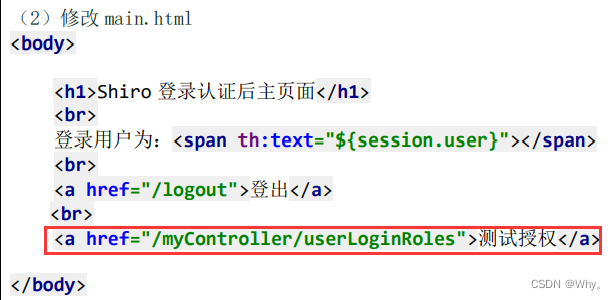
<h1>Shiro登录认证后主页面</h1>
<br>
登录用户为:<span th:text="${session.user}"></span>
<br>
<a href="/logout">登出</a>
<br>
<a shiro:hasRole="admin" href="/myController/userLoginRoles">测试授权-角色验证</a>
<br>
<a shiro:hasPermission="user:delete" href="/myController/userPermissions">测试授权-权限验证</a>
</body>
![]() 所以后端接口要传入session参数
所以后端接口要传入session参数
修改userLogin方法、添加login方法
    // 登录认证
    @GetMapping("userLogin")
    public String userLogin(String name, String pwd, HttpSession session){
        //1 获取Subject对象
        Subject subject = SecurityUtils.getSubject();
        //2 封装请求数据到token对象中
        UsernamePasswordToken token = new UsernamePasswordToken(name, pwd);
        //3 调用login方法进行登录认证
        try {
            subject.login(token);
            session.setAttribute("user",token.getPrincipal().toString());
            return "main";
        } catch (AuthenticationException e) {
            e.printStackTrace();
            System.out.println("登录失败");
            return "登录失败";
        }
    }

    // 跳转登录页面
    @GetMapping("login")
    public String login(){
        return "login";
    }
修改配置文件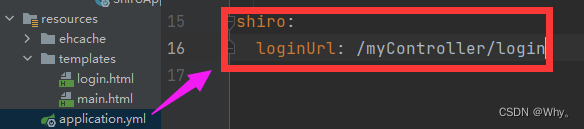
修改配置类
5.1 多个 realm 的认证策略设置
当应用程序配置多个Realm时,例如:用户名密码校验、手机号验证码校验等等。Shiro的ModularRealmAuthenticator会使用内部的AuthenticationStrategy组件判断认证是成功还是失败。
AuthenticationStrategy是一个无状态的组件,它在身份验证尝试中被询问4次(这4次交互所需的任何必要的状态将被作为方法参数):
(1)在所有Realm被调用之前
(2)在调用Realm的getAuthenticationInfo方法之前
(3)在调用Realm的getAuthenticationInfo方法之后
(4)在所有Realm被调用之后
认证策略的另外一项工作就是聚合所有Realm的结果信息封装至一个AuthenticationInfo实例中,并将此信息返回,以此作为Subject的身份信息。
Shiro中定义了3种认证策略的实现:
| AuthenticationStrategy class | 描述 |
| AtLeastOneSuccessfulStrategy | 只要有一个(或更多)的 Realm 验证成功,那么认证将视为成功 |
| FirstSuccessfulStrategy | 第一个 Realm 验证成功,整体认证将视为成功,且后续 Realm 将被忽略 |
| AllSuccessfulStrategy | 所有 Realm 成功,认证才视为成功 |
ModularRealmAuthenticator内置的认证策略默认实现是AtLeastOneSuccessfulStrategy方式。可以通过配置修改策略
    //配置 SecurityManager
    @Bean
    public DefaultWebSecurityManager defaultWebSecurityManager(){
        //1 创建 defaultWebSecurityManager 对象
        DefaultWebSecurityManager defaultWebSecurityManager = new
                DefaultWebSecurityManager();
        //2 创建认证对象,并设置认证策略
        ModularRealmAuthenticator modularRealmAuthenticator = new
                ModularRealmAuthenticator();
        modularRealmAuthenticator.setAuthenticationStrategy(new
                AllSuccessfulStrategy());

        defaultWebSecurityManager.setAuthenticator(modularRealmAuthenticator)
        ;
        //3 封装 myRealm 集合
        List<Realm> list = new ArrayList<>();
        list.add(myRealm);
        list.add(myRealm2);

        //4 将 myRealm 存入 defaultWebSecurityManager 对象
        defaultWebSecurityManager.setRealms(list);
        //5 返回
        return defaultWebSecurityManager;
    }
5.2 remember me 功能
下次访问时无需再登录即可访问。
基本流程
(1)首先在登录页面选中RememberMe然后登录成功;如果是浏览器登录,一般会把RememberMe的Cookie写到客户端并保存下来;
(2)关闭浏览器再重新打开;会发现浏览器还是记住你的;
(3)访问一般的网页服务器端,仍然知道你是谁,且能正常访问;
(4)但是,如果我们访问电商平台时,如果要查看我的订单或进行支付时,此时还是需要再进行身份认证的,以确保当前用户还是你。
5.3 用户登录认证后登出
用户登录后,配套的有登出操作。直接通过Shiro过滤器即可实现登出
//配置登出过滤器
definition.addPathDefinition("/logout","logout");
6、授权、角色认证
6.1 授权
用户登录后,需要验证是否具有指定角色指定权限。Shiro也提供了方便的工具进行判断。
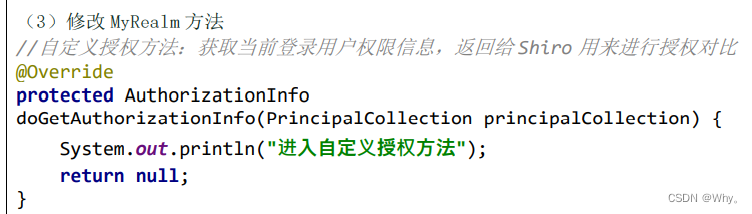
这个工具就是Realm的doGetAuthorizationInfo方法进行判断。触发权限判断的有两种方式
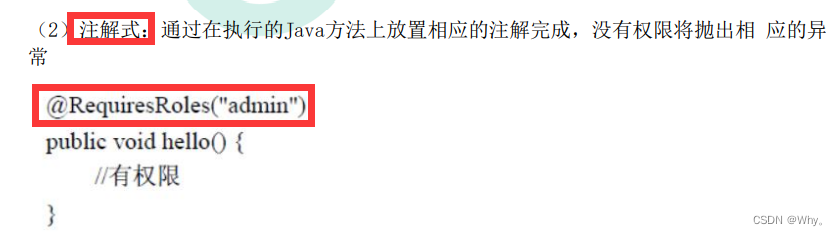
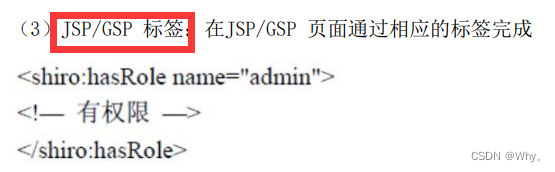
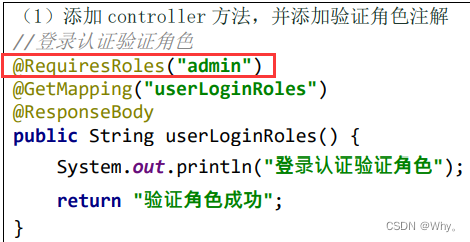
(1)在页面中通过shiro:****属性判断(2)在接口服务中通过注解@Requires****进行判断
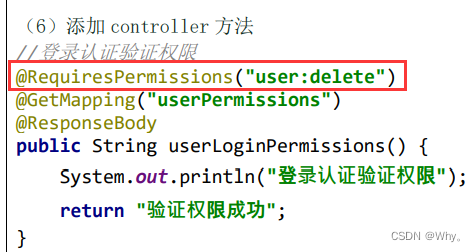
6.2 后端接口服务注解
通过给接口服务方法添加注解可以实现权限校验,可以加在控制器方法上,也可以加在业务方法上,一般加在控制器方法上。常用注解如下:
(1)@RequiresAuthentication:验证用户是否登录,等同于方法subject.isAuthenticated()
(2)@RequiresUser:验证用户是否被记忆:
登录认证成功subject.isAuthenticated()为true
登录后被记忆subject.isRemembered()为true
(3)@RequiresGuest:验证是否是一个guest的请求,是否是游客的请求。此时subject.getPrincipal()为null
(4)@RequiresRoles:验证subject是否有相应角色,有角色访问方法,没有则会抛出异常AuthorizationException。
例如:@RequiresRoles(“aRoleName”)
voidsomeMethod();
只有subject有aRoleName角色才能访问方法someMethod()
(5)@RequiresPermissions:验证subject是否有相应权限,有权限访问方法,没有则会抛出异常AuthorizationException。
例如:@RequiresPermissions(“file:read”,”wite:aFile.txt”)
voidsomeMethod();
subject必须同时含有file:read和wite:aFile.txt权限才能访问方法someMethod()
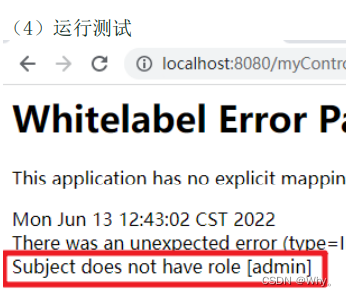
6.3 授权认证-没有角色无法访问
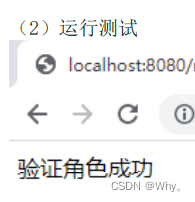
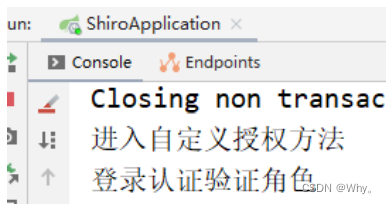
6.4 授权验证-获取角色进行验证
修改MyRealm.java
    @Override
    protected AuthorizationInfo
    doGetAuthorizationInfo(PrincipalCollection principalCollection) {
        System.out.println("进入自定义授权方法");
        //1 创建对象,存储当前登录的用户的权限和角色
        SimpleAuthorizationInfo info = new SimpleAuthorizationInfo();
        //2 存储角色
        info.addRole("admin");
        //返回
        return info;
} 
mapper方法
@Repository
public interface UserMapper extends BaseMapper<User> {
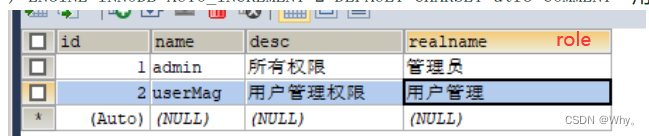
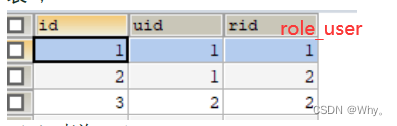
@Select("SELECT NAME FROM role WHERE id IN (SELECT rid FROM role_user WHERE uid=(SELECT id FROM USER WHERE NAME=#{principal}))")
List<String> getUserRoleInfoMapper(@Param("principal")String principal);
}service实现
public interface UserService {
    // 用户登录
    User getUserInfoByName(String name);
}
-----------------------------------------------------------
@Service
public class UserServiceImpl implements UserService {

    @Autowired
    private UserMapper userMapper;

    @Override
    public User getUserInfoByName(String name) {
        QueryWrapper<User> wrapper = new QueryWrapper<>();
        wrapper.eq("name",name);
        User user = userMapper.selectOne(wrapper);
        return user;
    }
}
Myrealm方法改造-doGetAuthorizationInfo方法
@Override
protected AuthorizationInfo doGetAuthorizationInfo(PrincipalCollection principalCollection) {
System.out.println("进入自定义授权方法");
//获取当前用户身份信息
String principal =
principalCollection.getPrimaryPrincipal().toString();
//调用接口方法获取用户的角色信息
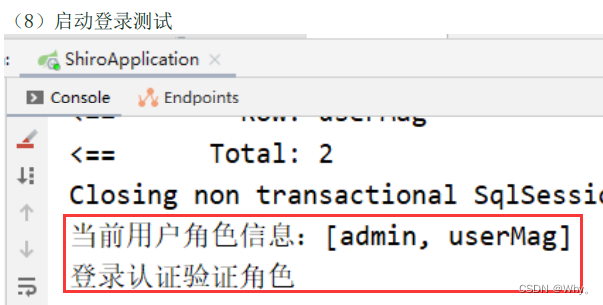
List<String> roles = userService.getUserRoleInfo(principal);
System.out.println("当前用户角色信息:"+roles);
//创建对象,存储当前登录的用户的权限和角色
SimpleAuthorizationInfo info = new SimpleAuthorizationInfo();
//存储角色
info.addRoles(roles);
//返回
return info;
}
6.5 授权验证-获取权限进行验证
mapper 方法
@Repository
public interface UserMapper extends BaseMapper<User> {
@Select({
"<script>",
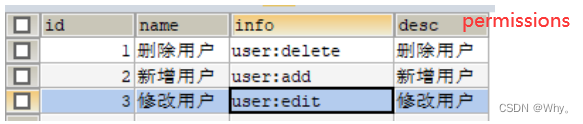
"select info FROM permissions WHERE id IN ",
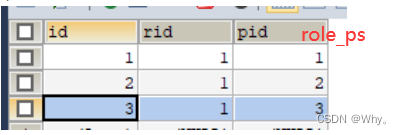
"(SELECT pid FROM role_ps WHERE rid IN (",
"SELECT id FROM role WHERE NAME IN ",
"<foreach collection='roles' item='name' open='(' separator=',' close=')'>",
"#{name}",
"</foreach>",
"))",
"</script>"
})
List<String> getUserPermissionInfoMapper(@Param("roles") List<String> roles);
}service 实现
public interface UserService {
    // 获取用户的角色信息
    List<String> getUserRoleInfo(String principal);
}
-----------------------------------------------------------
@Service
public class UserServiceImpl implements UserService {

    @Autowired
    private UserMapper userMapper;

    @Override
    public List<String> getUserRoleInfo(String principal) {
        return userMapper.getUserRoleInfoMapper(principal);
    }
}
MyRealm 方法改造
@Override
protected AuthorizationInfo doGetAuthorizationInfo(PrincipalCollection principalCollection) {
System.out.println("进入自定义授权方法");
//获取当前用户身份信息
String principal =
principalCollection.getPrimaryPrincipal().toString();
//调用接口方法获取用户的角色信息
List<String> roles = userService.getUserRoleInfo(principal);
System.out.println("当前用户角色信息:"+roles);
//调用接口方法获取用户角色的权限信息
List<String> permissions =
userService.getUserPermissionInfo(roles);
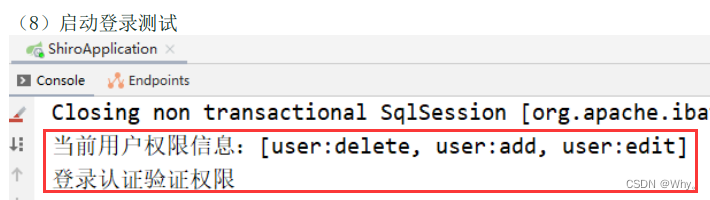
System.out.println("当前用户权限信息:"+permissions);
//创建对象,存储当前登录的用户的权限和角色
SimpleAuthorizationInfo info = new SimpleAuthorizationInfo();
//存储角色
info.addRoles(roles);
//存储权限信息
info.addStringPermissions(permissions);
//返回
return info;
}
6.6 授权验证-异常处理
创建认证异常处理类,使用@ControllerAdvice 加@ExceptionHandler 实现特殊异常处理。
@ControllerAdvice
public class PermissionsException {
@ExceptionHandler(UnauthorizedException.class)
@ResponseBody
public String unauthorizedException(Exception e){
return "无权限";
}
@ExceptionHandler(AuthorizationException.class)
@ResponseBody
public String authorizationException(Exception e){
return "权限认证失败";
}
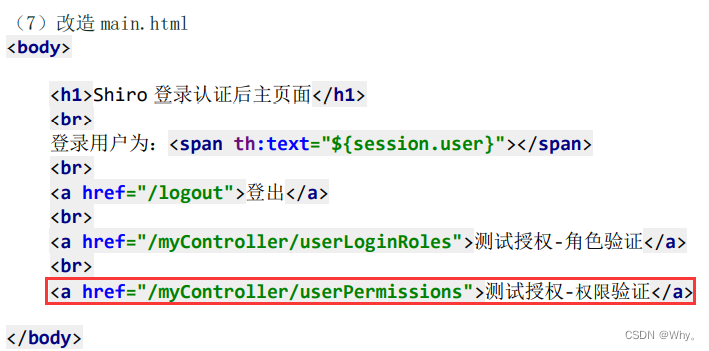
}6.7 前端页面授权验证-只显示有权限的链接
7、 实现缓存
7.1 EhCache
EhCache是一种广泛使用的开源Java分布式缓存。主要面向通用缓存,JavaEE和轻量级容器。可以和大部分Java项目无缝整合,例如:Hibernate中的缓存就是基于EhCache实现的。
EhCache支持内存和磁盘存储,默认存储在内存中,如内存不够时把缓存数据同步到磁盘中。EhCache支持基于Filter的Cache实现,也支持Gzip压缩算法。
EhCache直接在JVM虚拟机中缓存,速度快,效率高;
EhCache缺点是缓存共享麻烦,集群分布式应用使用不方便
7.1.1 案例
添加依赖:
    <dependencies>
        <dependency>
            <groupId>net.sf.ehcache</groupId>
            <artifactId>ehcache</artifactId>
            <version>2.6.11</version>
            <type>pom</type>
        </dependency>
    </dependencies>
添加配置文件-ehcahe.xml
<?xml version="1.0" encoding="UTF-8"?>
<ehcache>
    <!--磁盘的缓存位置-->
    <diskStore path="java.io.tmpdir/ehcache"/>
    <!--默认缓存-->
    <defaultCache
            maxEntriesLocalHeap="10000"
            eternal="false"
            timeToIdleSeconds="120"
            timeToLiveSeconds="120"
            maxEntriesLocalDisk="10000000"
            diskExpiryThreadIntervalSeconds="120"
            memoryStoreEvictionPolicy="LRU">
        <persistence strategy="localTempSwap"/>
    </defaultCache>

    <!--helloworld缓存-->
    <cache name="HelloWorldCache"
           maxElementsInMemory="1000"
           eternal="false"
           timeToIdleSeconds="5"
           timeToLiveSeconds="5"
           overflowToDisk="false"
           memoryStoreEvictionPolicy="LRU"/>

    <!--
     defaultCache:默认缓存策略,当ehcache找不到定义的缓存时,则使用这个缓存策略。只能定义一个。
   -->
    <!--
      name:缓存名称。
      maxElementsInMemory:缓存最大数目
      maxElementsOnDisk:硬盘最大缓存个数。
      eternal:对象是否永久有效,一但设置了,timeout将不起作用。
      overflowToDisk:是否保存到磁盘,当系统宕机时
      timeToIdleSeconds:设置对象在失效前的允许闲置时间(单位:秒)。仅当eternal=false对象不是永久有效时使用,可选属性,默认值是0,也就是可闲置时间无穷大。
      timeToLiveSeconds:设置对象在失效前允许存活时间(单位:秒)。最大时间介于创建时间和失效时间之间。仅当eternal=false对象不是永久有效时使用,默认是0.,也就是对象存活时间无穷大。
      diskPersistent:是否缓存虚拟机重启期数据 Whether the disk store persists between restarts of the Virtual Machine. The default value is false.
      diskSpoolBufferSizeMB:这个参数设置DiskStore(磁盘缓存)的缓存区大小。默认是30MB。每个Cache都应该有自己的一个缓冲区。
      diskExpiryThreadIntervalSeconds:磁盘失效线程运行时间间隔,默认是120秒。
      memoryStoreEvictionPolicy:当达到maxElementsInMemory限制时,Ehcache将会根据指定的策略去清理内存。默认策略是LRU(最近最少使用)。你可以设置为FIFO(先进先出)或是LFU(较少使用)。
      clearOnFlush:内存数量最大时是否清除。
      memoryStoreEvictionPolicy:可选策略有:LRU(最近最少使用,默认策略)、FIFO(先进先出)、LFU(最少访问次数)。
      FIFO,first in first out,这个是大家最熟的,先进先出。
      LFU, Less Frequently Used,就是上面例子中使用的策略,直白一点就是讲一直以来最少被使用的。如上面所讲,缓存的元素有一个hit属性,hit值最小的将会被清出缓存。
      LRU,Least Recently Used,最近最少使用的,缓存的元素有一个时间戳,当缓存容量满了,而又需要腾出地方来缓存新的元素的时候,那么现有缓存元素中时间戳离当前时间最远的元素将被清出缓存。
   -->

</ehcache>
7.1.2 Shiro整合EhCache
Shiro官方提供了shiro-ehcache,实现了整合EhCache作为Shiro的缓存工具。可以缓 存认证执行的Realm方法,减少对数据库的访问,提高认证效率
(2)在 resources 下添加配置文件 ehcache/ehcache-shiro.xml
<?xml version="1.0" encoding="UTF-8"?>
<ehcache name="ehcache" updateCheck="false">
    <!--磁盘的缓存位置-->
    <diskStore path="java.io.tmpdir"/>
    <!--默认缓存-->
    <defaultCache
            maxEntriesLocalHeap="1000"
            eternal="false"
            timeToIdleSeconds="3600"
            timeToLiveSeconds="3600"
            overflowToDisk="false">
    </defaultCache>

    <!--登录认证信息缓存:缓存用户角色权限-->
    <cache name="loginRolePsCache"
           maxEntriesLocalHeap="2000"
           eternal="false"
           timeToIdleSeconds="600"
           timeToLiveSeconds="0"
           overflowToDisk="false"
           statistics="true"/>

</ehcache>
修改配置类 ShiroConfig.java
import at.pollux.thymeleaf.shiro.dialect.ShiroDialect;
import com.atguigu.shiro.realm.MyRealm;
import net.sf.ehcache.CacheManager;
import org.apache.shiro.authc.credential.HashedCredentialsMatcher;
import org.apache.shiro.cache.ehcache.EhCacheManager;
import org.apache.shiro.io.ResourceUtils;
import org.apache.shiro.spring.web.config.DefaultShiroFilterChainDefinition;
import org.apache.shiro.web.mgt.CookieRememberMeManager;
import org.apache.shiro.web.mgt.DefaultWebSecurityManager;
import org.apache.shiro.web.servlet.SimpleCookie;
import org.springframework.beans.factory.annotation.Autowired;
import org.springframework.context.annotation.Bean;
import org.springframework.context.annotation.Configuration;

import java.io.IOException;
import java.io.InputStream;

@Configuration
public class ShiroConfig {
    @Autowired
    private MyRealm myRealm;

    //配置 SecurityManager
    @Bean
    public DefaultWebSecurityManager defaultWebSecurityManager() {
        //1 创建defaultWebSecurityManager对象
        DefaultWebSecurityManager defaultWebSecurityManager = new DefaultWebSecurityManager();
        //2 创建加密对象,设置相关属性
        HashedCredentialsMatcher matcher = new HashedCredentialsMatcher();
        //2.1采用md5加密
        matcher.setHashAlgorithmName("md5");;
        //2.2迭代加密次数
        matcher.setHashIterations(3);
        //3 将加密对象存储到myRealm中
        myRealm.setCredentialsMatcher(matcher);
        //4 将myRealm存入defaultWebSecurityManager对象
        defaultWebSecurityManager.setRealm(myRealm);
        //4.5 设置rememberMe
        defaultWebSecurityManager.setRememberMeManager(rememberMeManager());
        //4.6 设置缓存管理器
        defaultWebSecurityManager.setCacheManager(getEhCacheManager());
        //5 返回
        return defaultWebSecurityManager;
    }

    //cookie 属性设置
    public SimpleCookie rememberMeCookie(){
        SimpleCookie cookie = new SimpleCookie("rememberMe");
        //设置跨域
        //cookie.setDomain(domain);
        cookie.setPath("/");
        cookie.setHttpOnly(true);
        cookie.setMaxAge(30*24*60*60);
        return cookie;
    }
    //创建 Shiro 的 cookie 管理对象
    public CookieRememberMeManager rememberMeManager(){
        CookieRememberMeManager cookieRememberMeManager = new
                CookieRememberMeManager();
        cookieRememberMeManager.setCookie(rememberMeCookie());

        cookieRememberMeManager.setCipherKey("1234567890987654".getBytes());
        return cookieRememberMeManager;
    }

    //配置 Shiro 内置过滤器拦截范围
    @Bean
    public DefaultShiroFilterChainDefinition
    shiroFilterChainDefinition(){
        DefaultShiroFilterChainDefinition definition = new
                DefaultShiroFilterChainDefinition();
        //设置不认证可以访问的资源
        definition.addPathDefinition("/myController/userLogin","anon");
        definition.addPathDefinition("/myController/login","anon");
        //配置登出过滤器
        definition.addPathDefinition("/logout","logout");
        //设置需要进行登录认证的拦截范围
        definition.addPathDefinition("/**","authc");
        //添加存在用户的过滤器(rememberMe)
        definition.addPathDefinition("/**","user");
        return definition;
    }

    @Bean
    public ShiroDialect shiroDialect(){
        return new ShiroDialect();
    }

    // 缓存管理器
    public EhCacheManager getEhCacheManager(){
        EhCacheManager ehCacheManager = new EhCacheManager();
        InputStream is = null;
        try {
            is = ResourceUtils.getInputStreamForPath("lasspath:ehcache/ehcache-shiro.xml");
        } catch (IOException e) {
            e.printStackTrace();
        }
        CacheManager cacheManager = new CacheManager(is);
        ehCacheManager.setCacheManager(cacheManager);
        return ehCacheManager;
    }
}


 被折叠的 条评论
为什么被折叠?
被折叠的 条评论
为什么被折叠?
 到【灌水乐园】发言


