


 本文介绍了SpringBoot的核心功能,包括独立运行、内嵌容器、自动配置等,并详细讲解了SpringBoot的优缺点。此外,还展示了如何快速搭建SpringBoot项目,包括使用Spring Initializr和maven创建方式。最后,探讨了@SpringBootApplication和SpringApplication.run的细节,阐述了它们的作用和工作原理。
Springboot
1 SpringBoot入门
1.1 Springboot核心功能
1)独立运行的Spring项目
SpringBoot允许以jar包的形式独立的运行,运行一个SpringBoot项目只需要通过java -jar xxx.jar的方式来运行。
2)内嵌servlet容器
SpringBoot可选择内嵌Tomcat,jetty等,这样我们无需以war包形式部署项目。
3)提供Start简化Maven配置
Spring提供一系列的Start(场景启动器)来简化maven的依赖加载。
4)自动配置Spring
Spring Boot根据在类路径中jar包,为jar包中的类自动配置Bean,这样会极大的减少我们要使用的配置,当前,如果在实际开发过程中我们需要使用的bean,springboot没有提供支持,我们则可以自定义自动配置。
5)准生产的应用监控
Spring Boot提供基于http,ssh对运行时的项目进行监控。
6)无代码生成和xml配置。
Spring Boot 不需要任何 xml 配置即可实现 Spring 的所有配置。
1.2 Spring Boot的优缺点
1.2.1 优点
- 快速构建项目。
- 对主流开发框架的无配置集成。
- 项目可独立运行,无须外部依赖Servlet容器。
- 提供运行时的应用监控。
- 极大地提高了开发、部署效率。
- 与云计算的天然集成。
1.2.2 缺点
- 版本迭代速度很快,一些模块改动很大。
- 由于不用自己做配置,报错时很难定位。
2 SpringBoot快速搭建
springboot是spring框架对"约定优于配置"理念的最佳实践的产物。
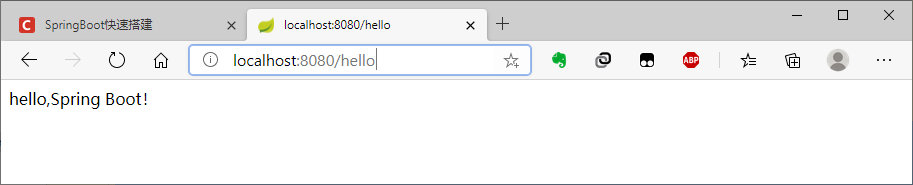
需求:实现项目启动,使用get请求,响应hello,spring Boot。
2.1 方式1:使用Spring Initializr
对于idea开发工具,我们可以使用其Spring Initializr来实现。
1 创建项目


等待其下载依赖结束。

2 添加数据库的连接参数
如果我们添加的依赖中存在mybatis等,则需要我们配置数据库的连接信息,springboot的配置信息配置在application.properties文件中,配置如下内容
server.port=8080

spring.datasource.url=jdbc:mysql://localhost:3306/java26?characterEncoding=utf8&useSSL=false&serverTimezone=UTC&rewriteBatchedStatements=true
spring.datasource.driver-class-name=com.mysql.cj.jdbc.Driver
spring.datasource.username=root
spring.datasource.password=19971001

3 写controller
创建controller,写我们需求。
@Controller
public class HelloController {

    @ResponseBody
    @GetMapping("/hello")
    public String hello(){
        return "hello,Spring Boot!";
    }
}
4 启动项目
因为springboot内置tomcat,因此我们只需要启动启动类就可以了。
@SpringBootApplication
public class DemoApplication {

    public static void main(String[] args) {
        SpringApplication.run(DemoApplication.class, args);
    }

}
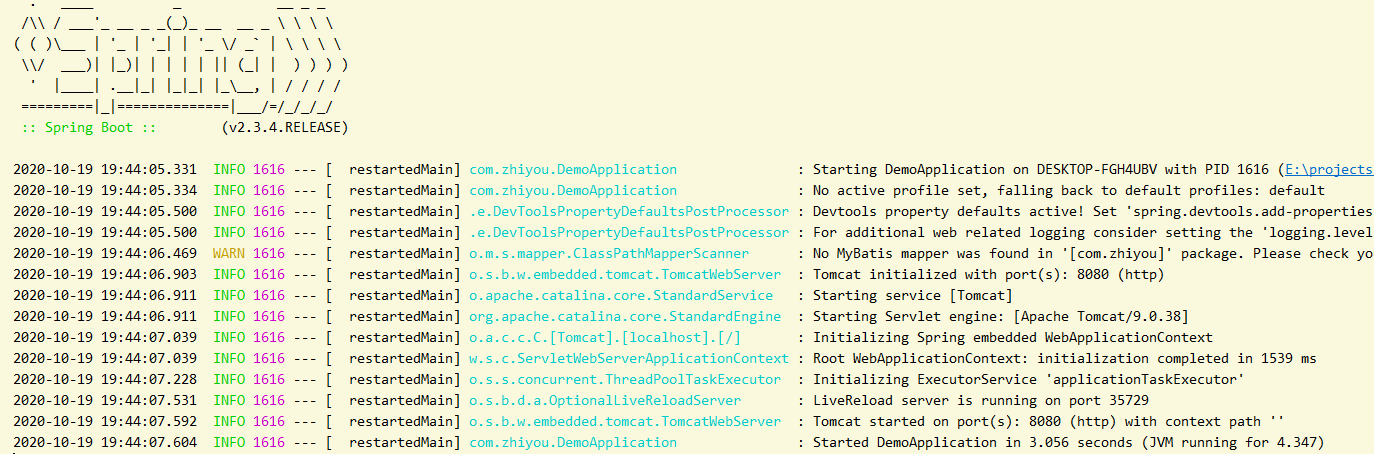
启动成功标志如下:
5 访问测试
2.2 方式2:使用maven创建项目
1 添加pom依赖
<parent>
    <groupId>org.springframework.boot</groupId>
    <artifactId>spring-boot-starter-parent</artifactId>
    <version>1.5.9.RELEASE</version>
</parent>
<!--web模块-->
<dependency>
    <groupId>org.springframework.boot</groupId>
    <artifactId>spring-boot-starter-web</artifactId>
</dependency>
如果创建的时maven模块,则将<parent下>的内容放到父项目中。
2 创建启动类
在java根目录下创建启动类:
@SpringBootApplication
public class Application {
    public static void main(String[] args) {
        SpringApplication.run(Application.class,args);
    }
}
项目搭建完成,后面的步骤和之前保持一致。
3 细节分析
3.1 SpringBootApplication注解
首先@SpringBootApplication是一个复合注解。
@Target(ElementType.TYPE)
@Retention(RetentionPolicy.RUNTIME)
@Documented
@Inherited
@SpringBootConfiguration
@EnableAutoConfiguration
@ComponentScan(excludeFilters = {
		@Filter(type = FilterType.CUSTOM, classes = TypeExcludeFilter.class),
		@Filter(type = FilterType.CUSTOM, classes = AutoConfigurationExcludeFilter.class) })
public @interface SpringBootApplication {...}
虽然他使用了很多个注解进行标注,但是实际有用的就三个:
- @Configuration
- @EnableAutoConfiguration
- @ComponentScan
我们也可以使用这三个注解来标注启动类来代替@SpringBootApplication。
1)@Configuration
该注解表明该类是一个配置类,启动类标注了 @Configuration 之后,本身其实也是一个 IoC 容器的配置类!
我们可以对以上的程序进行拆分,如下:
@Configuration
@EnableAutoConfiguration
@ComponentScan
public class DemoConfiguration {
    @Bean
    public Controller controller() {
        return new Controller();
    }
}

public class DemoApplication {
    public static void main(String[] args) {
        SpringApplication.run(DemoConfiguration.class, args);
    }
}
2)@EnableAutoConfiguration
@EnableAutoConfiguration 也是借助 @Import 的帮助,将所有符合自动配置条件的 bean 定义加载到 IoC 容器,仅此而已!类似于Spring框架中提供的@EnableScheduling、@EnableCaching、@EnableMBeanExport 等,借助于@Import的支持收集和注册特定场景相关的bean的定义。
- @EnableScheduling 是通过 @Import 将 Spring 调度框架相关的 bean 定义都加载到 IoC 容器。
- @EnableMBeanExport 是通过 @Import 将 JMX 相关的 bean 定义加载到 IoC 容器。
作为一个符合注解,其定义如下所示:
@Target(ElementType.TYPE)
@Retention(RetentionPolicy.RUNTIME)
@Documented
@Inherited
@AutoConfigurationPackage
@Import(EnableAutoConfigurationImportSelector.class)
public @interface EnableAutoConfiguration {...}
最关键的要属@Import(EnableAutoConfigurationImportSelector.class),借助 EnableAutoConfigurationImportSelector,@EnableAutoConfiguration 可以帮助 SpringBoot 应用将所有符合条件的 @Configuration 配置都加载到当前 SpringBoot 创建并使用的 IoC 容器。
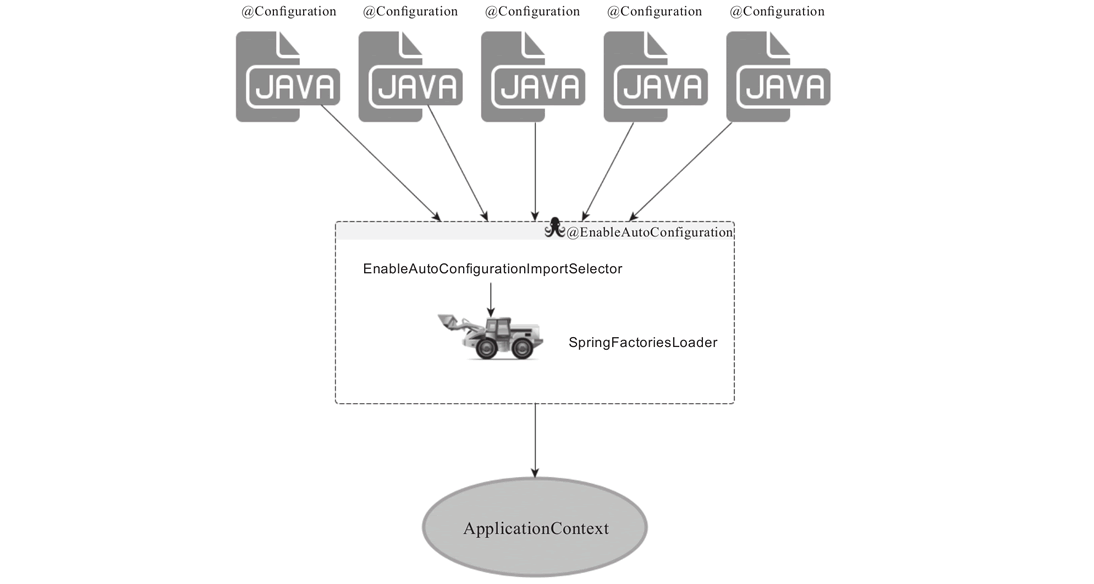
借助于 Spring 框架原有的一个工具类:SpringFactoriesLoader 的支持,@EnableAutoConfiguration 可以“智能”地自动配置功效才得以大功告成!
SpringFactoriesLoader 属于 Spring 框架私有的一种扩展方案,其主要功能就是从指定的配置文件 META-INF/spring.factories 加载配置。
spring.factories 是一个典型的 java properties 文件,配置的格式为 Key=Value 形式,只不过 Key 和 Value 都是 Java 类型的全类名。
3)@ComponentScan
该注解是可有可无的,@ComponentScan 的功能其实就是自动扫描并加载符合条件的组件或 bean 定义,最终将这些 bean 定义加载到容器中。加载 bean 定义到 Spring 的 IoC 容器,我们可以手工单个注册,不一定非要通过批量的自动扫描完成,所以说 @ComponentScan 是可有可无的。如果
3.2 SpringApplication.run
SpringApplication 将一个典型的 Spring 应用启动的流程“模板化”,在没有特殊需求的情况下,默认模板化后的执行流程就可以满足需求了但有特殊需求也没关系,SpringApplication 在合适的流程结点开放了一系列不同类型的扩展点,我们可以通过这些扩展点对 SpringBoot程序的启动和关闭过程进行扩展。
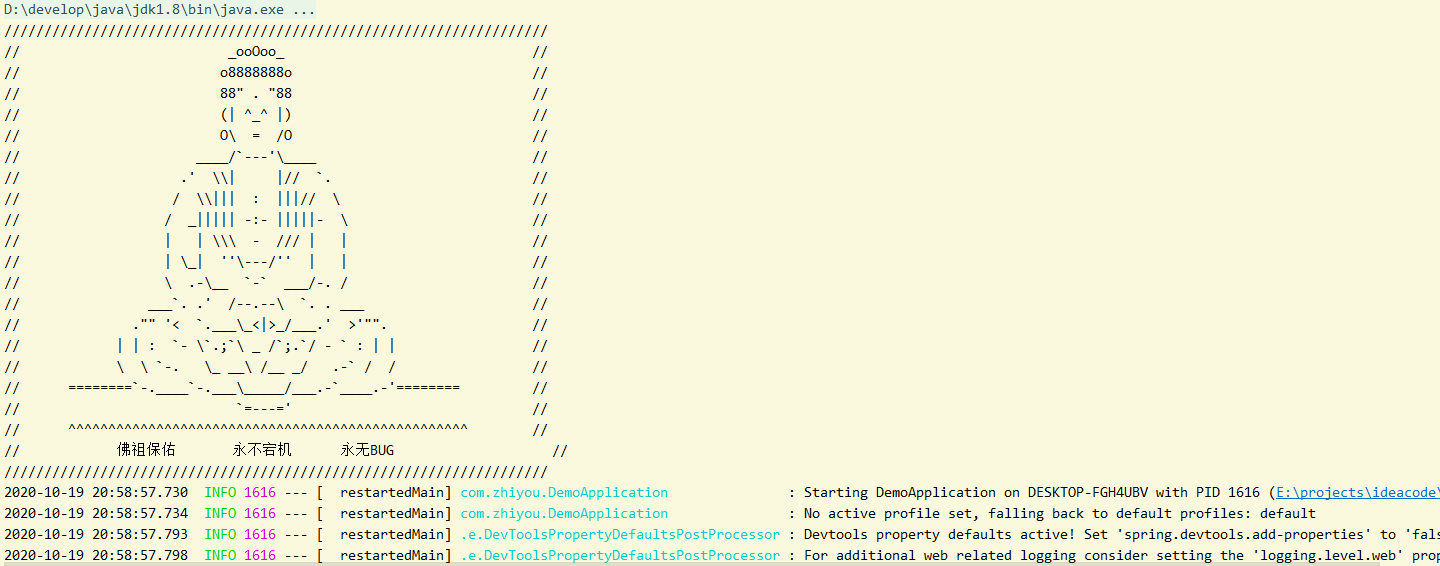
最粗浅的配置就是通过setter方法来设置一些定制的方式,比如在启动的时候使用我们自定义的banner。
在resources目录下创建一个文件banner.txt,添加如下内容:
//                          _ooOoo_                               //
//                         o8888888o                              //
//                         88" . "88                              //
//                         (| ^_^ |)                              //
//                         O\  =  /O                              //
//                      ____/`---'\____                           //
//                    .'  \\|     |//  `.                         //
//                   /  \\|||  :  |||//  \                        //
//                  /  _||||| -:- |||||-  \                       //
//                  |   | \\\  -  /// |   |                       //
//                  | \_|  ''\---/''  |   |                       //
//                  \  .-\__  `-`  ___/-. /                       //
//                ___`. .'  /--.--\  `. . ___                     //
//              ."" '<  `.___\_<|>_/___.'  >'"".                  //
//            | | :  `- \`.;`\ _ /`;.`/ - ` : | |                 //
//            \  \ `-.   \_ __\ /__ _/   .-` /  /                 //
//      ========`-.____`-.___\_____/___.-`____.-'========         //
//                           `=---='                              //
//      ^^^^^^^^^^^^^^^^^^^^^^^^^^^^^^^^^^^^^^^^^^^^^^^^^^        //
//            佛祖保佑       永不宕机      永无BUG                  //
启动启动类:
@SpringBootApplication
public class DemoApplication {

    public static void main(String[] args) {
        SpringApplication springApplication = new SpringApplication(DemoApplication.class);
        springApplication.setBanner(new ResourceBanner(new ClassPathResource("myBanner.txt")));
        springApplication.run(args);
    }
}
启动启动类
如果我们的文件名字为
banner.txt,则可以进行自动配置,不需要我们进行配置。


 385
385

 被折叠的 条评论
为什么被折叠?
被折叠的 条评论
为什么被折叠?
 到【灌水乐园】发言


