


一、安装依赖
yarn add i18next react-i18next二、添加多语言文件
在 src目录下新建一个locales目录
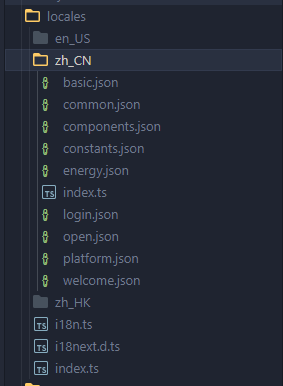
在对应的语言包下添加json字典文件
{
  "$联系邮箱$": "联系邮箱",
  "$账号ID$": "账号ID",
  "$项目数$": "项目数",
  "$手机号码$": "手机号码",
  "$最近登录时间$": "最近登录时间",
  "$新昵称不能为空$": "新昵称不能为空",
  "$账号昵称$": "账号昵称",
  "$基本信息$": "基本信息",
  "$安全设置$": "安全设置",
  "$密码$": "密码",
  "$我的角色$": "我的角色",
  "$我的项目$": "我的项目"
}
三、导出字典
import basic from '@/locales/en_US/basic.json'
import common from '@/locales/en_US/common.json'

export default {
  basic,
  common
}
import zh_CN from '@/locales/zh_CN'
import zh_HK from '@/locales/zh_HK'
import en_US from '@/locales/en_US'

export default { zh_CN, zh_HK, en_US }
四、配置字典的ts类型
import 'i18next'
import type resources from '@/locales'

declare module 'i18next' {
  interface CustomTypeOptions {
    defaultNS: 'zh_CN'
    resources: (typeof resources)['zh_CN']
  }
}

export type i18nKeys<T> = keyof (typeof resources)['zh_CN'][T]
五、初始化i18n
import i18n from 'i18next'
import { initReactI18next } from 'react-i18next'
import resources from '@/locales'
import Cache from '@/utils/cache'

const lng = Cache.get('language', 'i18n_')

i18n
  .use(initReactI18next)
  .init({ resources, lng: lng ?? 'zh_CN', interpolation: { escapeValue: false } })

console.log('i18n init....')

export default i18n
六、React组件中使用
import { useTranslation } from 'react-i18next'
const User: React.FC = () => {
  const { t } = useTranslation('basic')
  return (
     <h3>{t('$基本信息$')}</h3>
  )
}
七、普通文件使用
import i18n from 'i18next'
import type { i18nKeys } from '@/locales/i18next'
type i18nKey = i18nKeys<'basic'>
const t = (key: i18nKey) => {
  return i18n.t(key, {
    ns: 'basic',
  })
}

export const data = [
  {
    key: '2',
    field: 'TEXT',
    name: 'email',
    label: t('$联系邮箱$'),
    style: {
      paddingLeft: 10,
    },
  }
]
八、切换语言
const { i18n } = useTranslation()

const onChangeLanguage = () => {
  const language = i18n.language === 'zh_CN' ? 'zh_HK' : 'zh_CN'
  // i18n.changeLanguage(language).then(() => {
  //   Cache.set('language', language)
  //   window.location.reload()
  // })
  Cache.set('language', language, 'i18n_')
  window.location.reload()
}


 被折叠的 条评论
为什么被折叠?
被折叠的 条评论
为什么被折叠?
 到【灌水乐园】发言


