


官网地址:概览 :: ShardingSphere
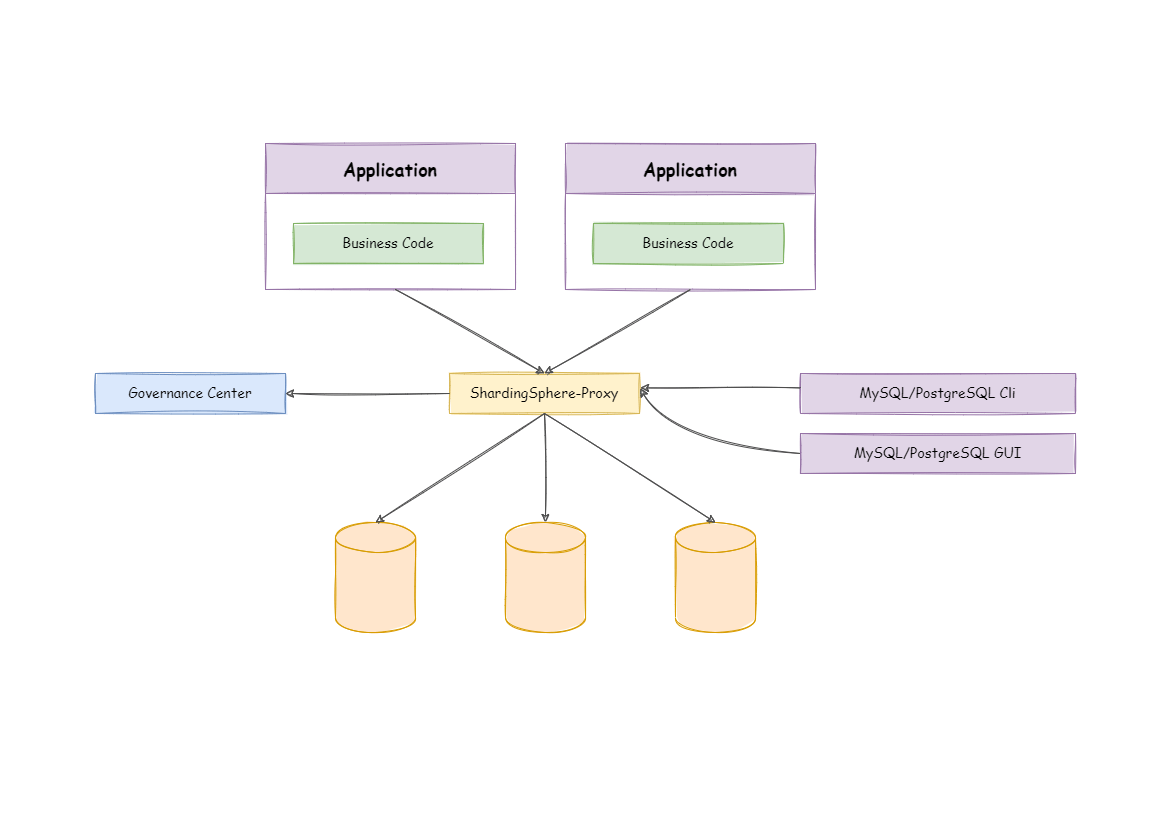
Sharding-Proxy是一个分布式数据库中间件,定位为透明化的数据库代理端。作为开发人员可以完全把它当成数据库,而它具体的分片规则在Sharding-Proxy中配置。
定位为透明化的数据库代理端,提供封装了数据库二进制协议的服务端版本,用于完成对异构语言的支持。 目前提供 MySQL 和 PostgreSQL(兼容 openGauss 等基于 PostgreSQL 的数据库)版本,它可以使用任何兼容 MySQL/PostgreSQL 协议的访问客户端(如:MySQL Command Client, MySQL Workbench, Navicat 等)操作数据,对 DBA 更加友好。
- 向应用程序完全透明,可直接当做 MySQL/PostgreSQL 使用;
- 适用于任何兼容 MySQL/PostgreSQL 协议的的客户端。
下载地址:Index of /dist/shardingsphere
这里是我测试用的
链接:https://pan.baidu.com/s/1O3zB2XO3B41fhBeOhIh4Wg
提取码:0529
这里我使用的是windows的,Linux和docker的配置也是一样的。
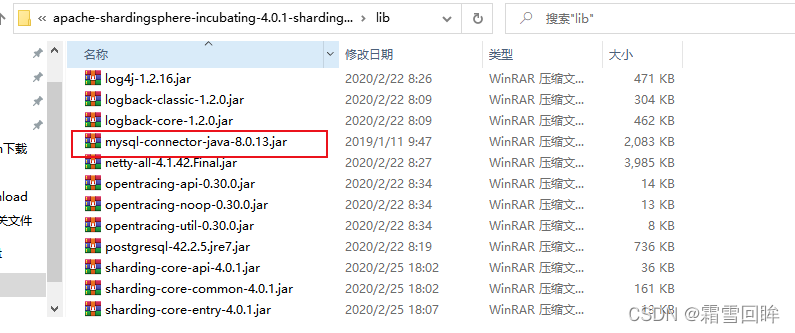
如果从官网上下载的话,它默认是没有mysql连接驱动包的,首先第一件事就是下载mysql连接驱动包放到lib目录下
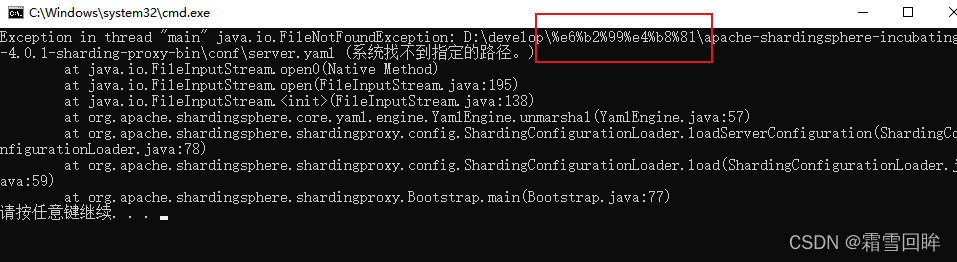
无论在那个系统下安装 都不能带有中文路径,否则中文会被编码然后报错路径找不到。例如:
在conf目录下有几个文件,里面的所有内容都是注释的,如果要做分库分表,读写分离配置的话只需要在conf文件夹下打开配置或者自己创建config-*。yaml的配置即可,sharding-proxy会读取所有config-*.yaml的配置文件。
分库分表配置
schemaName: sharding_db

dataSources:
  ds_0:
    url: jdbc:mysql://数据库ip:3306/edu_db_1?serverTimezone=UTC&useSSL=false
    username: root
    password: 123456
    connectionTimeoutMilliseconds: 30000
    idleTimeoutMilliseconds: 60000
    maxLifetimeMilliseconds: 1800000
    maxPoolSize: 50
  ds_1:
    url: jdbc:mysql://数据库iP:3306/edu_db_2?serverTimezone=UTC&useSSL=false
    username: root
    password: 123456
    connectionTimeoutMilliseconds: 30000
    idleTimeoutMilliseconds: 60000
    maxLifetimeMilliseconds: 1800000
    maxPoolSize: 50

shardingRule:
  tables:
    t_order:
      actualDataNodes: ds_${0..1}.t_order_${1..2}
      tableStrategy:
        inline:
          shardingColumn: order_id
          algorithmExpression: t_order_${order_id % 2 + 1}
      keyGenerator:
        type: SNOWFLAKE
        column: order_id
  bindingTables:
    - t_order
  defaultDatabaseStrategy:
    inline:
      shardingColumn: user_id
      algorithmExpression: ds_${user_id % 2}
  defaultTableStrategy:
    none:
上面的dataSources下的ds_0和ds_1是代理数据源,你的数据库信息以后就用他们两个进行代理了
shardingRule是分表规则,actualDataNodes: ds_${0..1}.t_order_${1..2}代表这数据库ds0或者ds1的t_order表。shardingColumn: order_id就是通过主键字段order_id表。 bindingTables:
- t_order就表示.t_order_1和t_order_2绑定的就是t_order表。
algorithmExpression: t_order_${order_id % 2 + 1}这段的意思就是:order_id对2取余数在加1,也就是说如果order_id为奇数结果就是2,如果为偶数结果就是1,假设order_id为3那么运算结果就为2。那么在上面的actualDataNodes: ds_${0..1}.t_order_${1..2}中就是在ds_0,ds_1中谁有t_order_2这张表就在谁里存数据。这就实现了分库分表。
shardingRule:
 tables:
 t_order:
 actualDataNodes: ds_${0}.t_order_${0..1}
 tableStrategy:
 inline:
 shardingColumn: order_id
 algorithmExpression: t_order_${order_id % 2}
 keyGenerator:
 type: SNOWFLAKE
 column: order_id
 bindingTables:
 - t_order
 defaultDatabaseStrategy:
 inline:
 shardingColumn: user_id
 algorithmExpression: ds_${0}
 defaultTableStrategy:
 none:
这样当order_id为奇数时在ds_0的表t_order_1里面存数据,这样当order_id为偶数时在ds_0的表t_order_0里面存数据,这种就是分表不分库,上面的可能不大容易理解,这个作为举例参考一下。
读写分离配置。
schemaName: master_slave_db

dataSources:
  master_ds:
    url: jdbc:mysql://数据库ip:3306/demo_ds_master?serverTimezone=UTC&useSSL=false
    username: root
    password: 123456
    connectionTimeoutMilliseconds: 30000
    idleTimeoutMilliseconds: 60000
    maxLifetimeMilliseconds: 1800000
    maxPoolSize: 50
  slave_ds_0:
    url: jdbc:mysql://数据库ip:3306/demo_ds_slave_0?serverTimezone=UTC&useSSL=false
    username: root
    password: 123456
    connectionTimeoutMilliseconds: 30000
    idleTimeoutMilliseconds: 60000
    maxLifetimeMilliseconds: 1800000
    maxPoolSize: 50
  slave_ds_1:
    url: jdbc:mysql://数据库ip:3306/demo_ds_slave_1?serverTimezone=UTC&useSSL=false
    username: root
    password: 123456
    connectionTimeoutMilliseconds: 30000
    idleTimeoutMilliseconds: 60000
    maxLifetimeMilliseconds: 1800000
    maxPoolSize: 50

masterSlaveRule:
  name: ms_ds
  masterDataSourceName: master_ds
  slaveDataSourceNames:
    - slave_ds_0
    - slave_ds_1
其中master_ds,slave_ds_0, slave_ds_1都是代理数据源。masterDataSourceName: master_ds这一段说明它是主数据库,slave_ds_0, slave_ds_1就是从数据库。主负责写数据
从数据库负责读数据。这个是需要配置主从复制的这样主数据库写的数据,从数据库就能更新,只从从数据库读取就行了。
以上是分库分表,读写分离的配置,还有一个是公共的配置。在server.yaml文件中需要配置访问用户名和账号。
authentication:
  users:
    root:
      password: root
    sharding:
      password: sharding
      authorizedSchemas: sharding_db

props:
  max.connections.size.per.query: 1
  acceptor.size: 16  # The default value is available processors count * 2.
  executor.size: 16  # Infinite by default.
  proxy.frontend.flush.threshold: 128  # The default value is 128.
    # LOCAL: Proxy will run with LOCAL transaction.
    # XA: Proxy will run with XA transaction.
    # BASE: Proxy will run with B.A.S.E transaction.
  proxy.transaction.type: LOCAL
  proxy.opentracing.enabled: false
  query.with.cipher.column: true
  sql.show: false
authorizedSchemas: sharding_db这里就是说用户名为:sharding 密码为:sharding的账户下代理了一个sharing_db的数据库,当然它不是真的数据库,它只是一个代理数据库,当然也是可以进行连接的。
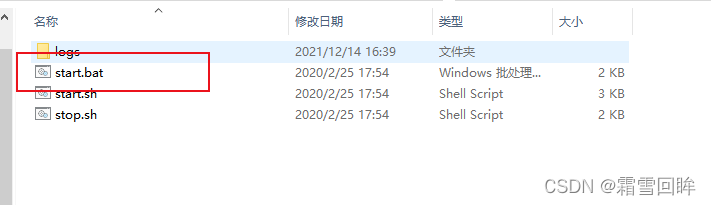
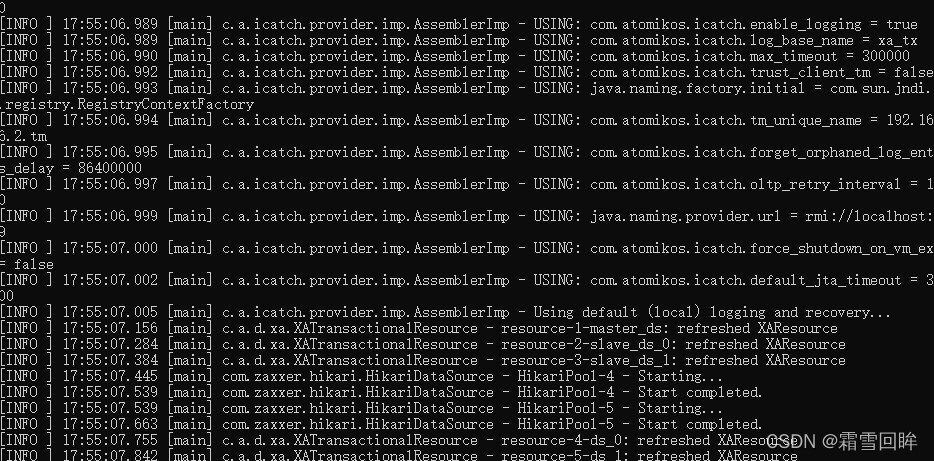
在以上的数据库中都创建好对应的数据库进入bin目录下进行启动
启动成功界面如下
我们可以用工具连接那个shaing数据库默认端口为3307
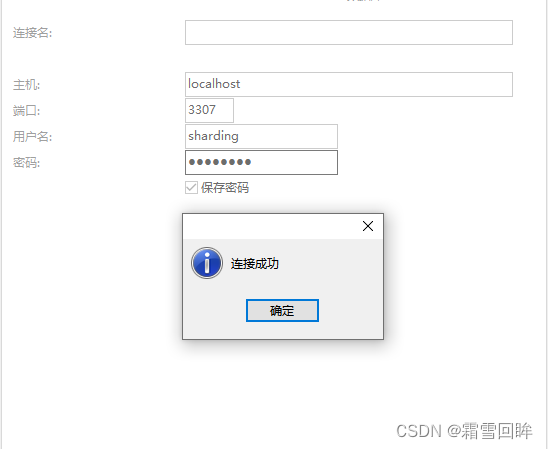
连接结果是这样,我用的是navicat15,这里比较坑的一点是只能连接但是进不去。

点击进去会报错。我查了以下论坛的资料MySQL client Navicat connection shardingsphere-5.0.0-alpha-proxy 3307 port bug · Issue #8458 · apache/shardingsphere · GitHub
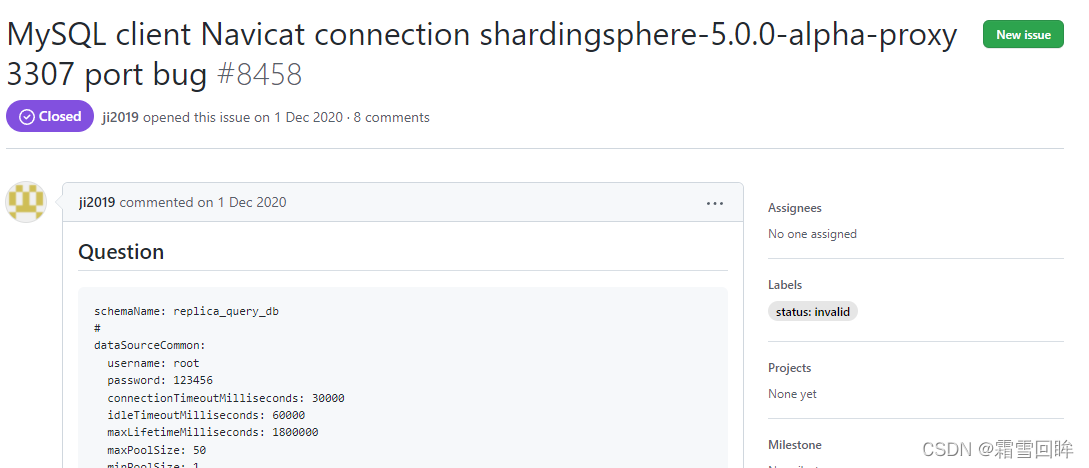
意思是navicat15的一个兼容性bug,于是我去VScode下载了一个MySQL连接工具
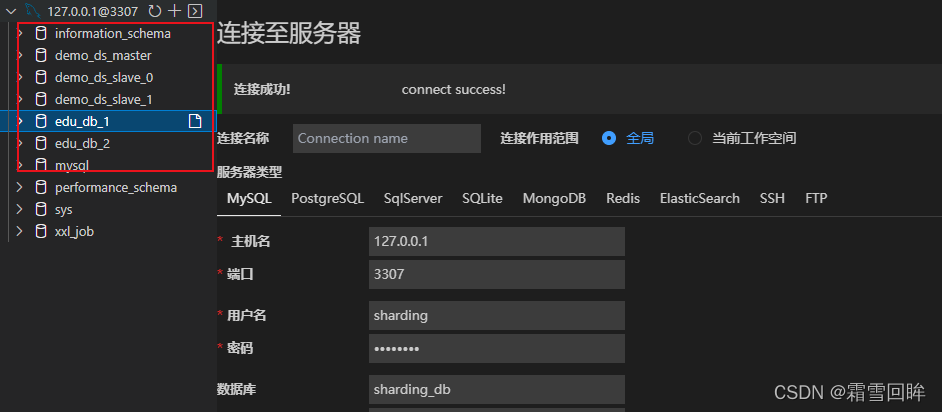
可以看到可以连接成功,所有的代理表都在这里。
sharding-proxy的分库分表,读写分离进行测试是可以成功的以后只需要连接这个代理数据库shardingdb就可以了。操作表的话就操作绑定的表就行了,例如操作t_order表就相当于操作了t_order1和t_order2表,因为t_order1和t_order2表绑定的就是t_order表,只要在配置里说明就行。


 4322
4322

 被折叠的 条评论
为什么被折叠?
被折叠的 条评论
为什么被折叠?
 到【灌水乐园】发言


