


 本文详细描述了在conda环境中配置PyTorch遇到的常见问题,如安装错误、JupyterNotebook汉化、工作目录修改、内核添加与管理等,并提供了相应的解决方案。
1.在conda中配置pytorch时报错
(1) 问题产生
在conda环境中安装pytorch及其相关的库时
出现如下报错:
Collecting package metadata (current_repodata.json): done
Solving environment: failed with initial frozen solve. Retrying with flexible solve.
Solving environment: failed with repodata from current_repodata.json, will retry with next repodata source.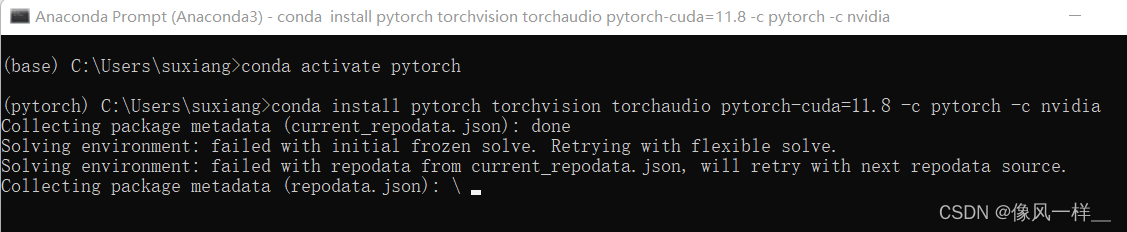
(2) 解决方案
找到.condarc文件,一般在 C:\Users\username 文件夹中
添加如下配置:
default_channels:
  - https://mirrors.tuna.tsinghua.edu.cn/anaconda/pkgs/main
  - https://mirrors.tuna.tsinghua.edu.cn/anaconda/pkgs/r
  - https://mirrors.tuna.tsinghua.edu.cn/anaconda/pkgs/msys2
custom_channels:
  conda-forge: https://mirrors.tuna.tsinghua.edu.cn/anaconda/cloud
  msys2: https://mirrors.tuna.tsinghua.edu.cn/anaconda/cloud
  bioconda: https://mirrors.tuna.tsinghua.edu.cn/anaconda/cloud
  menpo: https://mirrors.tuna.tsinghua.edu.cn/anaconda/cloud
  pytorch: https://mirrors.tuna.tsinghua.edu.cn/anaconda/cloud
  simpleitk: https://mirrors.tuna.tsinghua.edu.cn/anaconda/cloud
show_channel_urls: true
ssl_verify: true
channel_priority: flexible
remote_read_timeout_secs: 2000.0
配置后如果不生效,清空conda缓存后再尝试:
conda clean -i右键单击Anaconda文件夹——>属性——>安全——>编辑——>添加——>高级——>Everyone——>确定
然后在“权限”界面设置Everyone的权限为“完全控制”
更新conda:
conda update -n base conda
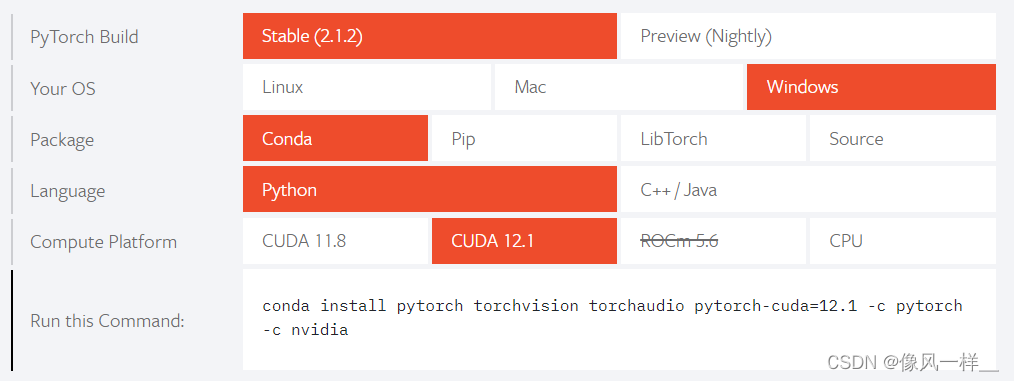
conda update -all最后执行最开始的命令(如下),等待安装(时间略长),不过在执行下列命令前,记得先安装CUDA和cuDNN:
conda install pytorch torchvision torchaudio pytorch-cuda=12.1 -c pytorch -c nvidia2.Jupyter Notebook汉化问题
此解决方案来自于:jupyter 中文 汉化 - 掘金
很多人设置环境变量后,无论是重启电脑还是更新jupyter版本,jupyter notebook依然是英文界面
如下所示:
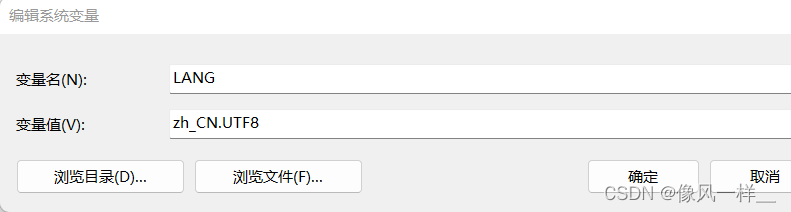
此时还需在conda环境中安装中文包,在base环境和新建的环境下都需要安装:
pip install jupyterlab-language-pack-zh-CN
安装完成后,重启jupyter notebook,设置中文即可

3.修改Jupyter工作目录
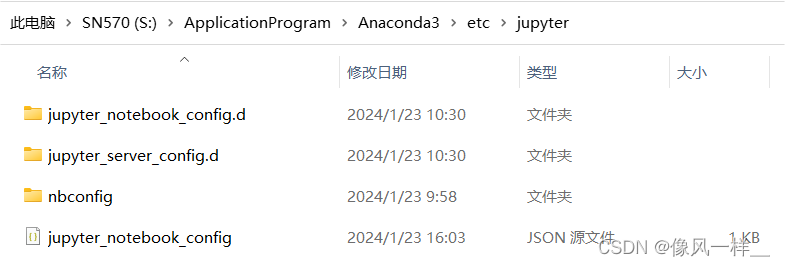
找到jupyter所在位置,比如我的:
S:\ApplicationProgram\Anaconda3\etc\jupyter   //base环境

S:\ApplicationProgram\Anaconda3\envs\pytorch\etc\jupyter  //pytorch环境
在对应的文件内找到jupyter_notebook_config.json文件(没有就创建一个),如下所示:
修改或写入如下代码:
{
    "NotebookApp": {
      "nbserver_extensions": {
       "jupyterlab": true
   },
    "notebook_dir":"S:/Documents/CodeDocuments"  //这是需要修改的地方,即工作目录
   }
}
完成后启动jupyter即可,工作目录已更改
4.添加内核
(1)为当前环境(前面括号里的)安装 ipykernel:
conda install ipykernel(2)查看 ipykernel 是否安装成功:
conda list  # 查看是否有 ipykernel 包

python -m ipykernel --version  # 查看安装的 Ipython 内核的版本号
(3)安装 ipython 内核并设置名称:
# pytoch1 为内核的真正名称, pytorch2 是在 Jupyter 笔记本中内核的显示名称
# 建议真正名称和显示名称都保持和环境名相同,便于使用

python -m ipykernel install --user --name=pytorch1 --display-name="pytorch2"
(4)列出所有已安装的 Jupyter 内核:
jupyter kernelspec list
(5)使用内核:
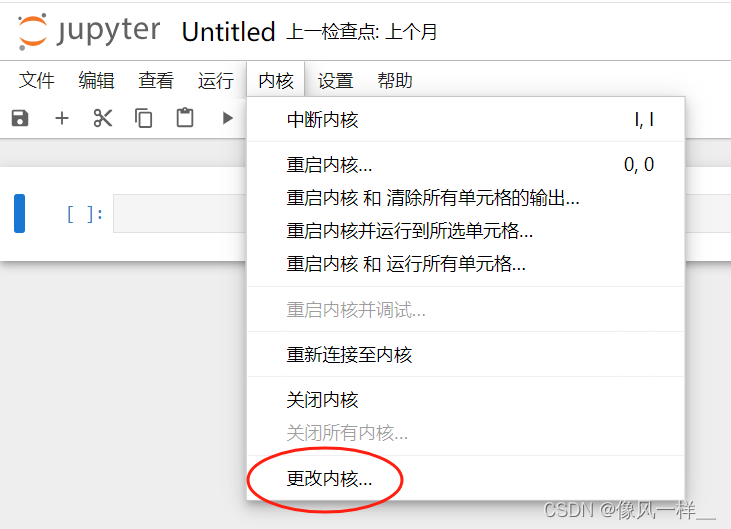
运行 Jupyter notebook 后,点击 内核——>更改内核(kernel->Change kernel) 即可选择已经配置好的内核
(6)Tip: 删除内核
# 移除名为 pytorch 的内核
jupyter kernelspec remove pytorch
5.一些基础命令
# 创建环境
conda create -n env_name python=3.7

# 按照 requirements.txt 中指定的包来安装依赖项
conda install --file requirements.txt

# 删除环境
conda remove -n env_name --all

# 在 conda-forge 通道中查找 pytorch 包
conda search -c conda-forge pytorch

#在 Ubuntu 中启动 Anaconda Prompt(anaconda已被加入环境变量的情况下)
source activate


 被折叠的 条评论
为什么被折叠?
被折叠的 条评论
为什么被折叠?
 到【灌水乐园】发言


