


 这篇博客详细介绍了如何创建SpringBoot工程,包括通过maven构建,引入web依赖,创建启动类。接着,讨论了SpringBoot中properties和yml配置文件的使用,并展示了Java如何读取配置内容。最后,文章阐述了SpringBoot注册web三大组件——Servlet、Filter和Listener的步骤。
SpringBoot工程
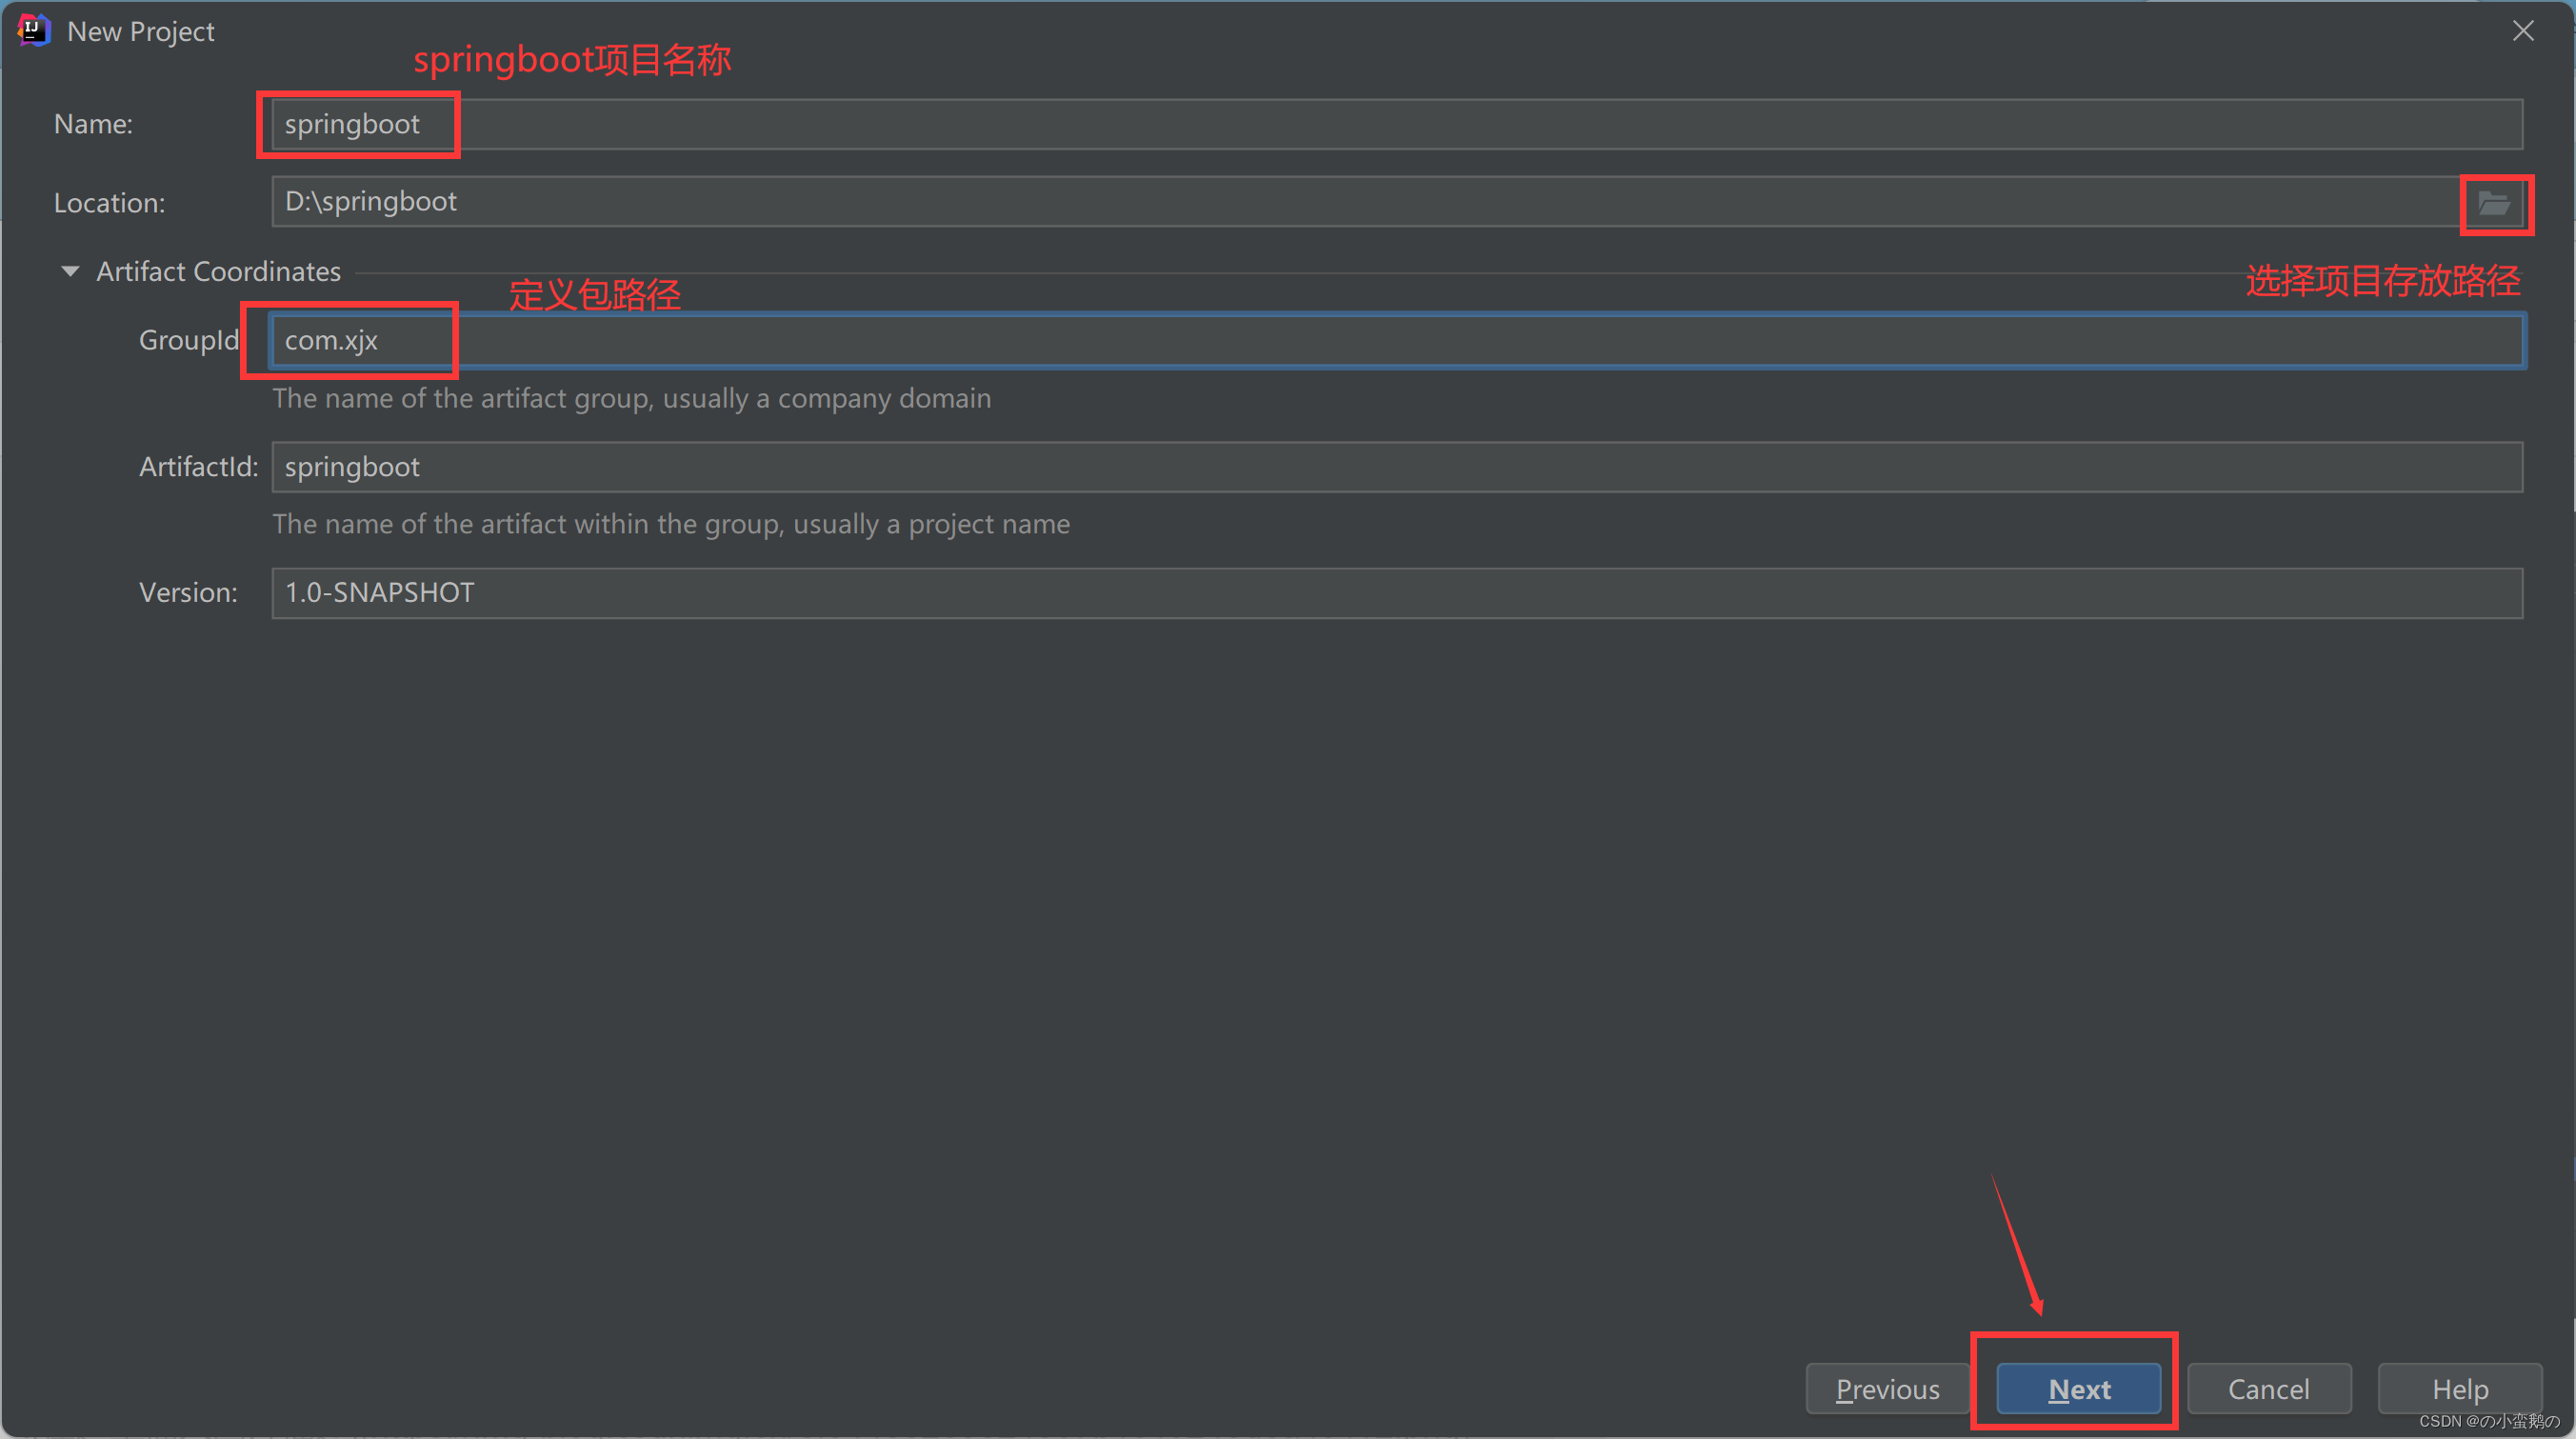
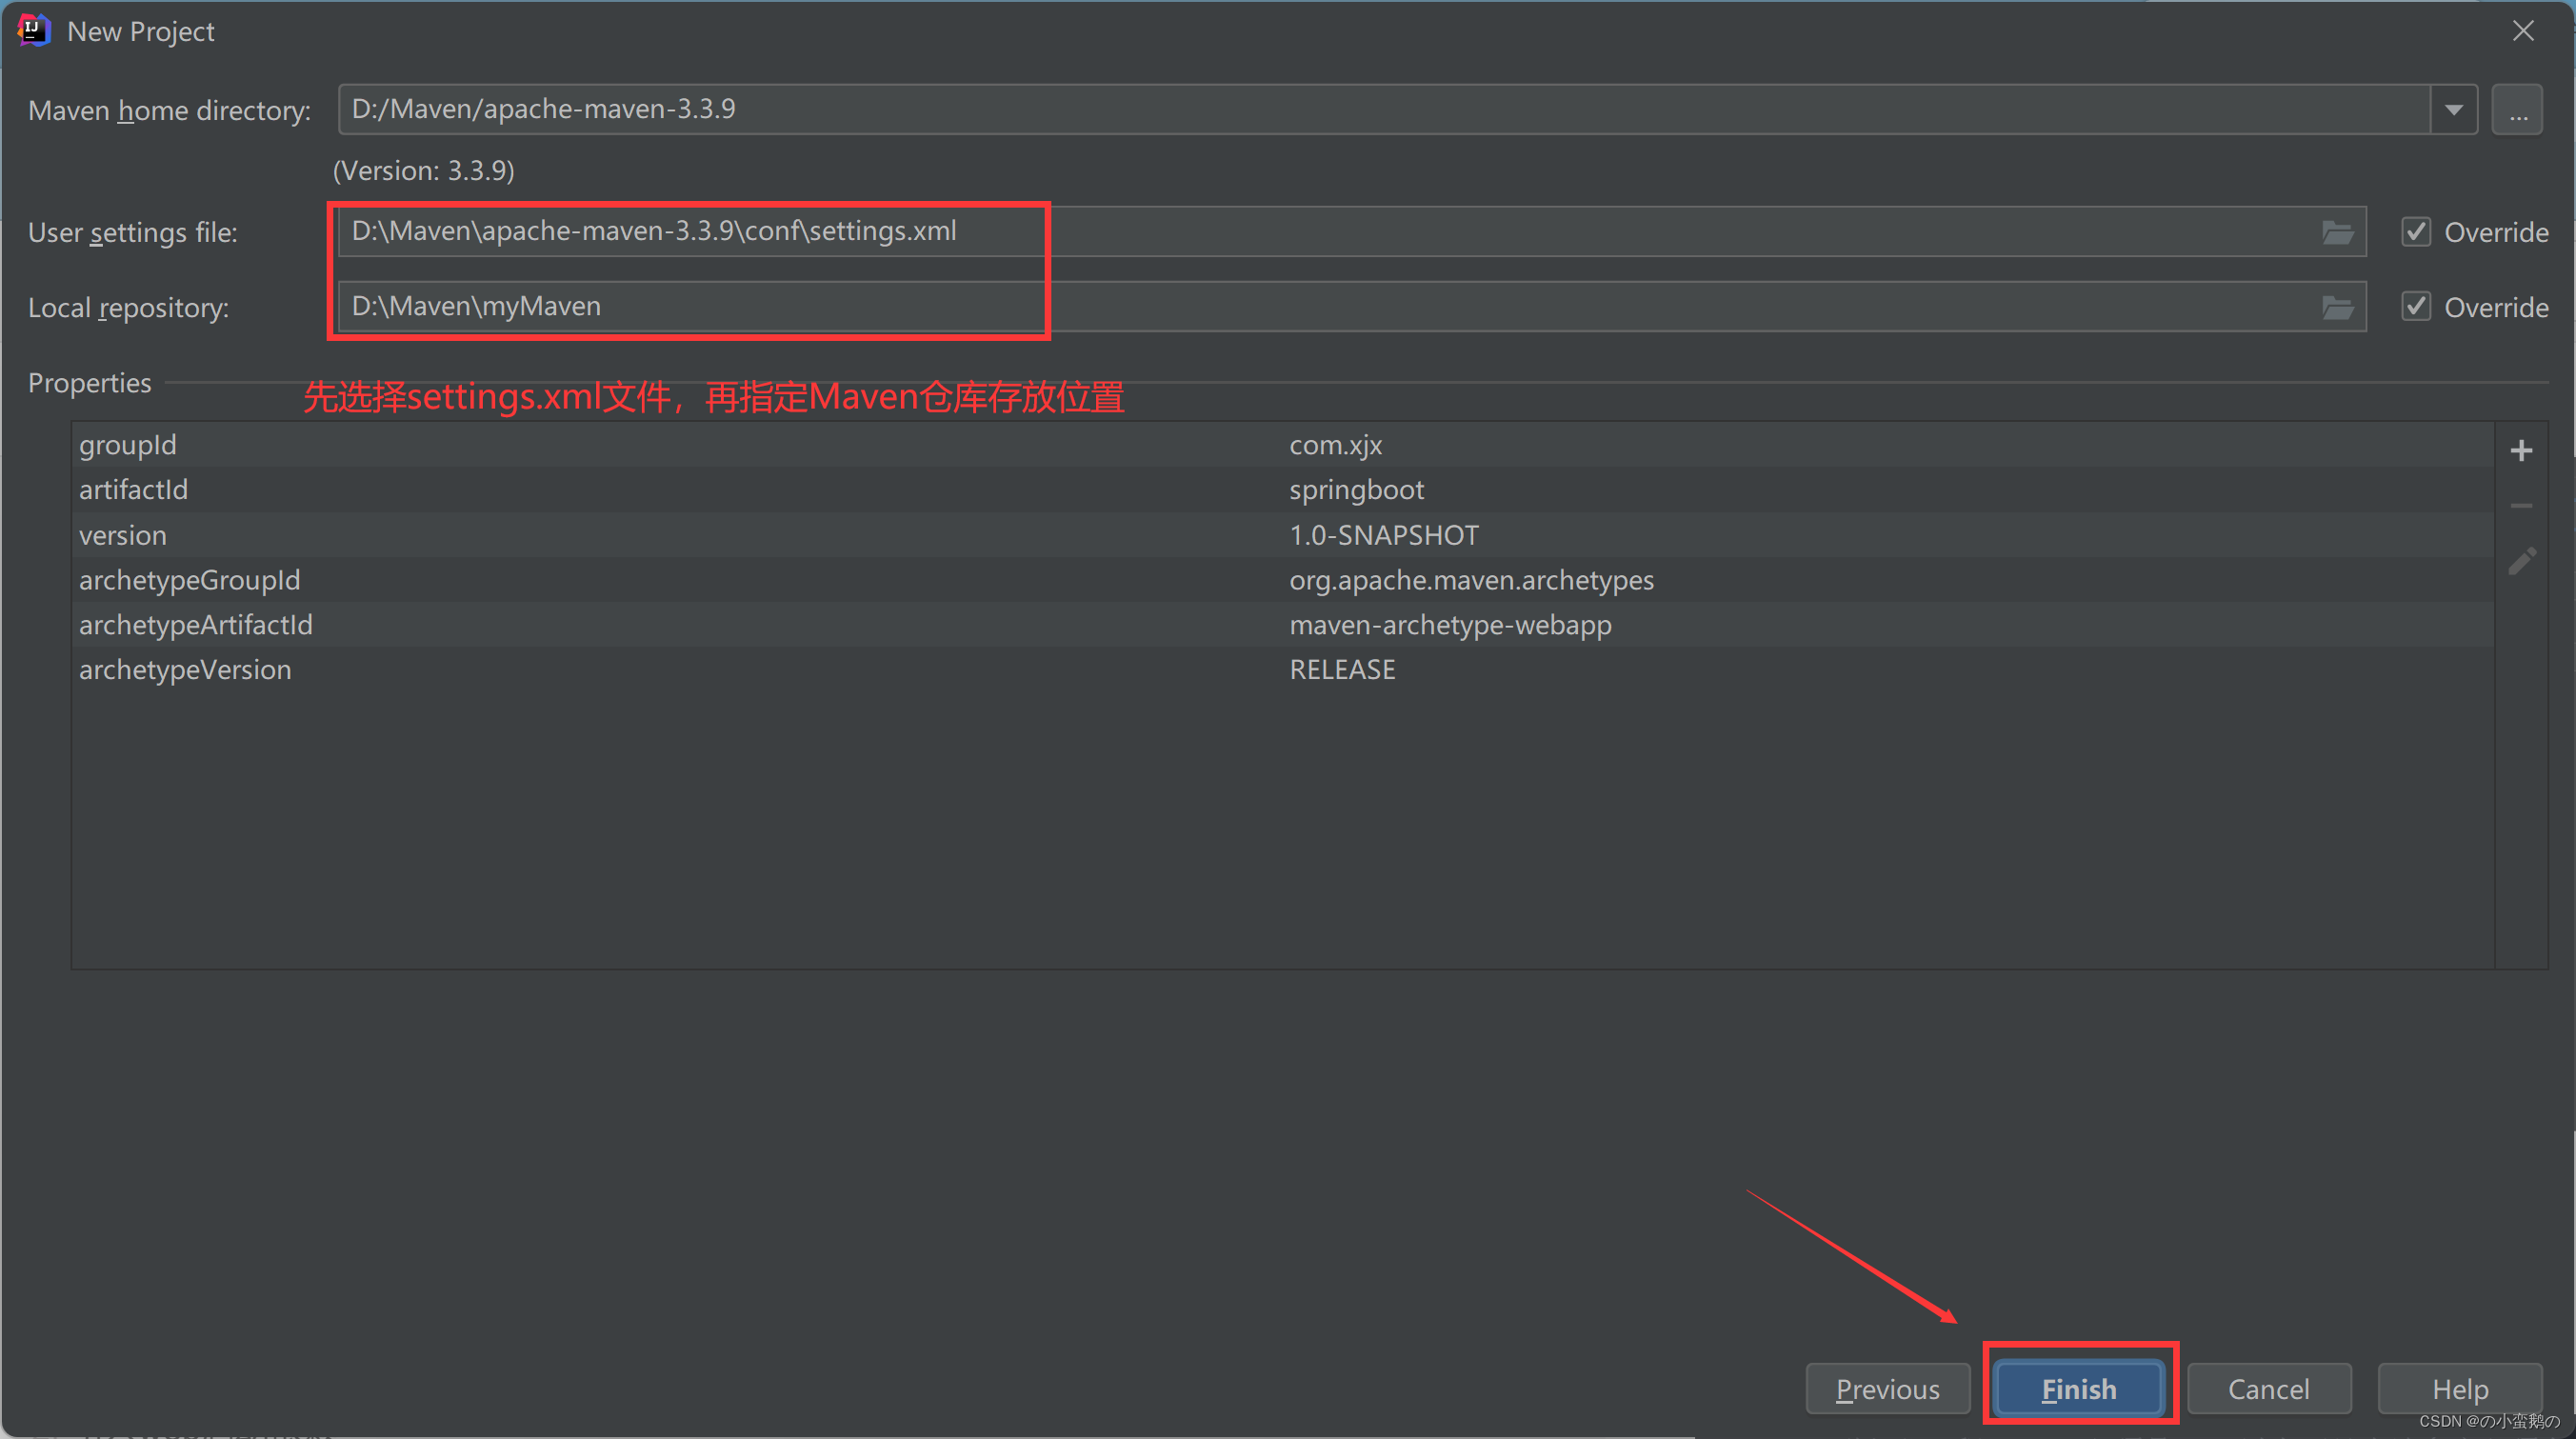
通过maven形式创建springboot工程
1. 通过maven形式创建工程

2. 引入web启动依赖
<!-- 1.引入父工程  idea必须是2020以上而且本地仓库必须存在依赖了-->
    <parent>
        <groupId>org.springframework.boot</groupId>
        <artifactId>spring-boot-starter-parent</artifactId>
        <version>2.5.1</version>
    </parent>

    <groupId>org.example</groupId>
    <artifactId>maven01</artifactId>
    <version>1.0-SNAPSHOT</version>

    <dependencies>
        <!--2.引用web启动依赖-->
        <dependency>
            <groupId>org.springframework.boot</groupId>
            <artifactId>spring-boot-starter-web</artifactId>
        </dependency>
        <dependency>
            <groupId>org.projectlombok</groupId>
            <artifactId>lombok</artifactId>
        </dependency>
    </dependencies>
3.创建启动类并加入注解
@SpringBootApplication
public class MavenApp1 {
    public static void main(String[] args) {
        SpringApplication.run(MavenApp1.class,args);
    }
}
4.springboot工程中常见的配置文件类型
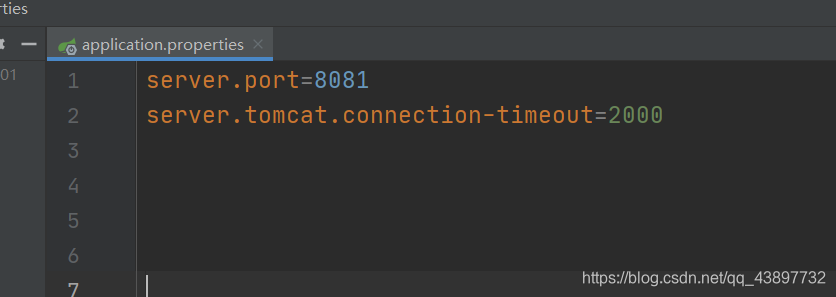
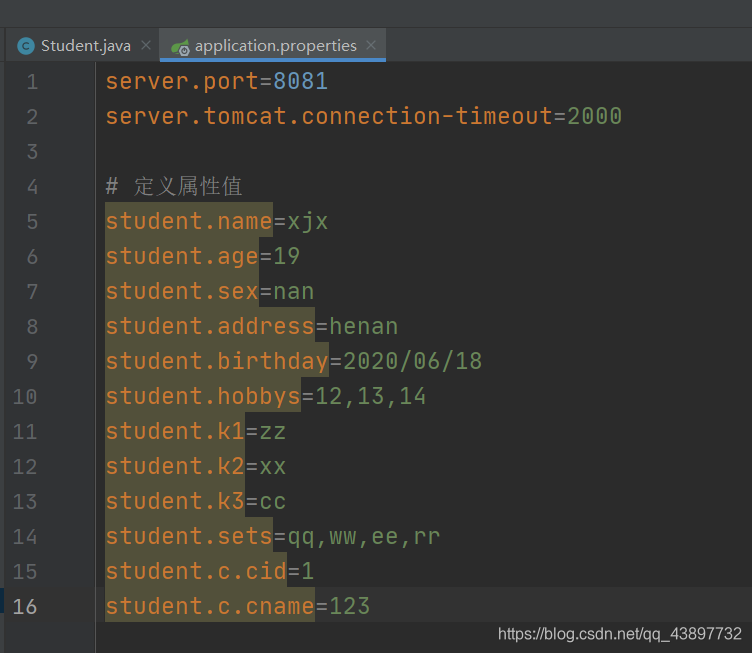
(1) properties属性文件类型
properties格式
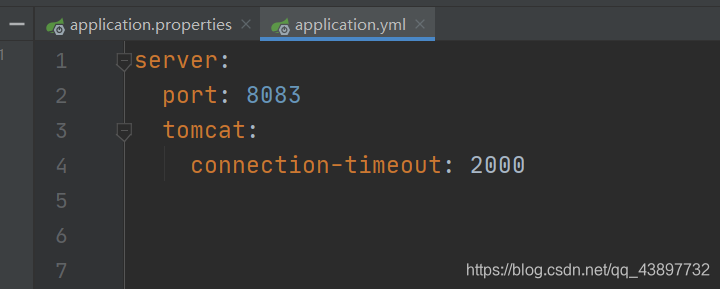
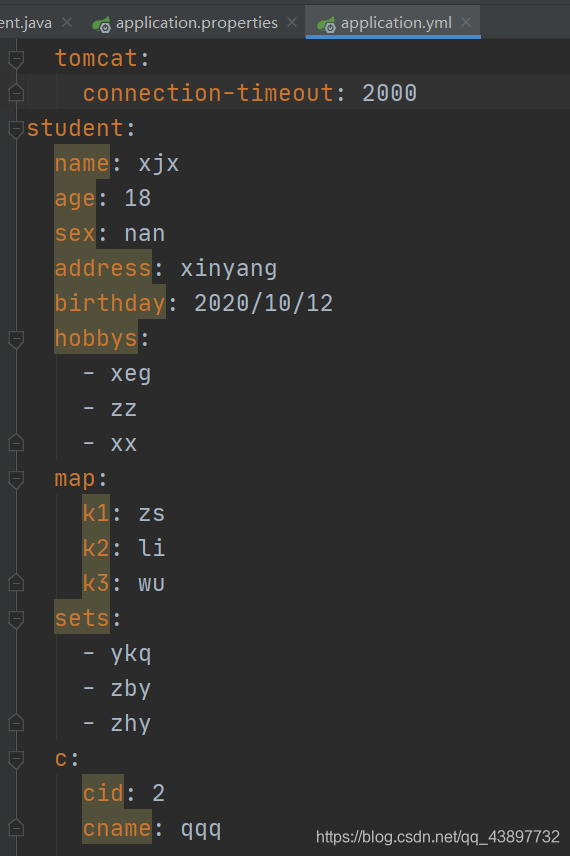
(2) yml文件
yml格式
5.Java如何读取spring boot配置文件中的内容
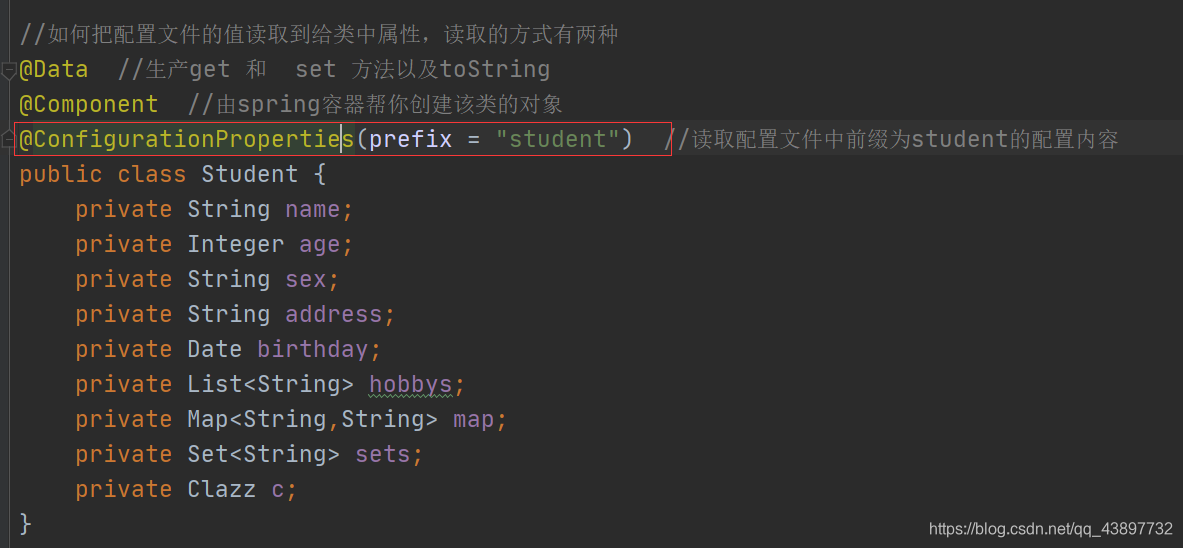
(1) 通过@ConfigurationProperties(prefix = “student”)读取配置文件中前缀为student的配置内容
(2) properties配置文件的内容
(3) yml文件的配置内容
(4) 通过@Value注解来读取
//如何把配置文件的值读取到给类中属性,读取的方式有两种
@Data  //生产get 和  set 方法以及toString
@Component  //由spring容器帮你创建该类的对象
//@ConfigurationProperties(prefix = "student")  //读取配置文件中前缀为student的配置内容
public class Student {
    @Value("${student.name}")
    private String name;
    @Value("${student.age}")
    private Integer age;
    @Value("${student.sex}")
    private String sex;
    @Value("${student.address}")
    private String address;
    @Value("${student.birthday}")
    private Date birthday;
    @Value("${student.hobbys}")
    private List<String> hobbys;
   // @Value("${student.map}")
    private Map<String,String> map;
    @Value("${student.sets}")
    private Set<String> sets;
    //自定义的一个类
    //@Value("${student.c.id}")
    private Clazz c;
}
如果通过@value读取的为properties 不能读取map以及自定义的类型。 如果读取的yml那么只能读取基本数据类型以及String和date类型
6.springboot如何注册web三大组件
- Servlet
- Filter:过滤器
- Listener:监听器
(1) 创建一个spring类
public class MyServlet extends HttpServlet {
    @Override
    protected void doGet(HttpServletRequest req, HttpServletResponse resp) throws ServletException, IOException {
        System.out.println("经过了doGet方法");
    }

    @Override
    protected void doPost(HttpServletRequest req, HttpServletResponse resp) throws ServletException, IOException {
        System.out.println("经过了doPost方法");
    }
}
(2)创建一个配置类
@Configuration
public class MyConfig {
    @Bean
    public ServletRegistrationBean servletBean(){
        ServletRegistrationBean servletRegistrationBean = new ServletRegistrationBean();
        servletRegistrationBean.setServlet(new MyServlet());
        servletRegistrationBean.setName("myServlet");
        servletRegistrationBean.addUrlMappings("/my");
        return servletRegistrationBean;
    }
 }
(3)注册Filter,创建一个过滤器类
public class MyFilter implements Filter {

    @Override
    public void init(FilterConfig filterConfig) throws ServletException {

    }
    @Override
    public void doFilter(ServletRequest servletRequest, ServletResponse servletResponse, FilterChain filterChain) throws IOException, ServletException {
        System.out.println("~~~~~~~~~~~经过了过滤器~~~~~~~~~~");
        filterChain.doFilter(servletRequest,servletResponse);//放行
    }

    @Override
    public void destroy() {

    }
}
(4)注册该过滤器到Springboot容器中
    //注册Filter
    @Bean
    public FilterRegistrationBean filterBean(){
        FilterRegistrationBean filterRegistrationBean = new FilterRegistrationBean();
        filterRegistrationBean.setName("myFilter");
        filterRegistrationBean.setFilter(new MyFilter());
        filterRegistrationBean.addUrlPatterns("/*");
        return filterRegistrationBean;
    }
(5)注册该监听器到Springboot容器中
//注册Listener
    @Bean
    public ServletListenerRegistrationBean myListener(){
        ServletListenerRegistrationBean servletListenerRegistrationBean = new ServletListenerRegistrationBean();
        servletListenerRegistrationBean.setListener(new ListeberConfig());
        return servletListenerRegistrationBean;
    }


 655
655

 被折叠的 条评论
为什么被折叠?
被折叠的 条评论
为什么被折叠?
 到【灌水乐园】发言


