


 本文介绍了Maven的基础知识,包括Maven的下载和配置,如何在Eclipse中使用Maven开发HelloWorld项目,详细讲解了Maven的常用命令、生命周期、项目目录结构以及在WEB项目中的应用,如配置本地仓库、整合Servlet,并提到了依赖管理和依赖范围的概念。
Maven项目管理工具
1. Maven下载和配置
简单介绍:
Mean俩大核心:
1.依赖管理:对jar管理的过程
2.项目构建:项目在编码完成后,对项目进行编译、测试、打包、部署通过命令实现
以下来2个地址记住:我们用的多
maven下载地址:http://maven.apache.org/
远程中央仓库地址:https://mvnrepository.com/
1.1现在本地构建一个第一个标准的maven项目

在mian的同级目录加一个pom.xml文件,在java内用记事本写自己的hello程序。
2)配置本地仓库
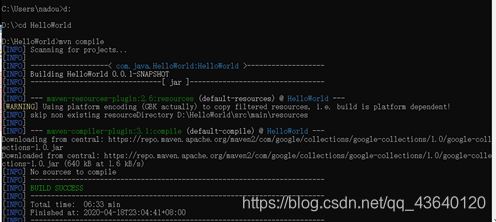
在cmd内运行自己的项目如下:执行mvn compile命令
在编译项目时,自动下载,成功会看见BUILD SUCCESS
分别执行以下命令
Mvn compile //编译
Mvn clean //清空
Mvn test // 测试
Mvn package打包在target目录下
Mvn install把项目安装到本地仓库
执行需要很多时间请耐心等待,卡在一个地方就退出,从新执行一下命令
把Maven本地仓库迁出c盘
操作:更改settings.xml文件
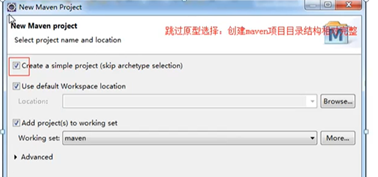
2. Eclipese中使用Maven开发HelloWorld
2.1 Maven常见命令:
Mvn compile编译
Mvn clean清空
Mvn test 测试
Mvn package打包在target目录下
Mvn install把项目安装到本地仓库
2.2.maven生命周期
有“三套”生命周期,每一套相互独立,互不影响。
在一套生命周期内,执行后面的命令前面操作会自动执行
CleanLifeCycle:清理生命周期
clean
defaultLifeCycle:默认生命周期
compile,test,package,Install,deploy
siteLifeCycle:站点生命周期:
site
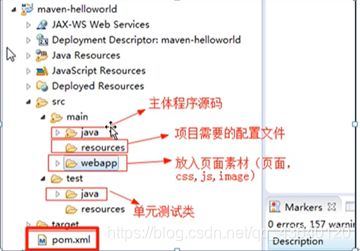
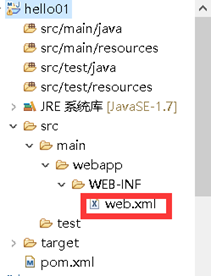
2.3maven项目标准目录结构
3.maven整合WEB项目案例
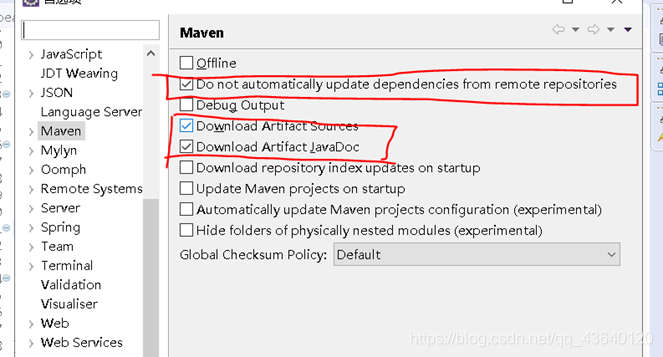
3.1在eclipse中必须的优化配置
1)下载时附带源码和javaDoc(最好加上第6个,我们在后面add Dependecy时可能会用到)
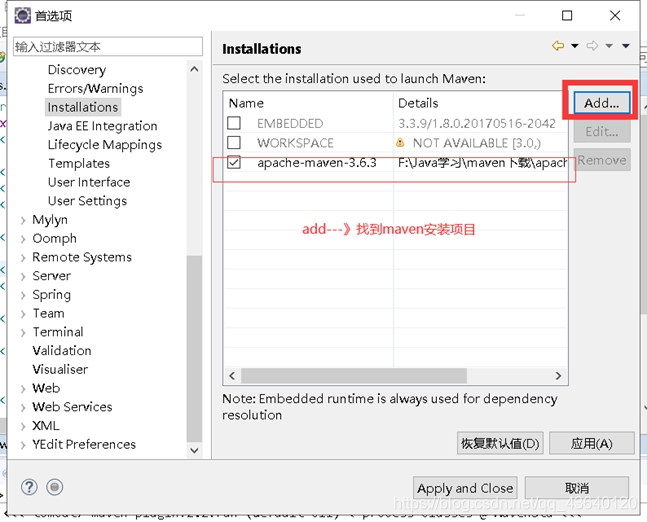
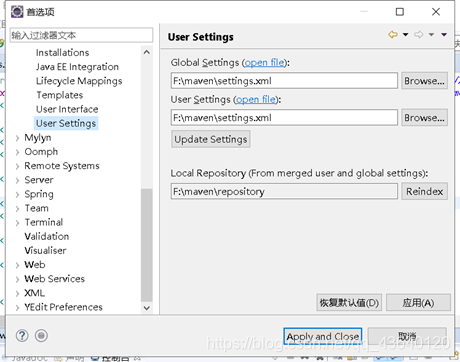
2)设置好Installation和User Settings
3)此外你还必须配置一下编译器
我这里没配置到
配置出错信息
在碰到maven install 发现报错
Failed to execute goal org.apache.maven.plugins:maven-compiler-plugin:3.2:compile (default-compile) on project autotest_fchtgl: Compilation failure
[ERROR] No compiler is provided in this environment. Perhaps you are running on a JRE rather than a JDK?
[ERROR] -> [Help 1]
[ERROR]
[ERROR] To see the full stack trace of the errors, re-run Maven with the -e switch.
[ERROR] Re-run Maven using the -X switch to enable full debug logging.
[ERROR]
[ERROR] For more information about the errors and possible solutions, please read the following articles:
[ERROR] [Help 1] http://cwiki.apache.org/confluence/display/MAVEN/MojoFailureException
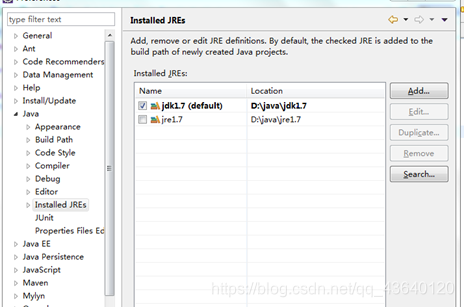
对这个问题其实报错中已经说的很清楚了,看第一条最后的 Perhaps you are running on a JRE rather than a JDK?
就是说你可能编译在一个JRE而不是JDK上,maven 编译是要JDK的,可能你的编译器配置了一个jre路径。
解决:
在eclipse中,选择window→preference→java→Installed JREs 点add添加你的jdk路径,选jdk而不是jre,之前的报错原因就出在这里。
4)构建仓库索引
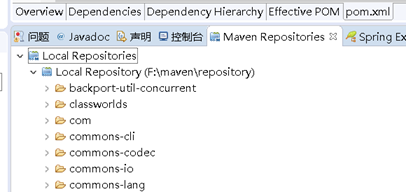
第二个右键Rebuild一下
3.2整合第一个Servlet
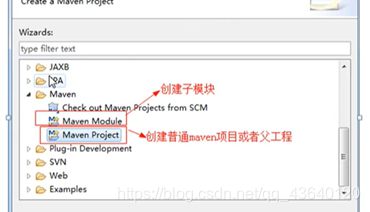
3.2.1先创建maven项目
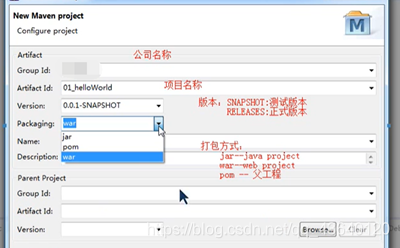
构建好的web出现错误:
1)差xml文件
2)Jdk版本1.5,在pom.xml文件中配置
<build>
  <plugins>
            <!-- 编译的时候使用JDK7和UTF8编码 ,-->
            <plugin>
                <artifactId>maven-compiler-plugin</artifactId>
                <!-- <version>3.0</version> -->
                <configuration>
                    <source>1.7</source>
                    <target>1.7</target>
                    <encoding>UTF-8</encoding>
                </configuration>
            </plugin>

            <!-- 编译jar包 -->
            <plugin>
                <groupId>org.apache.maven.plugins</groupId>
                <artifactId>maven-jar-plugin</artifactId>
                <configuration>
                    <archive>
                        <addMavenDescriptor>false</addMavenDescriptor>
                        <manifest>
                            <addDefaultImplementationEntries>true</addDefaultImplementationEntries>
                            <addDefaultSpecificationEntries>true</addDefaultSpecificationEntries>
                        </manifest>
                    </archive>
                </configuration>
            </plugin>
        </plugins>

  </build>
3)创建一个servlet
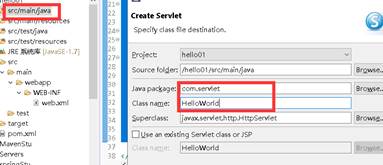
编译报错,缺失jarservlet-api-xx.jar
在中央仓库去找到jarservlet-api的依赖
3.2.2依赖查找
Pom.xml文件里右键maven-》add Dependcy
如果本地仓库没有就去中央仓库找依赖然后手动导入eclipse构建
如:
等待构建完成就行了
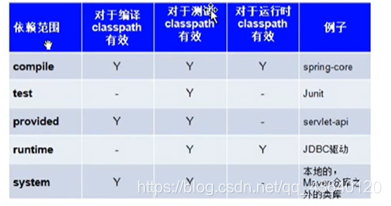
3.3依赖范围
添加依赖范围:默认provide
Provide部署到tomcat不在需要:
如果用到tomcat自带jar,将项目中依赖租用范围设置为provided
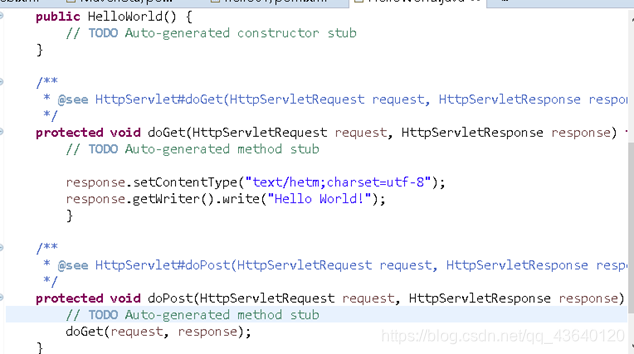
3.4运行Servlet
最简单的Servlet
Web.xml配置文件
  <display-name>HelloMaven</display-name>
  <servlet-name>HelloMaven</servlet-name>
  <servlet-class>com.servlet.HelloWorld</servlet-class>
最后运行
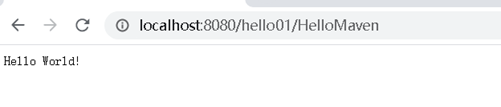
运行成功,整合web第一个Servlet完成!


 664
664

 被折叠的 条评论
为什么被折叠?
被折叠的 条评论
为什么被折叠?
 到【灌水乐园】发言


