


文章目录
01 | 开启springboot
- 新建Springboot工程步骤:
- 新建项目
- 在主方法中增加代码:
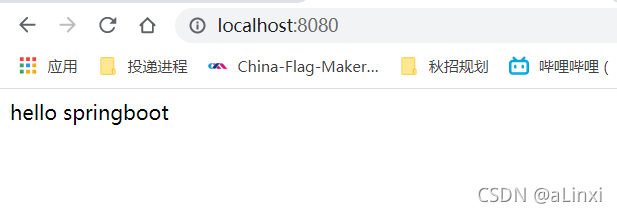
@RestController @SpringBootApplication public class DemoApplication { @RequestMapping("/") String index(){ return "hello springboot"; } public static void main(String[] args) { SpringApplication.run(DemoApplication.class, args); } } - 运行项目,可看见浏览器中显示:hello Springboot
- 注意点:
-
比如查看maven项目的依赖,我们可以用下面命令:
mvn dependency:tree -
排除不需要的依赖:
<exclusion> -
spring-boot-starter-parentspring-boot-starter-parent指定了当前项目为一个Spring Boot项目,它提供了诸多的默认Maven依赖,具体可查看目录D:\m2\repository\org\springframework\boot\spring-boot-dependencies\1.5.9.RELEASE下的spring-boot-dependencies-1.5.9.RELEASE.pom文件
-
spring-boot-starter-web
Spring Boot提供了许多开箱即用的依赖模块,这些模块都是以spring-boot-starter-XX命名的。比如要开启Spring Boot的web功能,只需要在pom.xml中配置spring-boot-starter-web即可. -
spring-boot-maven-plugin
spring-boot-maven-plugin为Spring Boot Maven插件,提供了:-
把项目打包成一个可执行的超级
JAR(uber-JAR),包括把应用程序的所有依赖打入JAR文件内,并为JAR添加一个描述文件,其中的内容能让你用java -jar来运行应用程序。 -
搜索
public static void main()方法来标记为可运行类。
-
02 | Spring Boot一些基础配置
-
Demo步骤:
- 新建springboot工程
- 新建三个pojo,如BlogProperties、PersonProperties、TestConfigBean
@Component public class BlogProperties { @Value("${alinxi.blog.name}") private String name; @Value("${alinxi.blog.title}") private String title; } @ConfigurationProperties(prefix = "alinxi.person") public class PersonProperties { private String age; private String sex; } @Configuration @ConfigurationProperties(prefix = "test") @PropertySource("classpath:test.properties") //指明使用的配置文件 @Component public class TestConfigBean { private String name; private int age; } - 在
application.properties配置文件中设置属性对应的值
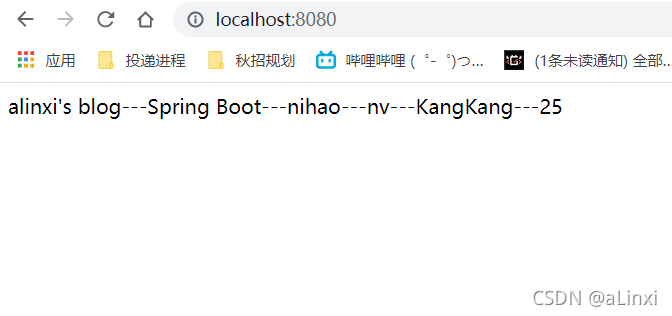
如果不想将值存放在alinxi.blog.name=alinxi's blog alinxi.blog.title=Spring Boot alinxi.blog.wholeTitle=${alinxi.blog.name}--${alinxi.blog.title} alinxi.person.age=nihao alinxi.person.sex=nvapplication.properties中,也可再创建一个test.properties文件test.name=KangKang test.age=25 - 新建
controller类@RestController public class IndexController { @Autowired private BlogProperties blogProperties; @Autowired private PersonProperties personProperties; @Autowired private TestConfigBean testConfigBean; @RequestMapping("/") String index(){ return blogProperties.getName()+"---"+blogProperties.getTitle()+"---" +personProperties.getAge()+"---"+personProperties.getSex()+"---" +testConfigBean.getName()+"---"+testConfigBean.getAge(); } } - 启动项目,localhost:8080:
-
定制
banner:在src/main/resources目录下新建banner.txt文件,然后将自己的图案黏贴进去即可。 -
banner的关闭: 在main方法中:public static void main(String[] args) { SpringApplication app = new SpringApplication(DemoApplication.class); app.setBannerMode(Mode.OFF); app.run(args); } -
通过
@Value("${属性名}")来加载配置文件application.properties中的属性值如在application.properties中定义: alinxi.blog.name=alinxi's blog 然后定义一个bean,通过 @Value("${属性名}") 来加载配置文件中的值: @Value("${alinxi.blog.name}") private String name; -
属性非常多时,可定义一个和配置文件对应的
Bean:1. 定义bean:注解指明前缀 @ConfigurationProperties(prefix = "alinxi.person") public class PersonProperties { private String age; private String sex; } 2. 在入口类加上注解@EnableConfigurationProperties({PersonProperties .class})来启用该配置 3. 在application.properties中添加属性值: alinxi.person.age=nihao alinxi.person.sex=nv 4. 在IndexController中注入该Bean,并使用: @Autowired private PersonProperties personProperties; personProperties.getAge(); -
属性间的引用:
- 在
application.properties配置文件中,各个属性可以相互引用alinxi.blog.name=alinxi's blog alinxi.blog.title=Spring Boot alinxi.blog.wholeTitle=${alinxi.blog.name}--${alinxi.blog.title}
- 在
-
自定义配置文件:
1. 在src/main/resources目录下新建一个test.properties:: test.name=KangKang test.age=25 2. 定义一个对应该配置文件的Bean: @Configuration @ConfigurationProperties(prefix="test") @PropertySource("classpath:test.properties") //指明使用的配置文件 @Component public class TestConfigBean { private String name; private int age; // get,set略 } 3. 在入口类里使用注解@EnableConfigurationProperties({TestConfigBean.class})来启用该配置 -
通过命令行设置属性值:
-
在运行
Spring Boot jar文件时,使用命令java -jar xxx.jar --server.port=8081来改变端口的值。等价于我们手动到application.properties中修改. -
禁止项目的配置被命令行修改,可在main方法中进行如下设置:
	public static void main(String[] args) {
	    SpringApplication app = new SpringApplication(Application.class);
	    app.setAddCommandLineProperties(false);
	    app.run(args);
	}
-
-
使用xml配置:不推荐使用,使用时需在入口类里通过注解
@ImportResource({"classpath:some-application.xml"})来引入xml配置文件。 -
profile配置:针对不同环境下使用不同的配置文件
- 格式: 以
application-{profile}.properties的格式命名,其中{profile}为环境标识。application-dev.properties:开发环境 application-prod.properties:生产环境 - 需要在
application.properties文件中通过spring.profiles.active属性来设置,其值对应{profile}值。如:spring.profiles.active=dev就会加载application-dev.properties配置文件内容。 可以在运行jar文件的时候使用命令 java -jar xxx.jar --spring.profiles.active={profile} 切换不同的环境配置。
- 格式: 以
03 | SpringBoot中使用MyBatis
- 步骤如下
- 引入
mybatis-spring-boot-starter、mysql、druid等相关依赖 - 配置
Druid数据源: 注意路径:server.servlet.context-path: /web。 配置好druid后,登录http://localhost:8080/web/druid,即可看到连接池页面。 - 创建数据库对应实体类
- 创建
mapper接口 - 创建
mapper接口的实现 - 创建
service接口 - 创建
service接口实现类 - 创建
controller - 启动项目:
http://localhost:8080/web/querystudent?sno=001, 即可看到json字符串
- 引入
04 | Spring Boot中使用JdbcTemplate
- 步骤:
- 引入依赖:
spring-boot-starter-jdbc、mysql、druid - 配置
Druid数据源: 注意路径:server.servlet.context-path: /web。 配置好druid后,登录http://localhost:8080/web/druid,即可看到连接池页面。 - 创建数据库对应实体类
- 创建
mapper接口 - 创建
mapper接口的实现 - 创建
service接口 - 创建
service接口实现类 - 创建
dao接口 - 创建
dao接口实现类 - 创建
controller - 启动项目:
http://localhost:8080/web/queryallstudent, 即可看到json字符串
- 引入依赖:
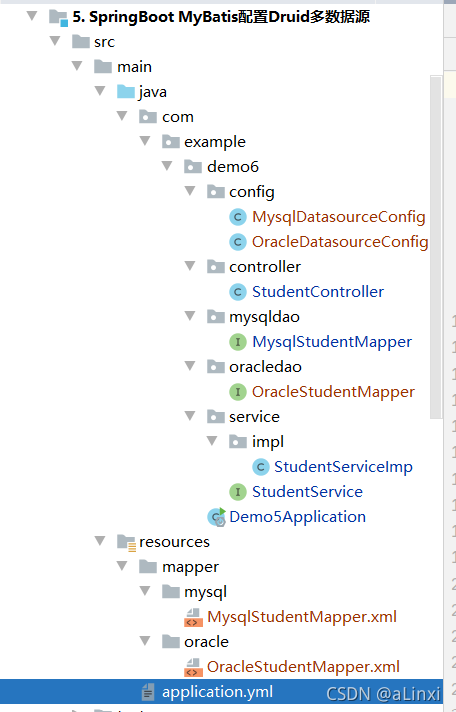
05 | Spring Boot MyBatis配置Druid多数据源
- Demo步骤:
-
目录如下:
-
注意要在
application.yml中配置oracle和mysql的url等。 -
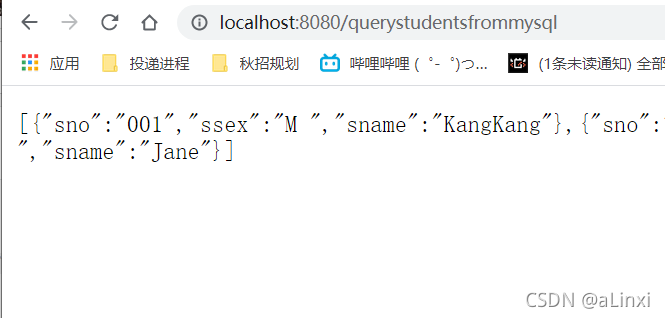
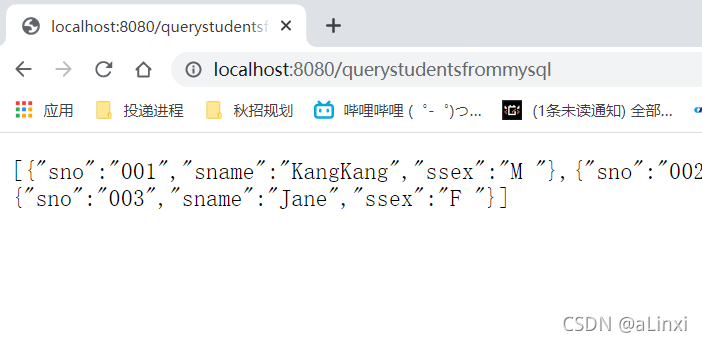
访问:http://localhost:8080/querystudentsfrommysql
-
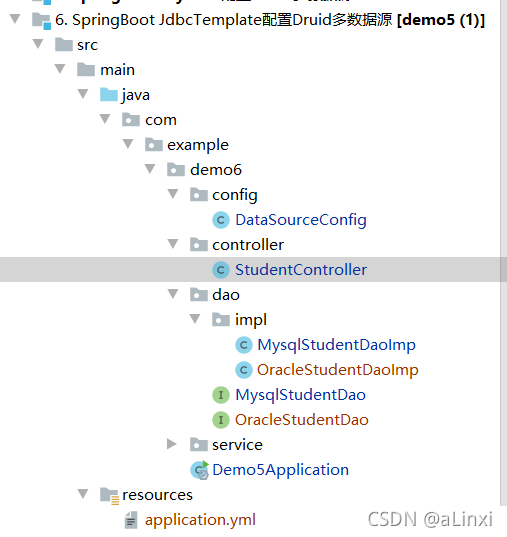
06 | Spring Boot JdbcTemplate配置Druid多数据源
-
Demo创建步骤:
- 在
application.yml中配置多数据源 - 然后创建一个多数据源配置类,根据
application.yml分别配置一个Mysql和Oracle的数据源,并且将这两个数据源注入到两个不同的JdbcTemplate中. 其中mysqldatasource用@Primary标注为主数据源.多数据源配置的时候,必须要有一个主数据源,用@Primary标志该Bean。 - 在
dao层注入相对应的数据源,然后再用数据源进行sql操作即可。@Repository public class MysqlStudentDaoImp implements MysqlStudentDao { @Autowired @Qualifier("mysqlJdbcTemplate") private JdbcTemplate jdbcTemplate; @Override public List<Map<String, Object>> getAllStudents() { return this.jdbcTemplate.queryForList("select * from student"); } } - 访问:http://localhost:8080/querystudentsfrommysql
- 项目目录:
- 在
-
JdbcTemplate配置Druid多数据源的核心在于创建JdbcTemplate时候为其分配不同的数据源,然后在需要访问不同数据库的时候使用对应的JdbcTemplate即可。
07 | Spring Boot AOP记录用户操作日志(有bug)
- 思路总结:首先在需要做日志记录的方法中添加一个自定义注解,再去实现一个日志AOP类,AOP类把自定义注解设置为切点,所以当系统执行某一个添加了自定义注解的方法时,AOP会自动获取该方法名称以及用户信息实现日志记录。
- 步骤如下:
- 引入依赖:aop、mysql驱动、druid数据源驱动
- 创建表
sys_log - 创建表对应的实体类
- 自定义注解:定义一个方法级别的
@Log,用于标注需要监控的方法@Target(ElementType.METHOD) @Retention(RetentionPolicy.RUNTIME) public @interface Log { String value() default ""; } - 定义接口
SysLogDao和SysLogDaoImpl,用于保存日志 - 定义切面和切点,定义
LogAspect类,加上注解@Aspect使其成为一个切面,切点使用自定义注解@Log。 切面类类似于service实现类,切面类实现调用sysLogDao保存操作日志。 - 定义controller
- 目录如下:

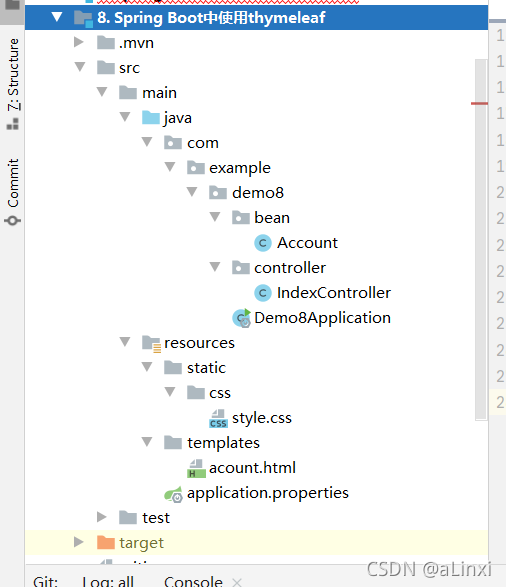
08 | Spring Boot中使用thymeleaf
- 步骤如下:
- 导入依赖:thymeleaf
ps:在Spring Boot中,默认的html页面地址为src/main/resources/templates,默认的静态资源地址为src/main/resources/static。 - 在Spring Boot配置文件中可对Thymeleaf的默认配置进行修改
- 编写
controller,编写account.html - 目录如下:
- 导入依赖:thymeleaf
09 | Spring Boot中使用Redis缓存数据
- 步骤如下:
-
创建一个子module:``springboot使用mybatis.html
-
yml中配置日志输出级别以观察SQL的执行情况:
com.spring.mapper为MyBatis的Mapper接口路径logging: level: com: springboot: mapper: debug -
编写测试方法:
@RunWith(SpringJUnit4ClassRunner.class) @SpringBootTest(classes = Application.class) public class ApplicationTest { @Autowired private StudentService studentService; @Test public void test() throws Exception { Student student1 = this.studentService.queryStudentBySno("001"); System.out.println("学号" + student1.getSno() + "的学生姓名为:" + student1.getName()); Student student2 = this.studentService.queryStudentBySno("001"); System.out.println("学号" + student2.getSno() + "的学生姓名为:" + student2.getName()); } } -
右键run as junit test 即可,发现第二个查询虽然和第一个查询完全一样,但其还是对数据库进行了查询。
-
开启springboot的缓存功能,在pom中引入
spring-boot-starter-cache:<dependency> <groupId>org.springframework.boot</groupId> <artifactId>spring-boot-starter-cache</artifactId> </dependency> -
在Spring Boot入口类中加入
@EnableCaching注解开启缓存功能
-


 1391
1391

 被折叠的 条评论
为什么被折叠?
被折叠的 条评论
为什么被折叠?
 到【灌水乐园】发言


