


 本文提供Sourcetree与Git的安装包下载链接,详细介绍安装步骤,包括解决版本不兼容问题,配置跳过注册流程,关联Git账户,以及通过Gitbash生成公钥和私钥的方法,确保开发者能够顺利进行版本控制。
安装包
1.放入sourcetree、git安装包
 sourcetree安装包
	链接:https://pan.baidu.com/s/1AbnPYicT8n9F53DQrB1zjA
 	提取码:rkv5
 git安装包
   链接:https://pan.baidu.com/s/136HU9QA8TFdPRzY3UkZ-tQ
   提取码:g5cp
2.安装步骤
先安装git,但是我的git版本不能被sourcetree扫描,安装sourcetree时会提示安装内嵌的git
git就没啥说的了,安装就是选择目录一直下一步就行
重点说一下sourcetree安装以及将sourcetree和git关联起来
首先sourcetree第一次安装会弹出注册,这时我们要在第一次安装之前配置以下步骤可跳过sourcetree注册
1)我们在资源文件输入%LocalAppData%\Atlassian\SourceTree\
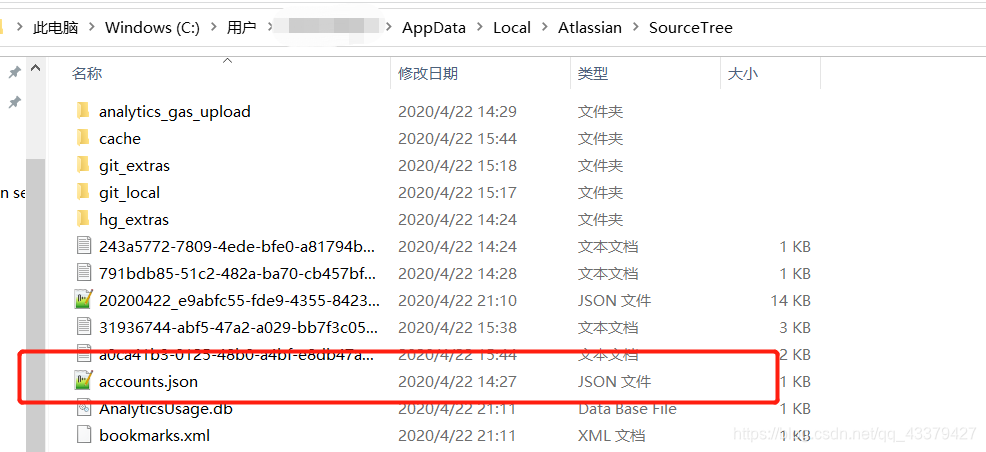
在此文件夹中加入accounts.json文件
[
  {
    "$id": "1",
    "$type": "SourceTree.Api.Host.Identity.Model.IdentityAccount, SourceTree.Api.Host.Identity",
    "Authenticate": true,
    "HostInstance": {
      "$id": "2",
      "$type": "SourceTree.Host.Atlassianaccount.AtlassianAccountInstance, SourceTree.Host.AtlassianAccount",
      "Host": {
        "$id": "3",
        "$type": "SourceTree.Host.Atlassianaccount.AtlassianAccountHost, SourceTree.Host.AtlassianAccount",
        "Id": "atlassian account"
      },
      "BaseUrl": "https://id.atlassian.com/"
    },
    "Credentials": {
      "$id": "4",
      "$type": "SourceTree.Model.BasicAuthCredentials, SourceTree.Api.Account",
      "Username": "username@email.com"
    },
    "IsDefault": false
  }
]
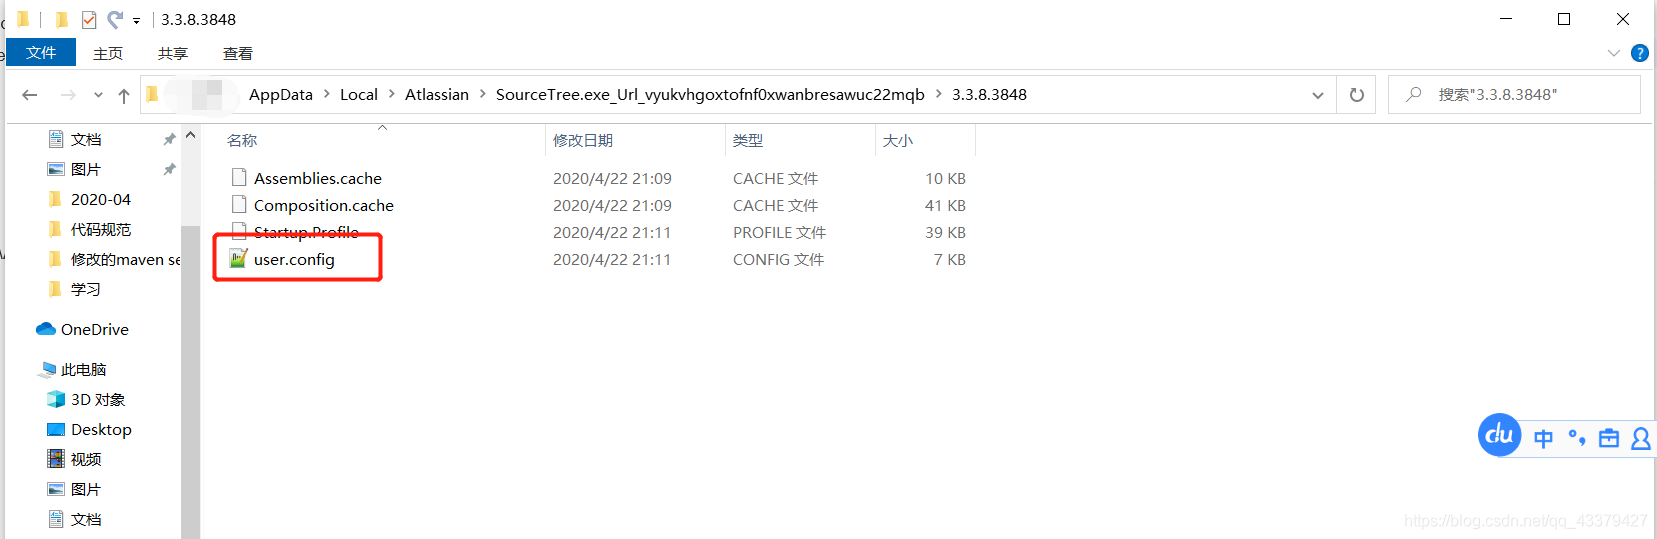
2)输入%LocalAppData%\Atlassian~修改user.config,添加代码块
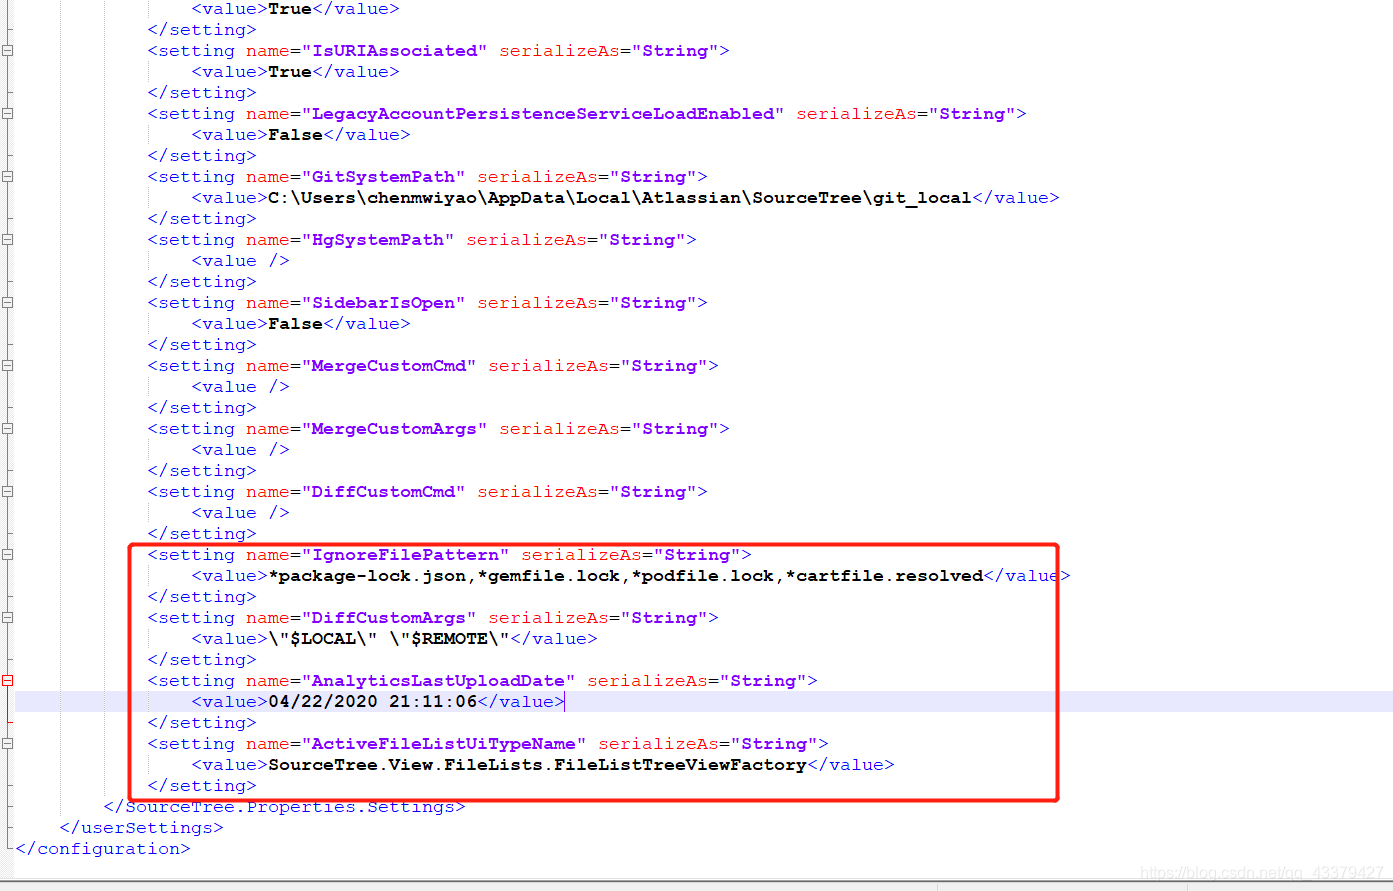
 	<setting name="IgnoreFilePattern" serializeAs="String">
            <value>*package-lock.json,*gemfile.lock,*podfile.lock,*cartfile.resolved</value>
        </setting>
         <setting name="DiffCustomArgs" serializeAs="String">
             <value>\"$LOCAL\" \"$REMOTE\"</value>
         </setting>
         <setting name="AnalyticsLastUploadDate" serializeAs="String">
             <value>04/22/2020 21:11:06</value>
         </setting>
         <setting name="ActiveFileListUiTypeName" serializeAs="String">
             <value>SourceTree.View.FileLists.FileListTreeViewFactory</value>
         </setting>
修改完上面两步,如果安装的是上面git安装包之后会出现找不到git
接着提示安装内嵌的git或者重新扫描等情况,建议点击第一个安装内嵌的git
然后会弹出Mercurial询问窗口,可以根据实际情况做相应的选择,我选择的是第四个选项“我不想使用Mercurial”
到此sourcetree和git就安装好了
3.接下来就是将sourcetree和git账户关联起来
[这部分我感觉这篇很详细,使用的是git bash生成公钥和私钥,转载一个这部分配置的链接](https://www.cnblogs.com/alwayswyy/p/5674635.html)
(进入git bash也可以在sourcetree直接用快捷接shift+alter+T打开)
除了用git bash 还可以在windows命令行直接生成密钥和sourcetree关联
window cmd输入
配置用户名
git config --global user.name "username" //( "username"是自己的账户名,)
配置邮箱
git config --global user.email "username@email.com" //("username@email.com"注册账号时用的邮箱)
以上命令执行结束后,可用 git config --global --list 命令查看配置是否OK
输入
ssh-keygen -t rsa
复制生成的密钥
然后ssh -T git@github.com 在gitlab中输入密钥
最后就是sourcetree关联和上面博客中一样的操作


 630
630

 被折叠的 条评论
为什么被折叠?
被折叠的 条评论
为什么被折叠?
 到【灌水乐园】发言


