


 本文详细介绍了Android中的动画机制,包括Animation、AnimatorSet和View动画。重点讲解了补间动画的实现,如AlphaAnimation、ScaleAnimation等,以及如何使用Transformation、Camera和Matrix进行复杂变换。还探讨了帧动画、属性动画的优势,并提供了使用ViewPropertyAnimator添加动画效果的方法。同时,提到了StateListDrawable和StateListAnimator在视图状态改变时的应用,以及Activity过渡动画和共享元素过渡的概念。
文章目录
https://developer.android.com/training/animation/overview
https://developer.android.com/guide/topics/resources/animation-resource
Animation
ValueAnimator - <animator>
ObjectAnimator - <objectAnimator>
AnimatorSet - <set>
AnimatorSet
Animation 容器,可以包含多个 Animation 类。
使用方法:
AnimatorSet set = (AnimatorSet) AnimatorInflater.loadAnimator(myContext,
    R.animator.property_animator);
set.setTarget(myObject);
set.start();
setTarget() 即可设置一个用于 AnimatorSet 的所有子项的目标对象。
View 动画
使用 View 动画框架可以创建两种类型的动画:
- 补间动画:通过使用 Animation 包 (android.view.animation) 对单个 View 执行一系列转换(位置,大小,旋转度等)来创建动画
- 帧动画:通过使用 AnimationDrawable 类按顺序显示一系列图片来创建动画。
注意:无论动画如何移动或调整大小,容纳动画的视图的边界不变,但是动画仍会被绘制到相应视图的边界之外,且不被剪裁。只有当动画超出了父级视图的边界,系统才对其进行剪裁。
补间动画
文件位置:res/anim/xxx.xml
文件必须具有一个根元素,可以是 <alpha>、<scale>、<translate>、<rotate> 或包含一组(或多组)其他动画元素(甚至是嵌套的 <set> 元素)的 <set> 元素。
使用方法:
View.startAnimation(Animation animation);
作为 startAnimation() 的替代方法,您可以使用 Animation.setStartTime() 定义动画的开始时间,然后使用 View.setAnimation() 将动画分配到视图。
Animation
https://developer.android.com/reference/android/view/animation/Animation
java.lang.Object
   ↳	android.view.animation.Animation
可以应用于 Views,Surfaces 或其他对象的动画的抽象。
已知直接子类:AlphaAnimation, AnimationSet, RotateAnimation, ScaleAnimation, TranslateAnimation
常用方法
initialize(int width, int height, int parentWidth, int parentHeight):使用要制作动画的对象以及对象父对象的尺寸初始化此动画。当已知要动画的对象及其父对象的大小时,并且在调用 getTransformation(long, Transformation) 之前,解释动画的对象应调用此方法。
applyTransformation(float interpolatedTime, Transformation t):getTransformation 的助手。子类应实现此功能,以在给定插值的情况下应用其变换。
getTransformation(long currentTime, Transformation outTransformation, float scale):获取要在指定时间点应用的转换。如果动画仍在运行,则返回 true
setFillAfter (boolean fillAfter):如果 fillAfter 为 true,则此动画执行的转换将在完成时保留。默认为 false,即在动画完成时还原原貌。请注意,这适用于单个动画和使用 AnimationSet 链接的多个转换动画。
Transformation
https://developer.android.com/reference/android/view/animation/Transformation
java.lang.Object
   ↳	android.view.animation.Transformation
定义要在动画的某个时间点应用的变换。
Camera
https://developer.android.com/reference/android/graphics/Camera
java.lang.Object
   ↳	android.graphics.Camera
摄影机实例可用于计算3D转换并生成可应用于例如Canvas的矩阵。
常用方法
getMatrix(Matrix matrix):计算与当前变换对应的矩阵,并将其复制到提供的矩阵对象。
restore():恢复保存的状态(如果有)。
save():保存摄像机状态。
getLocationZ():获取相机的z位置。
setLocation(float x, float y, float z):设置摄像机的位置。
translate (float x, float y, float z):在所有三个轴上应用平移变换。
Matrix
https://developer.android.com/reference/android/graphics/Matrix
java.lang.Object
   ↳	android.graphics.Matrix
Matrix 类包含一个用于转换坐标的 3x3 矩阵。
常用方法
preTranslate(float dx, float dy):前乘,相当于矩阵右乘;T:平移量,齐次坐标。 M’ = M * T(dx, dy)
postTranslate(float dx, float dy)::后乘,相当于矩阵左乘;T:平移量,齐次坐标。M’ = T(dx, dy) * M
如何使用前乘后乘?
正确使用方式就是先构造正常的 Matrix 乘法顺序,之后根据情况使用 pre 和 post 来把这个顺序实现。
还是用一个最简单的例子理解,假设需要围绕某一点旋转。
可以用这个方法 xxxRotate(angle, pivotX, pivotY) ,由于我们这里需要组合构造一个 Matrix,所以不直接使用这个方法。
首先,有两条基本定理:
- 所有的操作(旋转、平移、缩放、错切)默认都是以坐标原点为基准点的。
- 之前操作的坐标系状态会保留,并且影响到后续状态。
基于这两条基本定理,我们可以推算出要基于某一个点进行旋转需要如下步骤:
- 先将坐标系原点移动到指定位置,使用平移 T
- 对坐标系进行旋转,使用旋转 S (围绕原点旋转)
- 再将坐标系平移回原来位置,使用平移 -T
具体公式如下:
M ′ = M ∗ T ∗ R ∗ − T = T ∗ R ∗ − T M' = M*T*R*-T = T*R*-T M′=M∗T∗R∗−T=T∗R∗−T
M 为原始矩阵,是一个单位矩阵, M‘ 为结果矩阵, T 为平移, R为旋转。
按照公式写出来的伪代码如下:
Matrix matrix = new Matrix();
matrix.preTranslate(pivotX,pivotY);
matrix.preRotate(angle);
matrix.preTranslate(-pivotX, -pivotY);
围绕某一点操作可以拓展为通用情况,即:
Matrix matrix = new Matrix();
matrix.preTranslate(pivotX,pivotY);
// 各种操作,旋转,缩放,错切等,可以执行多次。
matrix.preTranslate(-pivotX, -pivotY);
公式为:
M ′ = M ∗ T ∗ . . . ∗ − T = T ∗ . . . ∗ − T M' = M*T* ... *-T = T* ... *-T M′=M∗T∗...∗−T=T∗...∗−T
但是这种方式,两个调整中心的平移函数就拉的太开了,所以通常采用这种写法:
Matrix matrix = new Matrix();
// 各种操作,旋转,缩放,错切等,可以执行多次。
matrix.postTranslate(pivotX,pivotY);
matrix.preTranslate(-pivotX, -pivotY);
这样公式为:
M ′ = T ∗ M ∗ . . . ∗ − T = T ∗ . . . ∗ − T M' = T*M* ... *-T = T* ... *-T M′=T∗M∗...∗−T=T∗...∗−T
可以看到最终化简结果是相同的。
所以说,pre 和 post 就是用来调整乘法顺序的,正常情况下应当正向进行构建出乘法顺序公式,之后根据实际情况调整书写即可。
在构造 Matrix 时,个人建议尽量使用一种乘法,前乘或者后乘,这样操作顺序容易确定,出现问题也比较容易排查。当然,由于矩阵乘法不满足交换律,前乘和后乘的结果是不同的,使用时应结合具体情景分析使用。
帧动画
https://developer.android.com/guide/topics/graphics/drawable-animation
文件位置:res/drawable/ 目录下
静态可绘制资源
- 可以使用 AnimationDrawable 类 API 在代码中定义动画帧
- 使用单个 XML 文件(其中列出构成动画的各个帧)可更轻松地完成此操作。
res/drawable/ 目录中定义 rocket_thrust.xml 文件:
<animation-list xmlns:android="http://schemas.android.com/apk/res/android"
    android:oneshot="true">
    <item android:drawable="@drawable/rocket_thrust1" android:duration="200" />
    <item android:drawable="@drawable/rocket_thrust2" android:duration="200" />
    <item android:drawable="@drawable/rocket_thrust3" android:duration="200" />
</animation-list>
oneshot 为 true 表示动画仅播放一次,并停留在最后帧;为 false 表示一直循环
使用:
ImageView rocketImage = (ImageView) findViewById(R.id.rocket_image);
rocketImage.setBackgroundResource(R.drawable.rocket_thrust);
AnimationDrawable rocketAnimation = (AnimationDrawable) rocketImage.getBackground();

rocketImage.setOnClickListener(new View.OnClickListener() {
    @Override
    public void onClick(View view) {
      rocketAnimation.start();
    }
});
对 AnimationDrawable 调用的 start() 方法不能在 Activity 的 onCreate() 方法期间调用,因为 AnimationDrawable 尚未完全附加到窗口。可以 onStart() 方法中无需互动而进行调用。
矢量可绘制对象
矢量可绘制对象是一种无需像素化或进行模糊处理即可缩放的可绘制对象。借助 AnimatedVectorDrawable 类(以及用于实现向后兼容的 AnimatedVectorDrawableCompat),您可以为矢量可绘制对象的属性添加动画效果。
- 定义矢量可绘制对象 res/drawable/vectordrawable.xml
<vector xmlns:android="http://schemas.android.com/apk/res/android"
    android:height="64dp"
    android:width="64dp"
    android:viewportHeight="600"
    android:viewportWidth="600">
    <group
        android:name="rotationGroup"
        android:pivotX="300.0"
        android:pivotY="300.0"
        android:rotation="45.0" >
        <path
            android:name="v"
            android:fillColor="#000000"
            android:pathData="M300,70 l 0,-70 70,70 0,0 -70,70z" />
    </group>
</vector>
<group> 元素定义一组路径或子组,而 <path> 元素定义要绘制的路径。
- 为 <group> 和 <path> 元素的属性添加动画效果 res/drawable/animatorvectordrawable.xml:
<animated-vector xmlns:android="http://schemas.android.com/apk/res/android"
  android:drawable="@drawable/vectordrawable" >
    <target
        android:name="rotationGroup"
        android:animation="@animator/rotation" />
    <target
        android:name="v"
        android:animation="@animator/path_morph" />
</animated-vector>
添加动画效果之后的矢量可绘制对象定义会按矢量可绘制对象中各个组和路径的名称对其进行引用。
- ObjectAnimator 或 AnimatorSet 对象定义动画
res/animator/rotation.xml 会将目标组旋转 360 度:
<objectAnimator
    android:duration="6000"
    android:propertyName="rotation"
    android:valueFrom="0"
    android:valueTo="360" />
res/animator/path_morph.xml 会将矢量可绘制对象的路径从一个形状变为另一个形状。这两个路径都必须兼容变形:具有相同数量的命令,每个命令具有相同数量的参数。
<set xmlns:android="http://schemas.android.com/apk/res/android">
    <objectAnimator
        android:duration="3000"
        android:propertyName="pathData"
        android:valueFrom="M300,70 l 0,-70 70,70 0,0   -70,70z"
        android:valueTo="M300,70 l 0,-70 70,0  0,140 -70,0 z"
        android:valueType="pathType" />
</set>
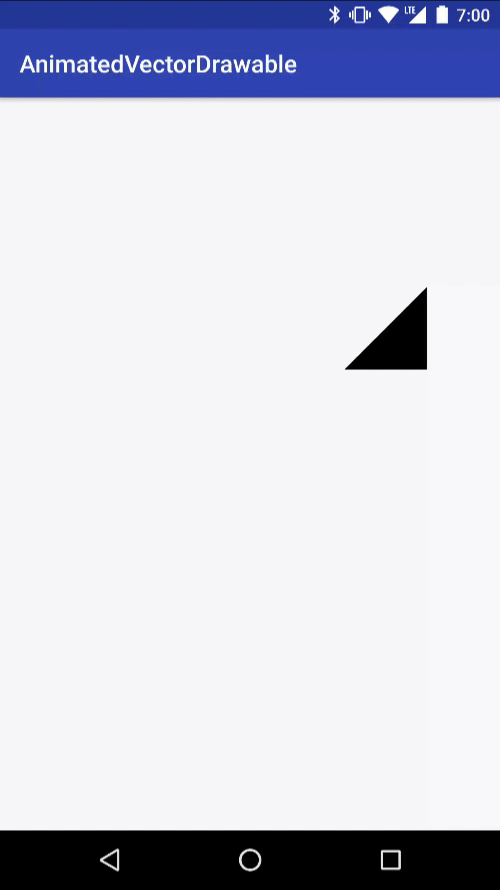
生成的 AnimatedVectorDrawable:
属性动画
https://developer.android.com/guide/topics/graphics/prop-animation
文件位置:res/animator/ 下
视图动画系统通过更改绘制视图对象的方式来转换视图对象。这会产生不好的效果,例如,某个对象已经在屏幕的其他位置绘制,但它仍位于其原始位置。
属性动画系统可以通过更改视图对象中的实际属性来为屏幕上的视图添加动画效果。此外,当视图的属性发生更改时,视图还会自动调用 invalidate() 方法来刷新屏幕。
ValueAnimator:在指定的时间段内执行动画。
ValueAnimator animation = ValueAnimator.ofFloat(0f, 100f);
animation.setDuration(1000);
animation.start();
上述代码中,当 start() 方法运行时,ValueAnimator 会开始计算 1000ms 时长内 0 和 100 之间的动画的值。
添加 AnimatorUpdateListener 来获取动画的值,为特定属性使用:
animation.addUpdateListener(new ValueAnimator.AnimatorUpdateListener() {
    @Override
    public void onAnimationUpdate(ValueAnimator updatedAnimation) {
        // 您可以为与动画值类型相同的属性使用动画值。
        // 此例中,您可以为 translationX 属性使用 floatX 值。
        float animatedValue = (float)updatedAnimation.getAnimatedValue();
        textView.setTranslationX(animatedValue);
    }
});
ObjectAnimator:在指定的一段时间内为对象的特定属性创建动画。
就上例,使用 ObjectAnimator 比 ValueAnimator 简单:
ObjectAnimator animation = ObjectAnimator.ofFloat(textView, "translationX", 100f);
animation.setDuration(1000);
animation.start();
插值器 & 估值器
ValueAnimator 包含 TimeInterpolator 和 TypeEvaluator;前者用于定义动画插值,后者用于定义如何计算正在添加动画效果的属性的值。
ValueAnimator 将基于动画时长和已播放时长计算动画已完成百分比(在 0 和 1 之间),计算完动画已完成百分比后,它会调用当前设置的 TimeInterpolator 来计算插值分数。插值分数会将动画已完成百分比映射为一个新分数(如果是线性插值器,则插值分数 = 动画已完成百分比;如果是加速减速插值器,刚开始加速阶段,则插值分数 < 动画已完成百分比,见下面插值器返回的实现)。计算插值分数后,ValueAnimator 会调用相应的 TypeEvaluator,以根据动画的插值分数、起始值和结束值来计算要添加动画效果的属性的值(起始值 + 插值分数 * (结束值 - 起始值))。
LinearInterpolator:
@Override
public float getInterpolation(float input) {
    return input;
}
AccelerateDecelerateInterpolator:
@Override
public float getInterpolation(float input) {
    return (float)(Math.cos((input + 1) * Math.PI) / 2.0f) + 0.5f;
}
input 是 0 ~ 1 之间的数, c o s ( i n p u t ∗ π + π ) / 2 cos(input*\pi+\pi)/2 cos(input∗π+π)/2 是值域为 -0.5 到 0.5 的增函数,最终返回的插值分数从 0 到 1 先快速后缓速递增,起到加速减速效果。
Float 类型 TypeEvaluator 的实现:fraction 就是 getInterpolation 返回的值
public class FloatEvaluator implements TypeEvaluator {

    public Object evaluate(float fraction, Object startValue, Object endValue) {
        float startFloat = ((Number) startValue).floatValue();
        return startFloat + fraction * (((Number) endValue).floatValue() - startFloat);
    }
}
可用插值器:https://developer.android.com/guide/topics/resources/animation-resource#Interpolators
可用估值器:Android 系统可以识别的类型为 int、float 或颜色,分别由 IntEvaluator、FloatEvaluator 和 ArgbEvaluator 类型评估程序提供支持。
属性动画优于 View 动画的地方
View 动画系统:
- 仅提供为 View 对象添加动画效果的功能,因此,如果您想为非 View
对象添加动画效果,则必须实现自己的代码才能做到。 - 仅公开 View 对象的部分方面来供您添加动画效果;例如,您可以对视图的缩放和旋转添加动画效果,但无法对背景颜色这样做。
- 只会在绘制视图的位置进行修改,而不会修改实际的视图本身。例如,如果您为某个按钮添加了动画效果,使其可以在屏幕上移动,该按钮会正确绘制,但能够点击按钮的实际位置并不会更改。
自动为布局更新添加动画
为布局添加如下属性:
<LinearLayout android:id="@+id/container"
    android:animateLayoutChanges="true"
    ...
/>
现在,您只需为布局添加、移除或更新项目,系统就会自动对这些项目进行动画处理:

使用 ViewPropertyAnimator 添加动画效果
ViewPropertyAnimator 有助于使用单个底层 Animator 对象轻松为 View 的多个属性并行添加动画效果。它的行为方式与 ObjectAnimator 非常相似,因为它会修改视图属性的实际值,但在同时为多个属性添加动画效果时,它更为高效。
以下代码段展示了在同时为视图的 x 和 y 属性添加动画效果时,使用多个 ObjectAnimator 对象、使用单个 ObjectAnimator 对象以及使用 ViewPropertyAnimator 的区别。
多个 ObjectAnimator 对象:
ObjectAnimator animX = ObjectAnimator.ofFloat(myView, "x", 50f);
ObjectAnimator animY = ObjectAnimator.ofFloat(myView, "y", 100f);
AnimatorSet animSetXY = new AnimatorSet();
animSetXY.playTogether(animX, animY);
animSetXY.start();
一个 ObjectAnimator:
PropertyValuesHolder pvhX = PropertyValuesHolder.ofFloat("x", 50f);
PropertyValuesHolder pvhY = PropertyValuesHolder.ofFloat("y", 100f);
ObjectAnimator.ofPropertyValuesHolder(myView, pvhX, pvhY).start();
ViewPropertyAnimator:
myView.animate().x(50f).y(100f);
StateListDrawable
https://developer.android.com/reference/android/graphics/drawable/StateListDrawable
java.lang.Object
   ↳	android.graphics.drawable.Drawable
 	   ↳	android.graphics.drawable.DrawableContainer
 	 	   ↳	android.graphics.drawable.StateListDrawable
使您可以将多个图形图像分配给单个Drawable,并通过字符串ID值替换可见项。
可以使用 <selector> 元素在XML文件中定义它。每个状态Drawable都在嵌套 <item> 元素中定义。有关更多信息,请参见Drawable Resources指南。
StateListAnimator
https://developer.android.com/reference/android/animation/StateListAnimator
java.lang.Object
   ↳	android.animation.StateListAnimator
只要指定的视图状态(例如“按下”或“聚焦”)发生更改,就会调用该动画。
有如下状态:
android:state_activated:State value for StateListDrawable, set when a view or its parent has been “activated” meaning the user has currently marked it as being of interest.
android:state_active:State value for StateListDrawable, set when a view or drawable is considered “active” by its host.
android:state_checkable:State identifier indicating that the object may display a check mark.
android:state_checked:State identifier indicating that the object is currently checked.
android:state_enabled:State value for StateListDrawable, set when a view is enabled.
android:state_first:State value for StateListDrawable, set when a view or drawable is in the first position in an ordered set.
android:state_focused:State value for StateListDrawable, set when a view has input focus.
android:state_last:State value for StateListDrawable, set when a view or drawable is in the last position in an ordered set.
android:state_middle:State value for StateListDrawable, set when a view or drawable is in the middle position in an ordered set.
android:state_pressed:State value for StateListDrawable, set when the user is pressing down in a view.
android:state_selected:State value for StateListDrawable, set when a view (or one of its parents) is currently selected.
android:state_single:State value for StateListDrawable, set when a view or drawable is considered “single” by its host.
android:state_window_focused:State value for StateListDrawable, set when a view’s window has input focus.
https://developer.android.com/reference/android/R.attr#state_checked
用法
使用根 <selector> 元素和子 <item> 元素在 XML 资源中定义 StateListAnimator,每个元素都指定一个由 StateListAnimator 类定义的不同视图状态。每个 <item> 可以包含一个属性动画集的定义,或者不需要任何动画定义,仅使用 drawable 属性定义不同状态的图片。
res/xml/animate_scale.xml 展示视图的缩放,按下后更改视图的 x 和 y 比例:
<?xml version="1.0" encoding="utf-8"?>
<selector xmlns:android="http://schemas.android.com/apk/res/android">
    <!-- the pressed state; increase x and y size to 150% -->
    <item android:state_pressed="true">
        <set>
            <objectAnimator android:propertyName="scaleX"
                android:duration="@android:integer/config_shortAnimTime"
                android:valueTo="1.5"
                android:valueType="floatType"/>
            <objectAnimator android:propertyName="scaleY"
                android:duration="@android:integer/config_shortAnimTime"
                android:valueTo="1.5"
                android:valueType="floatType"/>
        </set>
    </item>
    <!-- the default, non-pressed state; set x and y size to 100% -->
    <item android:state_pressed="false">
        <set>
            <objectAnimator android:propertyName="scaleX"
                android:duration="@android:integer/config_shortAnimTime"
                android:valueTo="1"
                android:valueType="floatType"/>
            <objectAnimator android:propertyName="scaleY"
                android:duration="@android:integer/config_shortAnimTime"
                android:valueTo="1"
                android:valueType="floatType"/>
        </set>
    </item>
</selector>
使用:
<Button android:stateListAnimator="@xml/animate_scale"
        ... />
代码中添加:使用 AnimatorInflater.loadStateListAnimator() 方法,然后使用 View.setStateListAnimator() 方法将 Animator 分配给相应视图。
实例
res/drawable/button_bg_seletor.xml 展示视图图片的切换,state_pressed 默认状态为 false:
<?xml version="1.0" encoding="utf-8"?>
<selector xmlns:android="http://schemas.android.com/apk/res/android" >
    <item android:state_focused="true" android:drawable="@drawable/button_p" />
    <item android:state_pressed="true" android:drawable="@drawable/button_p" />
    <item android:drawable="@drawable/button_n" />
</selector>
可以直接作为 drawable 使用:
<ImageView android:src="@drawable/button_bg_seletor"
        ... />
<TextView android:drawableTop="@drawable/button_bg_seletor"
		... />
ColorStateList
https://developer.android.com/reference/android/content/res/ColorStateList.html
java.lang.Object
   ↳	android.content.res.ColorStateList
Lets you map View state sets to colors.
ColorStateLists are created from XML resource files defined in the “color” subdirectory directory of an application’s resource directory. The XML file contains a single “selector” element with a number of “item” elements inside. For example:
<selector xmlns:android="http://schemas.android.com/apk/res/android">
  <item android:state_focused="true"
          android:color="@color/sample_focused" />
  <item android:state_pressed="true"
          android:state_enabled="false"
          android:color="@color/sample_disabled_pressed" />
  <item android:state_enabled="false"
          android:color="@color/sample_disabled_not_pressed" />
  <item android:color="@color/sample_default" />
</selector>
This defines a set of state spec / color pairs where each state spec specifies a set of states that a view must either be in or not be in and the color specifies the color associated with that spec.
Activity 过渡
在 Theme 中将 android:windowAnimationStyle 指向你设置的过渡动画类型:
<item name="android:windowAnimationStyle">@style/AnimaActivity</item>
在 style 中设置过渡动画类型的具体类型 & 其属性动画:
<style name="AnimaActivity">
	<item name="android:activityOpenEnterAnimation">@anim/activity_slide_enter_right</item>
    <item name="android:activityOpenExitAnimation">@anim/activity_slide_exit_left</item>
    <item name="android:activityCloseEnterAnimation">@anim/activity_slide_enter_left</item>
    <item name="android:activityCloseExitAnimation">@anim/activity_slide_exit_right</item>
</style>
在 res/anim 中创建各过渡动画类型的具体变换,如 activity_slide_enter_right.xml:
<?xml version="1.0" encoding="utf-8"?>
<set xmlns:android="http://schemas.android.com/apk/res/android" >
    <translate
        android:duration="300"
        android:fromXDelta="100%"
        android:toXDelta="0" />

    <alpha
        android:duration="300"
        android:fromAlpha="0.0"
        android:toAlpha="1.0" />

</set>
共享元素过渡
https://developer.android.google.cn/training/transitions/start-activity


 993
993

 被折叠的 条评论
为什么被折叠?
被折叠的 条评论
为什么被折叠?
 到【灌水乐园】发言


