


 本文详细介绍了一个使用Spring Security进行权限管理的实战案例,包括Maven配置、web.xml设置、spring-security.xml配置等步骤,实现了基于角色的访问控制。
案例:
1)创建工程SpringSecurityDemo
pom.xml
<?xml version="1.0" encoding="UTF-8"?>
<project xmlns="http://maven.apache.org/POM/4.0.0" xmlns:xsi="http://www.w3.org/2001/XMLSchema-instance"
  xsi:schemaLocation="http://maven.apache.org/POM/4.0.0 http://maven.apache.org/xsd/maven-4.0.0.xsd">
  <modelVersion>4.0.0</modelVersion>

  <groupId>com.bigdata</groupId>
  <artifactId>SpringSecurityDemo</artifactId>
  <version>1.0-SNAPSHOT</version>
  <packaging>war</packaging>


  <properties>
    <project.build.sourceEncoding>UTF-8</project.build.sourceEncoding>
    <maven.compiler.source>1.8</maven.compiler.source>
    <maven.compiler.target>1.8</maven.compiler.target>
    <spring.version>5.0.2.RELEASE</spring.version>
  </properties>

  <dependencies>
    <dependency>
      <groupId>org.springframework</groupId>
      <artifactId>spring-core</artifactId>
      <version>${spring.version}</version>
    </dependency>
    <dependency>
      <groupId>org.springframework</groupId>
      <artifactId>spring-web</artifactId>
      <version>${spring.version}</version>
    </dependency>
    <dependency>
      <groupId>org.springframework</groupId>
      <artifactId>spring-webmvc</artifactId>
      <version>${spring.version}</version>
    </dependency>
    <dependency>
      <groupId>org.springframework</groupId>
      <artifactId>spring-context-support</artifactId>
      <version>${spring.version}</version>
    </dependency>
    <dependency>
      <groupId>org.springframework</groupId>
      <artifactId>spring-test</artifactId>
      <version>${spring.version}</version>
    </dependency>
    <dependency>
      <groupId>org.springframework</groupId>
      <artifactId>spring-jdbc</artifactId>
      <version>${spring.version}</version>
    </dependency>
    <dependency>
      <groupId>org.springframework.security</groupId>
      <artifactId>spring-security-web</artifactId>
      <version>4.1.0.RELEASE</version>
    </dependency>
    <dependency>
      <groupId>org.springframework.security</groupId>
      <artifactId>spring-security-config</artifactId>
      <version>4.1.0.RELEASE</version>
    </dependency>
    <dependency>
      <groupId>javax.servlet</groupId>
      <artifactId>javax.servlet-api</artifactId>
      <version>3.1.0</version>
      <scope>provided</scope>
    </dependency>
  </dependencies>
  <build>
    <plugins>
      <!-- java编译插件 -->
      <plugin>
        <groupId>org.apache.maven.plugins</groupId>
        <artifactId>maven-compiler-plugin</artifactId>
        <version>3.3</version>
        <configuration>
          <source>1.8</source>
          <target>1.8</target>
          <encoding>UTF-8</encoding>
        </configuration>
      </plugin>
      <plugin>
        <groupId>org.apache.tomcat.maven</groupId>
        <artifactId>tomcat7-maven-plugin</artifactId>
        <configuration>
          <!-- 指定端口 -->
          <port>9090</port>
          <!-- 请求路径 -->
          <path>/</path>
        </configuration>
      </plugin>
    </plugins>
  </build>
</project>
2)创建web.xml
<?xml version="1.0" encoding="UTF-8"?>
<web-app xmlns="http://java.sun.com/xml/ns/javaee"
         xmlns:xsi="http://www.w3.org/2001/XMLSchema-instance"
         xsi:schemaLocation="http://java.sun.com/xml/ns/javaee
                      http://java.sun.com/xml/ns/javaee/web-app_3_0.xsd"
         version="3.0">

    <!--Spring监听器-->
    <context-param>
        <param-name>contextConfigLocation</param-name>
        <param-value>classpath:spring-security.xml</param-value>
    </context-param>
    <listener>
        <listener-class>org.springframework.web.context.ContextLoaderListener</listener-class>
    </listener>

    <!-- SpringSecurity过滤器-->
    <filter>
        <filter-name>springSecurityFilterChain</filter-name>
        <filter-class>org.springframework.web.filter.DelegatingFilterProxy</filter-class>
    </filter>
    <filter-mapping>
        <filter-name>springSecurityFilterChain</filter-name>
        <url-pattern>/*</url-pattern>
    </filter-mapping>

</web-app>
3)创建index.html
在这里插入代码片<!DOCTYPE html>
<html>
<head>
    <meta http-equiv="Content-Type" content="text/html; charset=UTF-8">
    <title>登陆</title>
</head>
<body>
    这是系统首页, 登录成功!
</body>
</html>
4)创建spring 配置文件spring-security.xml
<?xml version="1.0" encoding="UTF-8"?>
<beans:beans xmlns="http://www.springframework.org/schema/security"
             xmlns:beans="http://www.springframework.org/schema/beans"
             xmlns:xsi="http://www.w3.org/2001/XMLSchema-instance"
             xsi:schemaLocation="http://www.springframework.org/schema/beans
             http://www.springframework.org/schema/beans/spring-beans.xsd
          http://www.springframework.org/schema/security
          http://www.springframework.org/schema/security/spring-security.xsd">


    <!-- 页面拦截规则 -->
    <!-- use-expressions:禁用spel表达式, 这个表达式写起来较复杂所以禁用 -->
    <http use-expressions="false">
        <!-- pattern: url路径, access: 访问这个路径所需具有的权限 -->
        <intercept-url pattern="/**" access="ROLE_USER" />
        <form-login/>
    </http>

    <!-- 认证管理器 -->
    <authentication-manager>
        <authentication-provider>
            <user-service>
                <user name="admin" password="123456" authorities="ROLE_USER"/>
            </user-service>
        </authentication-provider>
    </authentication-manager>
</beans:beans>
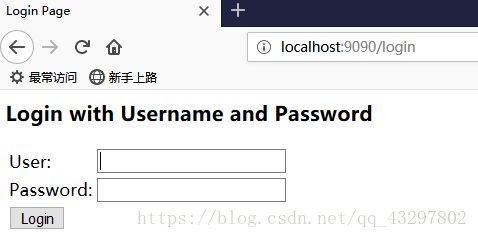
此案例我们没有登录页,而是使用了系统自动生成的登陆页,效果如下:
配置说明:
intercept-url 表示拦截页面
/* 表示的是该目录下的资源,只包括本级目录不包括下级目录
/** 表示的是该目录以及该目录下所有级别子目录的资源
form-login 为开启表单登陆
use-expressions 为是否使用 Spring 表达式语言( SpEL ),默认为true ,如果开启,则拦截的配置应该写成以下形式
<intercept-url pattern="/**" access="hasRole('ROLE_USER')" />


 5万+
5万+

 被折叠的 条评论
为什么被折叠?
被折叠的 条评论
为什么被折叠?
 到【灌水乐园】发言


