


 本文详述了如何在SpringBoot环境中整合dubbo和zookeeper,包括环境搭建、项目创建、服务接口与实现、服务提供者与消费者配置,以及测试步骤。提供了下载链接和配置细节。
目录
案例代码,tomcat,zookeeper,dubbo-admin包已上传,下载地址:https://download.youkuaiyun.com/download/qq_43280198/13524427,下文如有错误欢迎指出。
1、搭建环境
- jdk、maven和tomcat略过。
1.1 ZooKeeper
- 官方下载地址:https://mirror.bit.edu.cn/apache/zookeeper,选择想要版本后下载带-bin的压缩文件。
- 下载后解压,进入conf文件夹,复制一份zoo_sample.cfg,改名为zoo.cfg。
- zoo.cfg内容如下,注意修改自己的地址。
# The number of milliseconds of each tick
tickTime=2000
# The number of ticks that the initial
# synchronization phase can take
initLimit=10
# The number of ticks that can pass between
# sending a request and getting an acknowledgement
syncLimit=5
# the directory where the snapshot is stored.
# do not use /tmp for storage, /tmp here is just
# example sakes.
dataDir=自己的地址/tmp
dataDirLog=自己的地址/log
# the port at which the clients will connect
clientPort=2181
# the maximum number of client connections.
# increase this if you need to handle more clients
#maxClientCnxns=60
#
# Be sure to read the maintenance section of the
# administrator guide before turning on autopurge.
#
# http://zookeeper.apache.org/doc/current/zookeeperAdmin.html#sc_maintenance
#
# The number of snapshots to retain in dataDir
#autopurge.snapRetainCount=3
# Purge task interval in hours
# Set to "0" to disable auto purge feature
#autopurge.purgeInterval=1
- 进入bin文件夹,选中zkServer.cmd,右键->编辑,在最后添加一行 pause并保存(作用:启动后cmd窗口停留),如下图所示。
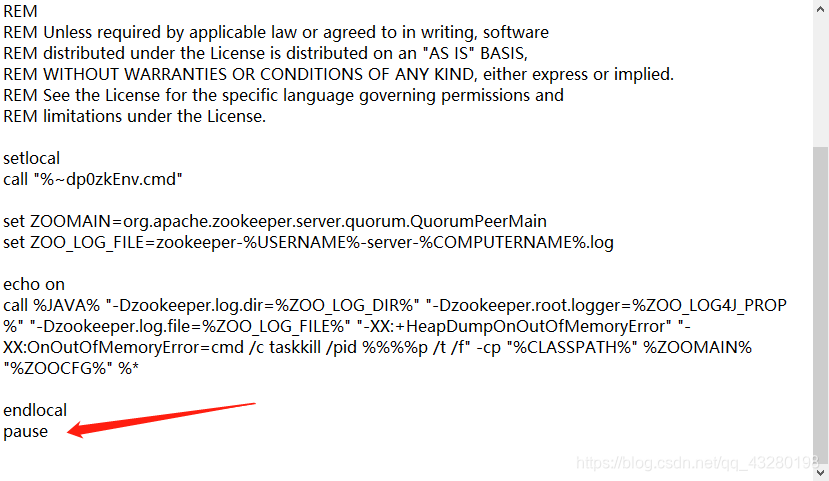
- 双击zkServer.cmd启动,不关闭cmd窗口,注册中心就一直开着。

1.2 dubbo-admin
建议自己拉取项目编译打包,在网上搜的war大多都启动不了...
- 官方地址:https://github.com/apache/dubbo/tree/2.5.x,使用git拉取到本地后用IDEA打开。
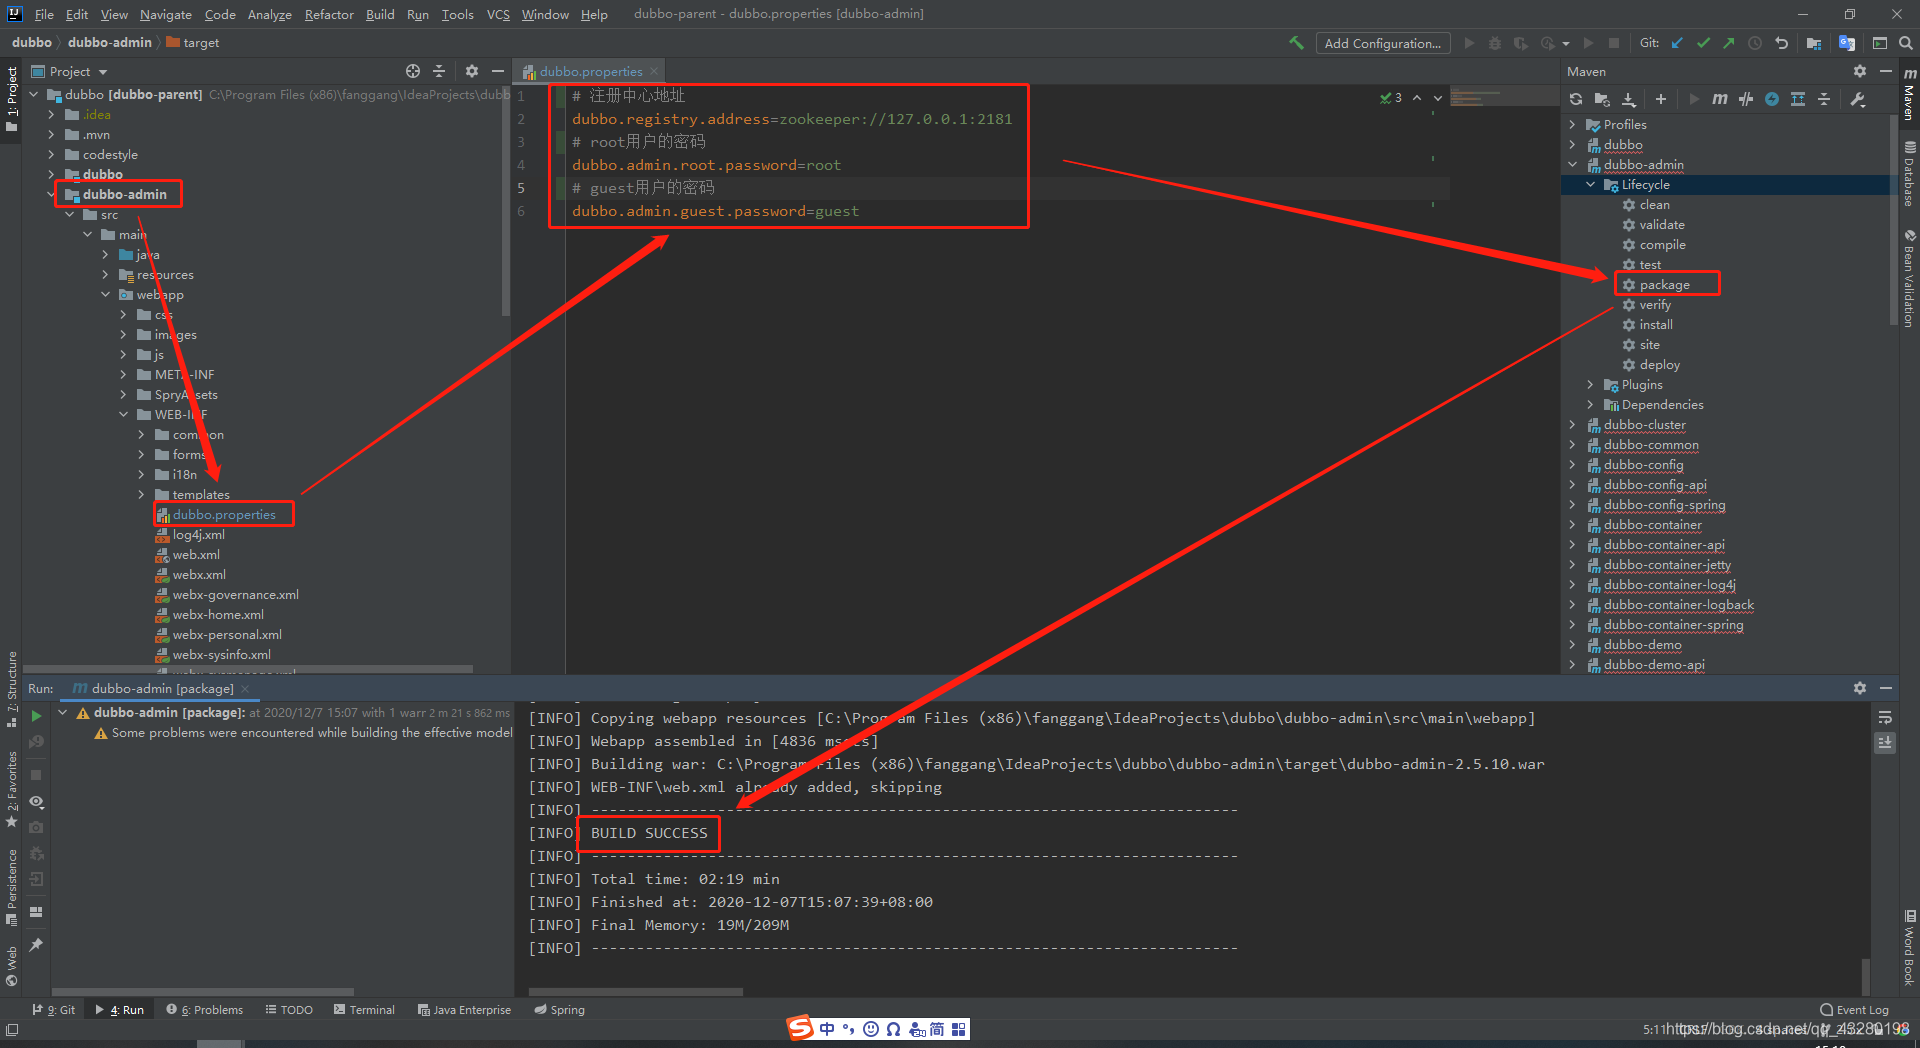
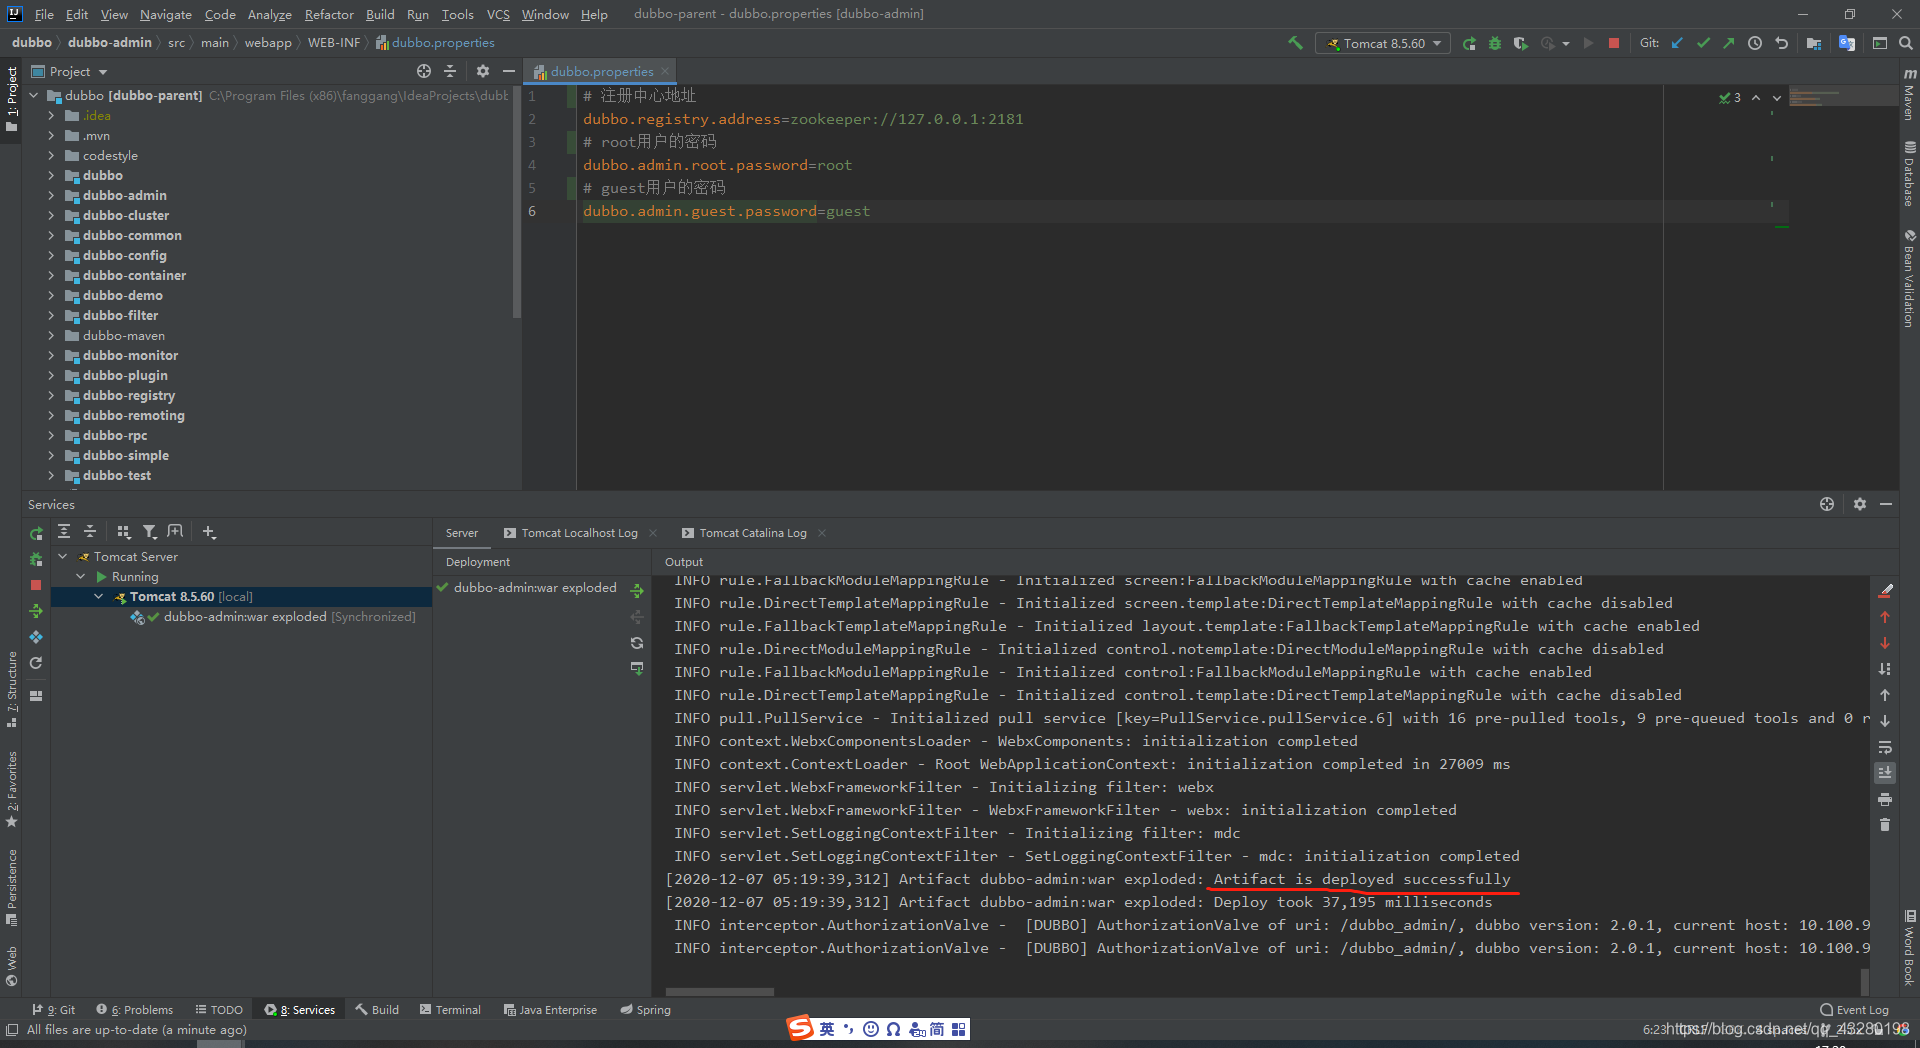
- 打开dubbo-admin模块下的dubbo.properties文件,可配置注册中心地址和用户密码(root用户的密码默认是root,guest用户的密码默认是guest),再使用maven打包。
启动的话有两种方式(建议使用第一种。第二种需要维持一个IDEA工作空间,有点占用内存...)
- 第一种:将dubbo-admin的war包放到本地tomcat中启动
- 找到dubbo-admin/target下的dubbo-admin-2.5.10.war,复制到tomcat的webapps目录下
- 进入tomcat的conf目录,打开server.xml文件,找到<Connector>标签,修改port为8090(一定要修改端口,tomcat默认的8080端口被zookeeper用到了)
- 进入tomcat的bin目录,双击startup.bat启动,看到部署完成信息后关闭窗口,再进入webapps目录下,会发现多了dubbo-admin-2.5.10文件夹
- 直接双击startup.bat启动tomcat,启动成功后浏览器访问http://localhost:8090/dubbo-admin-2.5.10/,输入用户名密码即可
- 或者,删除webapps目录下的ROOT,将dubbo-admin-2.5.10文件夹重命名为ROOT,再双击startup.bat启动tomcat,启动成功后浏览器访问http://localhost:8090/,输入用户名密码即可

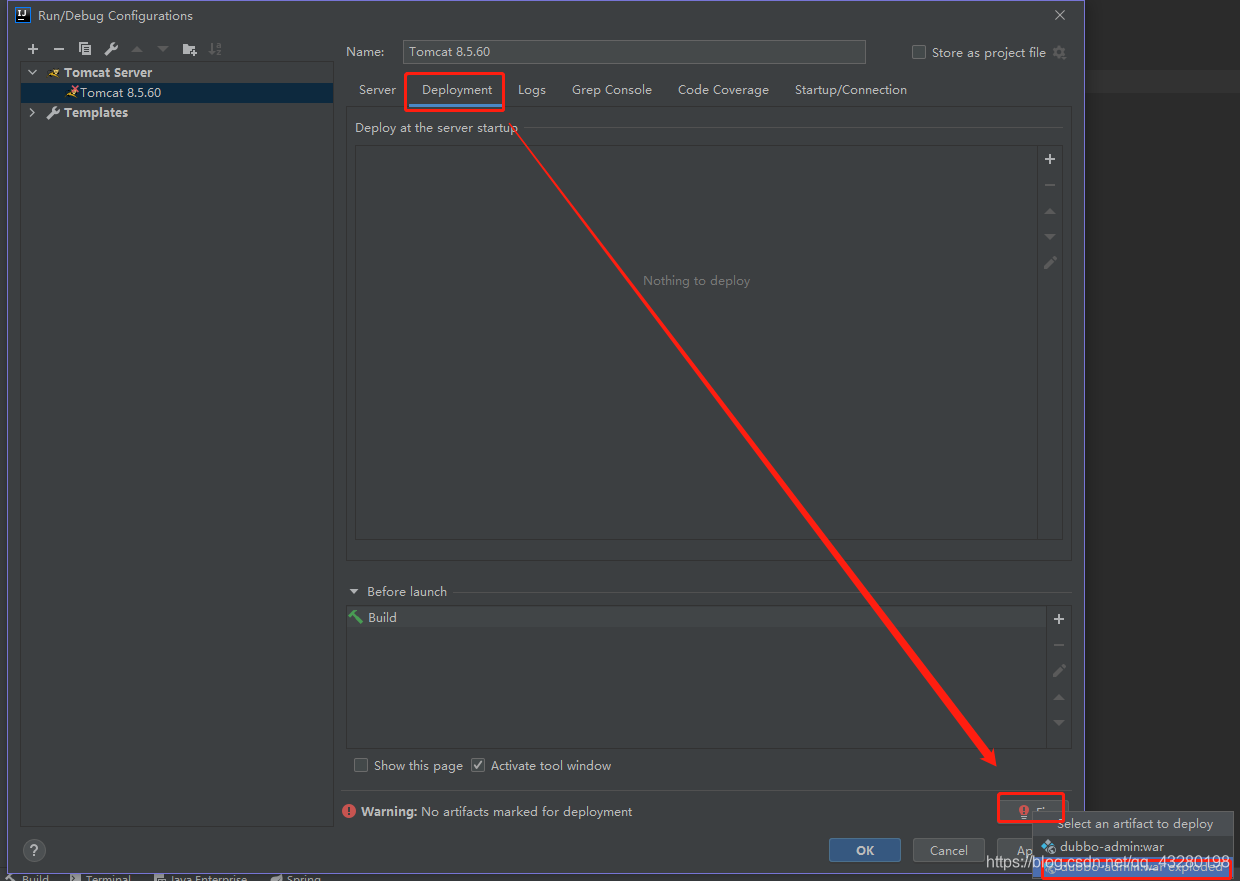
- 第二种:idea配置本地tomcat启动dubbo-admin,按照下面图片一步一步操作吧
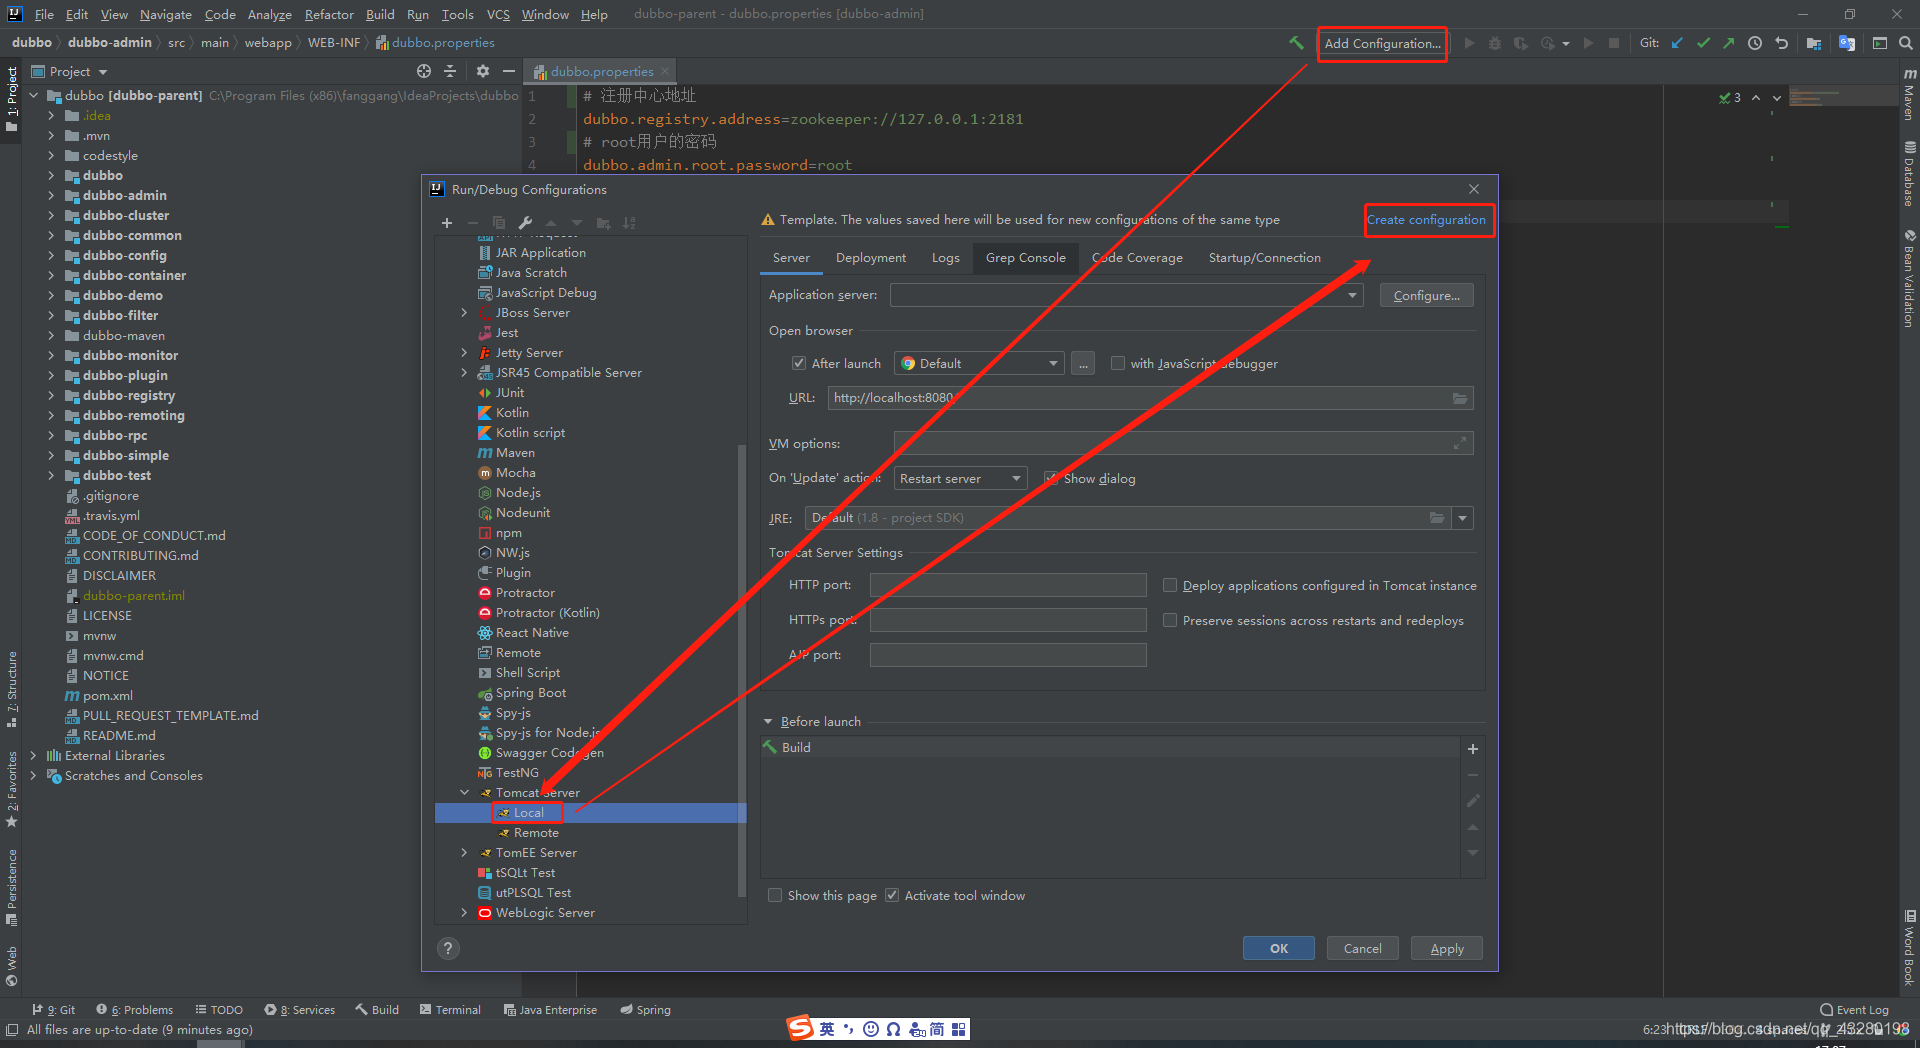
修改tomcat端口↓
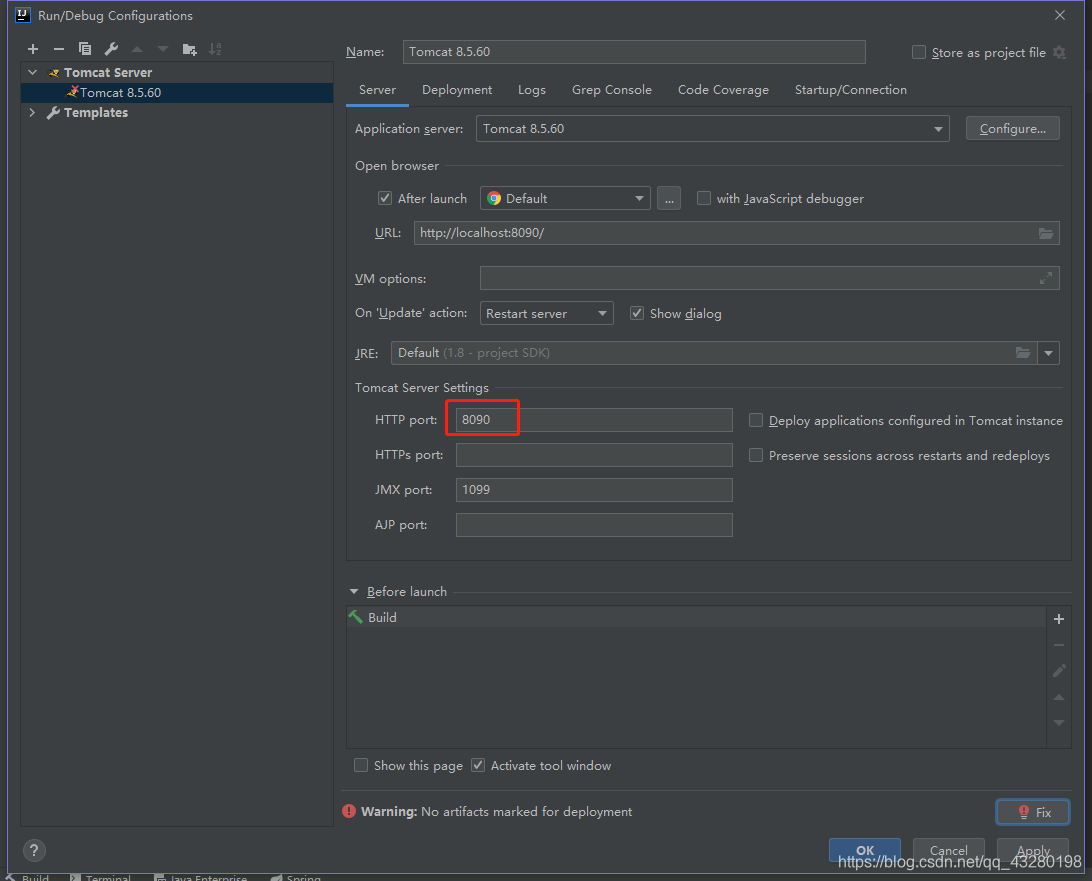
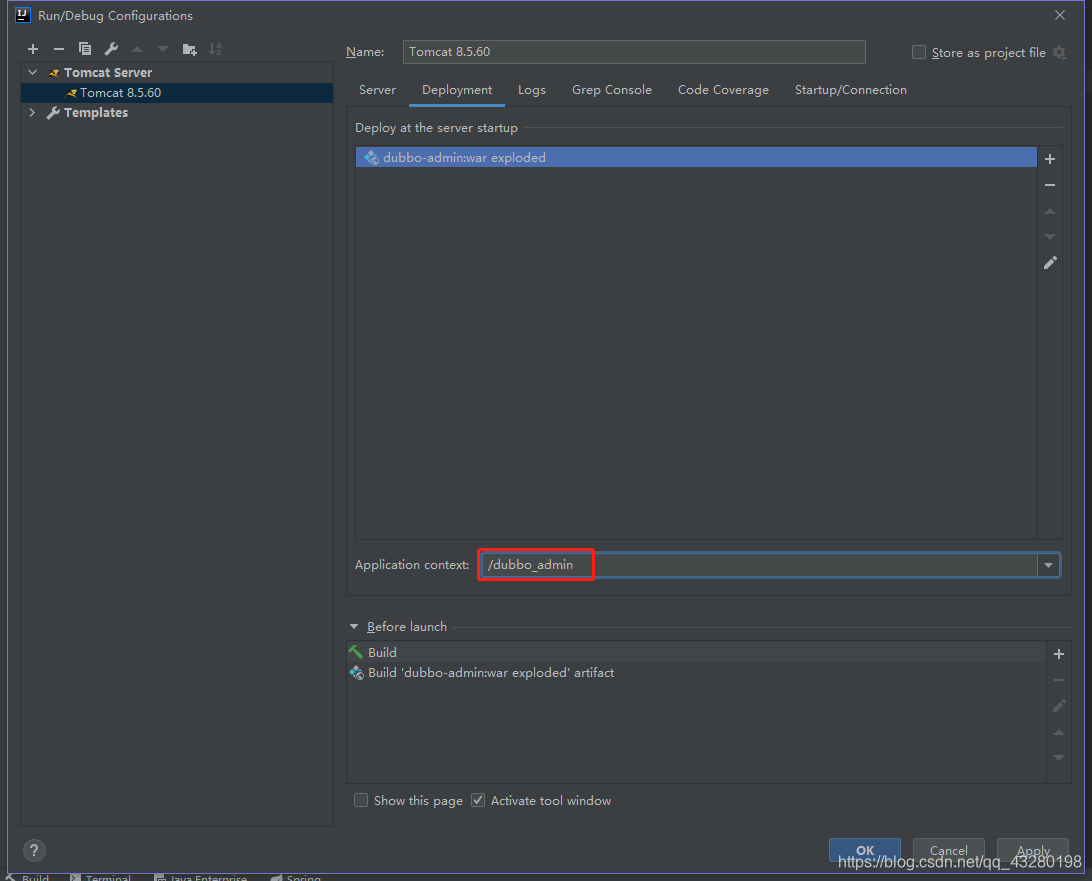
修改项目访问路径↓,点击apply
启动成功会自动打开浏览器访问,输入用户名密码即可
2、搭建项目
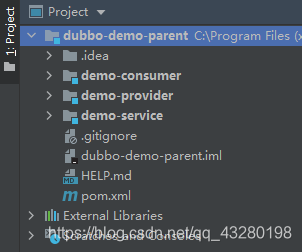
2.1 父项目 dubbo-demo-parent
- 项目结构
- pom文件
<?xml version="1.0" encoding="UTF-8"?>
<project xmlns="http://maven.apache.org/POM/4.0.0" xmlns:xsi="http://www.w3.org/2001/XMLSchema-instance"
         xsi:schemaLocation="http://maven.apache.org/POM/4.0.0 https://maven.apache.org/xsd/maven-4.0.0.xsd">
    <modelVersion>4.0.0</modelVersion>
    <parent>
        <groupId>org.springframework.boot</groupId>
        <artifactId>spring-boot-starter-parent</artifactId>
        <version>2.3.5.RELEASE</version>
        <relativePath/> <!-- lookup parent from repository -->
    </parent>

    <groupId>com.example</groupId>
    <artifactId>dubbo-demo-parent</artifactId>
    <version>0.0.1-SNAPSHOT</version>
    <name>dubbo-demo-parent</name>
    <packaging>pom</packaging>
    <description>Demo project for Spring Boot</description>

    <modules>
        <module>demo-service</module>
        <module>demo-provider</module>
        <module>dem
最低0.47元/天 解锁文章


 260
260

 被折叠的 条评论
为什么被折叠?
被折叠的 条评论
为什么被折叠?
 到【灌水乐园】发言


