


SpringBoot集成Swagger
springfox,两个jar包
-
Springfox-swagger2
-
swagger-springmvc
一、步骤:
1.新建SpringBoot项目
springboot版本2.5.7 (2.6.x会报空指针异常)
2.添加maven依赖
<!-- https://mvnrepository.com/artifact/io.springfox/springfox-swagger2 -->
<dependency>
    <groupId>io.springfox</groupId>
    <artifactId>springfox-swagger2</artifactId>
    <version>2.9.2</version>
</dependency>
<!-- https://mvnrepository.com/artifact/io.springfox/springfox-swagger-ui -->
<dependency>
    <groupId>io.springfox</groupId>
    <artifactId>springfox-swagger-ui</artifactId>
    <version>2.9.2</version>
</dependency>
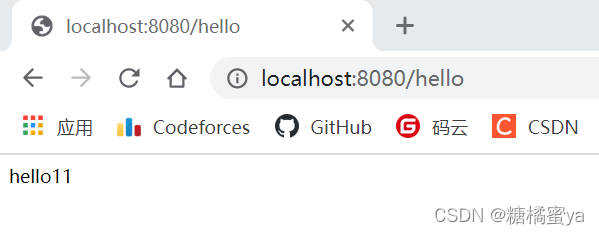
3.编写HelloController,测试确保运行成功
@RestController
public class HelloController {
  @RequestMapping("/hello")
  public Object hello(){
    return "hello11";
  }
}
4.要使用Swagger,我们需要编写一个配置类-SwaggerConfig来配置 Swagger
@Configuration
@EnableSwagger2  //开启swagger2
public class SwaggerConfig {
}
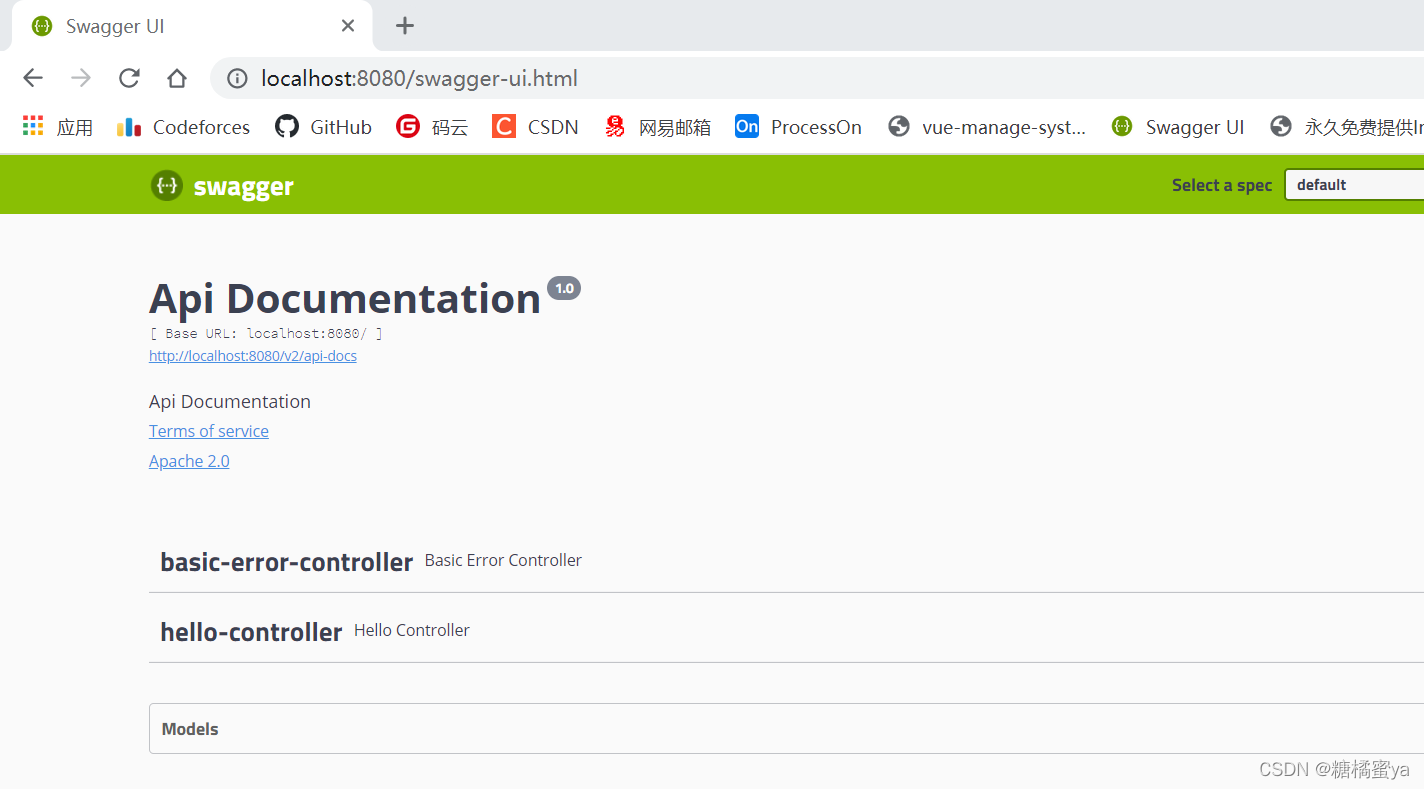
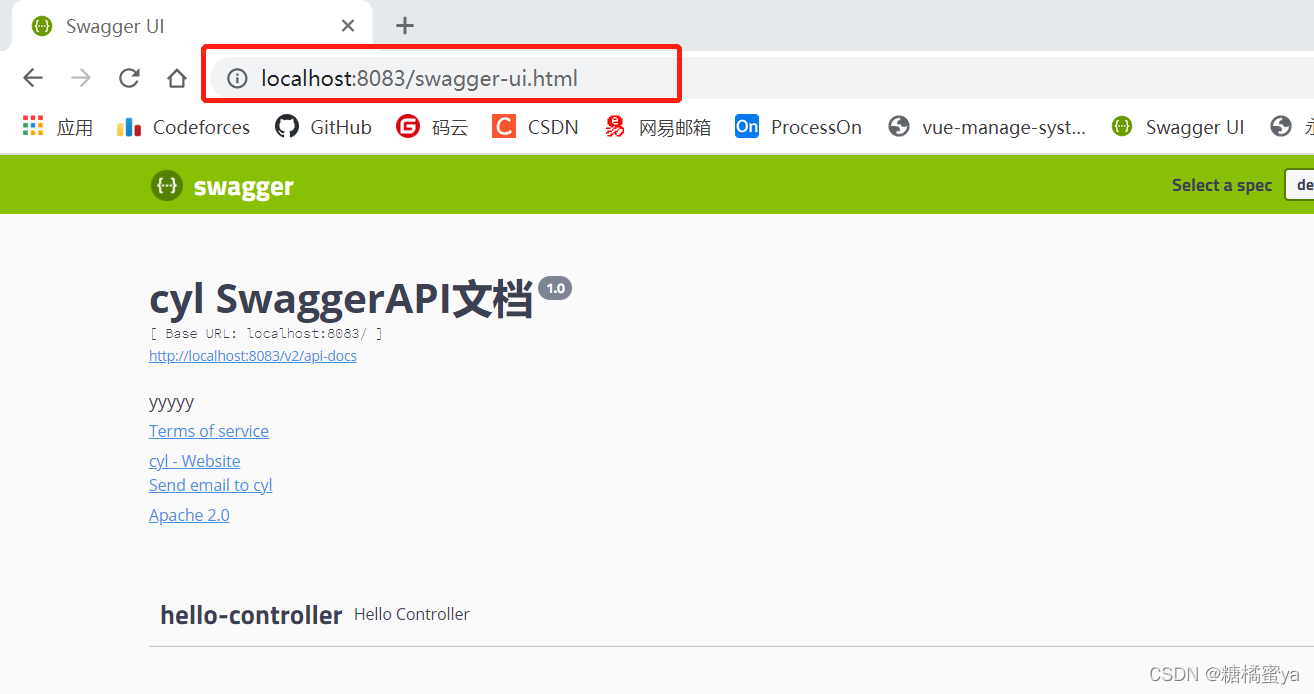
5.测试运行
- http://localhost:8080/swagger-ui.html
二、配置Swagger
1)步骤
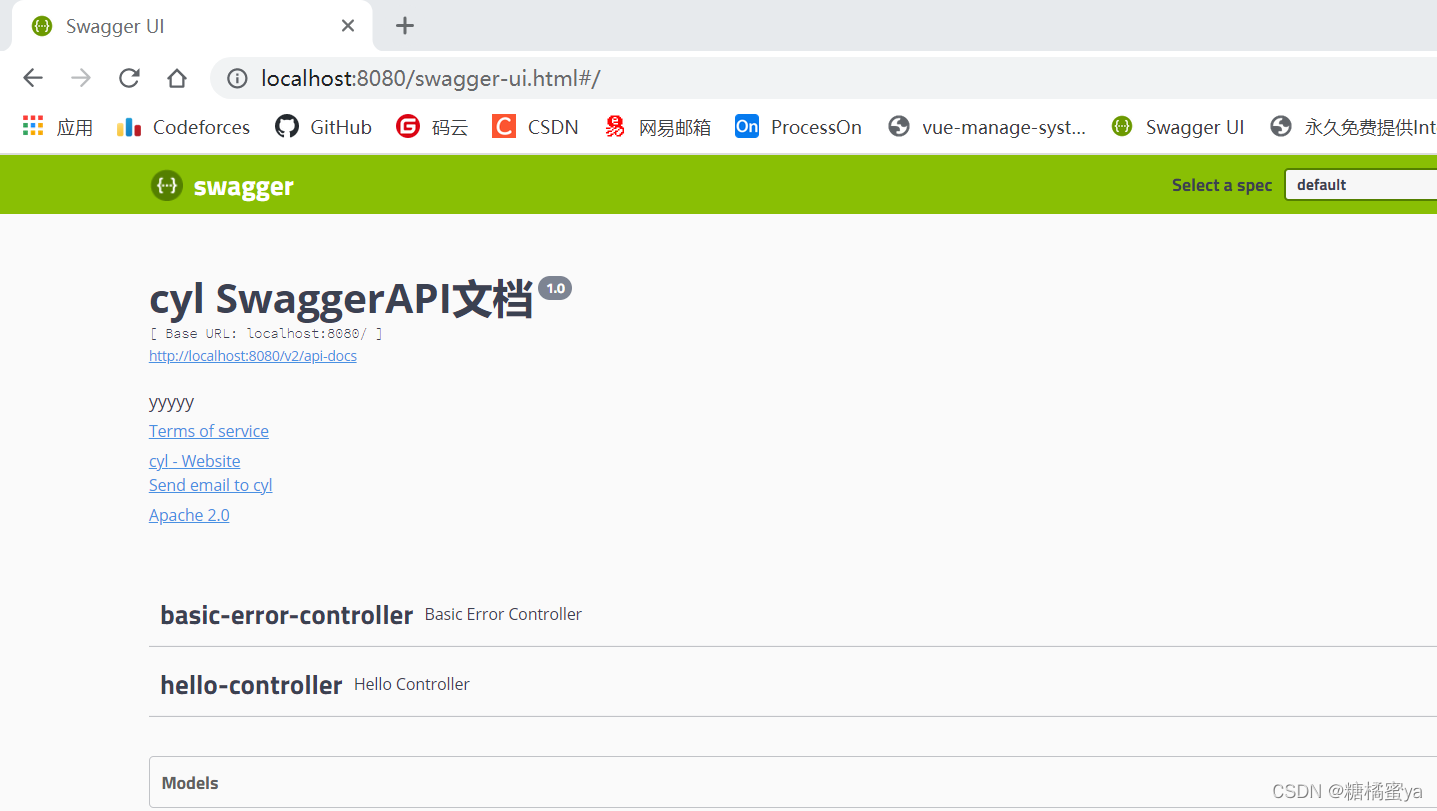
1.Swagger实例Bean是Docket,所以通过配置Docket实例来配置Swaggger
@Configuration
@EnableSwagger2  //开启swagger2
public class SwaggerConfig {
  //配置Swagger的Bean实例
  @Bean
  public Docket docket(){
    return new Docket(DocumentationType.SWAGGER_2)
        .apiInfo(apiInfo());
  }
  //配置Swagger信息 apiInfo
  private ApiInfo apiInfo(){
    //作者信息
    Contact contact = new Contact("cyl", "http://localhost:8080", "1505386118@qq.com");
    return new ApiInfo(
        "cyl SwaggerAPI文档",
        "yyyyy",
        "1.0",
        "http://localhost:8080",
        contact,
        "Apache 2.0",
        "http://www.apache.org/licenses/LICENSE-2.0",
        new ArrayList());
  }
}
2.配置扫描接口
//配置Swagger的Bean实例
  @Bean
  public Docket docket(){
    return new Docket(DocumentationType.SWAGGER_2)
        .apiInfo(apiInfo())
        .select()
        //RequestHandlerSelectors配置要扫描的接口方式
        //basePackage指定要扫描的包
        //.apis(RequestHandlerSelectors.basePackage("com.cyl.controller"))
        //any():扫描全部
        //none():都不扫描
        //withClassAnnotation():扫描类上的注解 参数是注解的反射对象
        //.apis(RequestHandlerSelectors.withClassAnnotation(GetMapping.class))
        //withMethodAnnotation():扫描了方法上的注解
        //.apis(RequestHandlerSelectors.withMethodAnnotation(RestController.class))
        //paths():过滤什么路径
        .paths(PathSelectors.ant("/cyl/**"))
        .build();
  }
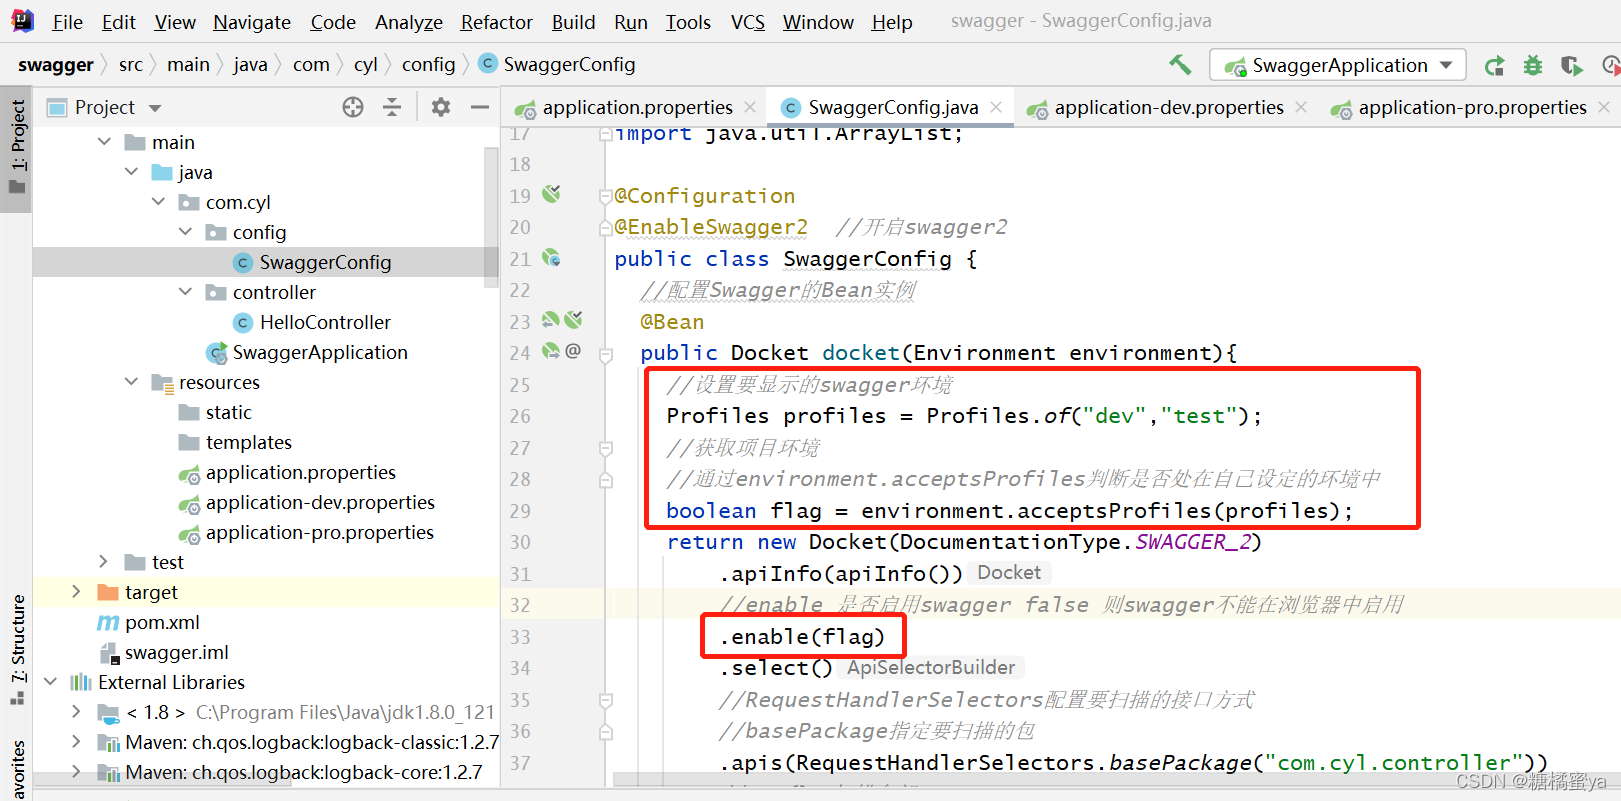
3.配置是否启用Swagger

2)Q:swagger只在生产环境中使用,发布时不使用?
(1)第一种
- 判断是不是生产环境 flag=false
- 注入enable (flag)

(2)第二种
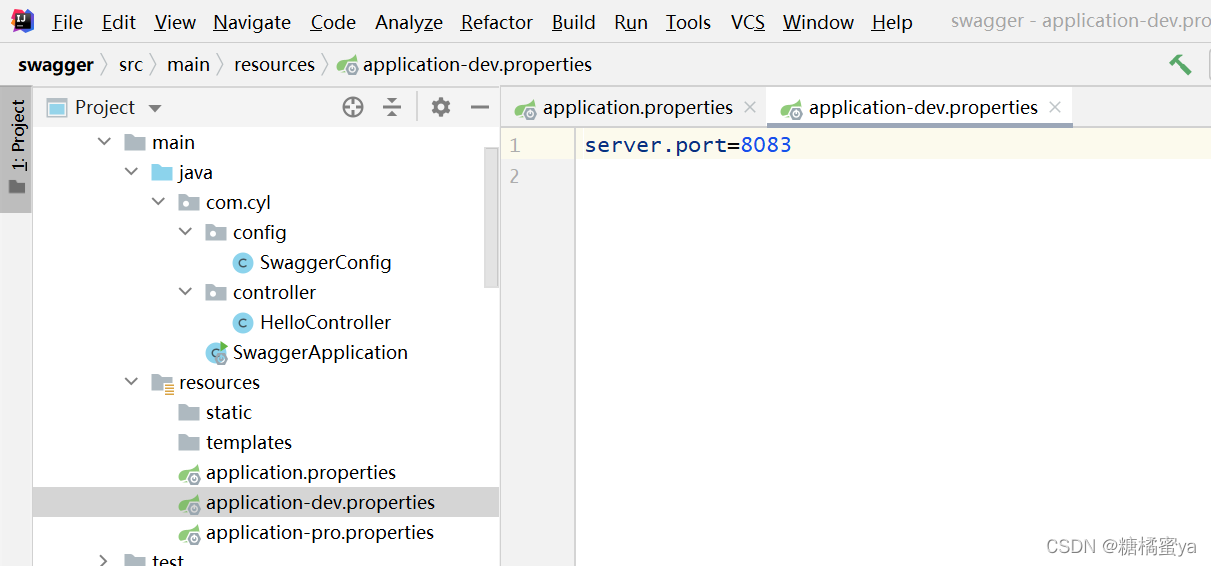
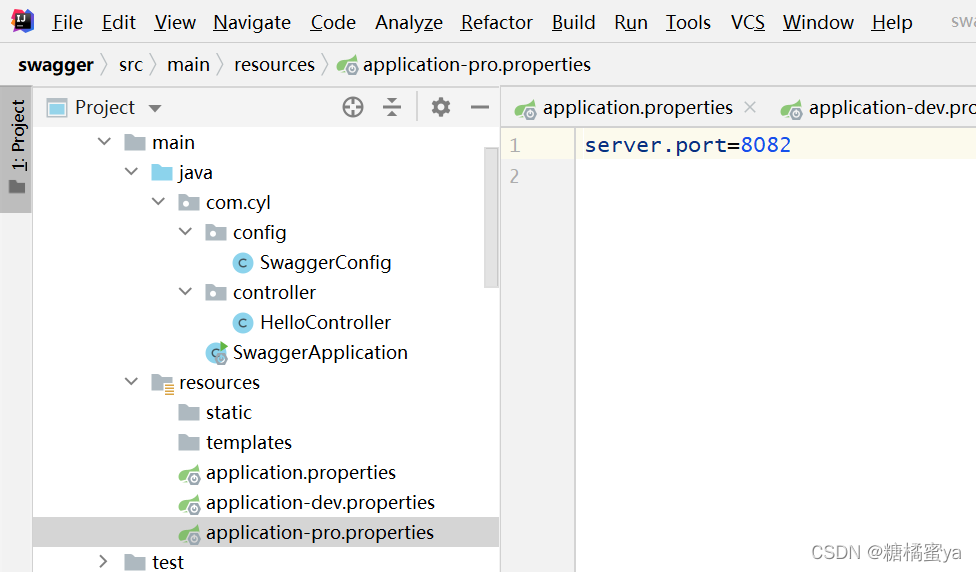
1.配置文件准备
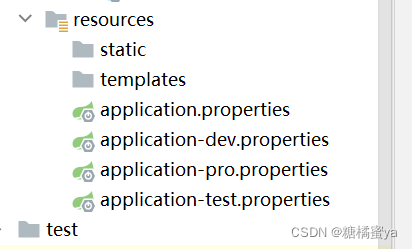
2.application.properties
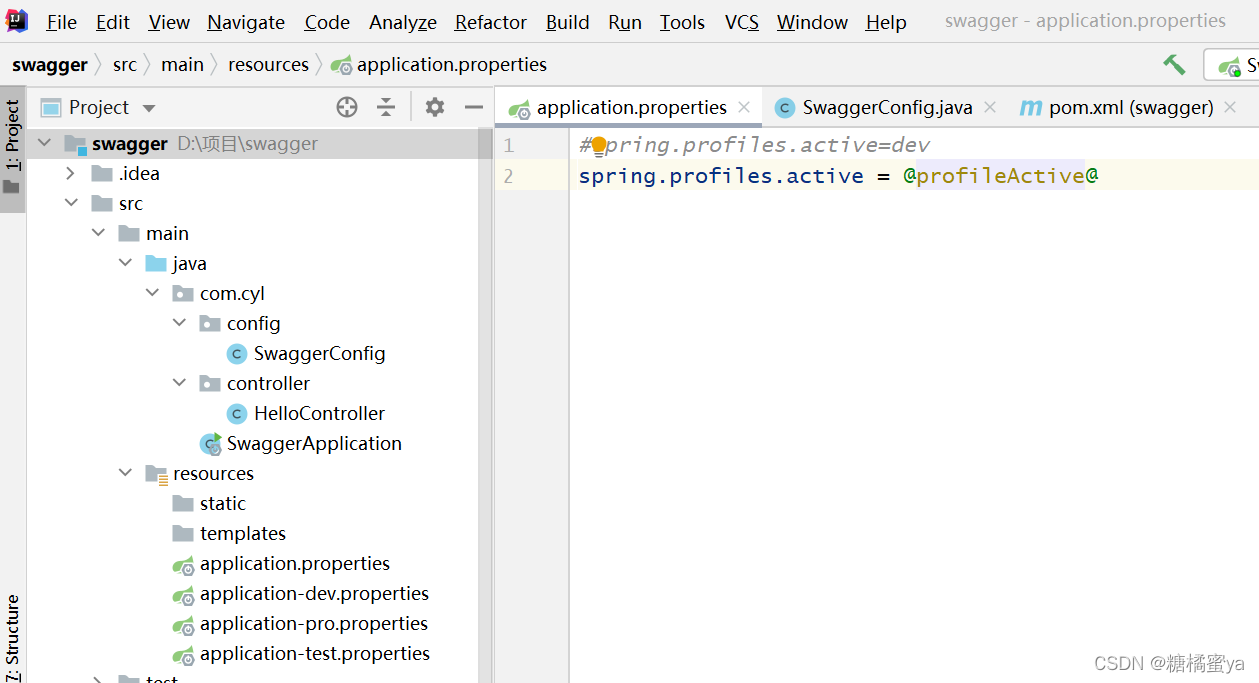
3.pom.xml
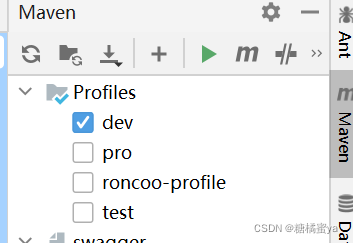
<profiles>
    <!--开发环境-->
    <profile>
      <id>dev</id>
      <properties>
        <profileActive>dev</profileActive>
      </properties>
    </profile>
    <!--测试环境-->
    <profile>
      <id>test</id>
      <properties>
        <profileActive>test</profileActive>
      </properties>
    </profile>
    <!--生产环境-->
    <profile>
      <id>pro</id>
      <properties>
        <profileActive>pro</profileActive>
      </properties>
    </profile>
  </profiles>

  <build>
    <resources>
      <resource>
        <directory>src/main/resources</directory>
        <excludes>
          <exclude>application*.properties</exclude>
        </excludes>
      </resource>
      <resource>
        <directory>src/main/resources</directory>
        <!-- 是否替换@xx@表示的maven properties属性值 -->
        <filtering>true</filtering>
        <includes>
          <include>application.properties</include>
          <include>application-${profileActive}.properties</include>
        </includes>
      </resource>
    </resources>
    <plugins>
      <plugin>
        <groupId>org.springframework.boot</groupId>
        <artifactId>spring-boot-maven-plugin</artifactId>
      </plugin>
    </plugins>
  </build>
4.maven重新打包
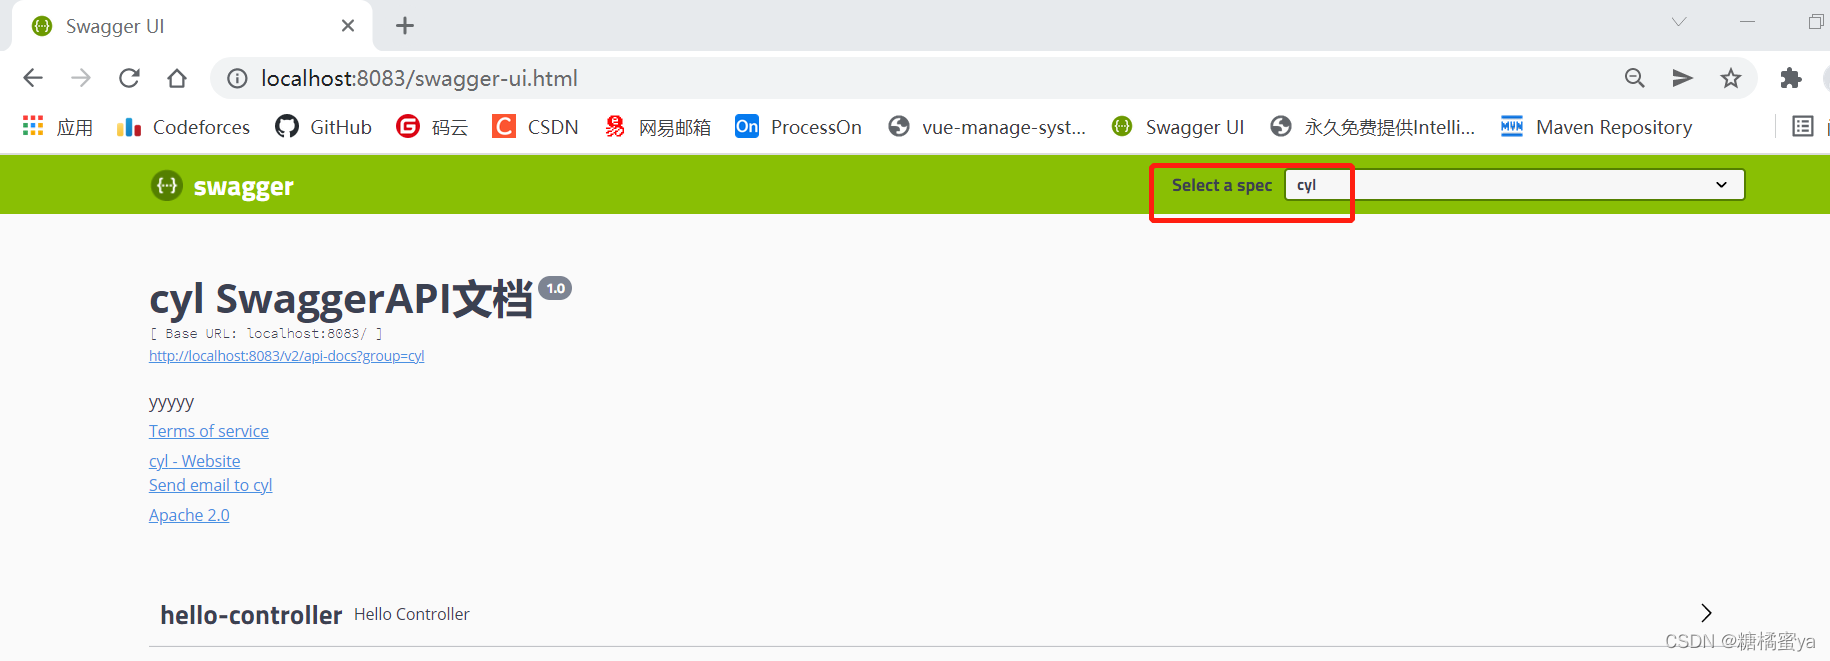
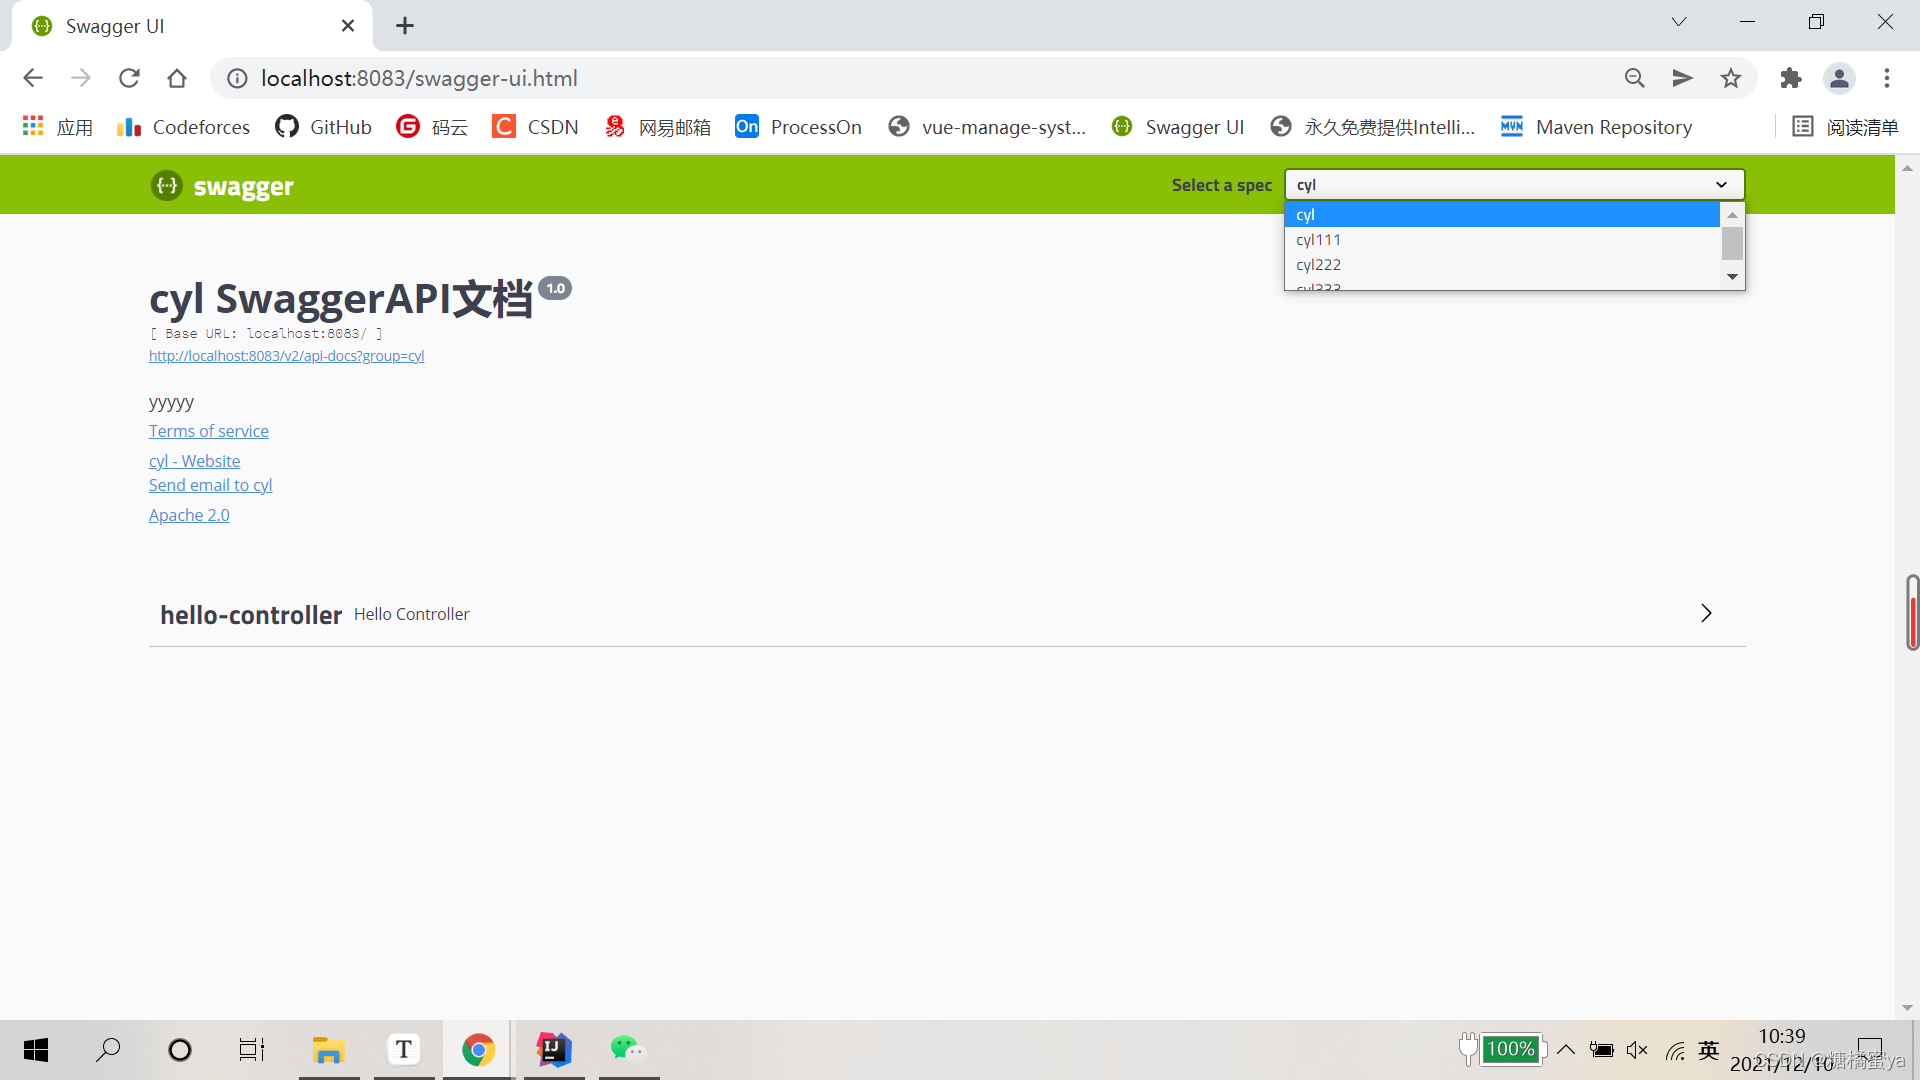
3)配置API分组
1. .groupName(“cyl”)
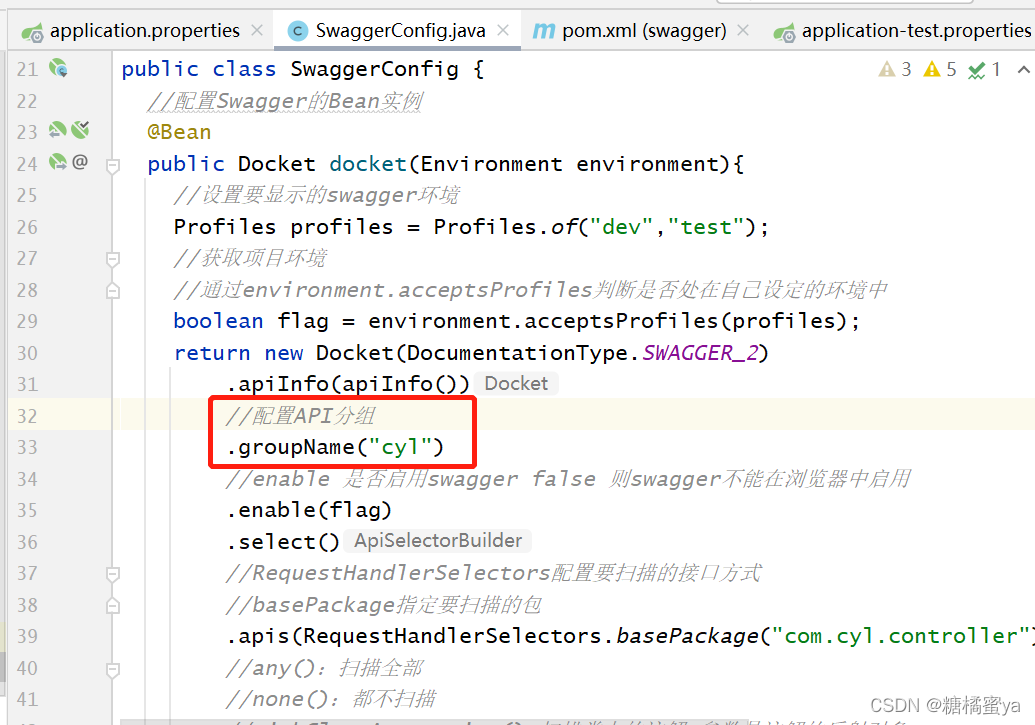
2.分组
@Bean
  public Docket docket1(){
    return new Docket(DocumentationType.SWAGGER_2).groupName("cyl111");
  }
  @Bean
  public Docket docket2(){
    return new Docket(DocumentationType.SWAGGER_2).groupName("cyl222");
  }
  @Bean
  public Docket docket3(){
    return new Docket(DocumentationType.SWAGGER_2).groupName("cyl333");
  }
4)实体配置
1、新建实体类
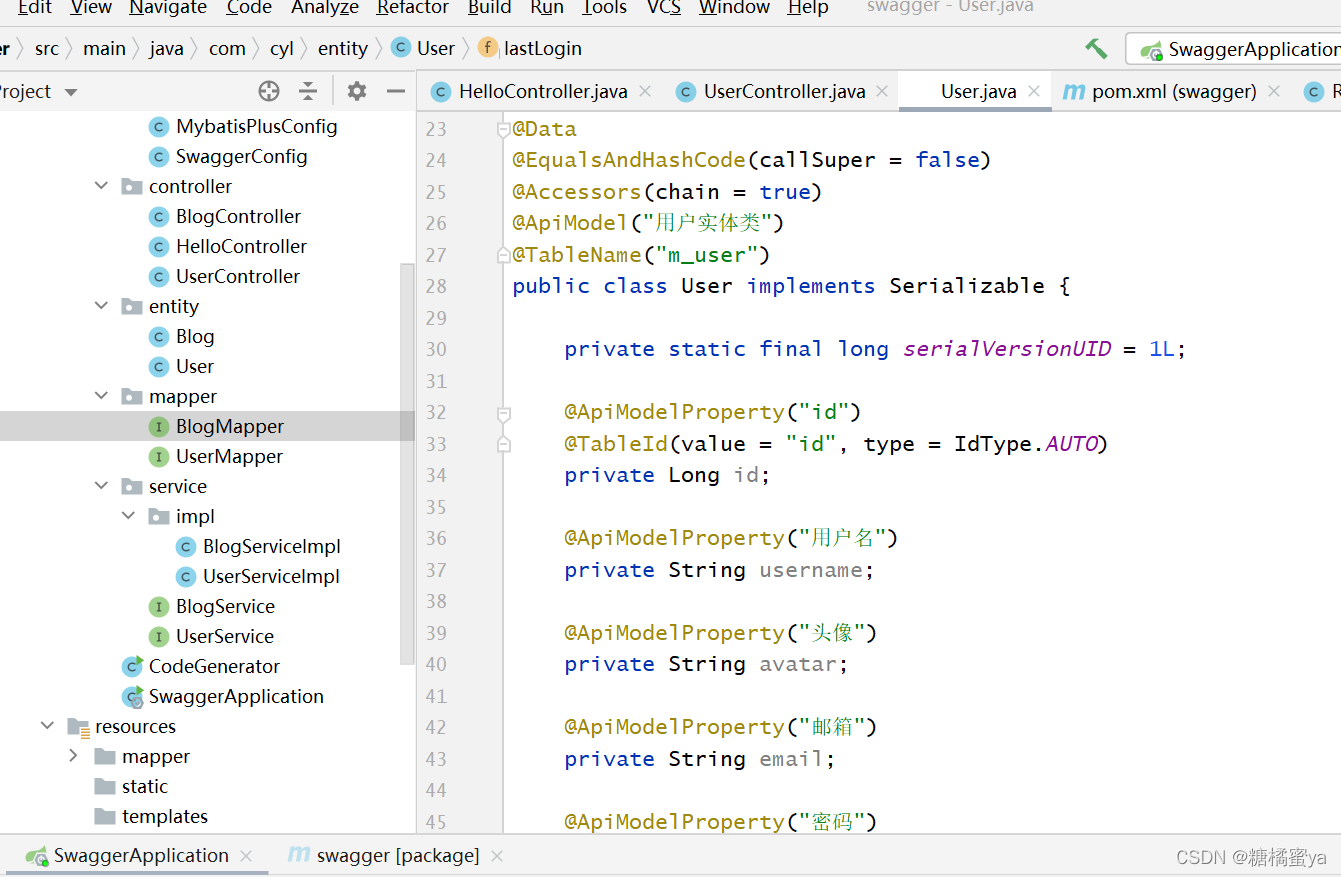
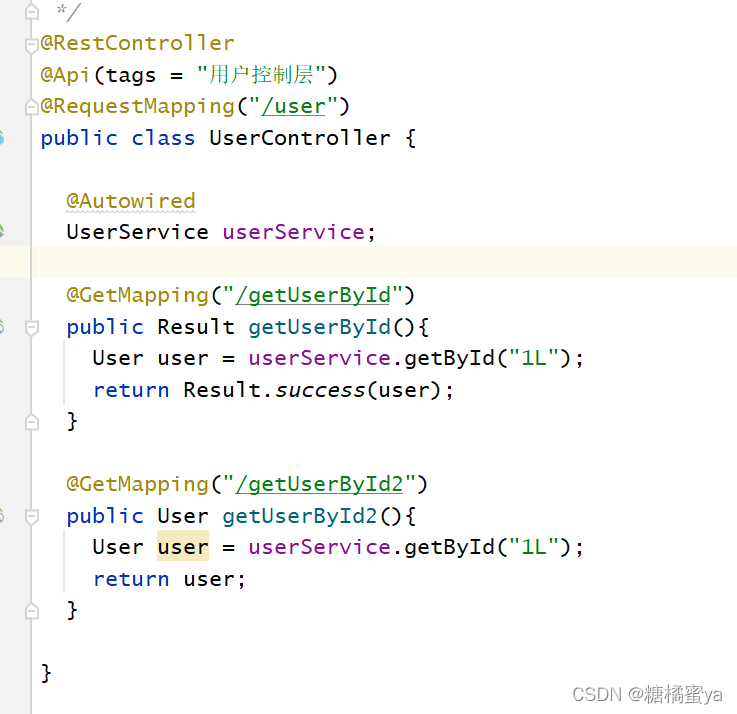
2.只要这个实体在请求接口的返回值上(即使是泛型),都能映射到实体项中:
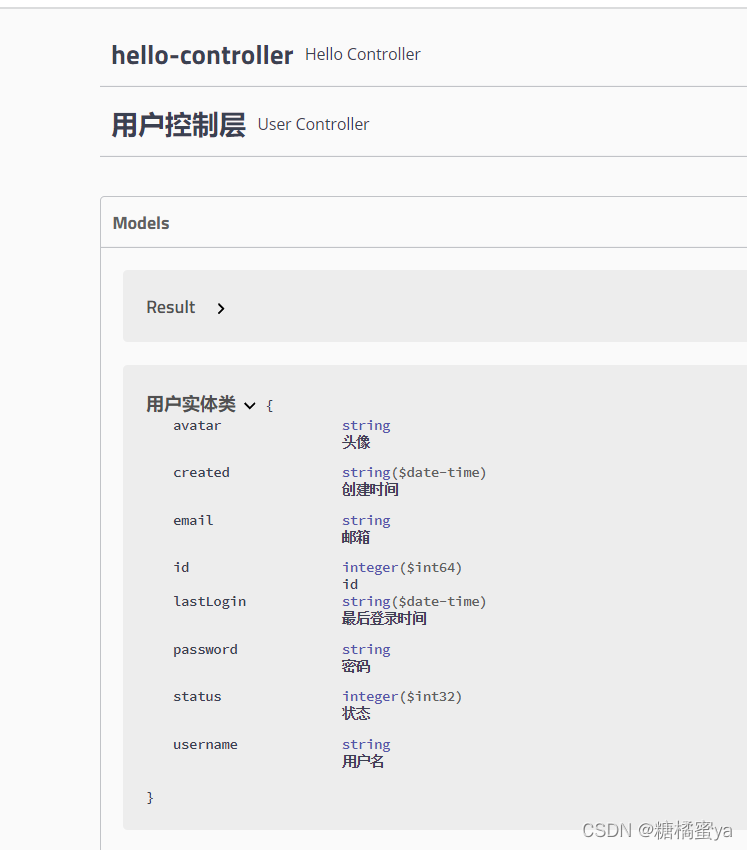
三、常用注解
Swagger的所有注解定义在io.swagger.annotations包下
| Swagger注解 | 简单说明 |
|---|---|
| @Api(tags = “xxx模块说明”) | 作用在模块类上 |
| @ApiOperation(“xxx接口说明”) | 作用在接口方法上 |
| @ApiModel(“xxxPOJO说明”) | 作用在模型类上:如VO、BO |
| @ApiModelProperty(value = “xxx属性说明”,hidden = true) | 作用在类方法和属性上,hidden设置为true可以隐藏该属性 |
| @ApiParam(“xxx参数说明”) | 作用在参数、方法和字段上,类似@ApiModelProperty |


 582
582

 被折叠的 条评论
为什么被折叠?
被折叠的 条评论
为什么被折叠?
 到【灌水乐园】发言


