


文章目录
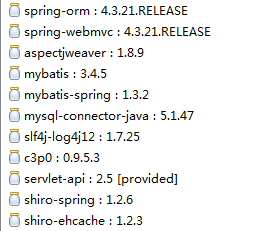
导入jar包
pom.xml
<build>
  	<plugins>
  		<!-- tomcat插件 -->
  		<plugin>
  			<groupId>org.apache.tomcat.maven</groupId>
  			<artifactId>tomcat7-maven-plugin</artifactId>
  			<version>2.2</version>
  			<configuration>
  				<!-- 端口号 -->
  				<port>8082</port>
  				<!-- /表示访问路径 省略项目名 -->
  				<path>/</path>
  				<!-- 设置编码方式 -->
  				<uriEncoding>utf-8</uriEncoding>
  			</configuration>
  		</plugin>
  	</plugins>
  </build>
web.xml文件中注册shiro过滤器
<?xml version="1.0" encoding="UTF-8"?>
<web-app xmlns:xsi="http://www.w3.org/2001/XMLSchema-instance"
xmlns="http://java.sun.com/xml/ns/javaee"
xsi:schemaLocation="http://java.sun.com/xml/ns/javaee http://java.sun.com/xml/ns/javaee/web-app_3_0.xsd"
id="WebApp_ID" version="3.0">
<display-name>test</display-name>
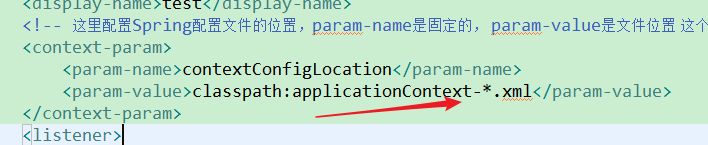
<!-- 这里配置Spring配置文件的位置,param-name是固定的, param-value是文件位置 这个配置可以省略,如果省略, 系统默认去/WEB-INF/目录下查找applicationContext.xml作为Spring的配置文件 -->
<context-param>
<param-name>contextConfigLocation</param-name>
<param-value>classpath:applicationContext-*.xml</param-value>
</context-param>
<listener>
<listener-class>org.springframework.web.context.ContextLoaderListener</listener-class>
</listener>
<servlet>
<servlet-name>springmvc</servlet-name>
<servlet-class>org.springframework.web.servlet.DispatcherServlet</servlet-class>
<init-param>
<param-name>contextConfigLocation</param-name>
<param-value>classpath:springmvc.xml</param-value>
</init-param>
</servlet>
<servlet-mapping>
<servlet-name>springmvc</servlet-name>
<url-pattern>/</url-pattern>
</servlet-mapping>
<filter>
<filter-name>encoding</filter-name>
<filter-class>org.springframework.web.filter.CharacterEncodingFilter</filter-class>
<init-param>
<param-name>encoding</param-name>
<param-value>UTF-8</param-value>
</init-param>
<init-param>
<param-name>forceRequestEncoding</param-name>
<param-value>true</param-value>
</init-param>
<init-param>
<param-name>forceResponseEncoding</param-name>
<param-value>true</param-value>
</init-param>
</filter>
<filter-mapping>
<filter-name>encoding</filter-name>
<url-pattern>/*</url-pattern>
</filter-mapping>
<!-- shiro过虑器,DelegatingFilterProxy通过代理模式将spring容器中的bean和filter关联起来 -->
<filter>
<filter-name>shiroFilter</filter-name>
<filter-class>org.springframework.web.filter.DelegatingFilterProxy</filter-class>
<!-- 设置true由servlet容器控制filter的生命周期 -->
<init-param>
<param-name>targetFilterLifecycle</param-name>
<param-value>true</param-value>
</init-param>
<!-- 设置spring容器filter的bean id,如果不设置则找与filter-name一致的bean -->
<init-param>
<param-name>targetBeanName</param-name>
<!-- 这个值随便叫什么,但是在后面要用到的地方必须保持一致 -->
<param-value>shiro</param-value>
</init-param>
</filter>
<filter-mapping>
<filter-name>shiroFilter</filter-name>
<url-pattern>/*</url-pattern>
</filter-mapping>
<!-- 防止资源文件被spring MVC拦截 -->
<servlet-mapping>
<servlet-name>default</servlet-name>
<url-pattern>*.jpg</url-pattern>
</servlet-mapping>
<servlet-mapping>
<servlet-name>default</servlet-name>
<url-pattern>*.js</url-pattern>
</servlet-mapping>
<servlet-mapping>
<servlet-name>default</servlet-name>
<url-pattern>*.css</url-pattern>
</servlet-mapping>
</web-app>
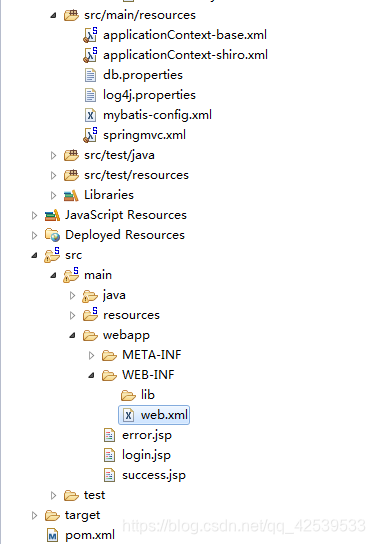
添加shiro的配置文件
注意shiro的配置可以添加在spring的配置文件中。但是为了便于管理我们再单独创建一个shiro的配置文件,里面的Schema还是spring的。
applicationContext-shiro.xml
<beans xmlns="http://www.springframework.org/schema/beans"
xmlns:xsi="http://www.w3.org/2001/XMLSchema-instance" xmlns:context="http://www.springframework.org/schema/context"
xmlns:aop="http://www.springframework.org/schema/aop" xmlns:tx="http://www.springframework.org/schema/tx"
xsi:schemaLocation="http://www.springframework.org/schema/beans http://www.springframework.org/schema/beans/spring-beans.xsd
http://www.springframework.org/schema/context http://www.springframework.org/schema/context/spring-context-4.3.xsd
http://www.springframework.org/schema/aop http://www.springframework.org/schema/aop/spring-aop-4.3.xsd
http://www.springframework.org/schema/tx http://www.springframework.org/schema/tx/spring-tx-4.3.xsd">
<!-- 配置凭证匹配器 -->
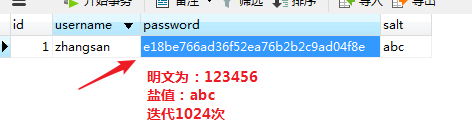
<bean id="credentialsMatcher" class="org.apache.shiro.authc.credential.HashedCredentialsMatcher">
<!-- 指定散列算法和迭代次数 -->
<property name="hashAlgorithmName" value="md5"/>
<property name="hashIterations" value="1024"/>
</bean>
<!-- 配置自定义的Realm -->
<bean class="com.sxt.realm.SecurityRealm" id="securityRealm">
<!-- 配置对应的匹配器 -->
<property name="credentialsMatcher" ref="credentialsMatcher"/>
</bean>
<!-- 配置SecurityManager -->
<bean class="org.apache.shiro.web.mgt.DefaultWebSecurityManager" id="securityManager">
<!-- 关联配置自定义Realm -->
<property name="realm" ref="securityRealm"/>
</bean>
<!-- 注册ShiroFilterFactoryBean id必须要和web.xml文件中的targetName一致 -->
<bean id="shiro" class="org.apache.shiro.spring.web.ShiroFilterFactoryBean">
<!-- 注册SecurityManager -->
<property name="securityManager" ref="securityManager"/>
<!-- 登录地址 如果用户请求的的地址是 login.do 那么会对该地址认证-->
<property name="loginUrl" value="/login.do"/>
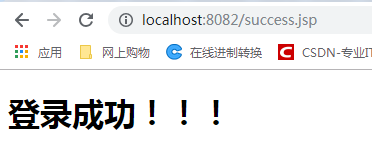
<!-- 登录成功的跳转地址 -->
<property name="successUrl" value="/success.jsp"/>
<!-- 访问未授权的页面跳转的地址 -->
<property name="unauthorizedUrl" value="/refuse.jsp"/>
<!-- 设置 过滤器链 -->
<property name="filterChainDefinitions">
<value>
<!--加载顺序从上往下。
authc需要认证
anon可以匿名访问的资源
-->
/login.do=authc
/login.jsp=anon
/**=authc
</value>
</property>
</bean>
</beans>
同时web.xml文件中加载spring的位置也需要调整
applicationContext-base.xml
<beans xmlns="http://www.springframework.org/schema/beans"
	xmlns:xsi="http://www.w3.org/2001/XMLSchema-instance" xmlns:context="http://www.springframework.org/schema/context"
	xmlns:aop="http://www.springframework.org/schema/aop" xmlns:tx="http://www.springframework.org/schema/tx"
	xsi:schemaLocation="http://www.springframework.org/schema/beans http://www.springframework.org/schema/beans/spring-beans.xsd
		http://www.springframework.org/schema/context http://www.springframework.org/schema/context/spring-context-4.3.xsd
		http://www.springframework.org/schema/aop http://www.springframework.org/schema/aop/spring-aop-4.3.xsd
		http://www.springframework.org/schema/tx http://www.springframework.org/schema/tx/spring-tx-4.3.xsd">

	<!-- 关联数据属性文件 -->
	<context:property-placeholder location="classpath:db.properties"/>
	<!-- 开启扫描 -->
	<context:component-scan base-package="com.sxt.service.impl"/>

	<!-- 配置数据源 -->
	<bean class="com.mchange.v2.c3p0.ComboPooledDataSource" id="dataSource" >
		<property name="driverClass" value="${driver}"></property>
		<property name="jdbcUrl" value="${url}"></property>
		<property name="user" value="${names}"></property>
		<property name="password" value="${password}"></property>
	</bean>
	<!-- 整合mybatis -->
	<bean class="org.mybatis.spring.SqlSessionFactoryBean" id="sqlSessionFactoryBean" >
		<!-- 关联数据源 -->
		<property name="dataSource" ref="dataSource"/>
		<!-- 关联mybatis的配置文件 -->
		<property name="configLocation" value="classpath:mybatis-config.xml"/>
		<!-- 添加别名设置 -->
		<property name="typeAliasesPackage" value="com.sxt.pojo"/>
	</bean>
	<!-- 配置扫描的路径 -->
	<bean class="org.mybatis.spring.mapper.MapperScannerConfigurer" >
		<property name="basePackage" value="com.sxt.mapper"/>
	</bean>
</beans>
db.properties
# mysql \u5F00\u53D1\u73AF\u5883
driver=com.mysql.jdbc.Driver
url=jdbc:mysql://localhost:3306/1227?characterEncoding=utf-8
names=root
password=1999

# \u6D4B\u8BD5\u73AF\u5883
#driver=com.mysql.jdbc.Driver
#url=jdbc:mysql://192.168.88.101:3306/1227?characterEncoding=utf-8
#username=root
#password=123456

# \u751F\u4EA7\u73AF\u5883
#driver=com.mysql.jdbc.Driver
#url=jdbc:mysql://192.168.88.102:3306/1227?characterEncoding=utf-8
#username=root
#password=123456
mybatis-config.xml
<?xml version="1.0" encoding="UTF-8" ?>
<!DOCTYPE configuration
  PUBLIC "-//mybatis.org//DTD Config 3.0//EN"
  "http://mybatis.org/dtd/mybatis-3-config.dtd">
<configuration>
	<settings>
		 <!-- 开启延迟加载 -->
		<setting name="lazyLoadingEnabled" value="true"/>
		<setting name="aggressiveLazyLoading" value="false"/>
	</settings>
</configuration>
springmvc.xml
<?xml version="1.0" encoding="UTF-8"?>
<beans xmlns="http://www.springframework.org/schema/beans"
	xmlns:xsi="http://www.w3.org/2001/XMLSchema-instance"
	xmlns:context="http://www.springframework.org/schema/context"
	xmlns:mvc="http://www.springframework.org/schema/mvc"
	xsi:schemaLocation="http://www.springframework.org/schema/mvc http://www.springframework.org/schema/mvc/spring-mvc-4.3.xsd
		http://www.springframework.org/schema/beans http://www.springframework.org/schema/beans/spring-beans.xsd
		http://www.springframework.org/schema/context http://www.springframework.org/schema/context/spring-context-4.3.xsd">

	<!-- 开启扫描 -->
	<context:component-scan base-package="com.sxt.controller" use-default-filters="false">
		<context:include-filter type="annotation" expression="org.springframework.stereotype.Controller"/>
	</context:component-scan>

	<!-- 开启SpringMVC注解的方式 -->
	<mvc:annotation-driven >
		<!-- <mvc:message-converters>
			<bean class="com.alibaba.fastjson.support.spring.FastJsonHttpMessageConverter"></bean>
		</mvc:message-converters> -->
	</mvc:annotation-driven>

</beans>
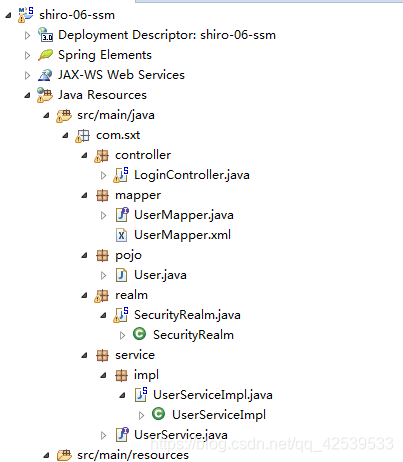
User.java

UserMapper.java
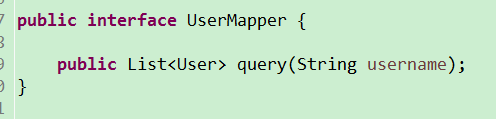
UserMapper.xml
<?xml version="1.0" encoding="UTF-8" ?>
<!DOCTYPE mapper
  PUBLIC "-//mybatis.org//DTD Mapper 3.0//EN"
  "http://mybatis.org/dtd/mybatis-3-mapper.dtd">
<mapper namespace="com.sxt.mapper.UserMapper">
	<select id="query" resultType="user">
		select * from users where username=#{param1}
	</select>
</mapper>
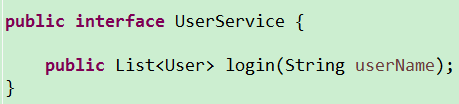
service接口
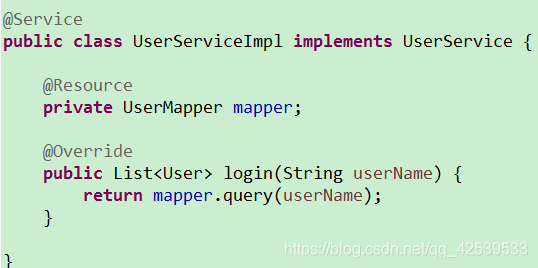
service实现类
创建自定义的realm(认证,授权方法)
SecurityRealm.java
package com.sxt.realm;

import java.util.List;

import javax.annotation.Resource;
import org.apache.shiro.authc.AuthenticationException;
import org.apache.shiro.authc.AuthenticationInfo;
import org.apache.shiro.authc.AuthenticationToken;
import org.apache.shiro.authc.SimpleAuthenticationInfo;
import org.apache.shiro.authc.UsernamePasswordToken;
import org.apache.shiro.authz.AuthorizationInfo;
import org.apache.shiro.authz.SimpleAuthorizationInfo;
import org.apache.shiro.realm.AuthorizingRealm;
import org.apache.shiro.subject.PrincipalCollection;
import org.apache.shiro.util.SimpleByteSource;
import com.sxt.pojo.User;
import com.sxt.service.UserService;

public class SecurityRealm extends AuthorizingRealm {
	@Resource
	private UserService userService;

	/**
	 * 认证的方法
	 */
	@Override
	protected AuthenticationInfo doGetAuthenticationInfo(AuthenticationToken token) throws AuthenticationException {
		UsernamePasswordToken t = (UsernamePasswordToken) token;
		// 获取登录的账号
		String username = t.getUsername();
		List<User> list = userService.login(username);
		if (list == null || list.size() !=1) {
			return null;
		}
		User user = list.get(0);
		// 身份信息(keys账号也可以是对象) 密码 realmName(自定义)
		return new SimpleAuthenticationInfo(user
				, user.getPassword()
				, new SimpleByteSource(user.getSalt())
				, "sxt");
	}
	/**
	 * 授权的方法
	 */
	@Override
	protected AuthorizationInfo doGetAuthorizationInfo(PrincipalCollection principals) {
		// 1.获取账号信息
		String userName = (String) principals.getPrimaryPrincipal();
		// 2.根据登录的账号信息去数据库中查询出对应的 角色和权限信息

		// 3.将查询到的权限信息封装到SimpleAuthorizationInfo
		SimpleAuthorizationInfo info = new SimpleAuthorizationInfo();
		info.addRole("role1");
		info.addRole("role2");
		info.addStringPermission("user:create");
		info.addStringPermission("user:delete");
		return info;
	}

}
跳转方法
package com.sxt.controller;
import javax.servlet.http.HttpServletRequest;
import org.apache.shiro.authc.IncorrectCredentialsException;
import org.apache.shiro.authc.UnknownAccountException;
import org.apache.shiro.web.filter.authc.FormAuthenticationFilter;
import org.springframework.stereotype.Controller;
import org.springframework.ui.Model;
import org.springframework.web.bind.annotation.RequestMapping;
@Controller
public class LoginController {
/**
* 设定登录失败跳转的资源以及获取失败的信息
*
* @param model
* @param request
* @return
*/
@RequestMapping("/login.do")
public String login(Model model, HttpServletRequest request) {
Object ex = request.getAttribute(FormAuthenticationFilter.DEFAULT_ERROR_KEY_ATTRIBUTE_NAME);
if (ex != null) {
System.out.println(ex.toString() + "----------");
}
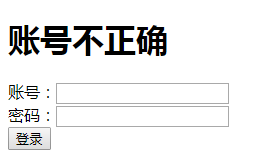
if (UnknownAccountException.class.getName().equals(ex)) {
System.out.println("----账号不正确----->");
model.addAttribute("msg", "账号不正确");
} else if (IncorrectCredentialsException.class.getName().equals(ex)) {
System.out.println("----密码不正确----->");
model.addAttribute("msg", "密码不正确");
} else {
System.out.println("----其他错误----->");
model.addAttribute("msg", "其他错误");
}
return "/login.jsp";
}
}
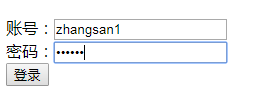
准备数据
<%@ page language="java" contentType="text/html; charset=UTF-8"
    pageEncoding="UTF-8"%>
<!DOCTYPE html PUBLIC "-//W3C//DTD HTML 4.01 Transitional//EN" "http://www.w3.org/TR/html4/loose.dtd">
<html>
<head>
<meta http-equiv="Content-Type" content="text/html; charset=UTF-8">
<title>Insert title here</title>
</head>
<body>
	<h1>${msg}</h1>
	<form action="/login.do" method="post">
		账号:<input type="text" name="username"><br>
		密码:<input type="password" name="password"><br>
		<input type="submit" value="登录">
	</form>
</body>
</html>
测试


 120
120

 被折叠的 条评论
为什么被折叠?
被折叠的 条评论
为什么被折叠?
 到【灌水乐园】发言


