


 本文介绍了CSS的相关知识,包括其三种编写方式(行内、内嵌、外部标签)及优先级,还阐述了CSS文本属性(如颜色、对齐方式等)和文字属性(如字体类型、大小等),同时详细讲解了多种选择器(标签、id、类、后代等)的作用、格式和注意事项。
css
**
1.什么是CSS*
作用:修改页面的元素样式
样式:字体:类型 大小 风格 粗细。
文本:颜色 首行缩进 行高 文本对齐方式。
背景:背景颜色 背景图片。
css的三种编写方式
1.行内
格式:
<p style="样式的属性:样式属性的值;....">别迟到</p>注意:
1.写在标签里面的。
2…缺点显得标签特别杂乱,不利于开发。
2.内嵌
格式:
<style type="text/css">
选择器{属性:属性值;......}
</style>注意:h5 style可简写 直接
<style></style>
style标签必须写在head标签里面每一个属性值后面都必须添加【;】
缺点 :显得标签特别杂乱 不利于开发。
3.外部标签
1.连接式
格式:<link href="css文件的路径" rel="stylesheet" type="text/css">
注意: 写在head里。
2.导入式
格式:<style type="text/css">@import url("css的文件路径");</style>
区别:
连接式html标签【网页结构】和css一起加载。
导入式先加载html【网页结构】 再加载css。
优点:css的重用
分组开发 提高开发效率
优先级
行内>内嵌>外部引入
css文本属性
1.文本颜色
格式:color:“值”;
取值:单词…
2.文本的水平对齐方式
格式:text-align:值
取值:left center right
3.文本的垂直对齐方式
格式:vertical-align:值;
取值:top middle bottom
注意:文图共存时,文字在图片的位置居中 在图片中设置
4.文本的缩进
格式:text-indent:值
取值:XX px[像素] em汉字如【1em】
5.文本的行高
格式:line-height:值;
取值:xx px;[像素]
6.文本的装饰
格式:text-decoration:值;
取值:underline 下划线 none默认的 没有线 overline 上划线 line-through 删除线
注意:去掉a标签的下划线可以使用text-decoration:none;
7.颜色的取值:
color:red
1.单词的取值
一般只用于常见的颜色,有局限性 。
color:rgb(255,0,0) r[red] g[green] b[blue]
2.其中每一个数字的取值范围在0-255之间 0表示无色 255表示纯色。
注意:不要求自己配颜色,但是必须会个灰色三个值相同即为灰色,值越大越白 值越小越黑。
如: rgb(100,100,100) color:rgba(255,0,0,1)
3.和rgb相同 唯一多了a, a代表透明度 取值0-1之间 值越小越透明
半透明color:rgba(255,0,0,0.5) color:#FF0000。
**4.**十六进制取值跟rgb相同,前两位代表red ,中间两位代表green ,后边两位代表blue只不过一个是十进制的值
一个是十六进制的值想要验证#FF0000就是红色 就要学会16进制转10进制。
**5.**在css中十六进制的颜色每两位相同可以简写为1位。
注意:当颜色对应的数字不一样时不能简写 #abcdef。
相同的数字不属于同一个颜色 不能简写 #ABBCDE 。
css文字属性
1.文字的属性
字体的类型
格式:font-family:“值”;
取值:黑体,微软雅黑,宋体,楷体…
注意:你所设置的字体必须是电脑中存在的字体。
字体的大小
格式:font-size:“值”。
取值:XX px[像素]。
注意:通过font-size设置文字大小 一定要加单位。
字体的粗细
格式:font-weight:值;
取值:bold加粗 bolder更粗 lighter正常粗细 100-900整数取值 值越大越粗
字体的风格
格式:font-style:值;
取值:italic倾斜 normal正常
2.字体属性的扩充
1.当我们设置了一个字体,电脑中不存在,但是又不想用电脑中默认的字体怎么办?
解决方式:添加备选方案
格式:font-family:“值”,“备选方案”;
2.简写
格式:font: 风格 粗细 大小 类型;
注意:中间空格隔开
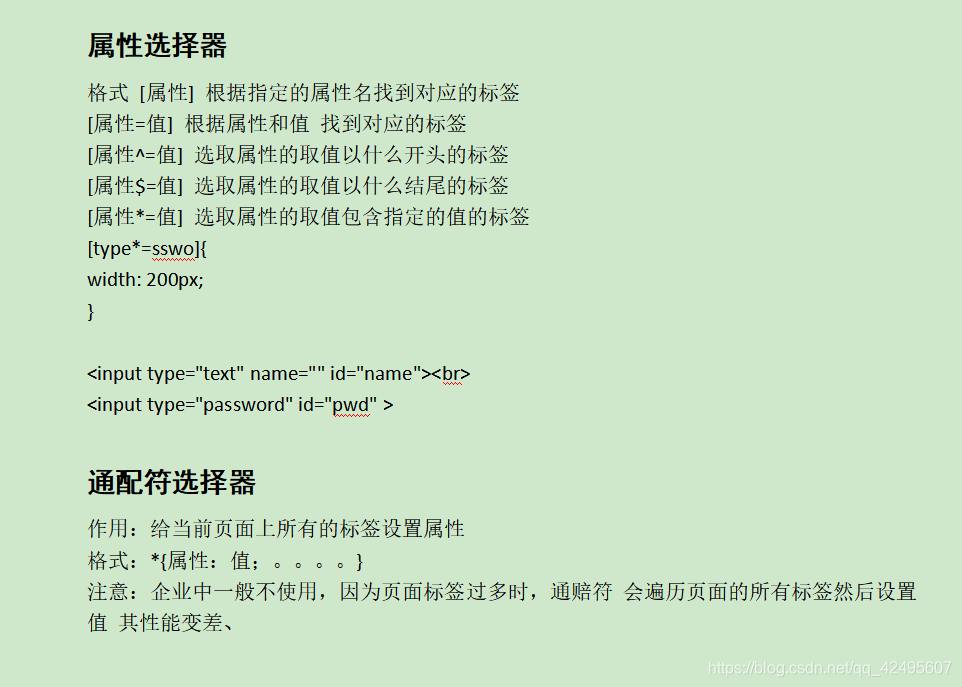
标签选择器
作用:根据指定的标签名称,在当前页面中找到所有该标签,并设置属性
格式:标签名称{属性:值;…}
注意:无法选择某一个无论藏得多深都能被选中,只要是html中的标签都能被当做标签选择器。
<style>
a{color:red;}
</style>
<a href="#">a</a>
选择器
id选择器
作用:根据指定的id的值,找到对应的标签 设置其属性。
格式:#id的值{属性:值;…}。
注意:
1.都可以给html的标签 设置id属性。
2.界面中的id的值不能相同。
3.写id选择器是一定要在前面加上 #。
4.id的取值需要遵守一些规范:
- 1.只能由数字字母或下划线组成。
2.值不能以数字开头。
3.不能使用html中的标签 作为id的值。
4.在企业开发中 如果你仅仅是为了设置样式,我们不会使用id选择器
#1input{color: red;}
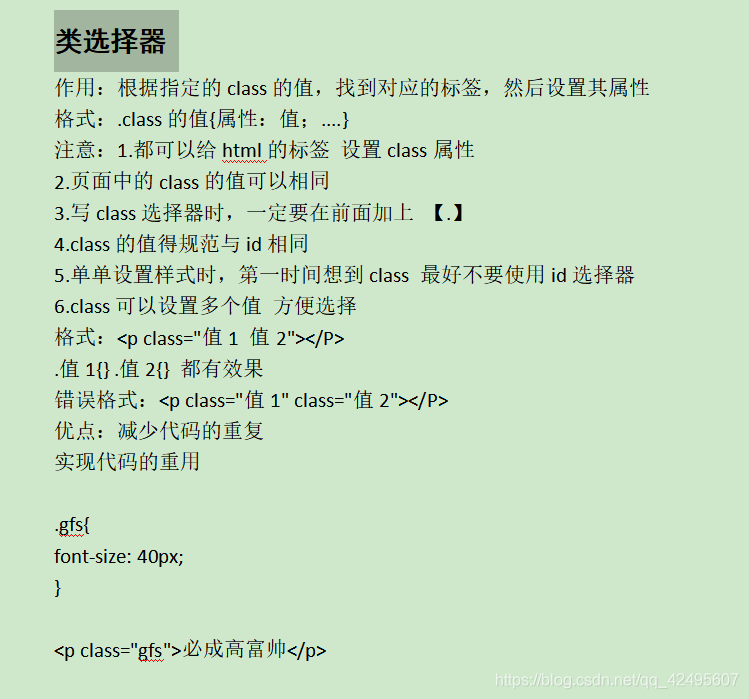
<p id="input">必成高富帅</p>类选择器
后代选择器
作用:找到指定标签的所有后代标签 并设置属性
格式:标签1 标签2{属性:值;…}
注意:
1.后代选择器之间空格隔开。
2.后代不仅仅是儿子 也包括孙子…
3.后代选择器不仅仅可以使用标签 还可以使用其他选择器【id/class …】

子元素选择器

交集选择器
作用:给所有选择器选中的 或被标签选择的 相交的那一部分标签 设置其属性。
格式:选择器1选择器2{属性:值;…}
注意:
1.选择器与选择器之间没有任何链接。
2.选择器可以使用标签名/id/class。
3.企业在交集选择器基本不用 【既然你都设置了 id/class 我干啥还要用交集】。
通用兄弟选择器 css3
作用:给指定选择器后面的所有选择器 选择的标签 添加样式
格式:选择器1~选择器2{属性:值;…}
注意:
1通用的兄弟选择器必须用~链接。
2通用的选择器是 指定选择器后面某个选择器选择的所有标签无论有没有被隔开都可以被选中。
伪元素选择器
:after
属性 content 作用给标签添加文本/图片/多媒体
代码示例
<html>
 <head>
  <meta charset="utf-8">
  <title></title>
  <link href="css.css" rel="stylesheet" type="text/css">
  <style>
   /**标签选择器:针对所有页面中的input标签*/
   input{
    background-color:red;
    width:100px;
    height:100px;
   }
   /**
   id选择器和类选择器
   */
   #pwd{
    background-color:yellow;
    width:100px;
    height:100px;
   }
   .p1{
    background-color:black;
    width:100px;
    height:100px;
   }
   /**
   id选择器:整个页面唯一。id对应值唯一
   类选择器:页面中可以多次出现
   */
  </style>
 </head>
 <body>
  <input type="password" id="pwd">
  <input type="password" id="repwd">
  <input type="password" class="p1">
  <input type="password" class="p2">
  <input type="password" class="p1">
 </body>
</html>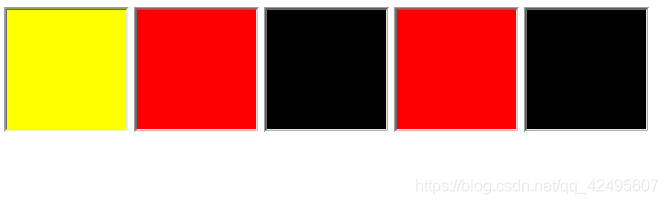
 <head>
  <meta charset="utf-8">
  <title></title>
  <link href="css.css" rel="stylesheet" type="text/css">
  <style>
   /**并集选择器*/
   body,a,div,img,p,span{
   font-size:24px;
   margin:0px;
   padding:0px;
   }
   /**
   后代选择器
   div ul{
    color:red;
   }

   div li{
   color:red
   }*/
   /**子元素选择器*/
   div>ul>li>ul{color:red;
   }
   /**相邻兄弟选择器*/
   div+p{
   color:red;
   }
   /**通用兄弟选择器*/
   div~p{
   color:yellow;
   }
   /**属性选择器,标签中有type属性,设置样式*/
   [type]{
   background-color:red;
   }
   /**标签中有type属性且属性值为text,设置样式*/
   [type=text]{
   background-color:yellow;
   }
   /**标签中有class属性且属性值是a开头的,设置样式*/
   [class^=a]{
   background-color:blue;
   }
   /**标签中有class属性且属性值是a结尾的,设置样式*/
   [class$=a]{
   background-color:green;
   }
   /**标签中有class属性且有属性值a的,设置样式*/
   [class*=a]{
   background-color:black;
   }
  </style>
 </head>
 <body>
  <div>
   <ul>
    <li>一级标题
     <ul>
      <li>二级标题

      </li>
      <li>
       二级标题
      </li>
     </ul>
    </li>
    <li>一级标题
     <ul>
      <li>
       二级标题
      </li>
      <li>
       二级标题
      </li>
     </ul>
    </li>
    <li>一级标题
     <ul>
      <li>
       二级标题
      </li>
      <li>
       二级标题
      </li>
     </ul>
    </li>
    <div>div</div>
   </ul>
   <p>段落标签</p>
  </div>
  <p>段落标签</p>
  <p>段落标签</p>
  <input name="username" type="text" class="ab">
  <input name="pwd" type="password" class="aa">
  <input name="pwd" type="password" class="ba">
 </body>
</html>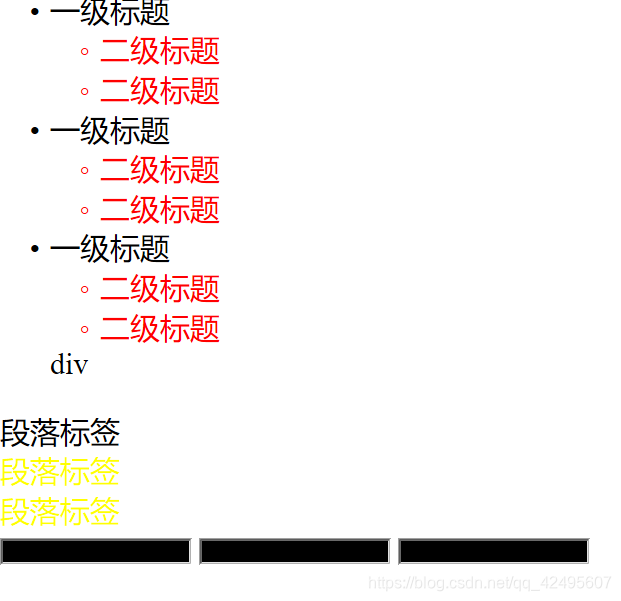
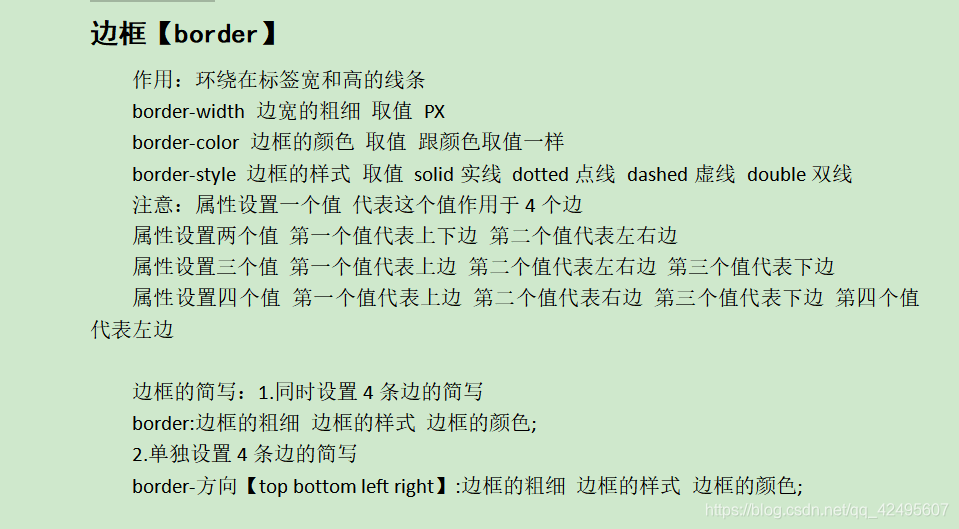
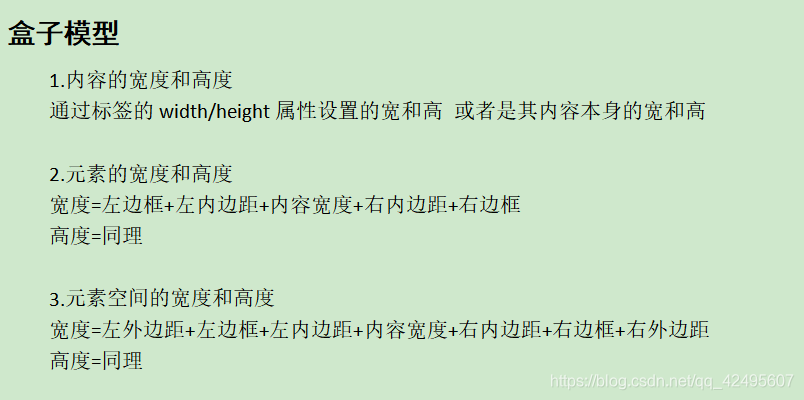
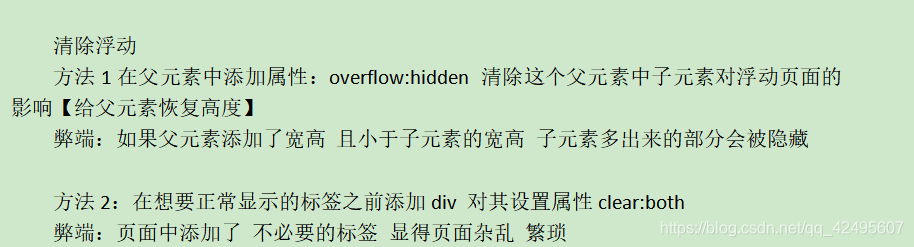
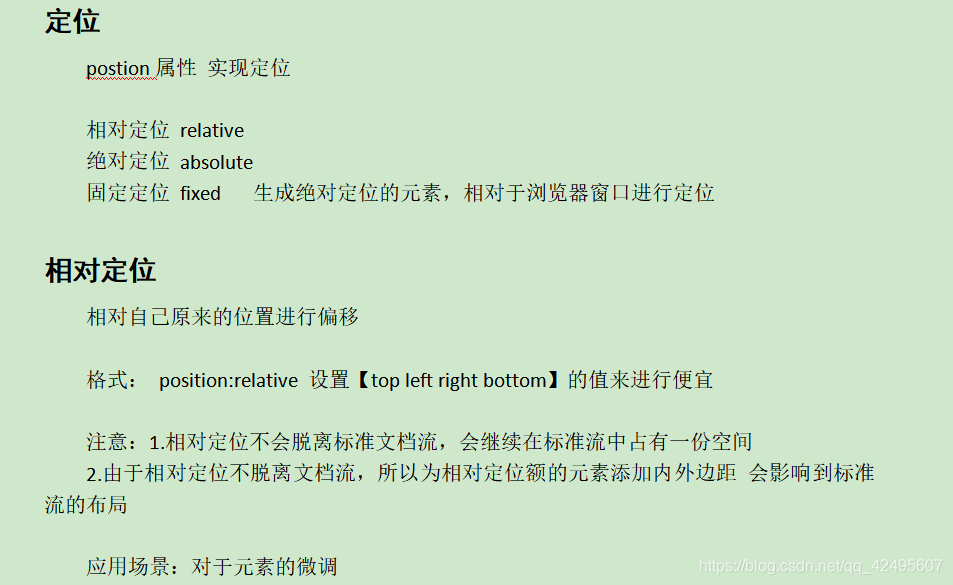
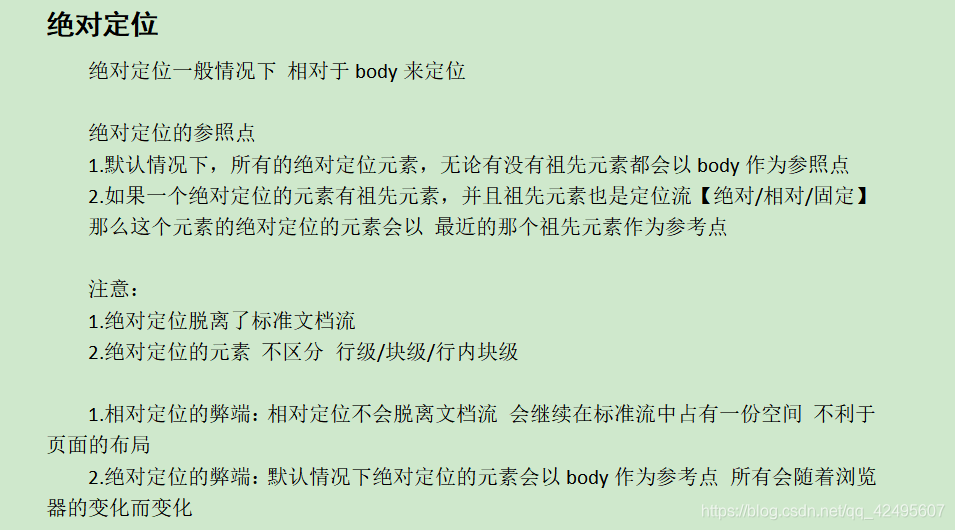
盒子模型
**代码示例:**
作业代码
<html>
<head>
<meta charset="utf-8">
<title></title>
<style>
img{
width:1000px;
height:100px;
}
.head img{
border:1px solid #000000
}
.div1{
width:1000px;
height:400px;
background-color:white;
border:1px solid #000000;
position:relative;
top:0px;
left:0px;
float:left;
}
.div2{
width:333px;
height:400px;
background-color:white;
float:left;
}
.div3{
width:333px;
height:400px;
background-color:white;
position:relative;
top:0px;
left:0px;
float:left;
}
.div4{
width:333px;
height:400px;
background-color:white;
position:relative;
top:0px;
left:0px;
float:left;
}
.div5{
width:333px;
height:80px;
background-color:lightblue;
text-align:right;
line-height:70px;
position:relative;
top:0px;
left:0px;
float:right;
}
.div6{
width:333px;
height:80px;
background-color:lightblue;
text-align:right;
line-height:70px;
position:relative;
top:20px;
left:0px;
float:right;
}
.div7{
width:333px;
height:80px;
background-color:lightblue;
text-align:right;
line-height:70px;
position:relative;
top:40px;
left:0px;
float:right;
}
.div8{
width:333px;
height:80px;
background-color:lightblue;
text-align:right;
line-height:70px;
position:relative;
top:80px;
left:0px;
float:right;
}
.div9{
width:333px;
height:80px;
background-color:white;
text-align:center;
position:relative;
top:30px;
left:0px;
float:right;
}
.div10{
width:333px;
height:80px;
background-color:white;
text-align:center;
position:relative;
top:50px;
left:0px;
float:right;
}
.div11{
width:333px;
height:80px;
background-color:white;
text-align:center;
line-height:70px;
position:relative;
top:70px;
left:0px;
float:right;
}
.div12{
width:333px;
height:60px;
background-color:white;
text-align:center;
line-height:70px;
position:relative;
top:100px;
left:0px;
float:right;
}
.div13{
width:333px;
height:80px;
background-color:white;
text-align:left;
line-height:80px;
position:relative;
top:0px;
left:0px;
float:right;
}
.div14{
width:333px;
height:80px;
background-color:white;
text-align:left;
line-height:80px;
position:relative;
top:20px;
left:0px;
float:right;
}
.div15{
width:333px;
height:80px;
background-color:white;
text-align:left;
line-height:80px;
position:relative;
top:40px;
left:0px;
float:right;
}
.div16{
width:333px;
height:80px;
background-color:white;
text-align:left;
line-height:80px;
position:relative;
top:60px;
left:0px;
float:right;
}
</style>
</head>
<body>
<div class="head">
<img src="作业图片/head.jpg" >
</div>
<p><font color="red">以下均为必选项</font></p>
<div class="div1">
<div class="div2">
<div class="div5">请填写您的Email地址:</div>
<div class="div6">设置您在当当网的昵称:</div>
<div class="div7">设置密码:</div>
<div class="div8">再次输入您设置的密码:</div>
</div>
<div class="div3">
<div class="div9"><input name="Email" placeholder="请输入Email"></div>
<div class="div10"><input name="name" placeholder="请输入昵称"></div>
<div class="div11"><input name="pwd" placeholder="请输入密码"></div>
<div class="div12"><input name="repwd" placeholder="请再次输入密码"></div>
</div>
<div class="div4">
<div class="div13"><font color="red">此项为必选项,请输入您的Email地址</font></div>
<div class="div14"><font color="red">此项为必填项,请输入您的昵称。</font></div>
<div class="div15"><font color="red">此项为必填项,请输入您的密码。</font></div>
<div class="div16"><font color="red">此项为必填项,请再次输入您设置的密码。</font></div>
</div>
</div>
<br><br><br><br><br><br><br><br><br><br><br><br><br><br><br><br><br><br><br><br><br><br>
<p> <input type="checkbox">我已阅读并同意《<a href="" class="a1">当当网交易条款</a>》和《<a href="" class="a2">当当网用户使用条款</a>》
</p>
<p>
<input type="reset" value="重置" style="width:80px;height:30px;">
<input type="button" value="注册" style="width:80px;height:30px;">
</p>
<div class="head">
<img src="作业图片/foot.jpg">
</div>
</body>
</html>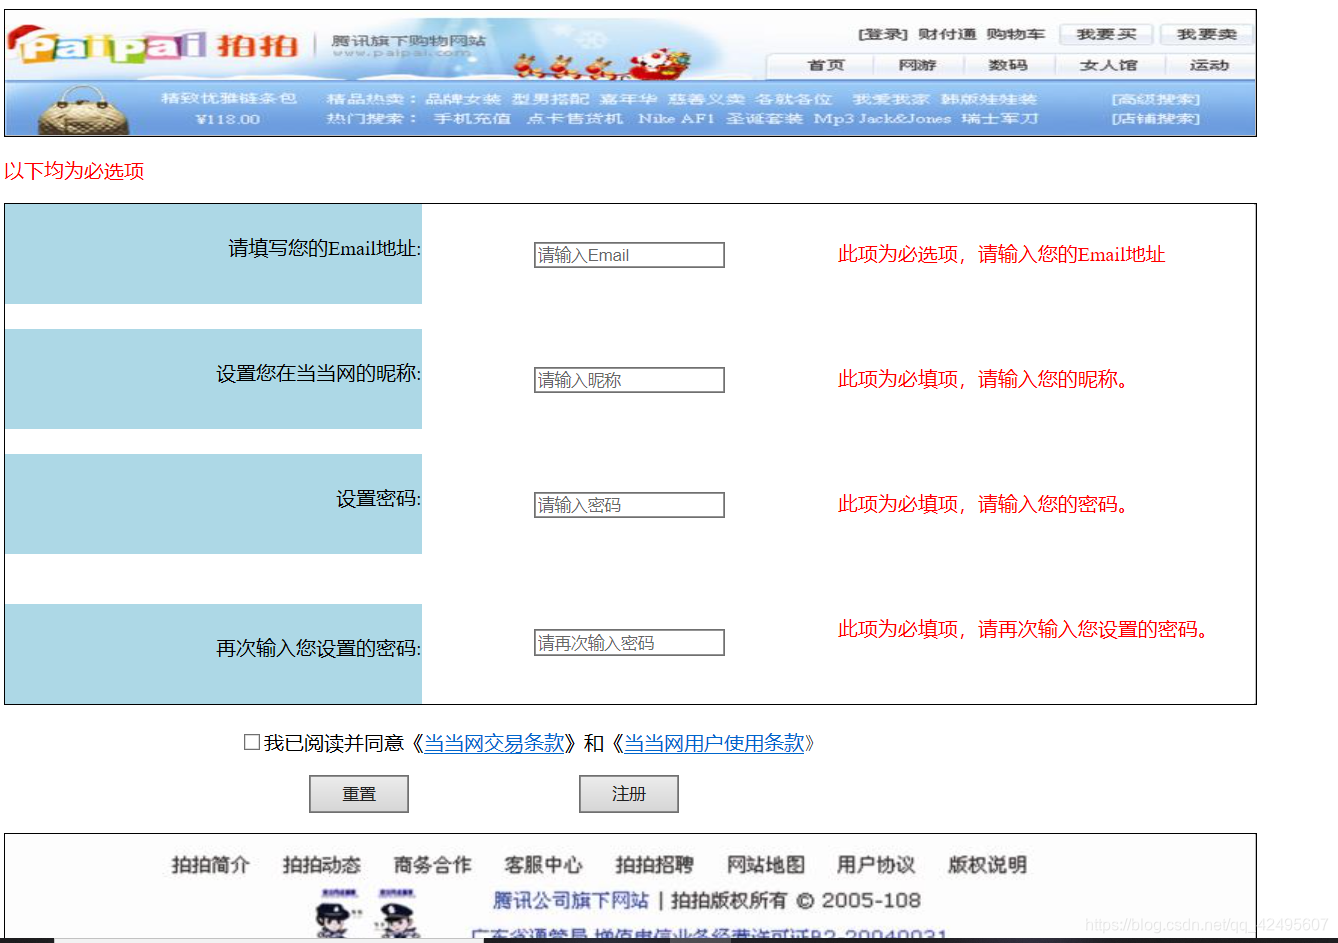


 453
453

 被折叠的 条评论
为什么被折叠?
被折叠的 条评论
为什么被折叠?
 到【灌水乐园】发言


