


手动使用webpack(webpack5)配置vue3开发环境
- 创建文件夹
vue3-webpack,初始化仓库npm init -y,安装基本依赖.
mkdir vue3-webpack
npm init -y
npm i -D webpack webpack-cli webpack-dev-server
webpack是基本的包
webpack-cli是执行脚本命令的包
webpack-dev-server是启动一个开发服务器的包
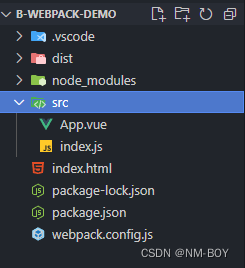
2. 创建源代码文件夹src和项目入口文件index.js和webpack配置文件webpack.config.js,index.js文件要防止在src文件夹里面(webpack约定),webpack.config.js防止在项目根目录下面
配置html-webpack-plugin插件
- 在项目根目录下创建
index.html模板和下载html-webpack-plugin插件,然后修改index.html文件,添加一个id为root的div标签,再在webpack.config.js中配置html插件.
touch index.html
npm i -D html-webpack-plugin
<!DOCTYPE html>
<html lang="en">
  <head>
    <meta charset="UTF-8" />
    <meta name="viewport" content="width=device-width, initial-scale=1.0" />
    <title>Document</title>
  </head>
  <body>
    <div id="app"></div>
    <h1>123</h1>
  </body>
</html>
const { Configuration } = require("webpack");
const path = require("path");
const HTMLWebpackPlugin = require("html-webpack-plugin");

/**
 * @type {Configuration}
 */
module.exports = {
  mode: "development",
  entry: "./src/index.js",
  output: {
    filename: "bundle.js",
    path: path.resolve(__dirname, "dist"),
    clean: true,
  },
  plugins: [
    new HTMLWebpackPlugin({
      template: "./index.html",
    }),
  ],
};
- 以上步骤完成,在终端中输入
npx webpack server,看到提示successfully表示开发环境启动成功. - 下载vue和vue-loader(webpack默认不识别.vue结尾的文件,需要下载loader解析)vue-loader文档地址,安装成功之后配置
webpack.config.js,然后编写入口文件index.js导入vue。
npm i vue
npm i -D vue-loader
webpack.config.js
const { Configuration } = require("webpack");
const path = require("path");
const HTMLWebpackPlugin = require("html-webpack-plugin");
const { VueLoaderPlugin } = require("vue-loader");

/**
 * @type {Configuration}
 */
module.exports = {
  mode: "development",
  entry: "./src/index.js",
  output: {
    filename: "bundle.js",
    path: path.resolve(__dirname, "dist"),
    clean: true,
  },
  module: {
    rules: [
      {
        test: /\.vue$/,
        use: "vue-loader",
      },
    ],
  },
  plugins: [
    new HTMLWebpackPlugin({
      template: "./index.html",
    }),
    new VueLoaderPlugin(),
  ],
};
// index.js
import { createApp } from "vue";
import App from "./App.vue";
const app = createApp(App);
app.mount(document.getElementById("app"));
// App.vue
<template>
    <h1>Hello Vue</h1>
</template>

<script setup>
</script>

<style scoped></style>
手动添加css-loader
- 编写完成启动
npx webpack server,此时应该可以正常渲染App.vue里的内容了。此时你发现你简单的修改下样式会提示错误,提示你需要添加额外的loader,这就需要添加额外的css loader了。vue-loader文档地址,配置完成之后重启服务。
npm i -D vue-style-loader css-loader
const { Configuration } = require("webpack");
const path = require("path");
const HTMLWebpackPlugin = require("html-webpack-plugin");
const { VueLoaderPlugin } = require("vue-loader");

/**
 * @type {Configuration}
 */
module.exports = {
  mode: "development",
  entry: "./src/index.js",
  output: {
    filename: "bundle.js",
    path: path.resolve(__dirname, "dist"),
    clean: true,
  },
  module: {
    rules: [
      {
        test: /\.vue$/,
        use: "vue-loader",
      },
      {
        test: /\.css$/,
        use: ["vue-style-loader", "css-loader"],
      },
    ],
  },
  plugins: [
    new HTMLWebpackPlugin({
      template: "./index.html",
    }),
    new VueLoaderPlugin(),
  ],
};
<template>
    <h1>Hello Vue</h1>
</template>

<script setup>
</script>

<style scoped>
h1 {
    color: red;
}
</style>
手动添加sass和sass-loader
- 简单的css语法不支持嵌套写法,肯定是需要使用sass预处理器来实现的,不同于
vite,webpack也是需要添加loader来解析sass。
npm i sass
npm i -D sass-loader
const { Configuration } = require("webpack");
const path = require("path");
const HTMLWebpackPlugin = require("html-webpack-plugin");
const { VueLoaderPlugin } = require("vue-loader");

/**
 * @type {Configuration}
 */
module.exports = {
  mode: "development",
  entry: "./src/index.js",
  output: {
    filename: "bundle.js",
    path: path.resolve(__dirname, "dist"),
    clean: true,
  },
  module: {
    rules: [
      {
        test: /\.vue$/,
        use: "vue-loader",
      },
      {
        test: /\.css$/,
        use: ["vue-style-loader", "css-loader"],
      },
      {
        test: /\.scss$/,
        use: ["vue-style-loader", "css-loader", "sass-loader"],
      },
    ],
  },
  plugins: [
    new HTMLWebpackPlugin({
      template: "./index.html",
    }),
    new VueLoaderPlugin(),
  ],
};
<template>
    <div class="container">
        <h1>Hello Vue</h1>
    </div>
</template>

<script setup>
</script>

<style scoped lang="scss">
$a: red;

.container {
    background-color: #f0f2f5;

    h1 {
        color: $a;
    }
}
</style>
- 最后添加
package.json脚本
"scripts": {
    "test": "echo \"Error: no test specified\" && exit 1",
    "dev":"webpack-dev-server",
    "build":"webpack"
  },
添加typescript支持和ts-loader。vue-loader支持ts
- 因为要支持typescript,首先使用
tsc --init在项目根目录下生成一个tsconfig.json文件,然后修改index.js为index.ts,当然webpack.config.js中的入口文件的index.js也需要修改为index.ts,然后添加参考vue-loader的文档添加ts-loader配置。因为要使ts识别vue,要在根目录添加一个env.d.ts的声明文件
npm install -D typescript ts-loader
// webpack.config.js
module.exports = {
  resolve: {
    // 将 `.ts` 添加为一个可解析的扩展名。
    extensions: ['.ts', '.js']
  },
  module: {
    rules: [
      // ... 忽略其它规则
      {
        test: /\.ts$/,
        loader: 'ts-loader',
        options: { appendTsSuffixTo: [/\.vue$/] }
      }
    ]
  },
  // ...plugin omitted
}
// env.d.ts
declare module "*.vue" {
    import { DefineComponent } from "vue"
    const component: DefineComponent<{}, {}, any>
    export default component
}
<template>
    <div class="container">
        <h1>hello</h1>
    </div>
</template>

<script setup lang="ts">
import { ref, Ref } from "vue";
const count: Ref<number> = ref(123);
</script>

<style scoped lang="scss">
.one {
    color: yellowgreen;
}
</style>
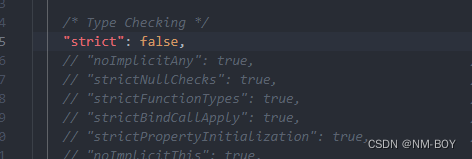
- 需要修改tsconfig.json中的strict为false,这样可以避免一些小问题。
总结
webpack默认不支持HTML,需要下载一个html-webpack-plugin插件。
webpack默认不支持热更新,需要下载一个webpack-dev-server来支持热更新。
在vue单文件组件中需要下载vue-style-loader(支持行内样式)和css-loader(支持类名)来支持css。
在vue单文件组件中需要下载sass-loader来支持sass。
以上的这些vite默认都支持。


 2169
2169

 被折叠的 条评论
为什么被折叠?
被折叠的 条评论
为什么被折叠?
 到【灌水乐园】发言


