


 本文详细介绍了SpringCloud与SpringBoot的关系,以及如何利用SpringCloud整合成熟的服务框架,快速搭建分布式项目。涵盖服务发现、服务调用、熔断器、服务网关、分布式配置和消息总线等核心组件,并通过实战项目演示环境搭建过程。
实战项目代码:SpringCloud_Test_GitHub
1.SpringCloud简介
1.1 SpringCloud与SpringBoot
SpringCloud是基于SpringBoot的一系列框架的有序集合,SpringCloud将成熟的广泛使用的服务框架整合起来,然后使用SpringBoot的特性“默认大于配置”的方式,让我们能够快速搭建项目。SpringCloud依赖SpringBoot,使用SpringCloud必须使用SpringBoot,反之没有这个要求。
1.2 SpringCloud与SpringBoot版本对应关系
上面说了它们两个的关系,所以两者版本之间是有对应的,SpringCloud版本名字有点怪异,是用伦敦地铁站名字命名。
| Spring Boot | Spring Cloud |
|---|---|
| 1.2.x | Angel版本 |
| 1.3.x | Brixton版本 |
| 1.4.x | Camden版本 |
| 1.5.x | Dalston版本、Edgware版本 |
| 2.0.x | Finchley版本 |
1.3 SpringCloud主要框架
- 服务发现——Netflix Eureka
- 服务调用——Netflix Feign
- 熔断器——Netflix Hystrix
- 服务网关——Netflix Zuul
- 分布式配置——Spring Cloud Config
- 消息总线 —— Spring Cloud Bus
1.3.1 服务发现——Netflix Eureka
负责注册服务和管理服务。分布式项目中每个模块都是独立的,那么需要一个模块将他们联系起来,Eureka就是做这个的,每个模块都需要在Eureka上面进行注册,这样就可以调用到其他模块中的功能
1.3.2 服务调用——Netflix Feign
使用了上面的“服务发现”之后,SpringCloud就知道项目中有这么一些注册过的模块,如果一些模块需要使用其他模块的功能,那么就需要用到“服务调用”
1.3.3 熔断器——Netflix Hystrix
熔断器,就像家里用的空气开关或保险丝,用来防止服务器雪崩,什么是服务器雪崩?简单来说就是A调用B,B调用C,但是C服务器已经挂了,这时候B就会一直调用C,然后B也挂了,紧接着A也挂了,所有的服务器都崩掉了。使用熔断器就能在C挂掉的时候,给B返回一可以识别的信息,让B知道C挂了
1.3.4 服务网关——Netflix Zuul
当我们的项目十分复杂的时候,不同微服务都有自己的地址,这样会存在很多问题:
- 客户端会多次请求不同微服务,增加客户端的复杂性
- 存在跨域请求,在一定场景下处理相对复杂
- 认证复杂,每一个服务都需要独立认证
简单的理解“服务网关”,他就像所有微服务的上司一样,他就收到信息,然后分发给下面的员工。
1.3.5 分布式配置——Spring Cloud Config
在分布式项目中,每个项目都有自己的配置文件,为了能够统一管理配置文件,使用后能够application.yml放在远端git仓库上。
1.3.6 消息总线 —— Spring Cloud Bus
我们集中管理了配置文件,但是如果我们修改了配置文件,还是要重启服务器才能有效。但是重启服务器其实是十分麻烦的一件事情,如果我们使用了Spring Cloud Bus,我们就能做到实时更新配置文件而不重启服务器。
2.准备工作
2.1 父工程环境搭建
创建父工程,使用maven创建工程,把不需要的文件夹都删除掉
向父工程中pom.xml导入坐标
    <!--SpringBoot-->
    <parent>
        <groupId>org.springframework.boot</groupId>
        <artifactId>spring-boot-starter-parent</artifactId>
        <version>2.0.1.RELEASE</version>
        <relativePath/>
    </parent>

    <properties>
        <project.build.sourceEncoding>UTF-8</project.build.sourceEncoding>
        <project.reporting.outputEncoding>UTF-8</project.reporting.outputEncoding>
        <java.version>1.8</java.version>
    </properties>

    <!--锁定SpringCloud版本-->
    <dependencyManagement>
        <dependencies>
            <dependency>
                <groupId>org.springframework.cloud</groupId>
                <artifactId>spring-cloud-dependencies</artifactId>
                <version>Finchley.M9</version>
                <type>pom</type>
                <scope>import</scope>
            </dependency>
        </dependencies>
    </dependencyManagement>

<!--固定Spring官方推荐仓库,jar包下载,有一些包阿里云上没有,由于是访问外网,记得VPN-->
    <repositories>
        <repository>
            <id>spring-snapshots</id>
            <name>Spring Snapshots</name>
            <url>https://repo.spring.io/snapshot</url>
            <snapshots>
                <enabled>true</enabled>
            </snapshots>
        </repository>
        <repository>
            <id>spring-milestones</id>
            <name>Spring Milestones</name>
            <url>https://repo.spring.io/milestone</url>
            <snapshots>
                <enabled>false</enabled>
            </snapshots>
        </repository>
    </repositories>

    <pluginRepositories>
        <pluginRepository>
            <id>spring-snapshots</id>
            <name>Spring Snapshots</name>
            <url>https://repo.spring.io/snapshot</url>
            <snapshots>
                <enabled>true</enabled>
            </snapshots>
        </pluginRepository>
        <pluginRepository>
            <id>spring-milestones</id>
            <name>Spring Milestones</name>
            <url>https://repo.spring.io/milestone</url>
            <snapshots>
                <enabled>false</enabled>
            </snapshots>
        </pluginRepository>
    </pluginRepositories>
2.2 功能模块
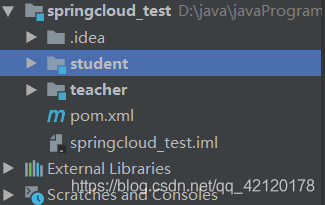
2.2.1 创建两个子模块
一个student,一个teacher
2.2.2 构建数据库
建表语句都写好了,直接运行就行(Mysql数据库)
create database `springcloudtest`;
use `springcloudtest`;
drop table if exists `tb_student`;
create table `tb_student`(
	`id` int PRIMARY KEY AUTO_INCREMENT ,
	`name`varchar(100) DEFAULT NULL COMMENT '姓名',
	`age`int DEFAULT 0 COMMENT '年龄'
);
drop table if exists `tb_teacher`;
create table `tb_teacher`(
	`id` int PRIMARY KEY AUTO_INCREMENT,
	`name`varchar(100) DEFAULT NULL COMMENT '姓名',
	`age`int DEFAULT 0 COMMENT '年龄'
);
insert into `tb_student`(`name`,`age`) values('小明',10);
insert into `tb_student`(`name`,`age`) values('小王',12);
insert into `tb_teacher`(`name`,`age`) values('李老师',32);
insert into `tb_teacher`(`name`,`age`) values('张老师',43);
2.2.3 构建学生模块逻辑
- 导入坐标pom
	<dependencies>
        <dependency>
            <groupId>org.springframework.boot</groupId>
            <artifactId>spring-boot-starter-data-jpa</artifactId>
        </dependency>
        <dependency>
            <groupId>mysql</groupId>
            <artifactId>mysql-connector-java</artifactId>
        </dependency>
        <dependency>
            <groupId>org.springframework.boot</groupId>
            <artifactId>spring-boot-starter-web</artifactId>
        </dependency>
    </dependencies>
- 编写springboot配置文件,在resources文件夹中创建application.yml,填写如下内容
server:
  port: 9001
spring:
  application:
    name: student
  datasource:
    driverClassName: com.mysql.jdbc.Driver
    url: jdbc:mysql://127.0.0.1:3306/springcloudtest?characterEncoding=UTF8
    #修改成自己的帐号密码
    username: root
    password: 123456
数据库帐号密码需要修改
- SpringBoot启动类编写,com.springcloud.student.StudentApplication
@SpringBootApplication
public class StudentApplication {
    public static void main(String[] args) {
        SpringApplication.run(StudentApplication.class,args);
    }
}
- 创建Result返回消息类,com.springcloud.student.pojo.Result,记得自己生产get和set方法
private String message;
    private Object data;

    public Result(String message, Object data) {
        this.message = message;
        this.data = data;
    }

    public Result(String message) {
        this.message = message;
    }

    public Result() {
    }
- 创建Student实体类,com.springcloud.student.pojo.Student,记得自己生产get和set方法
@Entity
@Table(name = "tb_student")
public class Student {
    @Id
    @GeneratedValue(strategy = GenerationType.IDENTITY)//主键自增
    private Integer id;
    private String name;
    private Integer age;
}
- 编写StudentDao接口,com.springcloud.student.dao.StudentDao
public interface StudentDao extends JpaRepository<Student,Integer> {
}
- 编写StudentService类,com.springcloud.student.service.StudentService
@Service
public class StudentService {
    @Autowired
    private StudentDao studentDao;

    public List<Student> findAll(){
        return studentDao.findAll();
    }
    public Student findById(int teacherid){
        return studentDao.findById(teacherid).get();
    }
}
- 编写StudentController类,com.springcloud.student.controller.StudentController
@RestController
@RequestMapping("/student")
public class StudentController {
    @Autowired
    private StudentService studentService;

    @RequestMapping(method = RequestMethod.GET)
    public Result findAll(){
        return new Result("查询成功",studentService.findAll());
    }

    @RequestMapping(value = "/{studentid}",method = RequestMethod.GET)
    public Result findById(@PathVariable int studentid){
        return new Result("查询成功",studentService.findById(studentid));
    }
}
- 启动该项目,使用postman进行测试,自行测试三个方法
2.2.4 构建老师模块逻辑
跟学生模块类似
- 导入pom坐标,同上面一样
- 编写application.yml
server:
  port: 9002
spring:
  application:
    name: teacher
  datasource:
    driverClassName: com.mysql.jdbc.Driver
    url: jdbc:mysql://127.0.0.1:3306/springcloudtest?characterEncoding=UTF8
    #修改成自己的帐号密码
    username: root
    password: 123456
- 编写启动类com.springcloud.teacher.TeacherApplication同学生模块类似
- 创建Result返回消息类,直接将学生模块中的复制过来就行了,注意包路径
- 创建Teacher类,com.springcloud.teacher.pojo.Teacher,@Table(name = “tb_student”)需要修改
- 编写TeacherDao接口,com.springcloud.teacher.dao.TeacherDao,修改泛型
- 编写TeacherService业务层,com.springcloud.teacher.service.TeacherService
@Service
public class TeacherService {
    @Autowired
    private TeacherDao teacherDao;

    public List<Teacher> findAll(){
        return teacherDao.findAll();
    }
    public Teacher findById(int teacherid){
        return teacherDao.findById(teacherid).get();
    }
}
- 编写TeacherController类,com.springcloud.teacher.controller.TeacherController
@RestController
@RequestMapping("/teacher")
public class TeacherController {
    @Autowired
    private TeacherService teacherService;

    @RequestMapping(method = RequestMethod.GET)
    public Result findAll(){
        return new Result("查询成功",teacherService.findAll());
    }

    @RequestMapping(value = "/{teacherid}",method = RequestMethod.GET)
    public Result findById(@PathVariable int teacherid){
        return new Result("查询成功",teacherService.findById(teacherid));
    }
}
- 使用postman,自行进行测试
下一章:(二)SpringCloud 服务发现Netflix Eureka 和 服务调用Netflix Feign
相关内容:
(一)初见SpringCloud、主要框架简介、与SpringBoot版本对应关系,实战环境搭建
(二)SpringCloud 服务发现Netflix Eureka 和 服务调用Netflix Feign
(三)SpringCloud 熔断器Netflix Hystrix、服务网关Netflix Zuul、分布式配置Spring Cloud Config、消息总线Spring Cloud Bus
RabbitMQ简单入门教程(安装及工作模式介绍)图文教学通俗易懂
作者编写不易,转载请注明我的博客,如果觉得写的不错的话,请随手点个赞,谢谢!!!
作者编写不易,转载请注明我的博客,如果觉得写的不错的话,请随手点个赞,谢谢!!!
作者编写不易,转载请注明我的博客,如果觉得写的不错的话,请随手点个赞,谢谢!!!


 336
336

 被折叠的 条评论
为什么被折叠?
被折叠的 条评论
为什么被折叠?
 到【灌水乐园】发言


