


 本文介绍了SpringSecurity的入门使用。先建立Maven工程并引入依赖,编写配置文件,解析了页面拦截规则、表单登录功能、认证管理器等配置。还进行了测试,展示错误凭证提示。此外,讲解了自定义登录页面的方法,包括修改表单提交地址、input框name属性,以及解决默认拦截iframe和登陆后页面跳转问题。
先来体验下SpringSecurity
建立Maven工程,引入相关依赖:
<project xmlns="http://maven.apache.org/POM/4.0.0" xmlns:xsi="http://www.w3.org/2001/XMLSchema-instance" xsi:schemaLocation="http://maven.apache.org/POM/4.0.0 http://maven.apache.org/xsd/maven-4.0.0.xsd">
  <modelVersion>4.0.0</modelVersion>
  <groupId>xin.bear.demo</groupId>
  <artifactId>spring-security-demo</artifactId>
  <version>0.0.1-SNAPSHOT</version>
  <packaging>war</packaging>

  <properties>
  	<spring.version>4.2.4.RELEASE</spring.version>
  </properties>

  <dependencies>
  	<dependency>
	    <groupId>org.springframework</groupId>
	    <artifactId>spring-core</artifactId>
	    <version>${spring.version}</version>
	</dependency>
	<dependency>
	    <groupId>org.springframework</groupId>
	    <artifactId>spring-web</artifactId>
	    <version>${spring.version}</version>
	</dependency>

	<dependency>
	    <groupId>org.springframework</groupId>
	    <artifactId>spring-webmvc</artifactId>
	    <version>${spring.version}</version>
	</dependency>

	<dependency>
	    <groupId>org.springframework</groupId>
	    <artifactId>spring-context-support</artifactId>
	    <version>${spring.version}</version>
	</dependency>

	<dependency>
	    <groupId>org.springframework</groupId>
	    <artifactId>spring-test</artifactId>
	    <version>${spring.version}</version>
	</dependency>

	<dependency>
	    <groupId>org.springframework</groupId>
	    <artifactId>spring-jdbc</artifactId>
	    <version>${spring.version}</version>
	</dependency>

	<dependency>
	    <groupId>org.springframework.security</groupId>
	    <artifactId>spring-security-web</artifactId>
	    <version>4.1.0.RELEASE</version>
	</dependency>

	<dependency>
	    <groupId>org.springframework.security</groupId>
	    <artifactId>spring-security-config</artifactId>
	    <version>4.1.0.RELEASE</version>
	</dependency>

	<dependency>
	    <groupId>javax.servlet</groupId>
	    <artifactId>servlet-api</artifactId>
	    <version>2.5</version>
	    <scope>provided</scope>
	</dependency>
  </dependencies>

    <build>
        <plugins>
	    <!-- java编译插件 -->
            <plugin>
		<groupId>org.apache.maven.plugins</groupId>
		<artifactId>maven-compiler-plugin</artifactId>
		<version>3.2</version>
		<configuration>
		    <source>1.8</source>
		    <target>1.8</target>
		    <encoding>UTF-8</encoding>
		</configuration>
            </plugin>
	    <plugin>
		<groupId>org.apache.tomcat.maven</groupId>
		<artifactId>tomcat7-maven-plugin</artifactId>
		<configuration>
		    <!-- 指定端口 -->
		    <port>9090</port>
		    <!-- 请求路径 -->
		    <path>/</path>
		</configuration>
            </plugin>
        </plugins>
    </build>
</project>
编写spring-security.xml
<?xml version="1.0" encoding="UTF-8"?>
<beans:beans xmlns="http://www.springframework.org/schema/security"
	xmlns:beans="http://www.springframework.org/schema/beans" xmlns:xsi="http://www.w3.org/2001/XMLSchema-instance"
	xsi:schemaLocation="http://www.springframework.org/schema/beans http://www.springframework.org/schema/beans/spring-beans.xsd
						http://www.springframework.org/schema/security http://www.springframework.org/schema/security/spring-security.xsd">


	<!-- 页面的拦截规则    use-expressions:是否启动SPEL表达式 默认是true -->
	<http use-expressions="false">
		<!-- 当前用户必须有ROLE_USER的角色 才可以访问根目录及所属子目录的资源 -->
		<intercept-url pattern="/**" access="ROLE_USER" />
		<!-- 开启表单登陆功能 -->
		<form-login/>
	</http>

	<!-- 认证管理器 -->
	<authentication-manager>
		<authentication-provider>
			<user-service>
				<user name="admin" password="123456" authorities="ROLE_USER"/>
			</user-service>
		</authentication-provider>
	</authentication-manager>

</beans:beans>
建立web.xml
<?xml version="1.0" encoding="UTF-8"?>
<web-app xmlns:xsi="http://www.w3.org/2001/XMLSchema-instance" xmlns="http://java.sun.com/xml/ns/javaee" xsi:schemaLocation="http://java.sun.com/xml/ns/javaee http://java.sun.com/xml/ns/javaee/web-app_2_5.xsd" version="2.5">
  <display-name>spring-security-demo</display-name>


   	 <context-param>
		<param-name>contextConfigLocation</param-name>
		<param-value>classpath:spring-security.xml</param-value>
	 </context-param>
	 <listener>
		<listener-class>
			org.springframework.web.context.ContextLoaderListener
		</listener-class>
	 </listener>

	 <filter>
		<filter-name>springSecurityFilterChain</filter-name>
		<filter-class>org.springframework.web.filter.DelegatingFilterProxy</filter-class>
	 </filter>
	 <filter-mapping>
		<filter-name>springSecurityFilterChain</filter-name>
		<url-pattern>/*</url-pattern>
	 </filter-mapping>


</web-app>
webapp下建立index.html文件
<!DOCTYPE html>
<html>
<head>
<meta charset="UTF-8">
<title>SpringSecurity</title>
</head>
<body>
	欢迎进入系统
</body>
</html>
配置文件解析:
页面拦截规则:
<http use-expressions="false">
    <intercept-url pattern="/**" access="ROLE_USER"/>
</http>
其中,
use-expressions="false" 表示是否启动SPEL表达式 默认是true,
如果默认,则下面的 access="ROLE_USER" 需写成 access=" hasRole('ROLE_USER') " 一般当既要拦截角色又要拦截IP地址时才选择开启 ,这里我们选择关闭。
pattern=" /** " 表示 /目录下的所有资源,包括子目录中的资源。 pattern=" /* " 表示只拦截 / 目录下的资源,不包括子目录。
access="ROLE_USER" 中的ROLE_部分必须写,其后面的USER可以自定义。
上述的配置表示:当前用户必须有ROLE_USER的角色 才可以访问根目录及所属子目录的资源
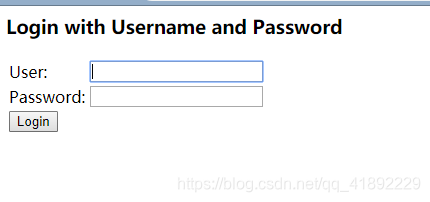
开启表单登录功能:<form-login />
<form-login login-page="/login.html" default-target-url="/index.html" authentication-failure-url="/login_error.html"/>
其中:当加上<form-login />配置时,SpringSecurity会自动帮你生成一个简单的登录页面,运行起来如下图
认证管理器:
<!-- 认证管理器 -->
<authentication-manager>
        <!-- 认证提供者 -->
	<authentication-provider>
                <!-- 配置当前系统用户 -->
		<user-service>
			<user name="admin" password="123456" authorities="ROLE_USER"/>
		</user-service>
	</authentication-provider>
</authentication-manager>
其中:
authorities="ROLE_USER" 表示配置的该用户属于那种角色(角色对应着相应权限)。
测试:
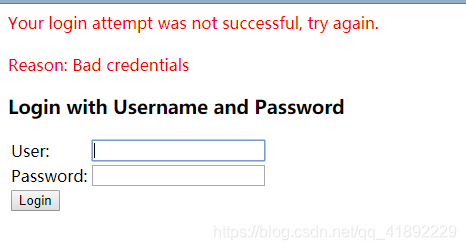
我们随便输入用户名密码
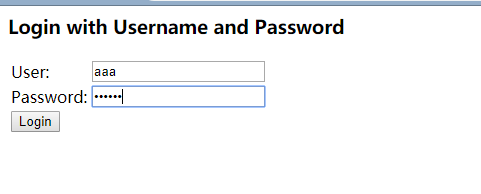
点登陆后提示:您的登录尝试没有成功,请再试一次。原因:错误凭证
换做正确的用户名(admin)和密码(123456)后,
自定义登录页面
form表单默认提交地址:
<form action="/login">
    ***
</form>
修改form表单默认提交地址
首先在spring-security.xml文件中修改表单登陆功能标签<form-login/>并添加 login-processing-url属性
<form-login login-processing-url="/login2" />
则form表单提交地址也需改为
<form action="/login2">
    ***
</form>
修改表单input框name属性
一般情况下
<input name="username" type="text"/>
<input name="password" type="passowrd"/>
在spring-security.xml中的文件中修改表单登陆功能标签<form-login/>并添加username-parameter=" "和password-parameter=""属性以完成自定义,
<form-login username-parameter="user" password-parameter="pwd" />
那么form表单中也需修改为
<input name="user" type="text"/>
<input name="pwd" type="passowrd"/>
关闭SpringSecurity的默认拦截 内置框架页iframe
SpringSecurity默认配置时拦截iframe的,未解决这个问题需要在spring-security.xml文件中的http标签中添加
<headers>
    <!-- 允许使用内置框架页iframe -->
    <frame-options policy="SAMEORIGIN"/>
</headers>
一般情况下没有登陆的用户直接通过地址栏访问主目录下的子页面内容时,SpringSecurity会将其重定向到登陆页面,而在登陆后页面将直接跳转值刚刚访问的子页面内容,而不是定义的登陆后跳转页面,这是我们就需要添加配置来解决。
在spring-security.xml中的文件中修改表单登陆功能标签<form-login/>并添加always-use-default-target="true" 即可解决。
未完待续。。。。


 2万+
2万+

 被折叠的 条评论
为什么被折叠?
被折叠的 条评论
为什么被折叠?
 到【灌水乐园】发言


