


一、外边距合并出现的条件
1.只有垂直方向的外边距会出现合并,水平方向上不会出现外边距合并。
2. 垂直方向上相邻的元素才会有外边距合并的问题
二、兄弟元素间的外边距合并
1.若两者都是正值,取值为两者间最大值
2.若两个外边距一正一负,取值为两者之和
3.若两个外边距都是负值,取值为绝对值较大的外边距
解决方案:一般不需要处理,这一般是对开发有利的,如果要处理,可以将本应该设置给两个元素的外边距直接设置给其中一个元素。
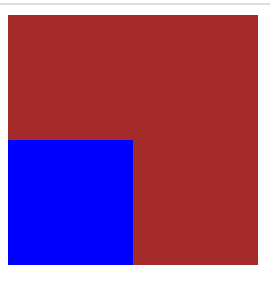
三、父子元素间的外边距合并
原本预想:想让子元素在父元素中向下移动100px,到达父元素的底部
<style>
        .box1{
            width: 200px;
            height: 200px;
            background-color: brown;

        }
        .box2{
            width: 100px;
            height: 100px;
            background-color: blue;
            margin-top: 100px;
        }
</style>

<div class="box1">
     <div class="box2">

      </div>
</div>
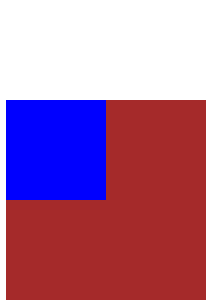
实际现象:可以看到,在给子元素设置margin-top后,父元素也向下移动了100px,以致于子元素与父元素的相对位置没有改变,没有达到预期的效果。
解决方案:
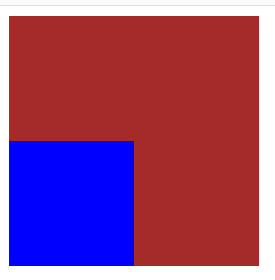
1.给原本设置给子元素的margin值,修改为设置父元素的padding,并相应减少父元素的height。
<style>

        .box1{
            width: 200px;
            height: 100px;
            background-color: brown;
            padding-top: 100px;
        }
        .box2{
            width: 100px;
            height: 100px;
            background-color: blue;
        }
</style>
<div class="box1">
     <div class="box2">

     </div>
</div>

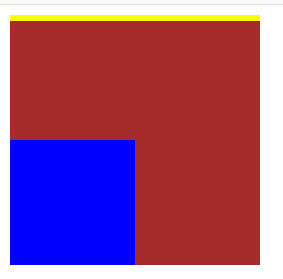
2.给父元素添加边框属性。给父元素添加边框属性。在父元素中用height减去边框高度,在子元素中用margin-top减去边框高度(由于增加了边框的厚度,所以导致盒子高度增大,这一步是为了保证父元素盒子的可见区域高度不变)。
<style>
       .box1{
           width: 200px;
           height: 195px;
           background-color: brown;
           border-top: 5px solid yellow;
       }
       .box2{
           width: 100px;
           height: 100px;
           background-color: blue;
           margin-top: 95px;
       }
</style>
3.给父元素或子元素设置浮动属性。
<style>
       .box1{
           width: 200px;
           height: 200px;
           background-color: brown;
           float: left;
       }
       .box2{
           width: 100px;
           height: 100px;
           background-color: blue;
           margin-top: 100px;
           /*float:right*/
       }
</style>

<div class="box1">
     <div class="box2">

     </div>
</div>

4.给父元素或子元素设置position:absolute属性
<style>
      .box1{
          width: 200px;
          height: 200px;
          background-color: brown;
          position: absolute;
      }
      .box2{
          width: 100px;
          height: 100px;
          background-color: blue;
          margin-top: 100px;
          /*position: absolute;*/
      }
</style>

<div class="box1">
      <div class="box2">

      </div>
</div>
5.给父元素设置overflow:hidden
<style>
        .box1{
            width: 200px;
            height: 200px;
            background-color: brown;
            overflow: hidden;
        }
        .box2{
            width: 100px;
            height: 100px;
            background-color: blue;
            margin-top: 100px;
        }
</style>

<div class="box1">
      <div class="box2">

      </div>
</div>

6.给父元素或子元素设置display:inline-block
<style>
      .box1{
          width: 200px;
          height: 200px;
          background-color: brown;
          display: inline-block;
      }
      .box2{
          width: 100px;
          height: 100px;
          background-color: blue;
          margin-top: 100px;
          /* display: inline-block; */
      }
</style>

<div class="box1">
      <div class="box2">

      </div>
</div>
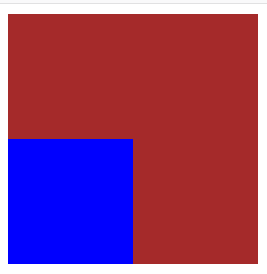
7.利用解决float高度塌陷的方法的原理
在父元素中before的位置设置伪元素,并将该伪元素设置为table类型,内容设置为空字符串,这样就相当于在box1和box2之间设置了个"隔板"(类似于边框的作用)
<style>

        .box1{
            width: 200px;
            height: 200px;
            background-color: brown;
        }
        .box1::before{
            display: table;
            content: "";
            /* clear: both; */
        }
        .box2{
            width: 100px;
            height: 100px;
            background-color: blue;
            margin-top: 100px;
        }
    </style>


 742
742

 被折叠的 条评论
为什么被折叠?
被折叠的 条评论
为什么被折叠?
 到【灌水乐园】发言


