


 本文详细介绍了数据集的划分技巧,包括使用numpy和sklearn进行训练集、测试集和验证集的划分,变量定义的方法,如tf.Variable、tf.get_variable及tf.placeholder的用法,以及在Jupyter Notebook中调用自定义py文件、numpy数组的操作和HDF5文件的读写技巧。
数据集整理的一些技巧
第一、对于数据集的划分
如果想把数据集划分成 训练集、测试集的话,步骤如下
所用方式为:np.random.randint(start,end,shape)和np.random.shuffle(temp)
temp =np.random.randint(1,100,[100])
print(temp)
np.random.shuffle(temp)
temp
结果:
Out[49]:
array([99, 95, 88, 30, 48, 12, 85, 11, 55, 15, 54, 30, 49, 60, 22, 16, 92,
       85, 15, 99, 93, 23, 52, 79,  6, 62, 49,  1, 86, 12, 23, 86, 97, 38,
       24, 59,  6, 81, 44, 74, 92, 68, 66, 41, 94, 11, 66, 78, 98, 65, 25,
       68, 92, 63, 26, 96, 68, 96, 77, 60, 39, 44, 27, 69, 11, 40, 71,  5,
       88, 34,  1, 90, 95, 87, 65, 61, 76,  4, 74,  9, 60, 63, 80, 43, 29,
       35, 27, 87, 50, 57, 58, 95, 12, 61, 81, 63, 39, 54, 38, 85])
这样就可以得到散乱的data序列号,然后利用前百分之60的序列号,从元数据中提取,
第二、对于变量和管道定义的方式总结
方法一:tf.Variable
用法:
tf.Variable.init(初始值,trainable=?,)
方法二: tf.get_variable()
用法:
v2 = tf.get_variable(姓名,shape=[], 初值= 初始化值)
方法三: tf.placeholder()
用法:
v2 = tf.placeholder(格式,shape=[ , ],姓名)
x = tf.placeholder(tf.float32,shape=[None,784],name=‘x’)
输入: 任意行,784列的32位浮点型数据。
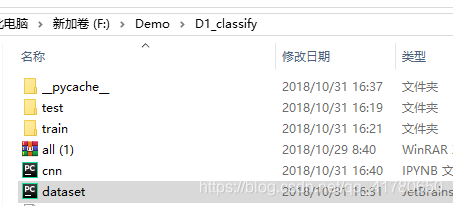
第三、在jupyter notebook 当中调用自己定义的py文件
所用方式为: os.chdir(DST_PATH)
import os
os.chdir('F:\\Demo\\D1_classify')
import dataset
第四、对于numpy的ndarray的处理,如何增一行
所用方式为:np.r_[tt,列表list]
tt = np.array([1,2,3,4,5,56,6])
np.r_[tt,[1111,2222,3333]]
array([   1,    2,    3,    4,    5,   56,    6, 1111, 2222, 3333])
所用方式为:c = np.insert(a, 0, values=b, axis=0)
tt = np.array([1,2,3,4,5,56,6])
np.insert(tt,len(tt),values=[111,222])

import numpy as np
a = np.array([[1,2,3],[4,5,6],[7,8,9]])
b = np.array([[0,0,0]])
c = np.insert(a, 0, values=b, axis=0)
d = np.insert(a, 0, values=b, axis=1)
在a的某个位置,按行或者按列插入 目标数据
- [ ]
- [ ]
- [ ]
- [ ]
第五、相较于第一 ,另一个划分数据集的办法
所用方式为:sklearn的自带库函数
函数: from sklearn.model_selection import train_test_split(X,Y,SIZE,SEED)
- [ 1 ] X: ndarray的特征
- [ 2 ] Y: ndarray的标签
- [ 3 ] SIZE:划分的百分比
- [ 4 ] SEED: 随机的种子序列
- List item
验证集 的划分
from sklearn.model_selection import train_test_split

partial_x_train,x_val,partial_y_train,y_val = train_test_split(x_train,y_train,
													test_size =0.3,random_state=0)
- [ ]
- [ ]
- [ ]
- [ ]
- [ ]
第六、ndarray的维度问题,增加问题
所用方式为:numpy所用的函数
函数:
    # 提取单通道,结果放在列表之中
    # Y的格式为(1313,256,256,3)
    # 目标:(1313,256,256,1)
    for i in range(a):
           Label.append(Y[i][:,:,2])
    #将列表转化为 ndarray
    		Label=np.array(Label)
    # 增加一个维度
  		    temp =Label[:,:,:,np.newaxis]
第七、HDF5的文件读写问题
方式如下
- [ 1 ] 利用import h5py模块
- [ 2 ] 利用Keras 自带的模块
方式2 如下所示: HDF5Matrix(filename,key_name)
from keras.utils.io_utils import HDF5Matrix
X = HDF5Matrix('CASIA-CMFD-Pos.hd5', 'X')
Y = HDF5Matrix('CASIA-CMFD-Pos.hd5','Y')
优点:很快,知道文件目的名和列名即可
缺点:得提前知道列名
HDF5的写
方式1 如下所示:import h5py
h5f = h5py.File(file_name,mode)
h5f.create_dataset(key,data)
h5f.close()
- [ 1 ] file_name : 存储地点
- [ 2 ] mode: 读或者写 r/w
- [ 3 ] key: 列名
- [ 4 ] data:数据
import h5py
h5f = h5py.File('/home/workspace/wanghao/Project/BusterNet/Data/gf123.h5','w')
h5f.create_dataset('xx',data=Label)
h5f.close()
HDF5的读
方式1 如下所示:import h5py
h5f = h5py.File(file_name,mode)
data = h5f[列名][:]
h5f.close()
- [ 1 ] file_name : 存储地点
- [ 2 ] mode: 读或者写 r/w
- [ 3 ] key: 列名
- [ 4 ] data:数据
qwe = 'CASIA-CMFD-Pos.hd5'
h5f = h5py.File(qwe,'r')
data = h5f['Y'][:]
h5f.close()
读取回来的数据data是ndarray形式
for i in h5f.keys():
    print(i)
以上操作可以读取一个HDF5文件的Key名,列名


 1万+
1万+

 被折叠的 条评论
为什么被折叠?
被折叠的 条评论
为什么被折叠?
 到【灌水乐园】发言


