


 本文详细解析了SpringMVC中控制器间的四种跳转方式,包括控制器跳转到页面、控制器之间的重定向及参数传递,展示了具体的代码实现。
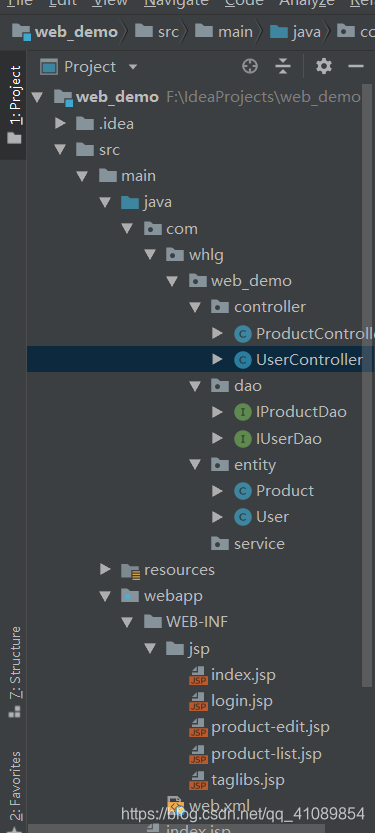
SpringMVC中实现从controller跳转到controller,controller跳转到页面
controller跳转网页
此处以简单的登录以及改操作等基本操作来实现跳转。因为WEB-INF文档下的jsp文件是无法直接通过浏览器来访问的,只能通过后台服务器跳转来实现。
登录过程
首先浏览器访问local host:8080/toLogin
其跳转过程的代码实现如下:
UserController层:
package com.whlg.web_demo.controller;

import com.whlg.web_demo.dao.IUserDao;
import com.whlg.web_demo.entity.User;
import org.apache.ibatis.annotations.Param;
import org.springframework.beans.factory.annotation.Autowired;
import org.springframework.stereotype.Controller;
import org.springframework.ui.Model;
import org.springframework.web.bind.annotation.RequestMapping;
import org.springframework.web.bind.annotation.RequestParam;
import org.springframework.web.bind.annotation.ResponseBody;

import javax.servlet.http.HttpServletRequest;
import javax.servlet.http.HttpSession;

@Controller
public class UserController {
    @Autowired
    IUserDao userDao;

    @RequestMapping("/toLogin")
    public String toLogin() {
        return "login";
    }

    @RequestMapping("/login")
    public String Login(Model model, HttpServletRequest request, User user) {
        User rightUser = userDao.getUserById2(user.getUsername());
        //判断是否存在用户
        if (rightUser == null) {
            model.addAttribute("msg", "不存在该用户");
            return "login";
        }
        if (!rightUser.getPassword().equals(user.getPassword())) {
            model.addAttribute("msg", "账号或密码错误");
            return "login";
        }
        HttpSession session = request.getSession();
        session.setAttribute("user", rightUser);
        return "index";
    }
}
对应的login.jsp和index.jsp:
index.jsp:
<%--
  Created by IntelliJ IDEA.
  User: admin
  Date: 2019-07-02
  Time: 12:46
  To change this template use File | Settings | File Templates.
--%>
<%@ page contentType="text/html;charset=UTF-8" language="java" %>
<%@ include file="/WEB-INF/jsp/taglibs.jsp" %>
<html>
<head>
    <title>我是首页</title>
</head>
<body>
    <span style="color: red;">${user}</span>
    <a href="${basePath}/product/toList">产品管理入口</a>
    <a href="#">用户管理入口</a>
</body>
</html>
login.jsp
<%@ page contentType="text/html;charset=UTF-8" %>
<%@ include file="/WEB-INF/jsp/taglibs.jsp" %>


<html>
<head>
    <title>${basePath}</title>
</head>
<body>
<form style="width: 300px;margin: 200px auto 0;" method="post" action="${basePath}/login">
    账号:<input type="text" name="username" value="${user.username}">
    <br>
    密码:<input type="password" name="password" value="${user.password}">
    <br>
    <input type="submit" value="登录">
    <br>
    <span style="color: red;">${msg}</span>
</form>
</body>
</html>
controller跳转到controller
在文件中,当对数据库进行修改之后,直接跳转到文件显示列表,此处采用了重定向的方法:
ProductController.java
package com.whlg.web_demo.controller;
import com.whlg.web_demo.dao.IProductDao;
import com.whlg.web_demo.entity.Product;
import org.springframework.beans.factory.annotation.Autowired;
import org.springframework.stereotype.Controller;
import org.springframework.web.bind.annotation.RequestMapping;
import org.springframework.ui.Model;
import org.springframework.web.bind.annotation.RequestParam;
import java.util.List;

@Controller
@RequestMapping("/product")
public class ProductController {
    @Autowired
    IProductDao productDao;
    //1、创建了product的dao层接口
    //2、创建了product实体类
    //3、创建了xml文件用来写product的dao层接口的方法的sql语句
    @RequestMapping("/toList")
    public String toList(Model model){
        List<Product> products = productDao.getProducts();
        model.addAttribute("products",products);
        return "product-list";
    }

    //1、获取到传过来的id
    //2、从数据库把该id对应的数据取出来
    //3、把取出来的数据存入model
    //4、跳转页面
    @RequestMapping("/toEdit")
    public String toEdit(Model model, @RequestParam("productId") Integer id){
        //从数据库把product取出来
        Product product=productDao.getProductsById(id);
        //将product存入model之中
        model.addAttribute("product",product);
        //跳转页面
        return "product-edit";
    }

    @RequestMapping("/edit")
    public String edit(Model model,Product product) {
        System.out.println(product);
        productDao.updateProduct(product);
        model.addAttribute("products",product);
        model.addAttribute("msg","修改成功!");
        System.out.println("hello");

        return "redirect:/product/toList";

    }
}
重定向直接使用:在return后直接,redirect 加上要跳转的地址,即可以从第一个controller跳到第二个controller,
本例子中就是使用的return “redirect:/product/toList”;
controller之间的跳转有四种方式
- 使用ModelAndView,例如return new ModelAndView(“redirect:product/toList”); 这样可以重定向到toList这个方法
- 在return后直接,redirect 加上要跳转的地址,即可以从第一个controller跳到第二个controller,如上图中的代码中的方法
- 在return后直接加想要跳到的controller的方法名即可,注意,这个方法名不是RequestMapping里影射的路径,是controller里具体的方法
上述三种方法是不带参数跳转,而接下来介绍带参数实现跳转。
- 直接在后面用?拼接,对应本例子就是
return redirect:/product/toList?name="+"ipnone X";
- 用RedirectAttributes,此处用它的addAttribute方法,重定向过去以后看url,是系统自动给你拼了你的url。
使用方法:
attr.addAttribute("param", value);
return "redirect:/product/toList";
这样在toList这个方法中就可以通过获得参数的方式获得这个参数,再传递到页面。过去的url还是和方式一一样的。
- 带参数不拼接url,页面也能拿到值
代码如下:
 @RequestMapping("/save")
    public String save(@ModelAttribute("form") Bean form,RedirectAttributes attr)
                   throws Exception {
        String code =  service.save(form);
        if(code.equals("000")){
            attr.addFlashAttribute("name", form.getName());
            attr.addFlashAttribute("success", "添加成功!");
            return "redirect:/index";
        }else{
            attr.addAttribute("projectName", form.getProjectName());
            attr.addAttribute("enviroment", form.getEnviroment());
            attr.addFlashAttribute("msg", "添加出错!错误码为:"+rsp.getCode().getCode()+",错误为:"+rsp.getCode().getName());
            return "redirect:/maintenance/toAddConfigCenter";
        }
    }

@RequestMapping("/index")
    public String save(@ModelAttribute("form") Bean form,RedirectAttributes attr)
                   throws Exception {
            return "redirect:/main/list";
    }
上面用的是页面取值,直接用el表达式就能获得到,这里的原理是放到session中,session在跳到页面后马上移除对象。所以你刷新之后这个值就会丢掉。session只是暂时性的存储数据。
有不对的欢迎指正!!!


 2万+
2万+

 被折叠的 条评论
为什么被折叠?
被折叠的 条评论
为什么被折叠?
 到【灌水乐园】发言


