


前言
phthon海龟绘图官方文档(中文版):https://docs.python.org/zh-cn/3.7/library/turtle.html
RGB配色表:http://www.wahart.com.hk/rgb.htm
很好玩,有些可能不是特别像哈哈哈
2019-5-13 微笑
2019-5-14 难过
2019-5-19 滑稽
2019-5-28 撇嘴
QQ表情
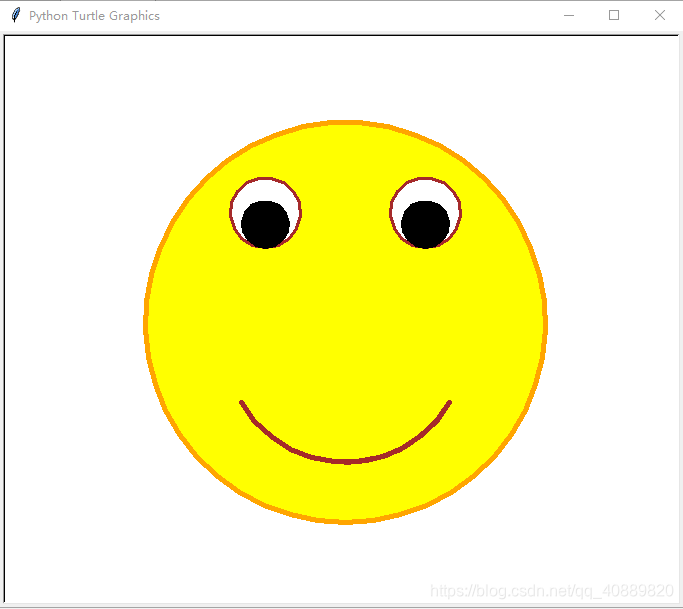
微笑
效果:
代码:
import turtle as t
#t.speed(20)
t.pensize(5)
#脸
t.pencolor("orange")
t.begin_fill()
t.penup()
t.goto(0,-200)
t.pendown()
t.fillcolor("yellow")
t.circle(200)
t.end_fill()
#嘴
t.pencolor("brown")
t.penup()
t.goto(0,-140)
t.pendown()
t.circle(120,60)
t.left(180)
t.circle(-120,120)
t.seth(0)
#眼睛
t.pensize(3)
 #右眼
t.penup()
t.goto(80,75)
t.pendown()
t.begin_fill()
t.circle(35)
t.fillcolor("white")
t.end_fill()
t.pencolor("black")
t.begin_fill()
t.circle(23)
t.fillcolor("black")
t.end_fill()
 #左眼
t.pencolor("brown")
t.penup()
t.goto(-80,75)
t.pendown()
t.begin_fill()
t.circle(35)
t.fillcolor("white")
t.end_fill()
t.pencolor("black")
t.begin_fill()
t.circle(23)
t.fillcolor("black")
t.end_fill()
t.hideturtle()
t.done()
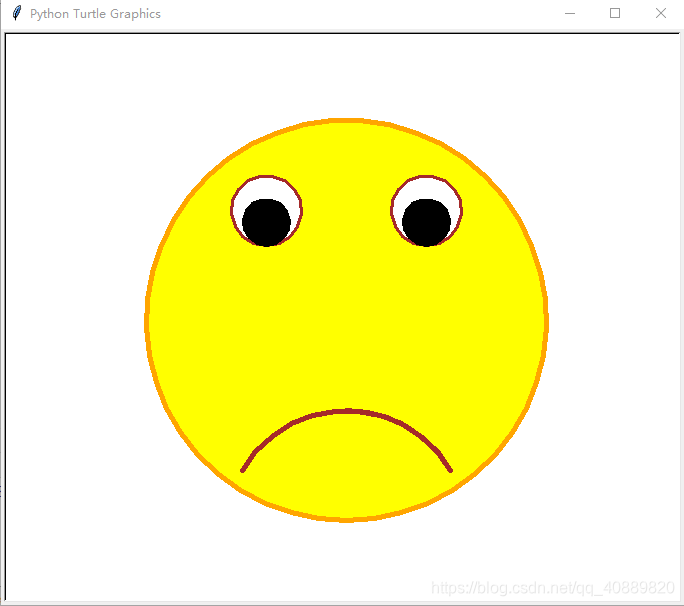
难过
改一下微笑的嘴部部分就行啦
效果:
代码:
import turtle as t
t.speed(20)
t.pensize(5)
#脸
t.pencolor("orange")
t.begin_fill()
t.penup()
t.goto(0,-200)
t.pendown()
t.fillcolor("Yellow1")
t.circle(200)
t.end_fill()
#嘴
t.pencolor("brown")
t.penup()
t.goto(0,-90)
t.pendown()
t.circle(-120,60)
t.left(180)
t.circle(120,120)
t.seth(0)
#眼睛
t.pensize(3)
 #右眼
t.penup()
t.goto(80,75)
t.pendown()
t.begin_fill()
t.circle(35)
t.fillcolor("white")
t.end_fill()
t.pencolor("black")
t.begin_fill()
t.circle(23)
t.fillcolor("black")
t.end_fill()
 #左眼
t.pencolor("brown")
t.penup()
t.goto(-80,75)
t.pendown()
t.begin_fill()
t.circle(35)
t.fillcolor("white")
t.end_fill()
t.pencolor("black")
t.begin_fill()
t.circle(23)
t.fillcolor("black")
t.end_fill()
t.hideturtle()
t.done()
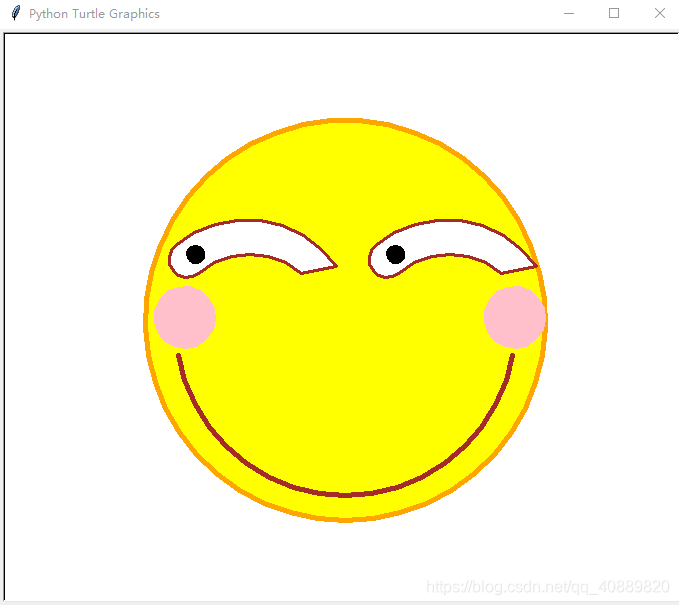
滑稽
啊!!我的眼睛!!
效果:
代码:
import turtle as t
t.speed(20)
t.pensize(5)
#脸
t.pencolor("orange")
t.begin_fill()
t.penup()
t.goto(0,-200)
t.pendown()
t.fillcolor("Yellow1")
t.circle(200)
t.end_fill()
#嘴
t.pencolor("brown")
t.penup()
t.goto(0,-175)
t.pendown()
t.circle(170,80)
t.left(180)
t.circle(-170,160)
t.seth(0)
#眼睛
t.pensize(3)
 #右眼框
t.penup()
t.goto(30,75)
t.pendown()
t.seth(40)
t.fillcolor("white")
t.begin_fill()
t.circle(-110,95)
pos1=t.pos()
#print(pos1)
t.penup()
t.goto(30,75)
t.pendown()
t.seth(-140)
t.circle(18,180)
t.circle(-80,80)
t.goto(pos1)
t.end_fill()
 #右眼珠
t.pencolor("black")
t.penup()
t.goto(45,60)
t.pendown()
t.begin_fill()
t.fillcolor("black")
t.circle(8)
t.end_fill()

 #左眼框
t.pencolor("brown")
t.penup()
t.goto(-170,75)
t.pendown()
t.begin_fill()
t.fillcolor("white")
t.seth(40)
t.circle(-110,95)
pos2=t.pos()
t.penup()
t.goto(-170,75)
t.pendown()
t.seth(-140)
t.circle(18,180)
t.circle(-80,80)
t.goto(pos2)
t.end_fill()
 #左眼珠
t.pencolor("black")
t.penup()
t.goto(-155,60)
t.pendown()
t.begin_fill()
t.fillcolor("black")
t.circle(8)
t.end_fill()

#腮红
t.penup()
t.goto(150,-20)
t.pencolor("pink")
t.pendown()
t.begin_fill()
t.fillcolor("pink")
t.circle(30)
t.end_fill()

t.penup()
t.goto(-180,-20)
t.pencolor("pink")
t.pendown()
t.begin_fill()
t.fillcolor("pink")
t.circle(30)
t.end_fill()

t.hideturtle()
t.done()
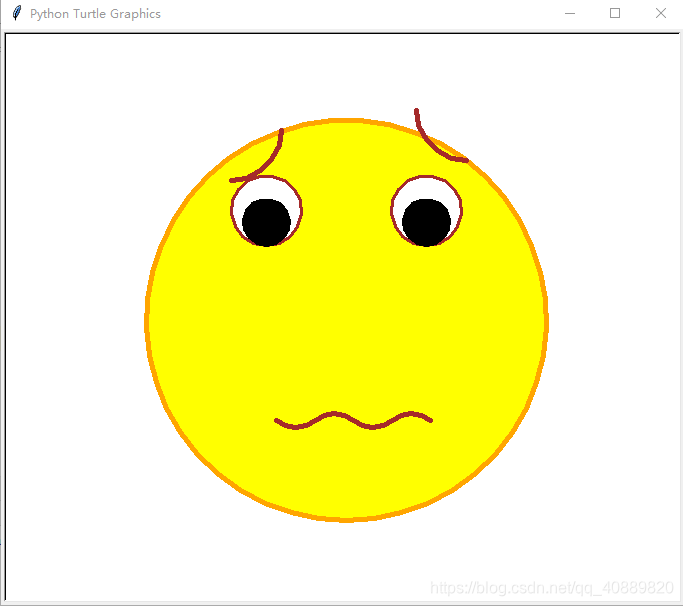
撇嘴
在微笑的基础上改
效果:
代码:
import turtle as t
t.speed(20)
t.pensize(5)
#脸
t.pencolor("orange")
t.begin_fill()
t.penup()
t.goto(0,-200)
t.pendown()
t.fillcolor("Yellow1")
t.circle(200)
t.end_fill()
#嘴
t.pencolor("brown")
t.penup()
t.goto(-70,-100)
t.pendown()
t.seth(-40)
t.circle(30,80)
t.circle(-30,80)
t.circle(30,80)
t.circle(-30,80)
t.seth(0)
#眉毛
t.penup()
t.goto(-115,140)
t.pendown()
t.circle(50,90)
t.penup()
t.goto(120,160)
t.pendown()
t.seth(-180)
t.circle(-50,90)
#眼睛
t.seth(0)
t.pensize(3)
 #右眼
t.penup()
t.goto(80,75)
t.pendown()
t.begin_fill()
t.circle(35)
t.fillcolor("white")
t.end_fill()
t.pencolor("black")
t.begin_fill()
t.circle(23)
t.fillcolor("black")
t.end_fill()
 #左眼
t.pencolor("brown")
t.penup()
t.goto(-80,75)
t.pendown()
t.begin_fill()
t.circle(35)
t.fillcolor("white")
t.end_fill()
t.pencolor("black")
t.begin_fill()
t.circle(23)
t.fillcolor("black")
t.end_fill()

t.hideturtle()
t.done()


 8529
8529

 被折叠的 条评论
为什么被折叠?
被折叠的 条评论
为什么被折叠?
 到【灌水乐园】发言


