


1 install opencv
download opencv_python-4.2.0-cp37-cp37m-win_amd64.whl
cmd: pip install opencv_python-4.2.0-cp37-cp37m-win_amd64.whl
2 Functions
2.1 show a picture
It is used to show a picture.
img1=cv2.imread(1.jpg, cv2.IMREAD_COLOR)
cv2.imshow("img", img1)
ATTENTION:
- Don’t use Chinese in the path.
- Avoid use special letters as the first letter, such as n, t and so on. Because these letters may be recognized as \n, \t and so on.
2.2 catch a video
cap = cv2.VideoCapture(0)
while(Ture):
    ret, frame= cap.read()
    cv2.imshow("frame", frame)
    cv2.waitKey(0)
cap.release()
cv2.destroyAllWindows()
where:
“ret” is used to show if the camera catch the video;
“frame” is used to store the picture that the camera catch.
2.3 draw a line
img = cv2.line(img, (0,0), (50,40), (255,0,0), 2)
There will be a line begins at (0,0), ends at (50,40), blue and wide 2.
The first parameter is the target picture, the second is the start point, the third is the end point, the fourth is the color(BGR) and the last is the wide.
2.4 Events with mouse
There are many events with mouse, such as left-click, right-click and so on . Using these events, we will be able to do something special with the picture.
def click_event(event, x, y, flags, param):
   if event == cv2.EVENT_LBUTTONDBLCLK:
       print(x, ",", y)
cv2.setMouseCallback("image", click_event)
“setMouseCallback” is used to combine the function with window.
It will print the location where we click the left key.
2.6 Bit-wise operation
bit_and = cv2.bitwise_and(img2, img1)
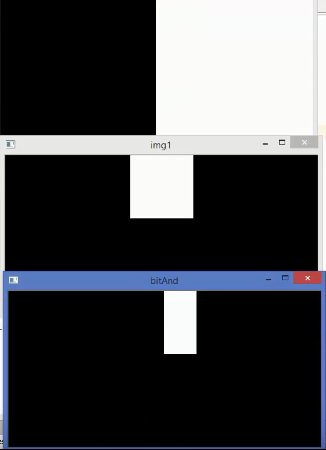
Between these 2 images, bit_and will show 0, if there is at least one 0 in img2 and img1.
2.7 Threshold
_, th1 = cv2.threshold(img, 127, 255, cv2.THRESH_BINARY)
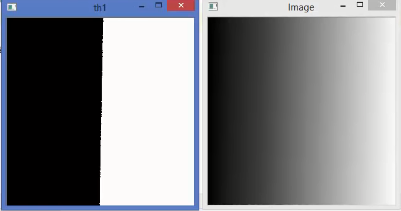
It means 0-127 will become 0 and 127-255 will become 255.
There are some other parameters:
cv2.THRESH_BINARY
cv2.THRESH_BINARY_INV
cv2.THRESH_TRUNC
cv2.THRESH_TOZERO
cv2.THRESH_TOZERO_INV
2.8 Kernel
kernel = np.ones((5, 5), np.float32)/25
dst = cv2. filter2D(img, -1, kernel)
blur = cv2.blur(img, (5,5))
gblur = GaussianBlur(img, (5,5),0)
median = medianBlur(img,5)
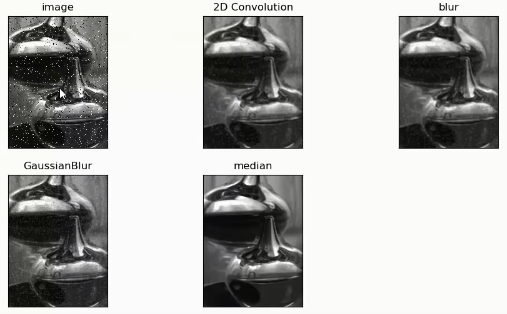
“filter2D” makes the edge smooth.
“blur” filters some noise but the picture may be more vague.
“medianBlur” and “medianBlur” are familiar with “blur”, but they may be more useful.
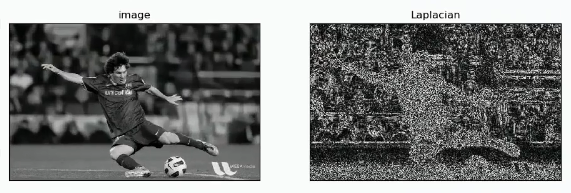
2.9 Edge detection
lap = cv2. Laplacian(img, cv2.CV_64F, ksize = 3)
lap = np.uint8(np.absolute(lap))
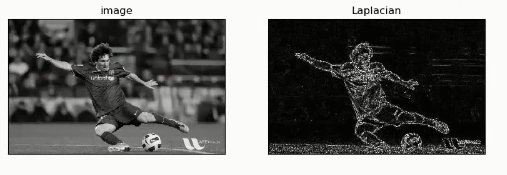
If we change ksize from 3 to 5:


 被折叠的 条评论
为什么被折叠?
被折叠的 条评论
为什么被折叠?
 到【灌水乐园】发言


