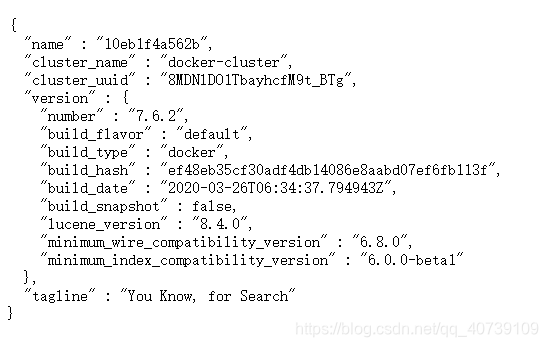
springboot配置操作es7.6.2

1.安装7.6.2的es

访问地址+端口显示如下表示安装成功。
在这里插入图片描述

2.加入maven依赖,在properties中制定版本号

<properties>
    <java.version>1.8</java.version>
    <project.build.sourceEncoding>UTF-8</project.build.sourceEncoding>
    <project.reporting.outputEncoding>UTF-8</project.reporting.outputEncoding>
    <spring-boot.version>2.3.7.RELEASE</spring-boot.version>
        <elasticsearch.version>7.6.2</elasticsearch.version>
</properties>
        <dependency>
        <groupId>org.springframework.boot</groupId>
        <artifactId>spring-boot-starter-data-elasticsearch</artifactId>
    </dependency>

3.创建es的连接配置类

@Configuration
public class ElasticsearchConfig {


    @Bean
    public RestHighLevelClient restHighLevelClient(){
   
   
        RestHighLevelClient client= new RestHighLevelClient(
                RestClient.builder(new HttpHost("***",9200,"http")));
        return client;
    }
}

4.一些简单的es操作测试

注解注入es类

 @Autowired
 private RestHighLevelClient restHighLevelClient;
  1. 添加索引值
    @Test
    void testIndex() throws IOException {
   
   
        CreateIndexRequest request = new CreateIndexRequest("d_index");

        CreateIndexResponse createIndexResponse= restHighLevelClient.indices().create(request, RequestOptions.DEFAULT);

    }
  1. 判断索引是否添加成功,返回true代表存在索引。
    @Test
    void testExitIndex() throws IOException {
   
   
        GetIndexRequest request = new GetIndexRequest("d_index");

        boolean exits=
                restHighLevelClient.indices().exists(request, RequestOptions.DEFAULT);
        System.out.println(exits);
    }
  1. 删除索引
    @Test
    void testdelIndex() throws IOException {
   
   
        DeleteIndexRequest request = new DeleteIndexRequest("d_index");

        AcknowledgedResponse delete =restHighLevelClient.indices().delete(request, RequestOptions.DEFAULT);
        System.out.println(delete.isAcknowledged());
    }
  1. 添加文档内容
### Spring Boot 集成 Elasticsearch 7.6.2 教程及配置示例 #### 添加依赖项 为了使Spring Boot应用程序能够与Elasticsearch交互,在`pom.xml`文件中加入必要的Maven依赖: ```xml <dependencies> <!-- 弹性搜索核心库 --> <dependency> <groupId>org.elasticsearch</groupId> <artifactId>elasticsearch</artifactId> <version>7.6.2</version> </dependency> <!-- REST高级客户端用于连接到弹性搜索引擎 --> <dependency> <groupId>org.elasticsearch.client</groupId> <artifactId>elasticsearch-rest-high-level-client</artifactId> <version>7.6.2</version> </dependency> <!-- Spring Data ES支持 --> <dependency> <groupId>org.springframework.boot</groupId> <artifactId>spring-boot-starter-data-elasticsearch</artifactId> </dependency> </dependencies> ``` 上述代码片段展示了如何引入Elasticsearch及其REST高层级Java API客户端,以及Spring Data Elasticsearch的支持[^3]。 #### 应用程序属性设置 编辑项目的`application.properties`或`application.yml`来指定Elasticsearch实例的位置和其他必要参数: 对于`.properties`文件: ```properties spring.data.elasticsearch.cluster-name=elasticsearch spring.data.elasticsearch.cluster-nodes=localhost:9300 ``` 对于`.yml`文件: ```yaml spring: data: elasticsearch: cluster-name: elasticsearch cluster-nodes: localhost:9300 ``` 这些配置指定了要连接的Elasticsearch集群名称和节点地址[^2]。 #### 创建实体类并映射至索引 定义一个简单的POJO作为文档模型,并通过注解将其关联到特定的Elasticsearch索引上: ```java import org.springframework.data.annotation.Id; import org.springframework.data.elasticsearch.annotations.Document; @Document(indexName = "product", type = "_doc") public class Product { @Id private String id; private String name; private double price; // Getters and Setters... } ``` 此部分说明了怎样创建一个代表商品的产品类,并把它绑定到了名为“product”的索引里。 #### 编写存储库接口 利用Spring Data提供的Repository抽象简化数据访问操作。只需声明继承自`ElasticsearchRepository<T, ID>`的标准CRUD方法即可自动实现基本功能: ```java import org.springframework.data.elasticsearch.repository.ElasticsearchRepository; public interface ProductRepository extends ElasticsearchRepository<Product, String> { } ``` 这段代码实现了针对Product对象的基础增删改查能力,而无需编写任何具体逻辑。 #### 使用服务层执行业务逻辑 最后一步是在Service组件内调用之前建立好的仓库来进行实际的数据检索或其他持久化动作: ```java @Service public class ProductService { @Autowired private ProductRepository productRepo; public List<Product> findAllProducts() { return (List<Product>) this.productRepo.findAll(); } // More business methods here... } ``` 至此完成了整个集成过程概述,包括环境准备、项目结构设计直至具体的编码实践。
评论
添加红包

请填写红包祝福语或标题

红包个数最小为10个

红包金额最低5元

当前余额3.43前往充值 >
需支付:10.00
成就一亿技术人!
领取后你会自动成为博主和红包主的粉丝 规则
hope_wisdom
发出的红包
实付
使用余额支付
点击重新获取
扫码支付
钱包余额 0

抵扣说明:

1.余额是钱包充值的虚拟货币,按照1:1的比例进行支付金额的抵扣。
2.余额无法直接购买下载,可以购买VIP、付费专栏及课程。

余额充值