


 该博客介绍了使用IntelliJ IDEA搭建SSM项目的详细步骤。包括配置Maven使用阿里镜像,创建工程并设置相关目录,创建各类Java类和服务,导入配置文件并修改数据库信息,添加Tomcat服务器,最后运行程序。
链接:百度云
提取码:vkpp
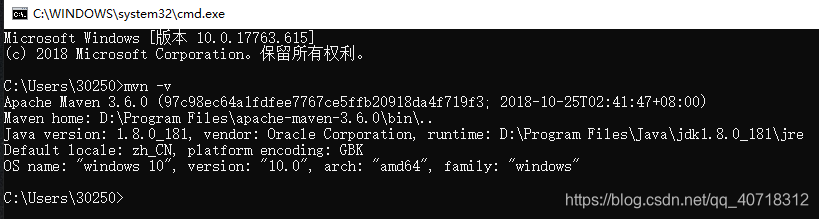
1.配置maven
在C:\Users\30250.m2\settings.xml文件中的mirrors中添加,使用阿里镜像
<mirror>
		<id>alimaven</id>
		<name>aliyun maven</name>
		<url>http://maven.aliyun.com/nexus/content/groups/public/</url>
		<mirrorOf>central</mirrorOf>
</mirror>
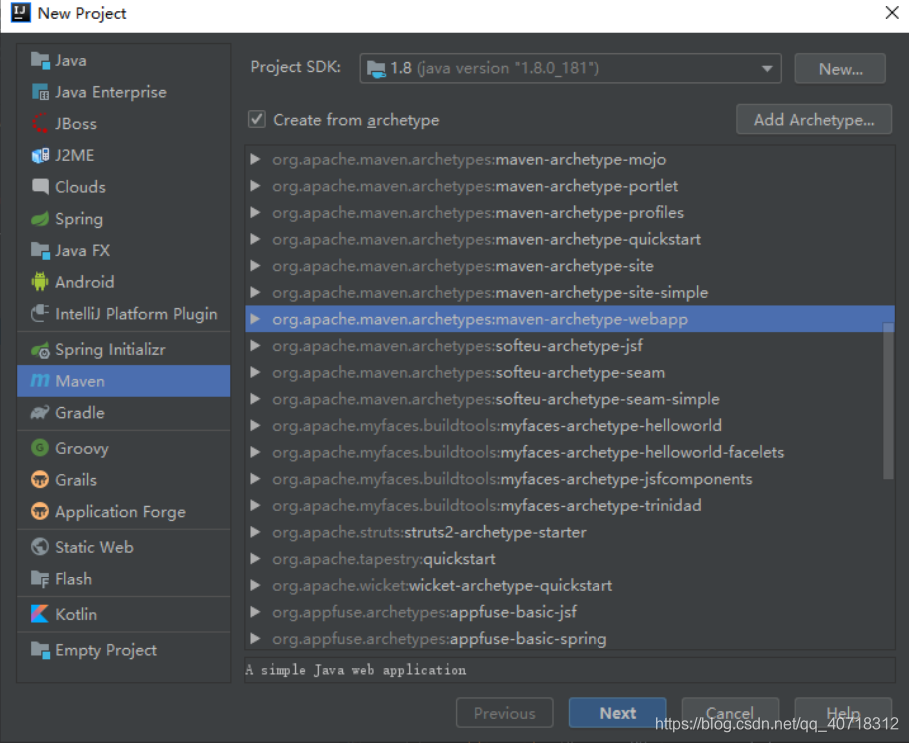
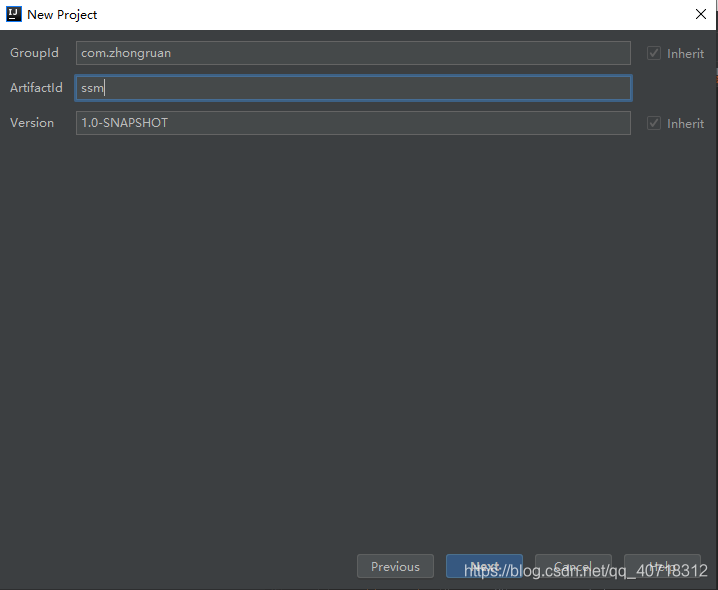
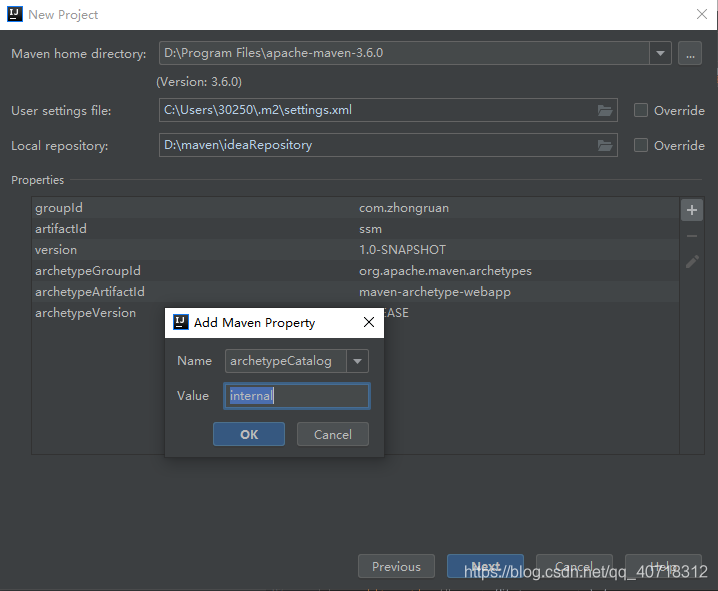
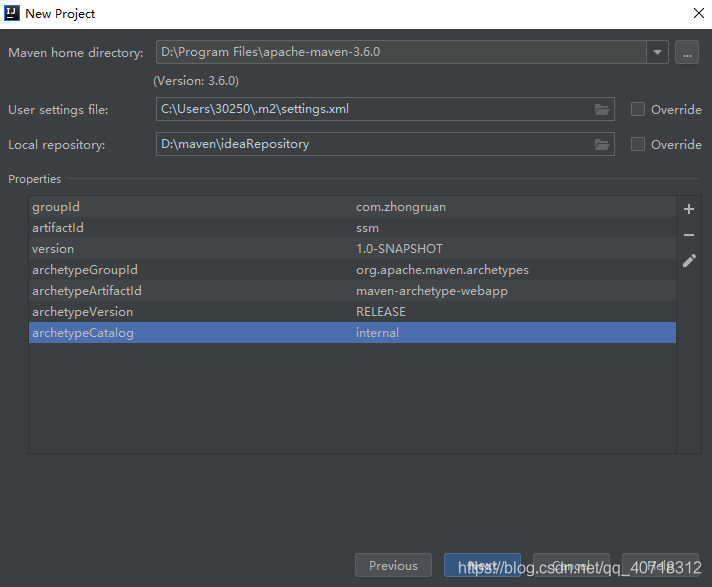
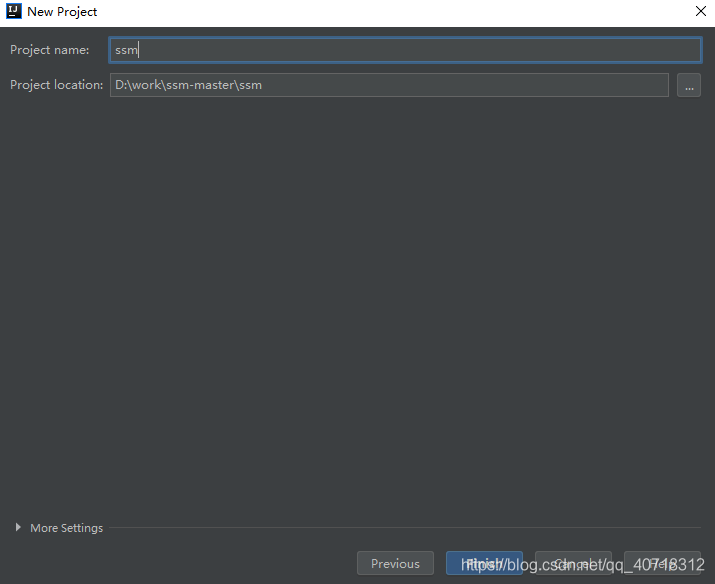
2.创建工程
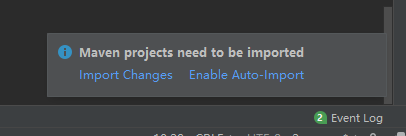
在右下角选择Enable Auto-Import
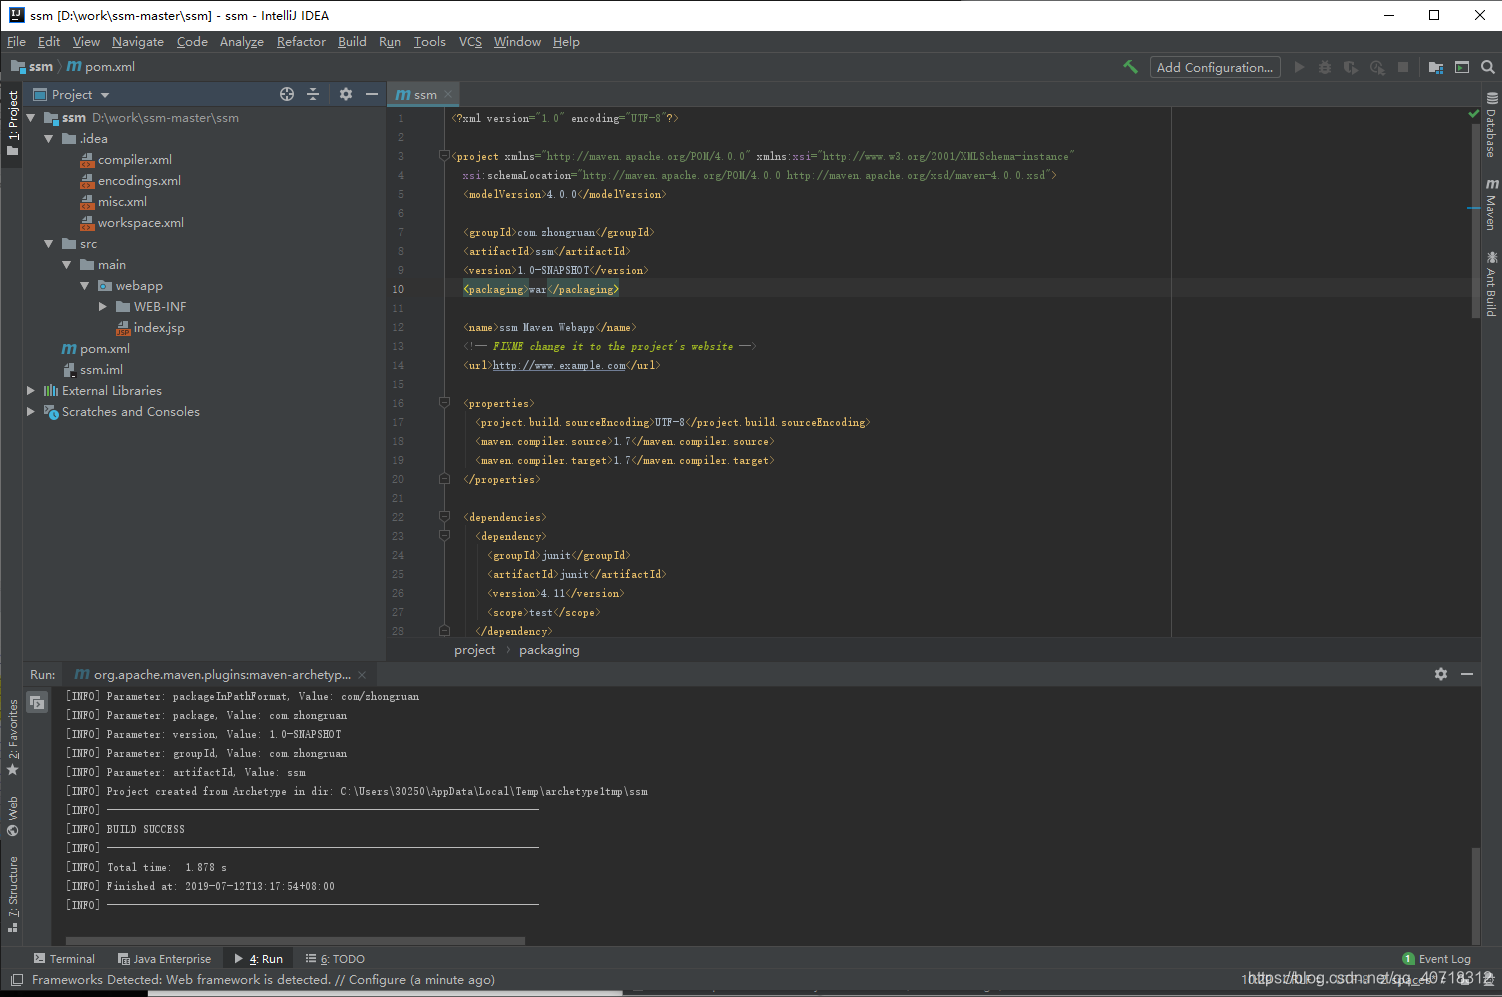
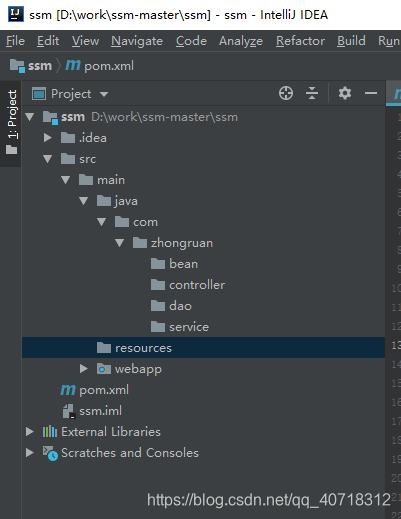
新建目录
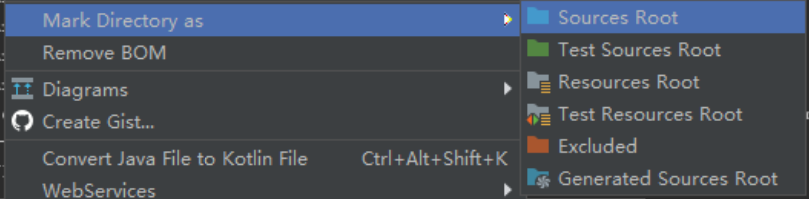
java包右键Sources Root ,resources包右键选择Resources Root
在bean包中创建一个UserInfo
package com.zhongruan.bean;

public class UserInfo {

    public UserInfo() {
    }

    private int id;
    private String username;
    private String password;

    public int getId() {
        return id;
    }

    public void setId(int id) {
        this.id = id;
    }

    public String getUsername() {
        return username;
    }

    public void setUsername(String username) {
        this.username = username;
    }

    public String getPassword() {
        return password;
    }

    public void setPassword(String password) {
        this.password = password;
    }

    @Override
    public String toString() {
        return "UserInfo{" +
                "id=" + id +
                ", username='" + username + '\'' +
                ", password='" + password + '\'' +
                '}';
    }
}
在dao中创建UserInfo
package com.zhongruan.dao;

import com.zhongruan.bean.UserInfo;

import java.util.List;

public interface IUserInfoDao {
    public List<UserInfo> findAll();
}
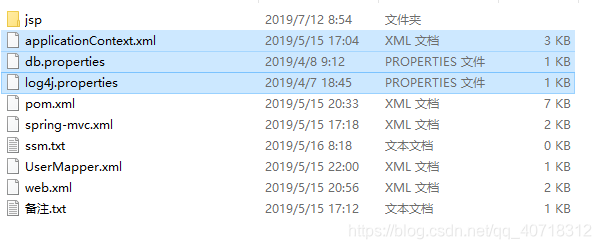
在resources中导入下面三个文件
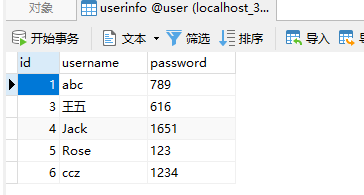
修改db.properties里的数据库为自己的数据库和密码
jdbc.driver=com.mysql.jdbc.Driver
jdbc.url=jdbc:mysql://127.0.0.1:3306/user?useSSL=true&characterEncoding=utf-8
jdbc.username=root
jdbc.password=1234
把spring-mvc.xml复制到resources

把jsp文件复制到webapp中,并把素材中的pom.xml的properties和dependencies替换pom.xml中对应的properties和dependencies
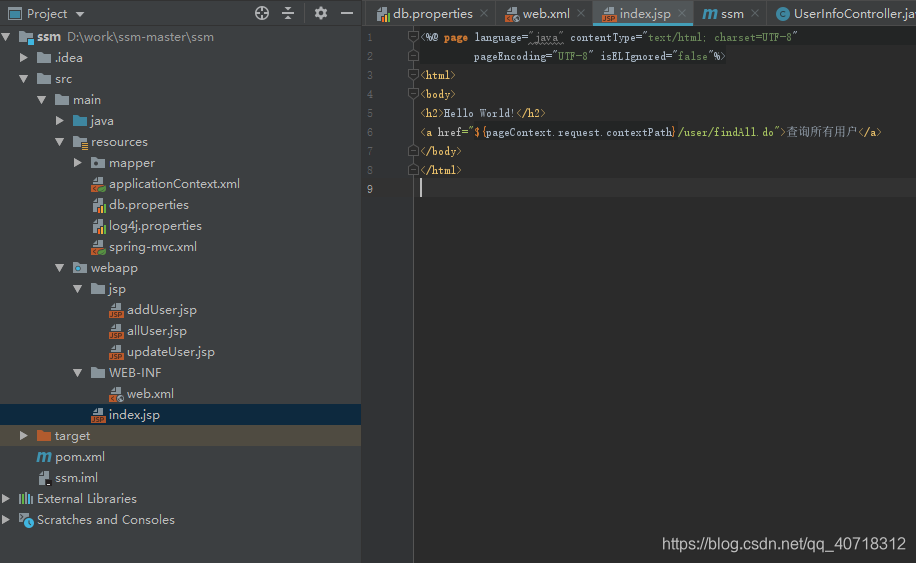
编辑index.jsp
<%@ page language="java" contentType="text/html; charset=UTF-8"
         pageEncoding="UTF-8" isELIgnored="false"%>
<html>
<body>
<h2>Hello World!</h2>
<a href="${pageContext.request.contextPath}/user/findAll.do">查询所有用户</a>
</body>
</html>
在service包中创建IUserInfoService
package com.zhongruan.service;

import com.zhongruan.bean.UserInfo;

import java.util.List;

public interface IUserInfoService {
    public List<UserInfo> findAll();
}
在service中创建impl包,并编写UserInfoServiceImpl
package com.zhongruan.service.impl;

import com.zhongruan.bean.UserInfo;
import com.zhongruan.dao.IUserInfoDao;
import com.zhongruan.service.IUserInfoService;
import org.springframework.beans.factory.annotation.Autowired;
import org.springframework.stereotype.Service;

import java.util.List;

@Service("userInfoService")
public class UserInfoServiceImpl implements IUserInfoService {

    @Autowired
    IUserInfoDao userInfoDao;

    public List<UserInfo> findAll(){
        return userInfoDao.findAll();
    }
}
在controller包中编写UserInfoController
package com.zhongruan.controller;

import com.zhongruan.bean.UserInfo;
import com.zhongruan.service.IUserInfoService;
import org.springframework.beans.factory.annotation.Autowired;
import org.springframework.stereotype.Controller;
import org.springframework.web.bind.annotation.RequestMapping;
import org.springframework.web.servlet.ModelAndView;

import java.util.List;

@Controller
@RequestMapping("user")
public class UserInfoController {

    @Autowired
    IUserInfoService userInfoService;

    @RequestMapping("findAll.do")
    public ModelAndView findAll(){
        List<UserInfo> users = userInfoService.findAll();
        ModelAndView mv = new ModelAndView();
        mv.addObject("users",users);
        mv.setViewName("allUser");
        return mv;
    }
}
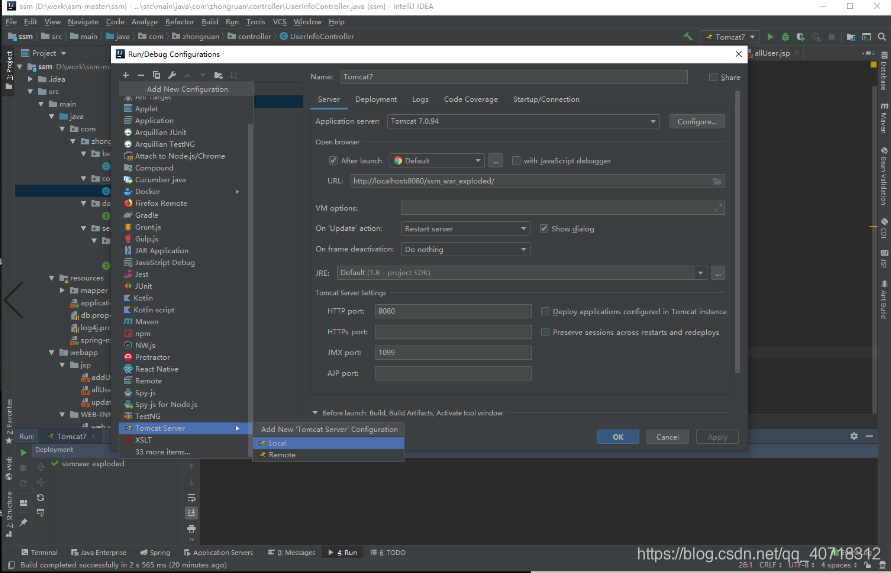
添加Tomcat服务器
在Run/Debug Configuations中点击左上角的+号,选择已安装的Tomcat文件路径即可
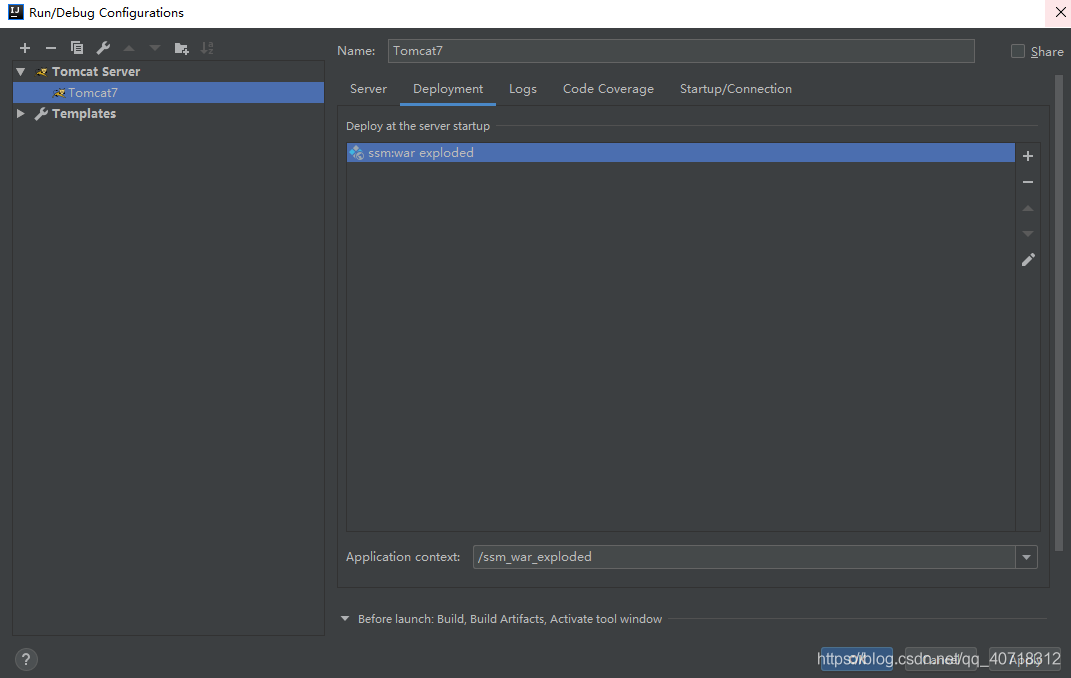
在Deployment中添加exploded
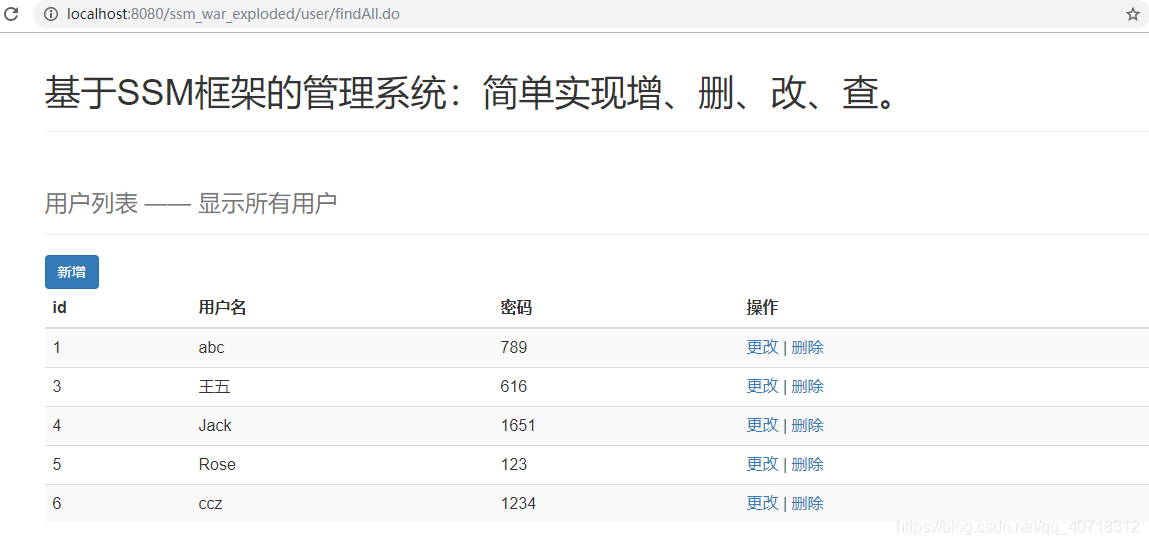
运行程序


 491
491

 被折叠的 条评论
为什么被折叠?
被折叠的 条评论
为什么被折叠?
 到【灌水乐园】发言


