


链接:https://www.cnblogs.com/sunniest/p/4555801.html
链接:https://blog.youkuaiyun.com/striner/article/details/80442500
链接:https://blog.youkuaiyun.com/shuaicihai/article/details/63052757
链接(上传文件):https://www.cnblogs.com/fjsnail/p/3491033.html
一、SpringMVC基础入门
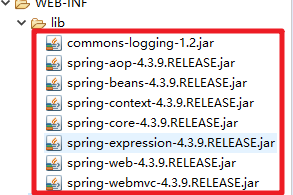
1.首先,导入SpringMVC需要的jar包。
2. web.xml中进行请求拦截映射, 具体可以看spring的内容:https://blog.youkuaiyun.com/qq_40303031/article/details/89225041
<?xml version="1.0" encoding="UTF-8"?>
<web-app xmlns:xsi="http://www.w3.org/2001/XMLSchema-instance" xmlns="http://java.sun.com/xml/ns/javaee" xsi:schemaLocation="http://java.sun.com/xml/ns/javaee http://java.sun.com/xml/ns/javaee/web-app_3_0.xsd" id="WebApp_ID" version="3.0">
  <display-name>springMVC</display-name>
  <welcome-file-list>
    <welcome-file>index.jsp</welcome-file>
  </welcome-file-list>

  <!-- The front controller of this Spring Web application, responsible for handling all application requests -->
	<servlet>
		<servlet-name>springDispatcherServlet</servlet-name>
		<servlet-class>org.springframework.web.servlet.DispatcherServlet</servlet-class>
		<init-param>
			<param-name>contextConfigLocation</param-name>
			<param-value>classpath:springMVC.xml</param-value>
		</init-param>
		<load-on-startup>1</load-on-startup>
	</servlet>

	<!-- Map all requests to the DispatcherServlet for handling -->
	<servlet-mapping>
		<servlet-name>springDispatcherServlet</servlet-name>
		<url-pattern>/</url-pattern>
	</servlet-mapping>
</web-app>
- 新建一个springMVC配置文件,选中常用的命名空间:beans aop context mvc
注意,名字要跟web.xml中的
<param-value>classpath:springMVC.xml</param-value>匹配
<?xml version="1.0" encoding="UTF-8"?>
<beans xmlns="http://www.springframework.org/schema/beans"
	xmlns:xsi="http://www.w3.org/2001/XMLSchema-instance"
	xmlns:aop="http://www.springframework.org/schema/aop"
	xmlns:context="http://www.springframework.org/schema/context"
	xmlns:mvc="http://www.springframework.org/schema/mvc"
	xsi:schemaLocation="http://www.springframework.org/schema/mvc http://www.springframework.org/schema/mvc/spring-mvc-4.3.xsd
		http://www.springframework.org/schema/beans http://www.springframework.org/schema/beans/spring-beans.xsd
		http://www.springframework.org/schema/context http://www.springframework.org/schema/context/spring-context-4.3.xsd
		http://www.springframework.org/schema/aop http://www.springframework.org/schema/aop/spring-aop-4.3.xsd">

	<!-- 文件扫描器 -->
	<context:component-scan base-package="org.wajpzywj.hander"></context:component-scan>

	<!-- 视图解析器 -->
	<bean class="org.springframework.web.servlet.view.InternalResourceViewResolver">
		<property name="prefix" value="/views/"></property>
		<property name="suffix" value=".jsp"></property>
	</bean>

</beans>
- 在控制层处理请求,
package org.wajpzywj.hander;

import org.springframework.stereotype.Controller;
import org.springframework.web.bind.annotation.RequestMapping;
// 声明该类被扫描,将会创建bean,实例化
@Controller
public class SpringMVCHander {
	// RequestMapping表示处理这个请求。
	@RequestMapping("welcome")
	public String welcome() {
		// 默认使用请求转发的跳转方式
		return "success";
	}

}
- 在WebContext目录中创建index.jsp测试文件
<%@ page language="java" contentType="text/html; charset=ISO-8859-1"
    pageEncoding="ISO-8859-1"%>
<!DOCTYPE html>
<html>
<head>
<meta charset="ISO-8859-1">
<title>Insert title here</title>
</head>
<body>
	<a href="welcome">first springmvc</a>
</body>
</html>
- 在WebContext目录中创建views文件夹,里面创建success.jsp文件
<%@ page language="java" contentType="text/html; charset=ISO-8859-1"
    pageEncoding="ISO-8859-1"%>
<!DOCTYPE html>
<html>
<head>
<meta charset="ISO-8859-1">
<title>Insert title here</title>
</head>
<body>
	welcomo to my springmvc;
</body>
</html>
- 启动tomcat,进行测试;
二、配置解析
10. Dispatcherservlet
DispatcherServlet是前置控制器,配置在web.xml文件中的。拦截匹配的请求,Servlet拦截匹配规则要自已定义,把拦截下来的请求,依据相应的规则分发到目标Controller来处理,是配置spring MVC的第一步。
- InternalResourceViewResolver
视图名称解析器
- 以上出现的注解
@Controller
负责注册一个bean 到spring 上下文中
@RequestMapping
注解为控制器指定可以处理哪些 URL 请求
三、SpringMVC常用注解
@Controller
负责注册一个bean 到spring 上下文中
@RequestMapping
注解为控制器指定可以处理哪些 URL 请求
@RequestBody
该注解用于读取Request请求的body部分数据,使用系统默认配置的HttpMessageConverter进行解析,然后把相应的数据绑定到要返回的对象上
,再把HttpMessageConverter返回的对象数据绑定到 controller中方法的参数上
@ResponseBody
该注解用于将Controller的方法返回的对象,通过适当的HttpMessageConverter转换为指定格式后,写入到Response对象的body数据区
@ModelAttribute
在方法定义上使用 @ModelAttribute 注解:Spring MVC
在调用目标处理方法前,会先逐个调用在方法级上标注了@ModelAttribute 的方法
在方法的入参前使用 @ModelAttribute 注解:可以从隐含对象中获取隐含的模型数据中获取对象,再将请求参数
–绑定到对象中,再传入入参将方法入参对象添加到模型中
@RequestParam
在处理方法入参处使用 @RequestParam 可以把请求参 数传递给请求方法
@PathVariable
绑定 URL 占位符到入参
@ExceptionHandler
注解到方法上,出现异常时会执行该方法
@ControllerAdvice
使一个Contoller成为全局的异常处理类,类中用@ExceptionHandler方法注解的方法可以处理所有Controller发生的异常
三、@RequestMapping
使用注意事项:
- 参数类型
@RequestMapping(value="welcome", method=RequestMethod.POST, params = {"name=zs"})
里面可以约束,请求的地址,请求方法,请求参数
age!=23:
a. 如果有name=“age”, 则age值不能是23
b. 没有age
!name2 :表示不能包含参数name2,否则报错
- ant风格的请求路径
?单字符
* 任意个字符(0或者多个)
** 任意目录
@RequestMapping(value=“welcome/**/test”)
接受示例:“welcome/abc/xyz/abbc/test”
四、RESTFul风格的SringMVC
- 在web.xml中添加配置
<!-- 增加HiddenHttpMethodFilter过滤器:目的是给普通浏览器增加put和delete请求方式 -->
<filter>
	<filter-name>HiddenHttpMethodFilter</filter-name>
	<filter-class>org.springframework.web.filter.HiddenHttpMethodFilter</filter-class>
</filter>
<filter-mapping>
	<filter-name>HiddenHttpMethodFilter</filter-name>
	<url-pattern>/*</url-pattern>
</filter-mapping>
- 在前台index.jsp可以用以下代码产生请求
<!-- restful风格 -->
<form action="rest/user/1" method="post">
     <input type="hidden" name="_method" value="PUT">
     <input type="submit" value="put">
 </form>

 <form action="rest/user/1" method="post">
     <input type="submit" value="post">
 </form>

 <form action="rest/user/1" method="get">
     <input type="submit" value="get">
 </form>

 <form action="rest/user/1" method="post">
     <input type="hidden" name="_method" value="DELETE">
     <input type="submit" value="delete">
 </form>
- 控制层处理请求
package org.wajpzywj.hander;

import org.springframework.stereotype.Controller;
import org.springframework.web.bind.annotation.PathVariable;
import org.springframework.web.bind.annotation.RequestMapping;
import org.springframework.web.bind.annotation.RequestMethod;

@Controller
@RequestMapping("/rest")
public class SpringMVCHander {

	@RequestMapping(value="/user/{id}",method=RequestMethod.GET)
    public String get(@PathVariable("id") Integer id){
        System.out.println("get"+id);
        return "/hello";
    }

    @RequestMapping(value="/user/{id}",method=RequestMethod.POST)
    public String post(@PathVariable("id") Integer id){
        System.out.println("post"+id);
        return "/hello";
    }

    @RequestMapping(value="/user/{id}",method=RequestMethod.PUT)
    public String put(@PathVariable("id") Integer id){
        System.out.println("put"+id);
        return "/hello";
    }

    @RequestMapping(value="/user/{id}",method=RequestMethod.DELETE)
    public String delete(@PathVariable("id") Integer id){
        System.out.println("delete"+id);
        return "/hello";
    }

}
注意点:
- 必须是post方式
- 通过隐藏域的value值 设置实际的请求方式 delete/put
- 通过 method=RequestMethod.PUT 匹配具体的请求方式
原理:
原始请求: request, 改请求默认只支持get,post
但是如果是"POST", 并且有隐藏域,则过滤器将原始的请求request加入新的请求方式delete,并将原始请求转为 requestToUse请求(request+delete)
最后将requestToUse 放入请求链中,
后续再实行request时,实际就是使用改造后的requestToUse
五、使用@RequestParam注解指定参数的name
@Controller
@RequestMapping("/test")
public class mvcController1 {
    @RequestMapping(value="/param")
    public String testRequestParam(@RequestParam(value="id") Integer id,
            , @RequestParam(value="age", required=false, defaultValue="23") Integer age){
        // 相当于 String name = request.getParameter("name")
        System.out.println(id+" "+name);
        return "/hello";
    }
}
注意点:
@RequestParam(value=“name”):接受前台传递的值,等价于request.getParameter(“name”)
required=false: 该属性不是必须的
defaultValue=“23” : 默认值是23
获取头信息:使用方法同@RequestParam
@Controller
@RequestMapping("/test")
public class mvcController1 {
    @RequestMapping(value="/param")
    public String testRequestParam(@RequestHeader(value="Accept-Language") String al){
        System.out.println("Accept-Language:"+al);
        return "/hello";
    }
}
获取cookie:使用方法同@RequestParam
@Controller
@RequestMapping("/test")
public class mvcController1 {
    @RequestMapping(value="/param")
    public String testRequestParam(@CookieValue(value="JSESSIONID") String jsessionId){
        System.out.println("JSESSIONID:"+jsessionId);
        return "/hello";
    }
}
知识点:
(前置知识:服务端在接受客户端第一次请求时,会给客户端分配一个session(该session包含一个sessionId),并且服务端会在第一次相应客户端时,请该sessionId赋值给JSESSIONID 并传递给客户端的cookie中)
小结:
sprignMVC处理各种参数的流程:
- 请求:前段发请求a -> @RequestMapping(“a”)
- 处理请求中的参数xyz:
@RequestMapping(“a”)
public String aa(@Xxx注解(“xyz”) xyz){}
六、自动装箱
使用对象(实体类Student)接受请求参数
student属性必须和form表单中的属性name值一致(支持级联属性)
- 编写一个Student实体类和 Address实体类
package org.wajpzywj.entity;
public class Student {
	private int id;
	private String name;
	private Address address;
	public int getId() {
		return id;
	}
	public void setId(int id) {
		this.id = id;
	}
	public String getName() {
		return name;
	}
	public void setName(String name) {
		this.name = name;
	}
	public Address getAddress() {
		return address;
	}
	public void setAddress(Address address) {
		this.address = address;
	}
	@Override
	public String toString() {
		return "Student [id=" + id + ", name=" + name + ", address=" + address + "]";
	}
}
package org.wajpzywj.entity;
public class Address {
	private String homeAddress;
	private String schoolAddress;
	public String getHomeAddress() {
		return homeAddress;
	}
	public void setHomeAddress(String homeAddress) {
		this.homeAddress = homeAddress;
	}
	public String getSchoolAddress() {
		return schoolAddress;
	}
	public void setSchoolAddress(String schoolAddress) {
		this.schoolAddress = schoolAddress;
	}
}
- 前台请求表单
<form action="testObjectProperties" method="post">
	id:<input name="id" type="text">
	name:<input name="name" type="text">
	homeAddress:<input name="address.homeAddress" type="text">
	schoolAddress:<input name="address.schoolAddress" type="text">
	<input type="submit" value="提交"/>
</form>
- 在Controller里编写方法
@RequestMapping(value="testObjectProperties")
public String welcome(Student student) {// student属性必须和form表单中的属性name值一致(支持级联属性)
	System.out.println(student);
	return "success";
}
七、在springMVC中使用原生态的Servlet API:HttpServletRequest:
直接将servlet-api中的类,接口等 写在springMVC所映射的方法参数中即可:
@RequestMapping(value="testObjectProperties")
public String welcome11(HttpServletRequest request, HttpServletResponse response) {
	request.getParameter("name");
	return "success";
}
八、ModelAndView处理模型数据
如果跳转时需要带数据:V,M,则可以使用以下方式:
ModelAndView, ModelMap, Map, Model
1. 数据放在了request作用域
@SessionAttributes , @ModelAttribute
- 控制层
@RequestMapping(value="testModelAndView")
// ModelAndView既有模型,又有视图
public ModelAndView testModelAndView() {
	ModelAndView mv = new ModelAndView("success");
	Student student = new Student();
	student.setId(1);
	student.setName("zs");
	// 相当于 request.setAttribute("student", student);
	mv.addObject("student",student);
	return mv;
}
- success.jsp怎么取出属性,
${requestScope.student.id}-${requestScope.student.name}
以上的控制层的方法可以这样写: 完全等价。
@RequestMapping(value="testModelMap")
public String testModelMap(ModelMap mm) {
	Student student = new Student();
	student.setId(1);
	student.setName("zs");
	mm.put("student",student);
	return "success";
}

@RequestMapping(value="testMap")
public String testMap(Map<String,Object> map) {
	Student student = new Student();
	student.setId(1);
	student.setName("zs");
	map.put("student",student);
	return "success";
}

@RequestMapping(value="testModel")
public String testModel(Model model) {
	Student student = new Student();
	student.setId(1);
	student.setName("zs");
	model.addAttribute("student",student);
	return "success";
}
2. 数据放在了session作用域
- 控制层 : 主要更改最上面的注解
package org.wajpzywj.hander;

import java.util.Map;

import javax.servlet.http.HttpServletRequest;
import javax.servlet.http.HttpServletResponse;

import org.springframework.stereotype.Controller;
import org.springframework.ui.Model;
import org.springframework.ui.ModelMap;
import org.springframework.web.bind.annotation.CookieValue;
import org.springframework.web.bind.annotation.PathVariable;
import org.springframework.web.bind.annotation.RequestHeader;
import org.springframework.web.bind.annotation.RequestMapping;
import org.springframework.web.bind.annotation.RequestMethod;
import org.springframework.web.bind.annotation.RequestParam;
import org.springframework.web.bind.annotation.SessionAttributes;
import org.springframework.web.servlet.ModelAndView;
import org.wajpzywj.entity.Student;

@Controller
@RequestMapping("/rest")
@SessionAttributes(value="student4") //(放一个)如果要在request域中存放student4对象,则同时将该对象放在session域中
//@SessionAttributes(types={Student.class}) //(放一批)如果要在request域中存放Student类型的对象,则同时将该对象放在session域中
public class SpringMVCHander {

	@RequestMapping(value="testModelAndView")
	// ModelAndView既有模型,又有视图
	public ModelAndView testModelAndView() {
		ModelAndView mv = new ModelAndView("success");
		Student student = new Student();
		student.setId(1);
		student.setName("zs");
		// 相当于 request.setAttribute("student", student);
		mv.addObject("student1",student);
		return mv;
	}


	@RequestMapping(value="testModelMap")
	public String testModelMap(ModelMap mm) {
		Student student = new Student();
		student.setId(1);
		student.setName("zs");
		mm.put("student2",student);
		return "success";
	}

	@RequestMapping(value="testMap")
	public String testMap(Map<String,Object> map) {
		Student student = new Student();
		student.setId(1);
		student.setName("zs");
		map.put("student3",student);
		return "success";
	}

	@RequestMapping(value="testModel")
	public String testModel(Model model) {
		Student student = new Student();
		student.setId(1);
		student.setName("zs");
		model.addAttribute("student4",student);
		return "success";
	}

}
- 视图层:success.jsp这样检测
<%@ page language="java" contentType="text/html; charset=ISO-8859-1"
    pageEncoding="ISO-8859-1"%>
<!DOCTYPE html>
<html>
<head>
<meta charset="ISO-8859-1">
<title>Insert title here</title>
</head>
<body>
	request域<br>
	${requestScope.student1.id}-${requestScope.student1.name}<br>
	${requestScope.student2.id}-${requestScope.student2.name}<br>
	${requestScope.student3.id}-${requestScope.student3.name}<br>
	${requestScope.student4.id}-${requestScope.student4.name}<br>

	session域<br>
	${sessionScope.student1.id}-${sessionScope.student1.name}<br>
	${sessionScope.student2.id}-${sessionScope.student2.name}<br>
	${sessionScope.student3.id}-${sessionScope.student3.name}<br>
	${sessionScope.student4.id}-${sessionScope.student4.name}<br>

</body>
</html>
九、@ModelAttribute 使用
作用:
- 经常在更新时使用
- 在不改变原有代码的基础上,插入一个新方法。
//在任何一次请求前都会执行@ModelAttribute修饰的方法
@ModelAttribute
public void queryStudentById(Map<String,Object> map) {
	// StudentService stuService = new StudentService();
	// Student student = stuService.queryStudentById(23);
	Student student = new Student();
	student.setId(33);
	student.setName("ls");
	// 约定:map的key就是 方法参数 类型的首字母小写
	map.put("student", student);
}

@RequestMapping(value="testModelAttribute")
public String testModelAttribute(Student student) {
	student.setName("小红书");
	System.out.println(student);
	return "success";
}
如果不一致,也可以使用注解,本质一样。
//在任何一次请求前都会执行@ModelAttribute修饰的方法
@ModelAttribute
public void queryStudentById(Map<String,Object> map) {
	// StudentService stuService = new StudentService();
	// Student student = stuService.queryStudentById(23);
	Student student = new Student();
	student.setId(33);
	student.setName("ls");
	// 约定:map的key就是 方法参数 类型的首字母小写
	// map.put("student", student);
	map.put("stu",student);
}

@RequestMapping(value="testModelAttribute")
public String testModelAttribute(@ModelAttribute("stu") Student student) {
	student.setName("小红书");
	System.out.println(student);
	return "success";
}
小结:
通过@ModelAttribute修饰的方法,会在每次请求前先执行;
并且该方法的参数map.put()可以将 对象放入即将查询的参数中;
必须满足的约定:
map.put(k, v) 其中的k, 必须是即将查询的方法参数的首字母小写
testModelAttribute(Student xxx), 即student;
十、国际化
- 视图, 视图解析器
<!-- 视图解析器 -->
<bean class="org.springframework.web.servlet.view.InternalResourceViewResolver">
	<property name="prefix" value="/views/"></property>
	<property name="suffix" value=".jsp"></property>
</bean>
常见的视图和解析器:
InternalResourceView, InternalResourceViewResolver
public class JstlView extends InternalResourceView:
springMVC解析jsp时,会默认使用InternalResourceView, 如果发现jsp中包含了jstl语言,则自动转为JstlView
- 实现国际化
JstlView 可以解析jstl,实现国际化操作
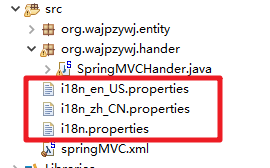
1. 创建资源文件
格式: 基名_语言_地区.properties
基名_语言.properties
2. 配置springMVC.xml, 加载资源文件
<!-- 加载国际化资源文件 -->
<bean id="messageSource" class="org.springframework.context.support.ResourceBundleMessageSource">
	<property name="basename" value="i18n"></property>
</bean>
重点:
- 将ResourceBundleMessageSource在程序加载:springMvc:springMVC 在启动时,会自动查找一个 id=“messageSource” 的bean, 如果有,则自动加载;
- 如果配置了ResourceBundleMessageSource, 则该类会在程序响应时介入
- 将以i18n开头的所有文件都加载。
3. 通过jstl使用国际化
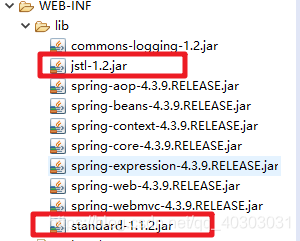
- jar包:
jstl.jar
standard.jar
- 控制层,一定经过控制层,才能加载到id=“messageSource” 的bean
@RequestMapping(value="testI18n")
public String testI18n() {
	return "success";
}
- 写properties文件,需要以配置中写道的value值开头的文件,此处是i18n开头的文件
跟据不同的名字写上不同的值:
resource.welcome=\u6B22\u8FCE
resource.exist=\u9000\u51FA
- 视图层
引入标签:是jstl的fmt标签,不要弄错了
<%@taglib uri="http://java.sun.com/jsp/jstl/fmt" prefix="fmt"%>
<fmt:message key="resource.welcome"></fmt:message><br>
<fmt:message key="resource.exist"></fmt:message>
十一、视图解析器 其他功能
正常流程:
index.jsp => Controller(@RequestMapping) => succes.jsp
要用SpringMVC实现:
index.jsp => success.jsp:
如何实现,不经过控制层,跳转页面?
答:只需配置上一下的话,即可进行跳转
第一步:
<!-- view-name会被视图解析器加上前缀和后缀 -->
<mvc:view-controller path="rest/testMvcViewController" view-name="success"/>
问题:以上注解,会让所有的请求 转入<mvc:..>中匹配映射地址,而会忽略调用@RequestMapping();
如果想要@RequestMapping(“a”)和mvc:.. 共存,则需要加入一个注解:
第二步:
<!-- 此注解是mvc基础配置,很多功能都需要该注解来协调 -->
<mvc:annotation-driven></mvc:annotation-driven>
十二、在Controller中使用redirect方式处理请求
指定跳转方式:
return “forward:/views/success.jsp”;
return “redirect:/views/success.jsp”;
需要注意:
- 此种方式不会被视图解析器加上前缀和后缀。
- 默认是转发,
- forward是转发,redirect是重定向
十三、静态资源访问
在springMvc中, 如果直接访问静态资源:404.
原因:
所有的请求 通过通配符"/" 拦截,进而交给springMVC的入口DispatcherServlet去处理:
找该请求映射对应的@RequestMapping
http://localhost:8888/SpringMVCProject/img.png
@RequestMapping(“img.png”)
没有对应的@RequestMapping(“img.png”);从而报错
解决:
- 交给springMVC的@RequestMapping(“img.png”)处理。 // 自行处理
- 不用sprignMVC处理,则使用tomcat默认的Servlet去处理
servlet怎么处理?
如果有对应的请求拦截,则交给相应的Servlet去处理;如果没有对应的servlet,则直接访问。
tomcat默认的Servlet在哪里?在tomcat配置文件\conf\web.xml中
终极实现方案:只需要增加两个配置即可
<!-- 该注解会让springMVC,接收一个请求,并且该请求没有对应的@RequestMapping的时候,将该请求交给服务器默认的servlet去处理(直接访问) -->
<mvc:default-servlet-handler/>

<!-- 此注解是mvc基础配置,很多功能都需要该注解来协调 -->
<mvc:annotation-driven></mvc:annotation-driven>
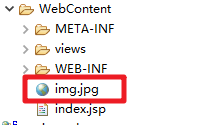
直接访问图片,不需要重启服务,图片放在WebContent文件下面。
十四、类型转换
- spring自带一些 常见的类型转换器:
public String testDelete(@PathVariable(“id”) String id),
即可以接受int类型数据id, 也可以接受String类型数据
- 可以自定义类型转换器
2.1. 编写自定义类型转换器的类(实现Converter接口)
package org.wajpzywj.conterver;

import org.springframework.core.convert.converter.Converter;
import org.wajpzywj.entity.Student;

public class MyConverter implements Converter<String, Student>{

	@Override
	public Student convert(String source) {
		String[] studentStrArr = source.split("-");
		Student student = new Student();
		student.setId(Integer.valueOf(studentStrArr[0]));
		student.setName(studentStrArr[1]);
		return student;
	}
}
2.2. 将转换器MyConverter配置到springMVC中去
<!-- 1. 将自定义转换器纳入SpringIOC容器 -->
<bean id="myConverter" class="org.wajpzywj.conterver.MyConverter"></bean>
<!-- 2. 将myConverter再纳入SpringMVC提供的转换器Bean -->
<bean id="conversionService" class="org.springframework.context.support.ConversionServiceFactoryBean">
	<property name="converters">
		<set>
			<ref bean="myConverter"/>
		</set>
	</property>
</bean>
<!-- 3. 将conversionService注册到annotation-driven中 -->
<!-- 此注解是mvc基础配置,很多功能都需要该注解来协调 -->
<mvc:annotation-driven conversion-service="conversionService"></mvc:annotation-driven>
2.3. 测试转换器
前端index.jsp代码:
<form action="rest/testConverter" method="post">
	student-infos:<input type="text" name="studentInfo">
	<input type="submit" value="converter"/>
</form>
控制层
@RequestMapping(value="testConverter")
public String testConverter(@RequestParam("studentInfo")Student student) { // 前段:44-zs
	System.out.println(student);
	return "redirect:/views/success.jsp";
}
实现原理:
其中@RequestParam(“studentInfo”)是触发转换器的桥梁
@RequestParam(“studentInfo”)接收的数据 是前段传递过来的:23-lisi;
但是需要将该数据复制给修饰的目的对象Student; 因此SpringMVC 可以发现接受的数据和目标数据不一致,并且这两种数据分别是String,Student, 正好符合public Student myconvert(String source)转换器
3. 数据格式化:日期格式
SimpleDateFormat sdf = new SimpleDateFormat("yyyy-MM-dd hh:mm:ss")
3.1 配置
<!-- 配置数据格式化 注解 所依赖的bean -->
<bean id="ConversionService" class="org.springframework.format.support.FormattingConversionServiceFactoryBean"></bean>
3.2 在类属性上加上注解
@NumberFormat(pattern="###,#")
private int id;

// 格式化前端传递来的数据,将前端传递来的数据固定为yyyy-MM-dd
@DateTimeFormat(pattern="yyyy-MM-dd")
3.3 写index.jsp页面
<form action="rest/testDateTimeFormat" method="post">
	id:<input type="text" name="id" value="32">
	name:<input type="text" name="name">
	birthday:<input type="text" name="birthday">
	<input type="submit" value="format"/>
</form>
<br>
3.4 写控制层
@RequestMapping(value="testDateTimeFormat")// 如果格式化错误,会将错误的信息传入result
public String testDateTimeFormat(Student student, BindingResult result) {
	System.out.println(student);
	if(result.getErrorCount() > 0) {
		for(FieldError error : result.getFieldErrors()) {
			System.out.println(error.getDefaultMessage());
		}
	}
	return "redirect:/views/success.jsp";
}
注意:
- BindingResult 是第二参数,当格式化错误的时候,自动将错误传入此参数,
- BindingResult 可以没有不写
重点
观察一下代码:
<!-- 1. 将自定义转换器纳入SpringIOC容器 -->
<bean id="myConverter" class="org.wajpzywj.conterver.MyConverter"></bean>
<!-- 2. 将myConverter再纳入SpringMVC提供的转换器Bean -->
<bean id="conversionService" class="org.springframework.context.support.ConversionServiceFactoryBean">
	<property name="converters">
		<set>
			<ref bean="myConverter"/>
		</set>
	</property>
</bean>
<!-- 3. 将conversionService注册到annotation-driven中 -->
<!-- 此注解是mvc基础配置,很多功能都需要该注解来协调 -->
<mvc:annotation-driven conversion-service="conversionService"></mvc:annotation-driven>

<!-- 配置数据格式化 注解 所依赖的bean -->
<bean id="ConversionService" class="org.springframework.format.support.FormattingConversionServiceFactoryBean"></bean>
FormattingConversionServiceFactoryBean既能实现格式化,又可以实现类型转换,可以完全替代ConversionServiceFactoryBean
<!-- FormattingConversionServiceFactoryBean既能实现格式化,又可以实现类型转换,可以完全替代ConversionServiceFactoryBean -->
<bean id="conversionService" class="org.springframework.format.support.FormattingConversionServiceFactoryBean"></bean>
<bean id="conversionService" class="org.springframework.context.support.ConversionServiceFactoryBean"></bean>
可以写成这样:
<!-- 1. 将自定义转换器纳入SpringIOC容器 -->
<bean id="myConverter" class="org.wajpzywj.conterver.MyConverter"></bean>
<!-- 2. 将myConverter再纳入SpringMVC提供的转换器Bean -->
<bean id="conversionService" class="org.springframework.format.support.FormattingConversionServiceFactoryBean">
	<property name="converters">
		<set>
			<ref bean="myConverter"/>
		</set>
	</property>
</bean>
<!-- 3. 将conversionService注册到annotation-driven中 -->
<!-- 此注解是mvc基础配置,很多功能都需要该注解来协调 -->
<mvc:annotation-driven conversion-service="conversionService"></mvc:annotation-driven>
以上例子将错误信息打印在控制台,怎么将错误信息显示在前台?
思路:如果要将控制台的错误消息 传到jsp中显示,则可以将错误消息对象放入request域中,然后再jsp中,从request域中获取
- 修改控制层: 注意BindingResult只能放在修饰的对象后面,否则报错
@RequestMapping(value="testDateTimeFormat")// 如果格式化错误,会将错误的信息传入result
public String testDateTimeFormat(Student student, BindingResult result, Map<String,Object> map) {
	System.out.println(student);
	if(result.getErrorCount() > 0) {
		// 将错误信息放到request作用域里面,让前台可以取到
		map.put("errors", result.getFieldErrors());
		for(FieldError error : result.getFieldErrors()) {
			System.out.println(error.getDefaultMessage());
		}
	}
	return "success";
}
- 修改success.jsp页面
<%@taglib uri="http://java.sun.com/jsp/jstl/core" prefix="c"%>
<c:forEach items="${requestScope.errors}" var="error">
	${error.getDefaultMessage()}
</c:forEach>
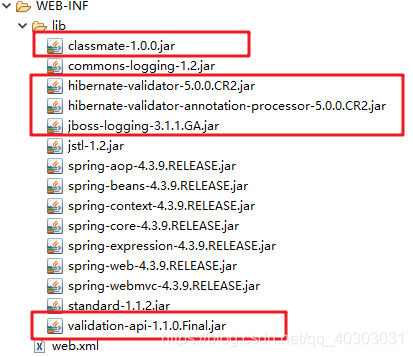
十五、表单的验证(使用Hibernate-validate)
Hibernate-validate 是JSR303的扩展,包含JSR303的所有功能,并且有其他新添加的功能
- jar包
hibernate-validator.jar
classmate.jar
jboss-logging.jar
validatetion-api.jar
hibernate-validator-annotation-processor.jar
注意版本问题:
版本问题可能不兼容,出现错误,可以参考:https://lanqiao.coding.me/springmvc框架/SpringMVC-lesson27
- 配置:
<mvc:annotation-driven></mvc:annotation-driven>
作用:
- 要实现Hibernate Validator/JSR303校验(或者其他各种校验), 必须实现接口:ValidatorFactory
- LocalValidatorFactoryBean是ValidatorFactory的一个实现类。
<mvc:annotation-driven></mvc:annotation-driven>会在springMVC容器中 自动加载一个LocalValidatorFactoryBean类,可以直接实现数据校验。
- 使用
- 在属性前面加上注解
- 在校验的Controller中,给校验的对象前增加 @Valid
例子:
- 创建user类。
package org.wajpzywj.entity;

import java.util.Date;

import javax.validation.constraints.Past;

import org.hibernate.validator.constraints.NotEmpty;
import org.springframework.format.annotation.DateTimeFormat;

public class User {
	private int id;
    @NotEmpty
    private String name;

    @Past
    @DateTimeFormat(pattern="yyyy-MM-dd")
    private Date birth;

	public int getId() {
        return id;
    }
    public void setId(int id) {
        this.id = id;
    }
    public String getName() {
        return name;
    }
    public void setName(String name) {
        this.name = name;
    }
    public Date getBirth() {
        return birth;
    }
    public void setBirth(Date birth) {
        this.birth = birth;
    }
    @Override
    public String toString() {
        return "User [id=" + id + ", name=" + name + ", birth=" + birth + "]";
    }

}
- 前端:index.jsp
<form action="form/add" method="post">
	id:<input type="text" name="id" value="32">
	name:<input type="text" name="name">
	birthday:<input type="text" name="birth">
	<input type="submit" value="format"/>
</form>
- 控制层
package org.wajpzywj.hander;

import java.util.Map;

import javax.validation.Valid;

import org.springframework.stereotype.Controller;
import org.springframework.validation.BindingResult;
import org.springframework.validation.FieldError;
import org.springframework.web.bind.annotation.RequestMapping;
import org.springframework.web.bind.annotation.RequestMethod;
import org.wajpzywj.entity.User;

@Controller
@RequestMapping("/form")
public class formController {
    @RequestMapping(value="add",method=RequestMethod.POST)
    public String add(@Valid User u,BindingResult result, Map<String,Object> map){
    	System.out.println(u);
        if(result.getErrorCount()>0){
        	for(FieldError error : result.getFieldErrors()) {
				System.out.println(error.getDefaultMessage());
				map.put("errors", result.getFieldErrors());
			}
        }
        return "forward:/views/success.jsp";
    }

}
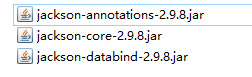
十六、使用Ajax调用
- jar包
jackson-annotations.jar
jackson-core.jar
jackson-databind.jar
注意版本要一致
2. 控制层
// 告诉springMVC, 此时返回的不是一个View页面,而是一个ajax调用的返回值
@ResponseBody
@RequestMapping(value="testJson")
public List<Student> testJson() {
	System.out.println(123);
	Student stu1 = new Student(1,"zhangsan");
	Student stu2 = new Student(2,"lisi");
	Student stu3 = new Student(3,"wangwu");
	List<Student> students = new ArrayList<>();
	students.add(stu1);
	students.add(stu2);
	students.add(stu3);
	return students;
}
- 前端 ajax 调用
<script type="text/javascript" src="js/jquery-3.3.1.js"></script>
<script type="text/javascript">
$(document).ready(function(){
	 $("#testJson").click(function(){
		 alert("22");
		 // 通过ajax请求springMVC
		 $.post(
			// 服务器地址
			"rest/testJson", //服务器地址
			function(result){ // 服务端处理完毕后的回调函数LIst<Student> students,
			// 加上@ResponseBody后, students实质是一个json数组的格式
				for(var i=0;i<result.length;i++){
					alert(result[i].id +"---"+ result[i].name);
				}
			}
		 );
	 });
});
</script>

<input type="button" value="testJson" id="testJson"/>
十七、文件上传
链接:https://lanqiao.coding.me/springmvc框架/SpringMVC-lesson30
链接:https://www.cnblogs.com/fjsnail/p/3491033.html
本质:和servlet一样
springMVC可以简化文件上传的代码,但是必须满足条件:
实现MultipartResolver接口
该接口的实现类springMvc已经提供了CommonsMultipartResolver
(直接使用CommonsMultipartResolver实现上传)
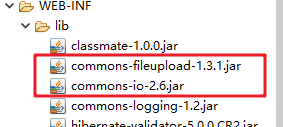
- jar包
commons-fileupload.jar
commons-io.jar
2. 配置 CommonsMultipartResolver
<!-- 配置CommonsMultipartResolver,实现文件上传,springIOC容器初始化的时候,会自动查找id=multipartResolver的bean,并加入ioc容器中 -->
<bean id="multipartResolver" class="org.springframework.web.multipart.commons.CommonsMultipartResolver">
	<property name="defaultEncoding" value="UTF-8"></property>
	<property name="maxUploadSize" value="10240000"></property>
</bean>
- 控制层
@RequestMapping(value="testFileUpload")
public String testFileUpload(@RequestParam("desc") String desc, @RequestParam("file") MultipartFile file) throws IOException {// student属性必须和form表单中的属性name值一致(支持级联属性)
	System.out.println("文件的描述信息:"+desc);
	// jsp中上传的文件:file
	InputStream input = file.getInputStream();
	String fileName = file.getOriginalFilename();
	OutputStream output = new FileOutputStream("C:\\E\\"+fileName);
	int len=0;
	byte[]arr=new byte[1024];
	while((len=input.read(arr)) != -1) {
		output.write(arr, 0, len);
	}
	output.close();
	input.close();
	// 将file上传到服务器中的某一个硬盘文件中。
	return "success";
}
- 前端jsp
<form action="rest/testFileUpload" method="POST" enctype="multipart/form-data">
	 文件: <input type="file" name="file"/>
	  描述: <input type="text" name="desc"/>
	  <input type="submit" value="Submit"/>
</form>
十八、设置一个自定义拦截器
- 创建一个MyInterceptor类,并实现HandlerInterceptor接口
package org.wajpzywj.interceptor;

import javax.servlet.http.HttpServletRequest;
import javax.servlet.http.HttpServletResponse;

import org.springframework.web.servlet.HandlerInterceptor;
import org.springframework.web.servlet.ModelAndView;

public class MyIntercepter implements HandlerInterceptor{

	@Override
	public boolean preHandle(HttpServletRequest request, HttpServletResponse response, Object handler)
			throws Exception {
		System.out.println("拦截请求");
		// true 拦截之后放行,false拦截之后不放行
		return true;
	}

	@Override
	public void postHandle(HttpServletRequest request, HttpServletResponse response, Object handler,
			ModelAndView modelAndView) throws Exception {
		System.out.println("拦截相应");
	}

	@Override
	public void afterCompletion(HttpServletRequest request, HttpServletResponse response, Object handler, Exception ex)
			throws Exception {
		System.out.println("视图(jsp)被渲染完毕");
	}
}
- 在SpringMVC的配置文件中配置
<!-- 将自己写的拦截器配置到springMvc中 -->
<mvc:interceptors>
	<!-- 配置具体的拦截路径 -->
	<mvc:interceptor>
		<!-- 指定拦截路径,可以使用ant风格 -->
		<mvc:mapping path="/**"/>
		<!-- 指定不拦截的路径 -->
		<mvc:exclude-mapping path="/rest/testFileUpload"/>
		<bean class="org.wajpzywj.interceptor.MyIntercepter"></bean>
	</mvc:interceptor>
</mvc:interceptors>
也可以拦截所有请求:
<!-- 将自己写的拦截器配置到springMvc中,默认拦截所有请求 -->
<mvc:interceptors>
	<bean class="org.wajpzywj.interceptor.MyIntercepter"></bean>
</mvc:interceptors>
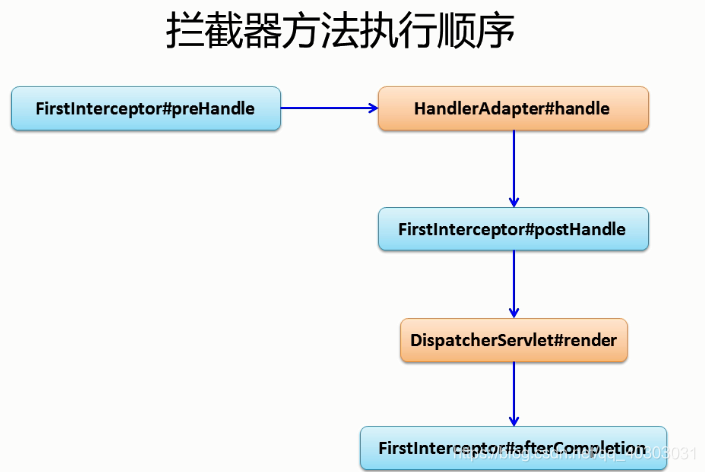
- 拦截器执行顺序
十九、异常的处理
链接:https://lanqiao.coding.me/springmvc框架/SpringMVC-lesson31
1. 处理局部异常(Controller内)
package org.wajpzywj.hander;

import org.springframework.stereotype.Controller;
import org.springframework.web.bind.annotation.ExceptionHandler;
import org.springframework.web.bind.annotation.RequestMapping;
import org.springframework.web.servlet.ModelAndView;

@Controller
@RequestMapping("second")
public class SecondSpringMVCHandler {
	@RequestMapping("testExceptionHandler")
	public String testExceptionHandler() {
		System.out.println(1/0);
		return "success";
	}

	// 该方法可以捕获本类中出现的 一些异常,放入到requestScope域中,
	@ExceptionHandler({ArithmeticException.class, ArrayIndexOutOfBoundsException.class})
	public ModelAndView handlerArithmeticException(Exception e) {
		ModelAndView mv = new ModelAndView("error");
        mv.addObject("exception", e);
		System.out.println(e);
		return mv;
	}

}
- 处理全局异常(所有Controller)
package org.wajpzywj.hander;

import org.springframework.web.bind.annotation.ControllerAdvice;
import org.springframework.web.bind.annotation.ExceptionHandler;
import org.springframework.web.servlet.ModelAndView;

@ControllerAdvice
public class testControllerAdvice {

	@ExceptionHandler
    public ModelAndView exceptionHandler(Exception ex){
        ModelAndView mv = new ModelAndView("error");
        mv.addObject("exception", ex);
        System.out.println("in testControllerAdvice");
        return mv;
    }

}
- 另一种处理全局异常的方法
在SpringMVC配置文件中配置
<!-- SimpleMappingExceptionResolver配置的方式处理异常 -->
<bean class="org.springframework.web.servlet.handler.SimpleMappingExceptionResolver">
	<!-- 如果发生异常,异常对象会保存在exceptionAttribute的value中 ,并且会放在requestScope域中-->
	<property name="exceptionAttribute" value="e"></property>
       <property name="exceptionMappings">
           <props>
               <prop key="java.lang.ArithmeticException">error</prop>
               <prop key="java.lang.ArrayIndexOutOfBoundsException">error</prop>
           </props>
       </property>
   </bean>


 784
784

 被折叠的 条评论
为什么被折叠?
被折叠的 条评论
为什么被折叠?
 到【灌水乐园】发言


