


Albumentations 在计算机视觉的图像增强中使用频率很高,无论是分类人物、语义分割人物、目标检测任务等等都很常用。但是由于变换方法较多,没有一个十分直观的可视化来观看变换以后的结果。
以下内容由 Featurize 的 Dave 同学整理出来方便大家查询。
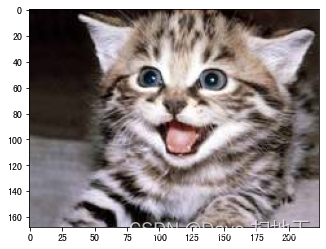
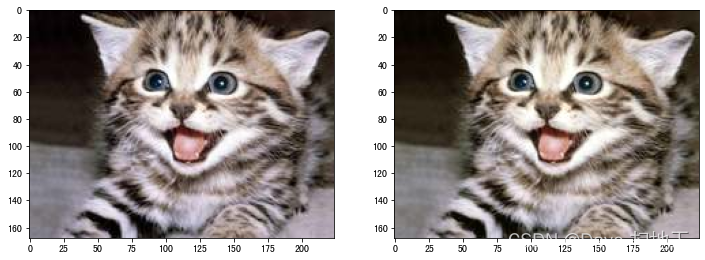
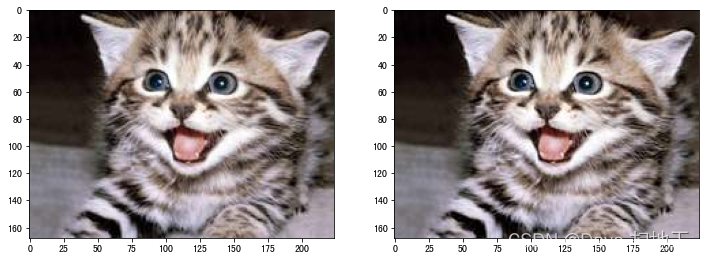
原图
import cv2
import albumentations as A
import matplotlib.pyplot as plt
img = cv2.cvtColor(cv2.imread('kitten_small.jpg'), cv2.COLOR_BGR2RGB)
plt.imshow(img);
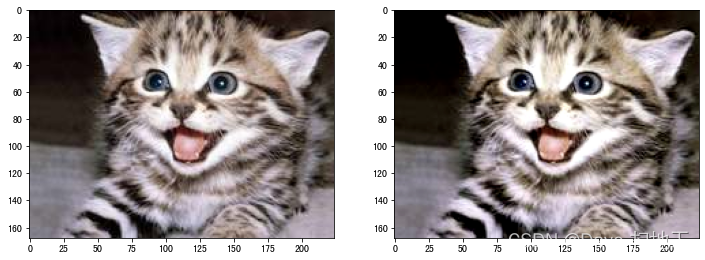
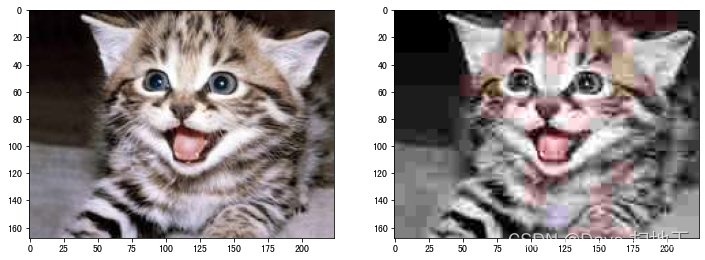
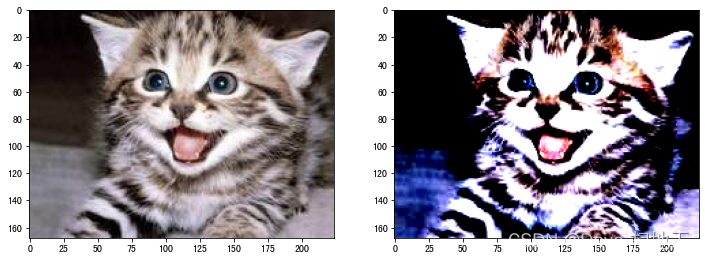
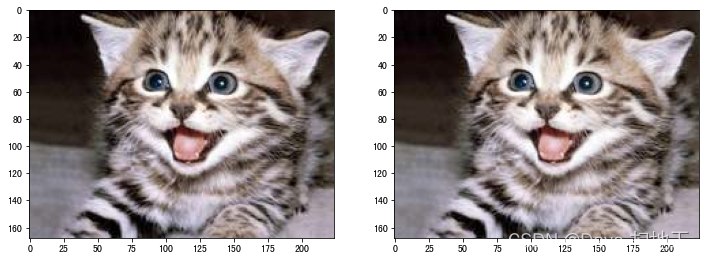
AdvancedBlur
使用随机选择参数的广义法线滤波器对输入图像进行模糊处理。这种变换还在卷积之前向生成的内核添加了乘法噪声。
f, ax = plt.subplots(1,2, figsize=(12, 12))
ax[0].imshow(img);
ax[1].imshow(A.AdvancedBlur(p=1)(image=img)['image']);

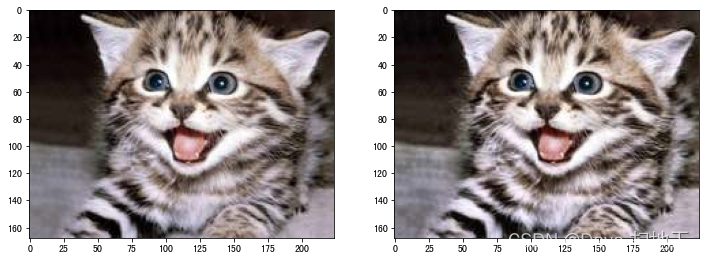
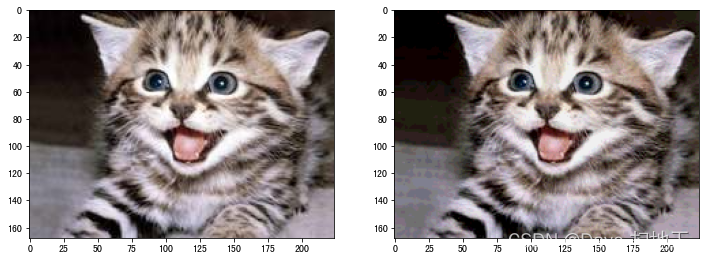
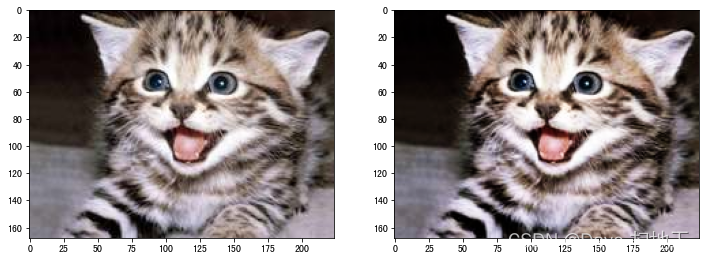
Blur
使用一个随机大小的内核对输入图像进行模糊处理。
f, ax = plt.subplots(1,2, figsize=(12, 12))
ax[0].imshow(img);
ax[1].imshow(A.Blur(p=1)(image=img)['image']);

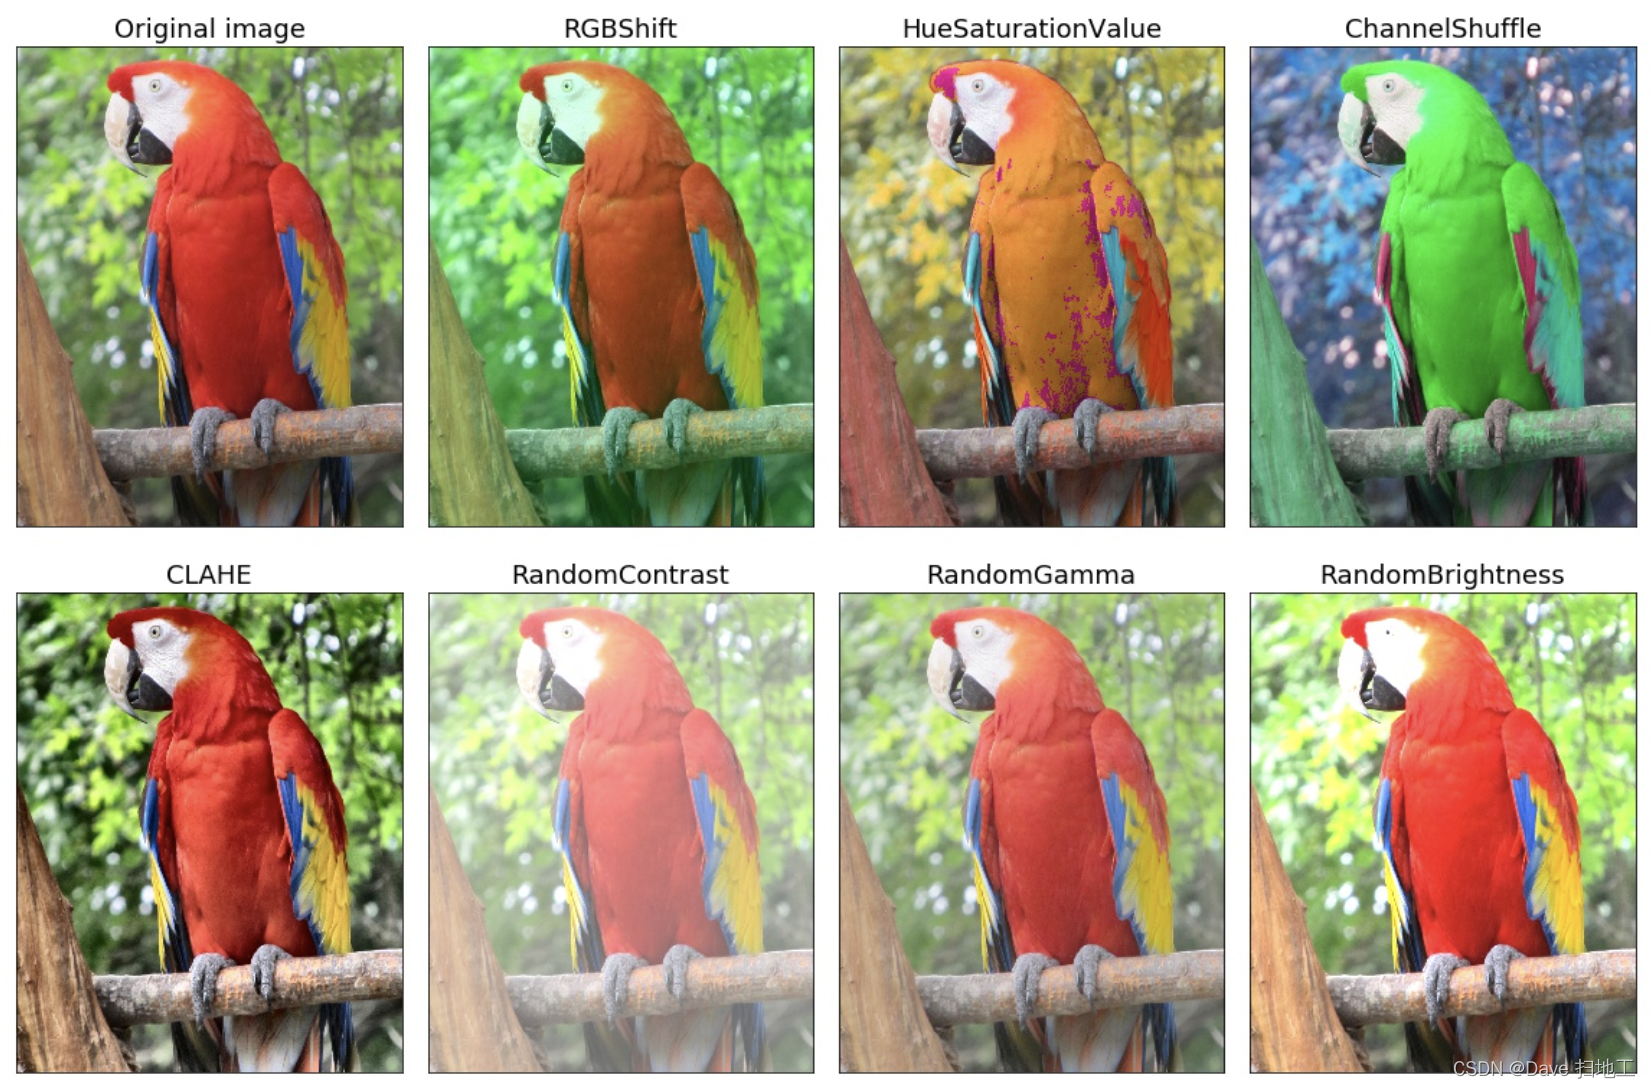
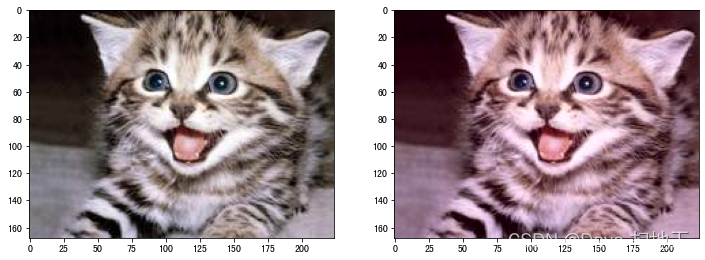
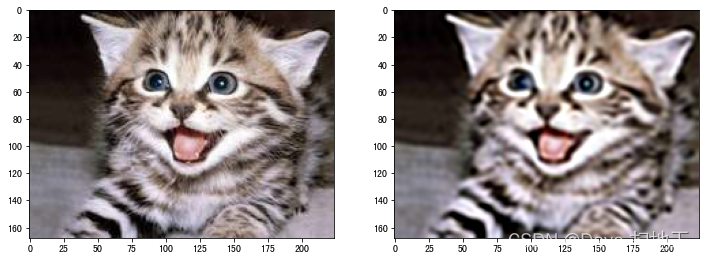
CLAHE
对输入图像应用对比度有限的自适应直方图均衡化。
f, ax = plt.subplots(1,2, figsize=(12, 12))
ax[0].imshow(img);
ax[1].imshow(A.CLAHE(p=1)(image=img)['image']);
ChannelDropout
随机删除输入图像中的通道。
f, ax = plt.subplots(1,2, figsize=(12, 12))
ax[0].imshow(img);
ax[1].imshow(A.ChannelDropout(p=1)(image=img)['image']);
ChannelShuffle
随机地重新排列输入的RGB图像的通道。
f, ax = plt.subplots(1,2, figsize=(12, 12))
ax[0].imshow(img);
ax[1].imshow(A.ChannelShuffle(p=1)(image=img)['image']);

ColorJitter
随机改变图像的亮度、对比度和饱和度。与来自torchvision的ColorJitter相比,这种变换给出的结果有点不同,因为Pillow(用于torchvision)和OpenCV(用于Albumentations)通过不同的公式将图像转换为HSV格式。另一个区别是–Pillow使用uint8溢出,而我们使用值饱和度。
f, ax = plt.subplots(1,2, figsize=(12, 12))
ax[0].imshow(img);
ax[1].imshow(A.ColorJitter(p=1)(image=img)['image']);
Defocus
应用散焦变换。详情见 https://arxiv.org/abs/1903.12261。
f, ax = plt.subplots(1,2, figsize=(12, 12))
ax[0].imshow(img);
ax[1].imshow(A.Defocus(p=1)(image=img)['image']);

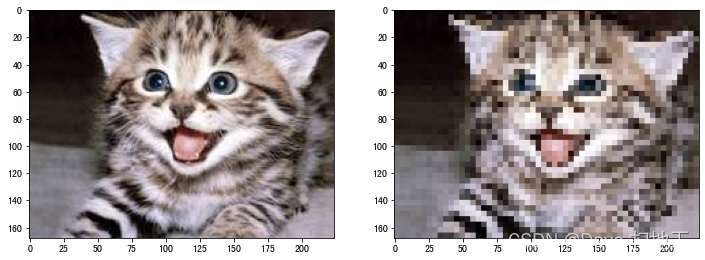
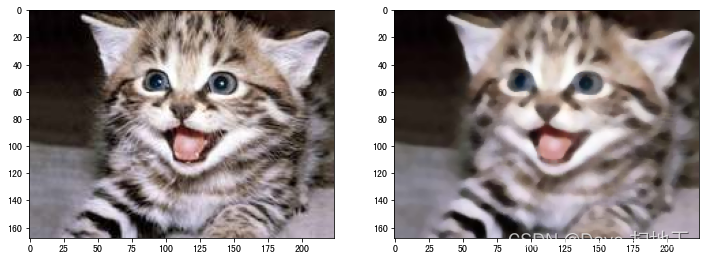
Downscale
通过降频和升频回放降低图像质量。
f, ax = plt.subplots(1,2, figsize=(12, 12))
ax[0].imshow(img);
ax[1].imshow(A.Downscale(p=1)(image=img)['image']);
Emboss
对输入的图像进行压印,并将结果与原始图像叠加。
f, ax = plt.subplots(1,2, figsize=(12, 12))
ax[0].imshow(img);
ax[1].imshow(A.Emboss(p=1)(image=img)['image']);
Equalize
对图像直方图进行均衡化处理
f, ax = plt.subplots(1,2, figsize=(12, 12))
ax[0].imshow(img);
ax[1].imshow(A.Equalize(p=1)(image=img)['image']);
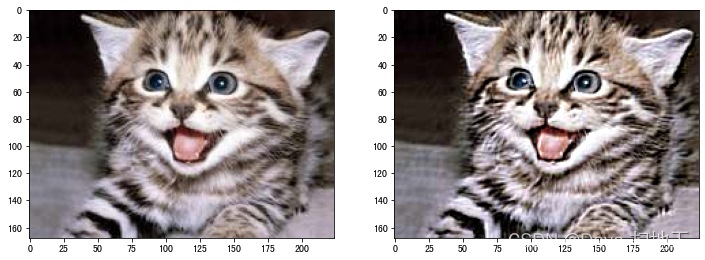
FancyPCA
使用Krizhevsky的论文 ImageNet Classification with Deep Convolutional
Neural Networks 中的FancyPCA增强RGB图像。
f, ax = plt.subplots(1,2, figsize=(12, 12))
ax[0].imshow(img);
ax[1].imshow(A.FancyPCA(p=1)(image=img)['image']);
GaussNoise
对输入图像施加高斯噪声。
f, ax = plt.subplots(1,2, figsize=(12, 12))
ax[0].imshow(img);
ax[1].imshow(A.GaussNoise(p=1)(image=img)['image']);

GaussianBlur
使用具有随机核大小的高斯滤波器模糊输入图像。
f, ax = plt.subplots(1,2, figsize=(12, 12))
ax[0].imshow(img);
ax[1].imshow(A.GaussianBlur(p=1)(image=img)['image']);

GlassBlur
对输入图像施加玻璃噪音。
f, ax = plt.subplots(1,2, figsize=(12, 12))
ax[0].imshow(img);
ax[1].imshow(A.GlassBlur(p=1)(image=img)['image']);
HueSaturationValue
随机改变输入图像的色调、饱和度和数值。
f, ax = plt.subplots(1,2, figsize=(12, 12))
ax[0].imshow(img);
ax[1].imshow(A.HueSaturationValue(p=1)(image=img)['image']);
ISONoise
应用相机传感器噪音。
f, ax = plt.subplots(1,2, figsize=(12, 12))
ax[0].imshow(img);
ax[1].imshow(A.ISONoise(p=1)(image=img)['image']);
ImageCompression
减少图像的Jpeg、WebP压缩。
f, ax = plt.subplots(1,2, figsize=(12, 12))
ax[0].imshow(img);
ax[1].imshow(A.ImageCompression(quality_lower=0, p=1)(image=img)['image']);
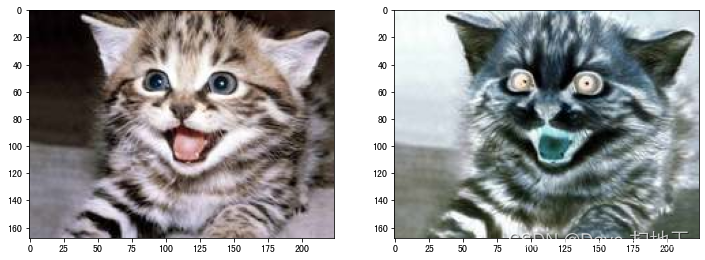
InvertImg
通过从255减去像素值来反转输入图像。
f, ax = plt.subplots(1,2, figsize=(12, 12))
ax[0].imshow(img);
ax[1].imshow(A.InvertImg(p=1)(image=img)['image']);
MedianBlur
通过从255减去像素值来反转输入图像。
f, ax = plt.subplots(1,2, figsize=(12, 12))
ax[0].imshow(img);
ax[1].imshow(A.MedianBlur(p=1)(image=img)['image']);
MotionBlur
使用一个随机大小的核对输入图像进行运动模糊处理。
f, ax = plt.subplots(1,2, figsize=(12, 12))
ax[0].imshow(img);
ax[1].imshow(A.MotionBlur(p=1)(image=img)['image']);

MultiplicativeNoise
将图像与随机数或数组相乘。
f, ax = plt.subplots(1,2, figsize=(12, 12))
ax[0].imshow(img);
ax[1].imshow(A.MultiplicativeNoise(p=1)(image=img)['image']);
Normalize
归一化的应用公式为:img = (img - mean * max_pixel_value) / (std * max_pixel_value)
f, ax = plt.subplots(1,2, figsize=(12, 12))
ax[0].imshow(img);
ax[1].imshow(A.Normalize(p=1)(image=img)['image']);
Posterize
减少每个颜色通道的比特数。
f, ax = plt.subplots(1,2, figsize=(12, 12))
ax[0].imshow(img);
ax[1].imshow(A.Posterize(p=1)(image=img)['image']);
RGBShift
对输入的RGB图像的每个通道进行随机移值。
f, ax = plt.subplots(1,2, figsize=(12, 12))
ax[0].imshow(img);
ax[1].imshow(A.RGBShift(p=1)(image=img)['image']);
RandomBrightnessContrast
随机改变输入图像的亮度和对比度。
f, ax = plt.subplots(1,2, figsize=(12, 12))
ax[0].imshow(img);
ax[1].imshow(A.RandomBrightnessContrast(p=1)(image=img)['image']);
RandomGamma
随机 Gamma 变换
f, ax = plt.subplots(1,2, figsize=(12, 12))
ax[0].imshow(img);
ax[1].imshow(A.RandomGamma(p=1)(image=img)['image']);
RandomToneCurve
通过操纵图像的色调曲线,随机改变图像的亮部和暗部之间的关系。
f, ax = plt.subplots(1,2, figsize=(12, 12))
ax[0].imshow(img);
ax[1].imshow(A.RandomToneCurve(p=1)(image=img)['image']);
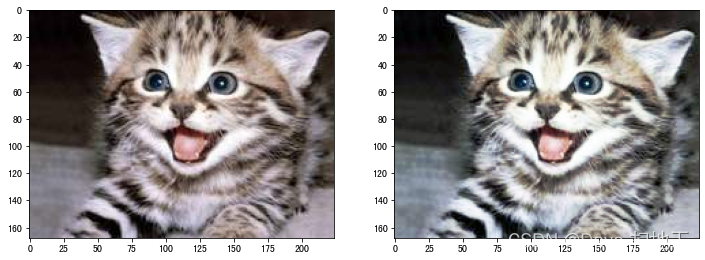
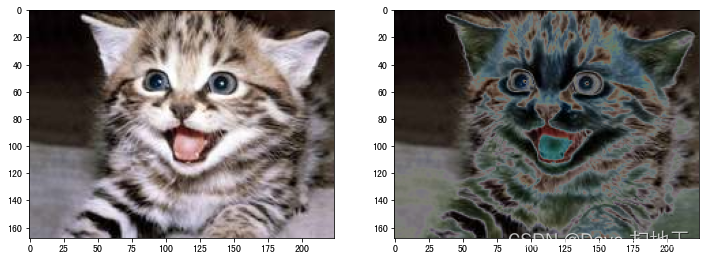
RingingOvershoot
通过用二维sinc滤波器对图像进行卷积,产生振铃或过冲的伪影。
f, ax = plt.subplots(1,2, figsize=(12, 12))
ax[0].imshow(img);
ax[1].imshow(A.RingingOvershoot(p=1)(image=img)['image']);
Sharpen
锐化输入图像并将结果与原始图像重叠。
f, ax = plt.subplots(1,2, figsize=(12, 12))
ax[0].imshow(img);
ax[1].imshow(A.Sharpen(p=1)(image=img)['image']);
Solarize
反转所有超过阈值的像素值。
f, ax = plt.subplots(1,2, figsize=(12, 12))
ax[0].imshow(img);
ax[1].imshow(A.Solarize(p=1)(image=img)['image']);
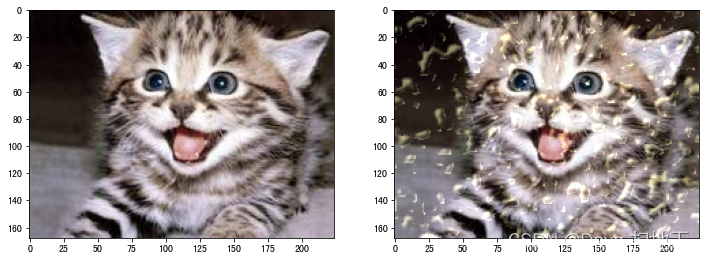
Spatter
应用飞溅变换,它模拟以雨或泥的形式遮蔽镜头。
f, ax = plt.subplots(1,2, figsize=(12, 12))
ax[0].imshow(img);
ax[1].imshow(A.Spatter(p=1)(image=img)['image']);
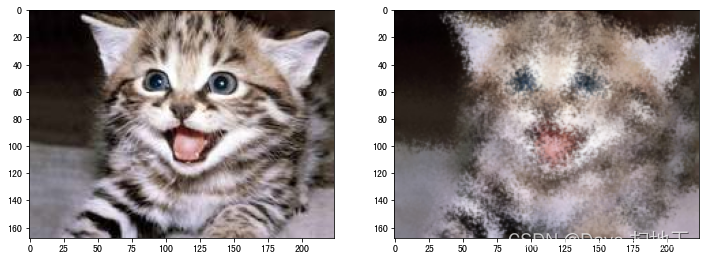
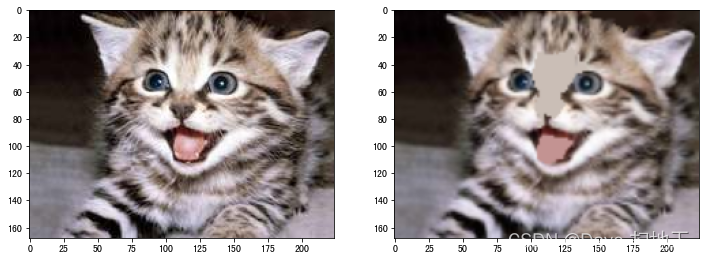
Superpixels
将图像部分/完全转换为其超级像素表示。这个实现使用skimage的SLIC算法的版本。
f, ax = plt.subplots(1,2, figsize=(12, 12))
ax[0].imshow(img);
ax[1].imshow(A.Superpixels(p=1)(image=img)['image']);
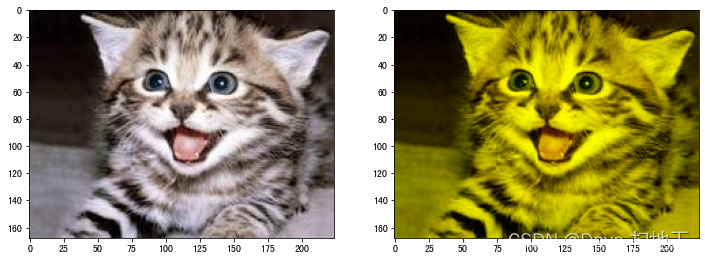
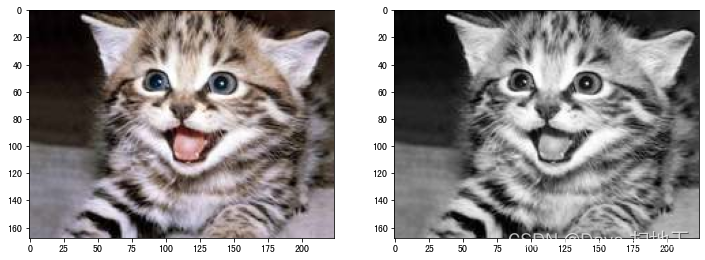
ToGray
将图像转换成灰度
f, ax = plt.subplots(1,2, figsize=(12, 12))
ax[0].imshow(img);
ax[1].imshow(A.ToGray(p=1)(image=img)['image']);
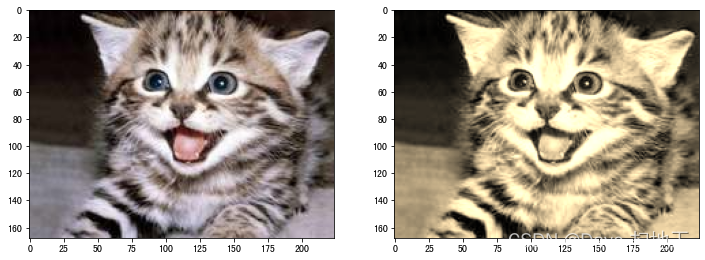
ToSepia
对输入的RGB图像应用棕褐色过滤器
f, ax = plt.subplots(1,2, figsize=(12, 12))
ax[0].imshow(img);
ax[1].imshow(A.ToSepia(p=1)(image=img)['image']);
UnsharpMask
使用非透明遮蔽处理对输入图像进行锐化,并将结果与原始图像重叠。
f, ax = plt.subplots(1,2, figsize=(12, 12))
ax[0].imshow(img);
ax[1].imshow(A.UnsharpMask(p=1)(image=img)['image']);
ZoomBlur
应用变焦模糊变换。 详情见 https://arxiv.org/abs/1903.12261.
f, ax = plt.subplots(1,2, figsize=(12, 12))
ax[0].imshow(img);
ax[1].imshow(A.ZoomBlur(p=1)(image=img)['image']);


 2205
2205

 被折叠的 条评论
为什么被折叠?
被折叠的 条评论
为什么被折叠?
 到【灌水乐园】发言


