


我自己最后的demo效果图

前言
本文只是我的一个demo,只列举了我用到的一些功能,完整功能可以参考官方文档https://github.com/nhn/tui.calendar/blob/main/docs/en/apis/calendar.md#setdate
安装
#tui.calendar包
npm install --save @toast-ui/calendar
#因为calendar中默认使用了时间组件这里引入一下
npm install tui-date-picker
npm install tui-time-picker
#demo中用到uuid生成id
npm install uuid
使用
1.定义一个div,用来渲染日历
<div id="calendar" style="height: 90%"></div>
2.定义初始化配置
const options = {}
options可配置如下key:
-
defaultView:string:日历维度
- month:日历展示为月维度
- week:日历展示为周维度
- day:日历展示为日维度
-
useFormPopup:boolean:是否使用原生的新建功能
- true:启用原生新建功能,点击日历后会弹出原生的新建表单
- false:关闭原生新建功能,点击日历后不会弹出原生的新建表单,并且点击的日期会留下蓝色选中样式(自定义时可使用calendar.clearGridSelections();清除选中)
-
useDetailPopup:boolean:是否使用原生的详情功能
- true:启用原生新建功能,点击日历后会弹出原生的新建表单
- false:关闭原生新建功能,点击日历后不会弹出原生的新建表单,并且点击的日期会留下蓝色选中样式(自定义时可使用calendar.clearGridSelections();清除选中)
-
usageStatistics:boolean:是否允许收集主机名用于谷歌分析(GA)
- false:不允许
-
theme:object:主题设置
-
common:object:公共设置
-
backgroundColor:string:设置日历背景颜色代码
-
today:object:今天的详细设置
- color:string:设置今天日期字体的颜色代码
-
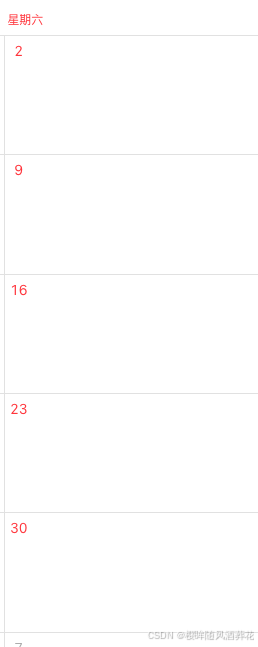
saturday:object:星期六的进一步设置
- color:string:设置星期六的列头和日期字体颜色代码(下图为设置为红色时)
- color:string:设置星期六的列头和日期字体颜色代码(下图为设置为红色时)
-
-
month:object:月维度主题设置
-
week:object:周主题设置
-
-
month:object:月维度日历设置
- dayNames:Array:设置日历列头的文字,例如:[‘星期天’, ‘星期一’, ‘星期二’, ‘星期三’, ‘星期四’, ‘星期五’, ‘星期六’]
-
week:object:周维度日历设置
- dayNames:Array:设置日历列头的文字,例如:[‘星期天’, ‘星期一’, ‘星期二’, ‘星期三’, ‘星期四’, ‘星期五’, ‘星期六’]
-
day:object:日维度日历设置
- dayNames:Array:设置日历列头的文字,例如:[‘星期天’, ‘星期一’, ‘星期二’, ‘星期三’, ‘星期四’, ‘星期五’, ‘星期六’]
3.新建一个日历对象,挂到div上
function init(){
	const calendar = new Calendar('#calendar,options);
}

onMounted(() => {
  init();
})
自定义表单
- 将calendar的useFormPopup和useDetailPopup设置为false,将原生的新增弹窗和详情弹窗关闭
1.覆盖原生新增
监听selectDateTime事件
calendar.on('selectDateTime', (e) => {
  console.log(e);
  //todo 在这里写你自定义的逻辑,例如打开自己的表单弹窗

  //跟数据库交互完,在日历上新建事件
    calendar.createEvents([
      {
        id: uuidv4(), //生成UUID,也可以设置为自己数据库的主键
        calendarId: 'cal1', //日历ID,可以随便起,只要保证所有event都是一个就可以
        title: "自定义标题",	//标题
        start: new TZDate("yyyy-MM-dd HH:mm:ss"), //开始时间
        end: new TZDate("yyyy-MM-dd HH:mm:ss"), //结束时间
        color: '#fff',//字体颜色
        backgroundColor: "自定义颜色代码", //活动元素背景颜色,这里我自己设置成了动态颜色
        dragBackgroundColor: "自定义颜色代码", //活动元素拖拽时,留在原地的活动元素背景色
        category: "allday", //自定义活动元素类型,在下面的各种配置-不同的时间样式有配置详解
        borderColor: "自定义颜色代码" //活动元素左边框颜色配置
    ])
  calendar.clearGridSelections();//清除选中事件,否则会有蓝色选中样式残留
});
2.覆盖原生详情
监听clickEvent事件
calendar.on('clickEvent', ({event}) => {
  console.log(event); // EventObject
  //todo 在这里写你自定义的逻辑,例如打开自己的修改或删除或详情弹窗

  //调用完更新或删除接口后更改日历
  //修改--->calendar.updateEvent(targetEvent.id, targetEvent.calendarId, changes);
  //删除--->calendar.deleteEvent(targetEvent.id, targetEvent.calendarId);
});
3.拖拽和拉伸后的回调
  calendar.on('beforeUpdateEvent', (e) => {
    console.log("修改", e)
    const targetEvent = e.event; //事件内容,如果在创建事件时id设置成了数据库主键,就可以拿targetEvent中的id来进行数据库操作了
    const changes = {...e.changes}; //修改了哪些东西(挪动和拉伸只会有修改后的开始时间和结束时间)

    //todo 调用自己的修改接口

    calendar.updateEvent(targetEvent.id, targetEvent.calendarId, changes);
  });
各种配置
不同的事件样式
- category:‘milestone’ | ‘task’ | ‘allday’ | ‘time’;
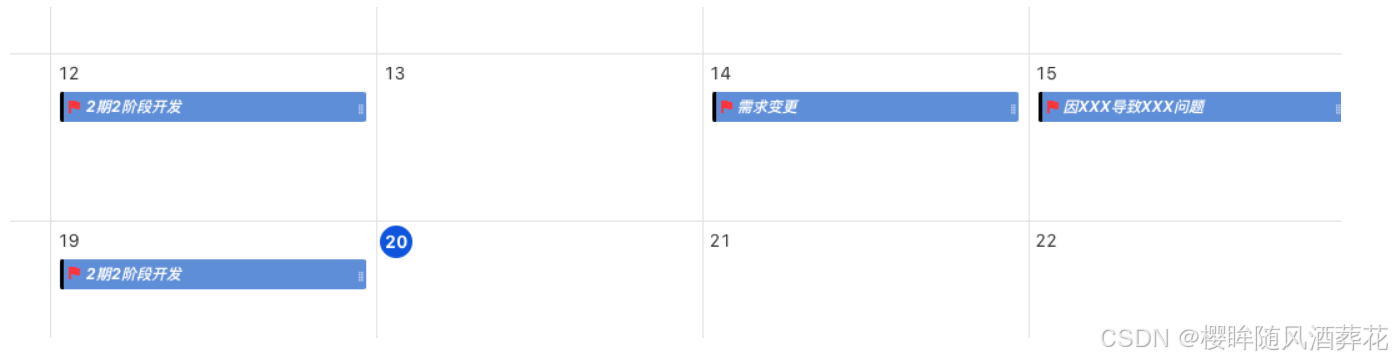
里程碑
- category:‘milestone’
为小旗子样式,只会在end_time的日期显示一条里程碑
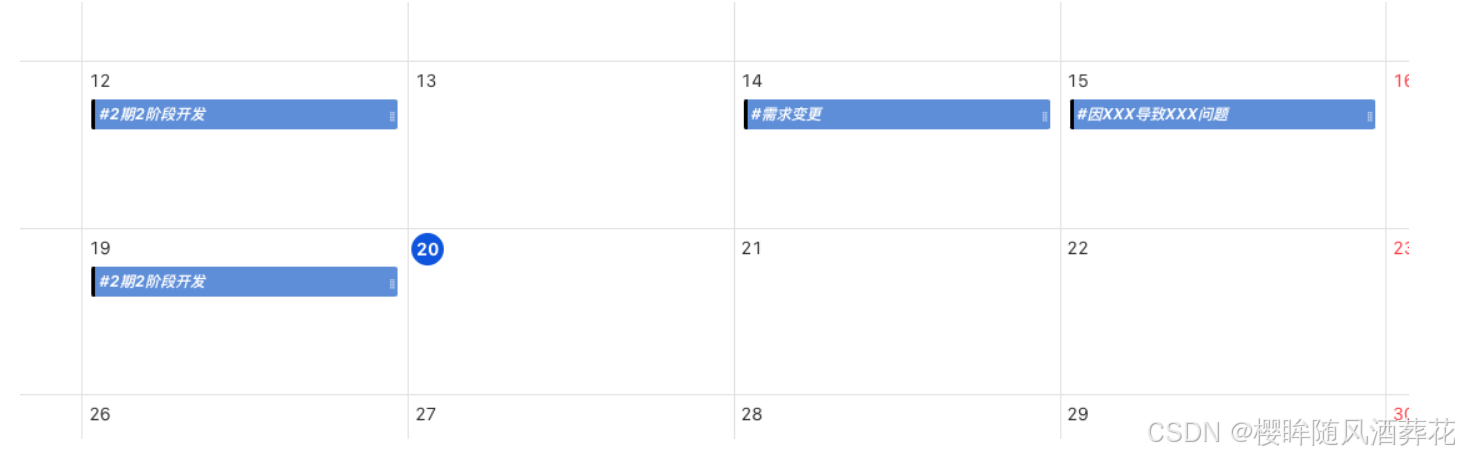
任务
- category:‘task’
没有小旗子样式,同样只会在end_time的日期显示一条
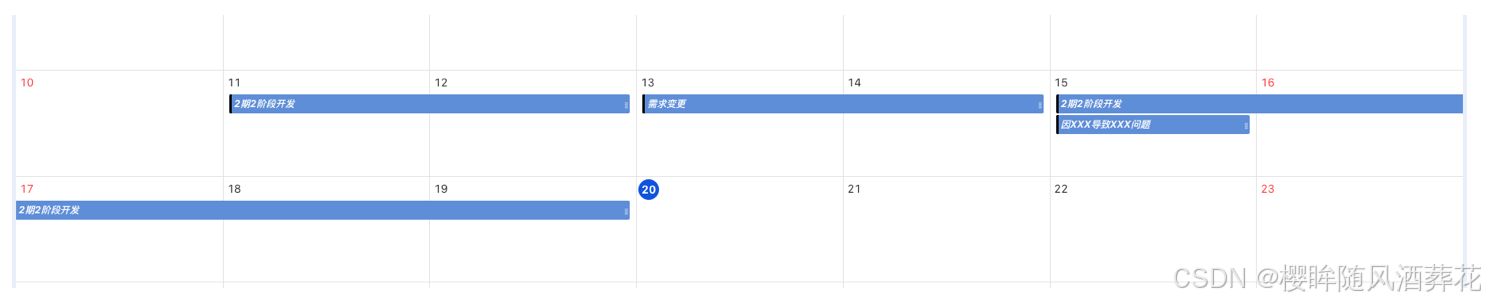
全天
- category:‘allday’
从开始时间到结束时间绘制条形
时间
- category:‘time’
从开始时间到结束时间绘制条形,会在title上显示开始时间。如果开始时间和结束时间为同一天,会变为点状

活动元素(日历上的事件)
背景色
backgroundColor: '#6e98e1'
拖拽时留在原地的背景色
dragBackgroundColor: '#9aa7b1'
左侧边框颜色
borderColor:'#6e98e1'
是否可见
isVisible: true
为false会隐藏该事件
今天的背景颜色
:deep(.toastui-calendar-grid-cell-date .toastui-calendar-weekday-grid-date.toastui-calendar-weekday-grid-date-decorator) {
  background-color: #f0908d;
}

日历原生方法
前进
calendar.next()
月维度调用:前进一月
周维度调用:前进一周
日维度调用:前进一日
后退
calendar.prev()
定位到今天
calendar.today();
定位到某一天
calendar.setDate(new Date("yyyy-MM-dd HH:mm:ss").getTime())
新建事件
calendar.createEvents(event)
event内容可以参考官网event-object或本文中自定义表单->覆盖原生新增中的内容
修改事件
calendar.updateEvent(id, calendarId, changes);
id:事件ID
calendarId:日历ID
changes:修改项
删除事件
calendar.deleteEvent(id, calendarId);
id:事件ID
calendarId:日历ID
清除选中状态
calendar.clearGridSelections();
销毁日历
calendar.destroy();
获取日历当前维度时间
let dateRangeText = ref('');

function setDateRangeText() {
  const date = calendar.getDate();
  const start = calendar.getDateRangeStart();
  const end = calendar.getDateRangeEnd();

  const startYear = start.getFullYear();
  const endYear = end.getFullYear();

  switch (defaultView) {
    case 'month':
      dateRangeText.value = `${date.getFullYear()}.${date.getMonth() + 1}`;
      return;
    case 'day':
      dateRangeText.value = `${date.getFullYear()}.${date.getMonth() + 1}.${date.getDate()}`;
      return;
    default:
      dateRangeText.value = `${startYear}.${start.getMonth() + 1}.${start.getDate()} - ${
          startYear !== endYear ? `${endYear}.` : ''
      }${end.getMonth() + 1}.${end.getDate()}`;
  }
}
三种日历维度获取的是不一样的值,以下为样例:
月维度:2024.11
周维度:2024.11.17 - 11.23
日维度:2024.11.22


 1836
1836

 被折叠的 条评论
为什么被折叠?
被折叠的 条评论
为什么被折叠?
 到【灌水乐园】发言


