


 本文详细介绍了如何在GitHub上创建一个新的SwiftSDK项目,包括设置仓库、添加必要的文件如README和LICENSE,创建SwiftPackageManager项目,以及在XCode中构建SDK和Example项目。同时,文章还指导了如何在Example项目中添加SDK依赖并运行测试。
恭喜你决定开始创建一个Swift SDK项目并将其发布到GitHub!以下是一些步骤和建议,帮助你开始和组织你的项目:
-
在GitHub上创建一个新的仓库
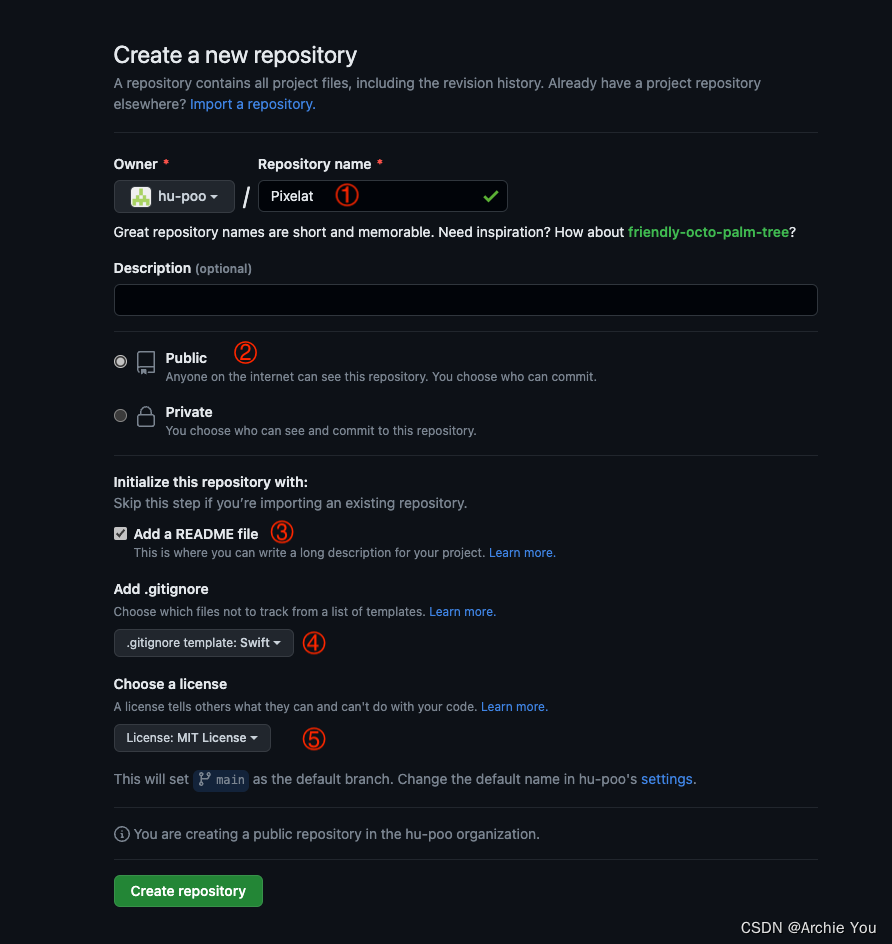
① 给你的仓库起一个名字
② 将权限改为 “Public”
③ 勾选 “Add a README file”
④ 添加.gitignore文件,这里的模板选Swift
⑤ 开源证书选 “MIT License” -
clone 到本地,以下是clone后的目录结构
.
├── .git
├── .gitignore
└── LICENSE
└── README.md -
新建文件夹Srcs和Examples
.
├── .git
├── .gitignore
├── Examples
├── LICENSE
├── README.md
└── Srcs -
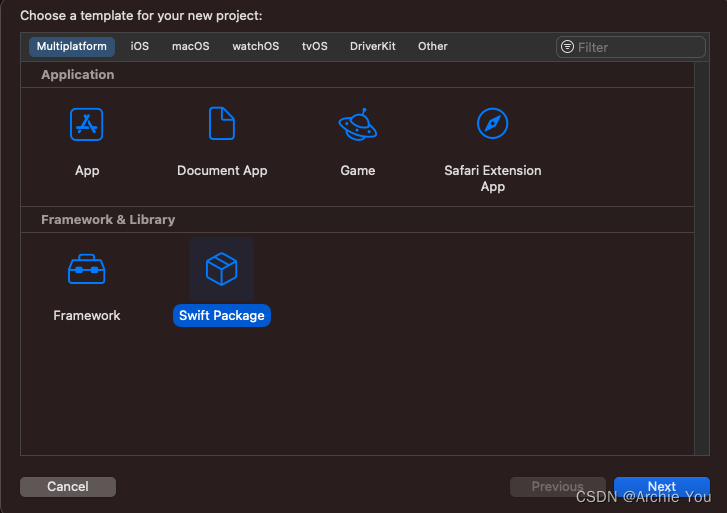
XCode创建一个SDK项目
File -> New -> Project… -> Swift Package
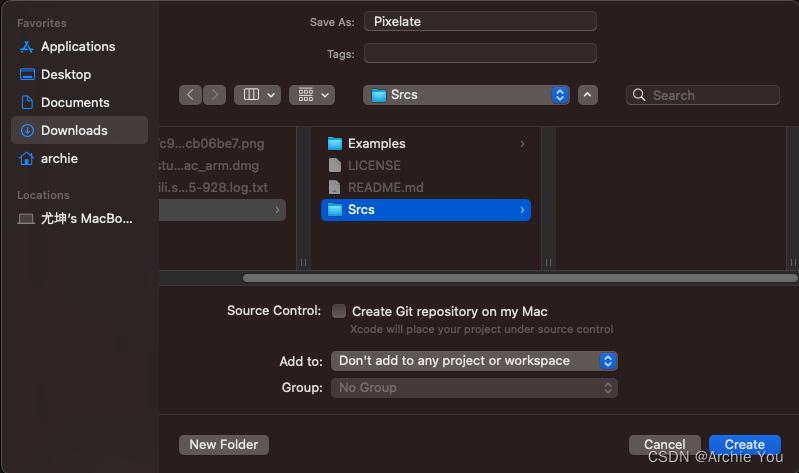
将名字改为你的SDK的名字,目录选择Srcs。目录结构如下:
Srcs
└── Pixelate
├── .gitignore
├── .swiftpm
│ └── xcode
│ ├── package.xcworkspace
│ └── xcuserdata
├── Package.swift
├── README.md
├── Sources
│ └── Pixelate
│ └── Pixelate.swift
└── Tests
└── PixelateTests
└── PixelateTests.swift -
XCode创建一个Example项目
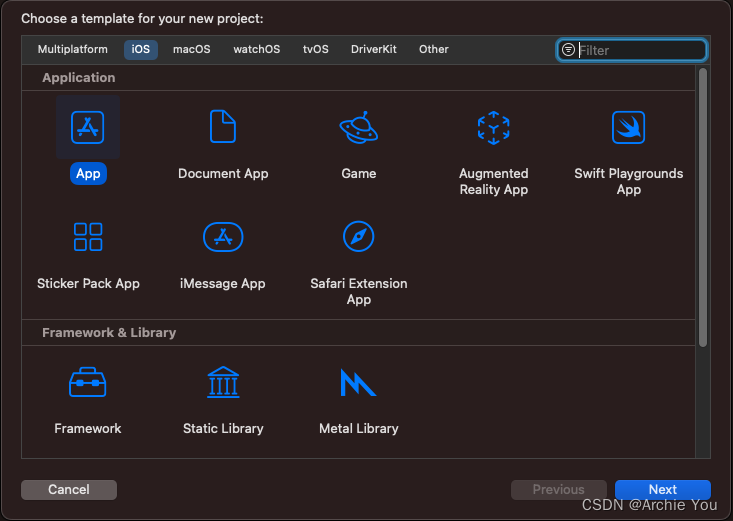
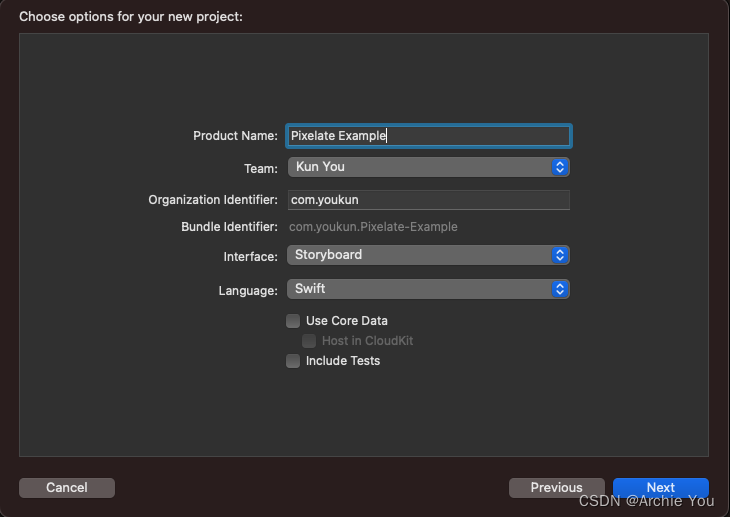
目录结构如下:
Examples
└── Pixelate Example
├── Pixelate Example
│ ├── AppDelegate.swift
│ ├── Assets.xcassets
│ ├── Base.lproj
│ │ ├── LaunchScreen.storyboard
│ │ └── Main.storyboard
│ ├── Info.plist
│ ├── SceneDelegate.swift
│ └── ViewController.swift
└── Pixelate Example.xcodeproj -
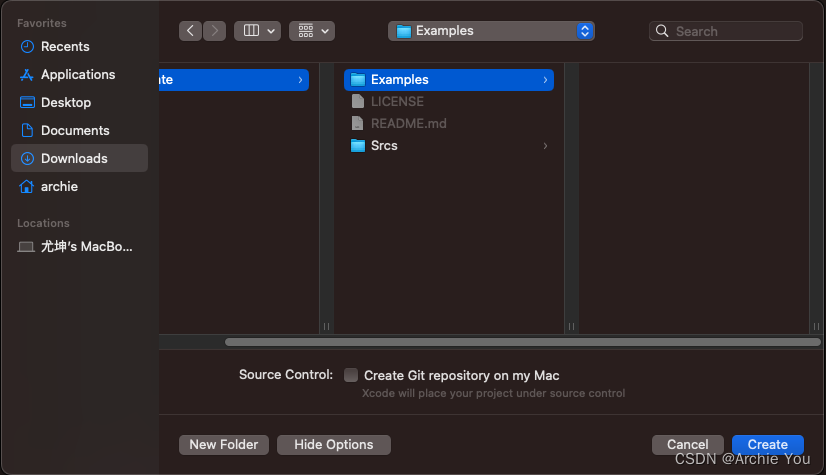
添加SDK依赖到Example中
打开Pixelate Example.xcodeproj
File -> Add Packages… -> Add Local…
选择SDK所在的文件夹
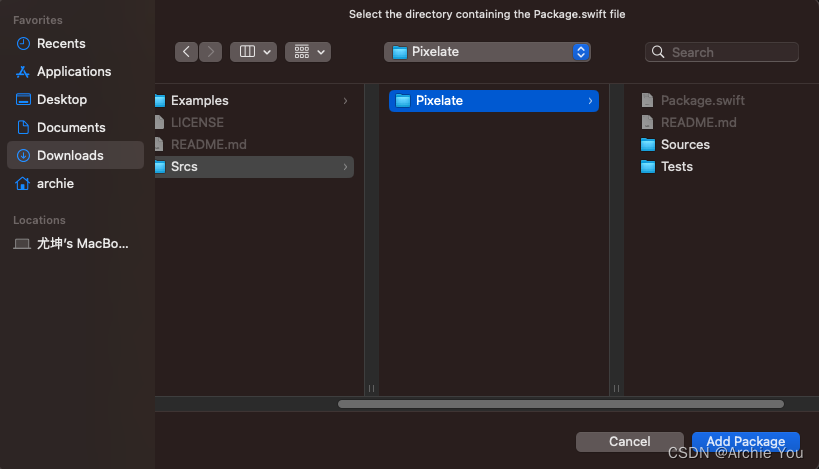
可以看到SDK被加入到项目中了
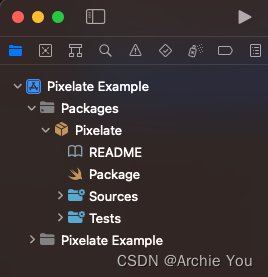
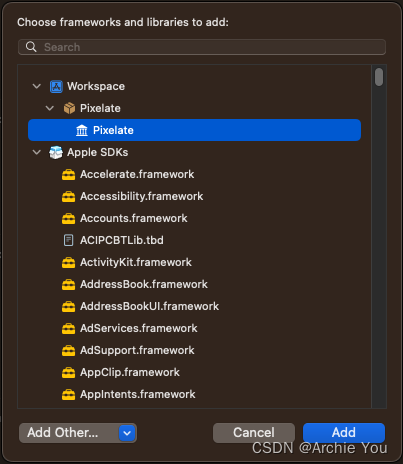
最后添加依赖:
General -> Frameworks, Libraries, and Embedded Content -> +

选中你的SDK,并点击Add
-
修改ViewController.swift
import UIKit
import Pixelate

class ViewController: UIViewController {

    override func viewDidLoad() {
        super.viewDidLoad()

        print(Pixelate().text)
    }

}
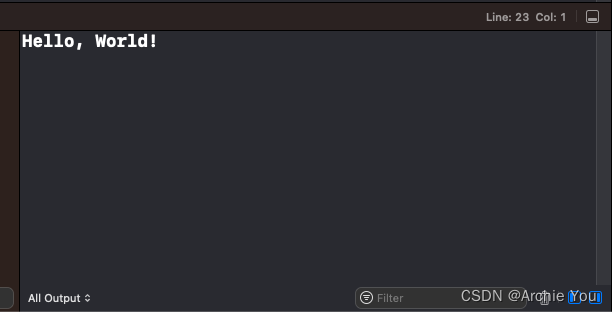
- 点击运行,可以看到控制台的log
祝你好运,创建一个成功的Swift SDK项目!


 2359
2359

 被折叠的 条评论
为什么被折叠?
被折叠的 条评论
为什么被折叠?
 到【灌水乐园】发言


