


 本文档介绍了如何使用SpringBoot结合Swagger2和swagger-bootstrap-ui,通过注解方式实现接口分组,详细步骤包括引入依赖、创建注解、版本接口管理类以及SwaggerConfig配置,最终实现按不同版本进行接口文档的分组展示。
说明:
(1) 项目 - springboot + springfox-swagger2 + swagger-bootstrap-ui
(2) swagger 分组可以根据 - 包路径 / 路由 / 注解...进行. 这里选择使用注解声明分组
(3) 配置成功后的文档访问路径: http://localhost:项目端口/doc.html
(4) 补充说明
#swagger是否启用接口文档
swagger:
  production: true;
1.导入依赖
<dependency>
	<groupId>io.springfox</groupId>
	<artifactId>springfox-swagger2</artifactId>
	<version>2.9.2</version>
</dependency>
<!--     swagger2 接口API页面       -->
<dependency>
	<groupId>com.github.xiaoymin</groupId>
	<artifactId>swagger-bootstrap-ui</artifactId>
	<version>1.9.6</version>
</dependency>
2.创建注解类
import java.lang.annotation.ElementType;
import java.lang.annotation.Retention;
import java.lang.annotation.RetentionPolicy;
import java.lang.annotation.Target;

@Retention(RetentionPolicy.RUNTIME)
@Target(ElementType.METHOD)
public @interface ApiVersion {

    String[] group();

}
3.创建版本号接口管理类
public interface ApiVersionInterface {

    String V_1_0_1 = "1.0.1";

}
4.创建 SwaggerConfig 配置类
import com.github.xiaoymin.swaggerbootstrapui.annotations.EnableSwaggerBootstrapUI;
import com.google.common.base.Optional;
import com.google.common.base.Predicate;
import org.springframework.context.annotation.Bean;
import org.springframework.context.annotation.Configuration;
import org.springframework.util.CollectionUtils;
import org.springframework.web.context.request.async.DeferredResult;
import springfox.documentation.RequestHandler;
import springfox.documentation.builders.ApiInfoBuilder;
import springfox.documentation.builders.PathSelectors;
import springfox.documentation.builders.RequestHandlerSelectors;
import springfox.documentation.service.ApiInfo;
import springfox.documentation.service.Contact;
import springfox.documentation.spi.DocumentationType;
import springfox.documentation.spring.web.plugins.Docket;
import springfox.documentation.swagger2.annotations.EnableSwagger2;
import io.swagger.annotations.ApiOperation;
import java.util.Arrays;
import java.util.Iterator;
import java.util.Set;

/**
 * @Description  Swagger文档
 * @Author liuyan
 * @Date 2019/5/23
 **/
@Configuration
@EnableSwagger2
@EnableSwaggerBootstrapUI
public class SwaggerConfig {

    /* 默认全部: basePackage[扫描指定包下所有带有swagger2注解的方法]*/
    @Bean
    public Docket createRestApi() {
        return new Docket(DocumentationType.SWAGGER_2)
                .groupName("1-ALL")
                .apiInfo(apiInfo("接口管理文档", "1.0.0"))
                .select()
                .apis(RequestHandlerSelectors.withMethodAnnotation(ApiOperation.class))
                .paths(PathSelectors.any())
                .build();
    }

    /* 分组(使用注解进行分组): (版本1.0.1)*/
    @Bean
    public Docket V_1_0_1(){
        return createBean(ApiVersionInterface.V_1_0_1,"接口管理文档1.0.1", ApiVersionInterface.V_1_0_1);
    }

    // 通过注解进行分组
    private Docket createBean(String groupName,String desc,String version){
        return new Docket(DocumentationType.SWAGGER_2)
                .groupName(groupName)
                .genericModelSubstitutes(DeferredResult.class)
                .useDefaultResponseMessages(false)
                .forCodeGeneration(false)
                .select()
                .apis(new Predicate<RequestHandler>() {
                    @Override
                    public boolean apply(RequestHandler input) {
                        Optional<ApiVersion> controllerAnnotation = input.findAnnotation(ApiVersion.class);
                        Set<ApiVersion> apiVersions = controllerAnnotation.asSet();
                        if(!CollectionUtils.isEmpty(apiVersions)){
                            Iterator<ApiVersion> iterator = apiVersions.iterator();
                            while (iterator.hasNext()) {
                                ApiVersion next = iterator.next();
                                if (Arrays.asList(next.group()).contains(groupName)) {
                                    return true;
                                }
                            }
                        }
                        return false;
                    }
                })
                .paths(PathSelectors.any())//过滤的接口
                .build()
                .apiInfo(apiInfo(desc, version));
    }

    private ApiInfo apiInfo(String desc,String version) {
        return new ApiInfoBuilder()
                .title("xxxx") // 项目名称
                .description(desc) // 简介
                .version(version) // 版本
                .contact(new Contact("作者姓名(选填)","服务器路径(选填)","联系邮箱(选填)"))
                .build();
    }

}
5.这里一开始设定了两个组.
1.默认找到@ApiOperation注解(swagger2自带的)的方法
2.找到自定义注解@ApiVersion(group= {ApiVersionInterface.V_1_0_1}).
3.某个方法分配到多个组的话首先需要在版本号接口中新增版本号, 然后 @ApiVersion(group= { ApiVersionInterface.V_1_0_1, ApiVersionInterface.组2, ApiVersionInterface.组3.... })
示例:
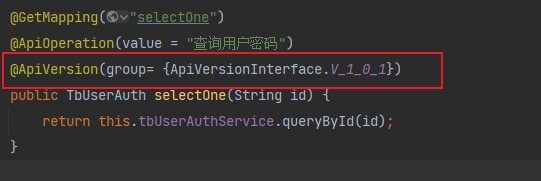
.


 1147
1147

 被折叠的 条评论
为什么被折叠?
被折叠的 条评论
为什么被折叠?
 到【灌水乐园】发言


